4. Generating an Application Framework
This chapter introduces application frameworks and the steps necessary to generate and build on such a framework. This process uses two tools: AppExpress and ClassExpress.Before reading this chapter, take look at the material in Starting a Project and Defining Workspaces in the IDDE. AppExpress creates both an application framework (according to specifications you provide) and the project in which that framework resides.
More about AppExpress and More about ClassExpress are the reference chapters for the AppExpress and ClassExpress tools.
What Is an Application Framework?
An application framework is a standardized skeleton architecture for an object-oriented application. The framework is composed of C++ classes derived from base classes in the Microsoft Foundation Class (MFC) library.Using a framework to build an application dramatically shortens its development time. All the files needed to create the application are included in the skeleton program. Standard user interface components such as windows, menus, and toolbars are already defined. Some of the necessary connections between the defined C++ classes are established automatically.
With a framework as a starting point and using the MFC library, you can build many different types of applications by:
- Adding or changing user interface components with ResourceStudio (see Chapter 7, "Adding Look and Feel with Resources")
- Creating new C++ classes, class methods, and class member variables with ClassExpress
- Writing code
Because message maps are used by MFC to route Windows messages to the messages' handlers, they provide the essential translations needed to present the event-driven model of the Windows API in an object-oriented guise. By automating the creation and maintenance of message maps, AppExpress and ClassExpress relieve you of much error-prone drudgery, and allow you to spend more of your development time writing code that implements functionality.
The following sample message map was automatically generated by AppExpress for an MDI-style application framework:
    BEGIN_MESSAGE_MAP( CMainView, CView)
	//{{ AFX_MSG_MAP( CMainView)
	// NOTE -ClassExpress will add and
	// remove mapping macros here.
	// DO NOT EDIT what you see in these
	// blocks of generated code !
	//}} AFX_MSG_MAP
	// Standard printing commands
	ON_COMMAND( ID_FILE_PRINT, CView::OnFilePrint)
	ON_COMMAND( ID_FILE_PRINT_PREVIEW,
		CView:: OnFilePrintPreview)
	END_MESSAGE_MAP()
Creating a Framework with AppExpress
This section describes how to launch AppExpress and use it to generate an application framework.Launching AppExpress
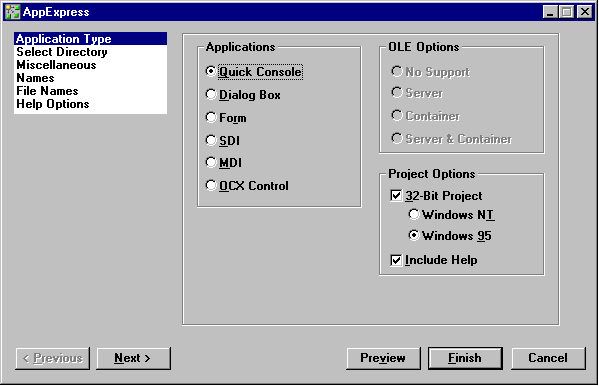
From the IDDE main window, choose AppExpress from the Tools menu. This opens the window shown in Figure 4-1.
[Figure 4-1 AppExpress window]
Looking at the AppExpress window
The AppExpress window contains:- A listbox at the upper left displaying the steps required to create an application framework. The current selection from this list determines which page of options is shown in the larger pane to the right.
- A pane on the right showing the options associated with the currently selected step.
- Buttons below the panes that you can use to navigate among the steps, preview your work, or generate a framework.
Specifying an application framework
AppExpress divides the process of building a framework into six steps:- Select an application type
- Select a directory for the project
- Provide copyright information and project options
- Specify class names
- Specify source file names
- Specify help file names
Selecting an application type
To select an application type:- Select Application Type from the steps list in the AppExpress window.
- Select an application type by clicking on a radio button in the Applications group. There are six categories of applications, two of which SDI and MDI can be made OLE clients and/or servers.
Selecting application type options sets default options for many of the other steps in AppExpress. For example, if you select Dialog Box, AppExpress automatically creates three C++ classes with default class names in your skeleton program. You can change these defaults; for example, you can modify the default class names by selecting Names from the steps list.
Selecting a directory for the project
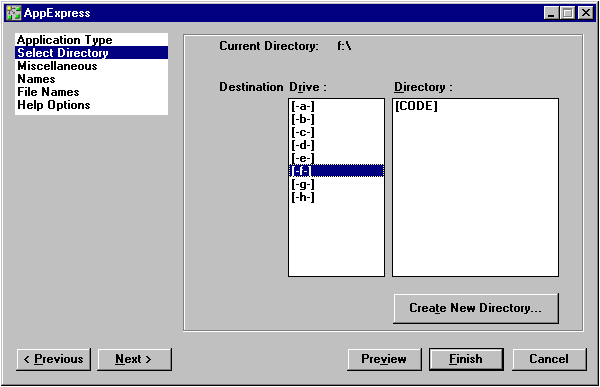
To select a directory for your source files and project file:- Select the Select Directory item from the steps list. The Select Directory options page opens as shown in Figure 4-2.
- Select the appropriate drive and directory. Or, click on
Create New Directory to create and name a new
directory. AppExpress suggests the project name as the
new directory name, but you may change that default.
[Figure 4-2 Select Directory options]
Providing copyright information and project options
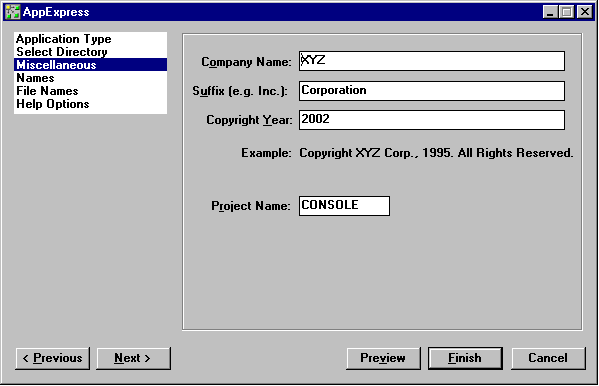
You can supply copyright information for your source code, and set the project's name, stack size, and heap size as follows:- Select Miscellaneous from the steps list. The
Miscellaneous options page opens as shown in
Figure 4-3.
[Figure 4-3 Miscellaneous options]
- Provide copyright information in the appropriate fields. AppExpress uses this information to write a copyright notice in the comment header of all of your application's source files, and to construct the application's About dialog box.
- Specify the project name in the appropriate field. Stack and heap sizes can be changed later in the Project Settings dialog box.
Specifying class names
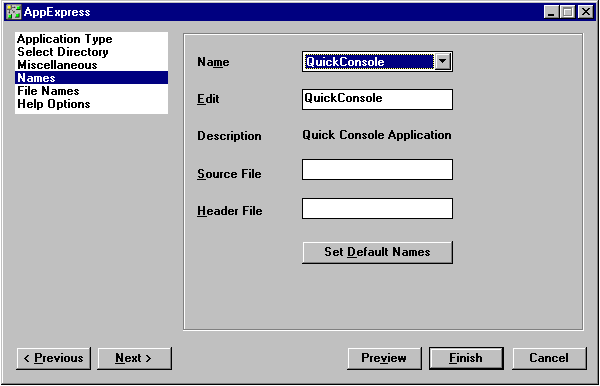
To view and change the names of C++ classes or their associated source files:- Select Names from the steps list. The Names options page opens as shown in Figure 4-4.
- In the options pane, select a class from the Name drop-down list automatically created by AppExpress. The class names included in this list depend on the application type you have selected.
- If you like, you can edit the selected class name. Note, however, that C++ class names follow a standardized naming convention. Using the default names allows your program's structure to be easily understood by others.
- In the appropriate field, type the names of the header and source files in which AppExpress should place the class source code.
To discard any changes you have made on this page, click on the Set Default Names button.
[Figure 4-4 Names options]
Naming source files
To edit filenames automatically generated by AppExpress:- Select File Names from the steps list. The File Names options page opens as shown in Figure 4-5.
- In the options pane, click on the filename you want to change. The files listed depend on the application type you have selected. Their names correspond to their functionality within the application.
- Edit the filename, but remember that these changes
could make it harder for someone else to identify the
purpose of the file.
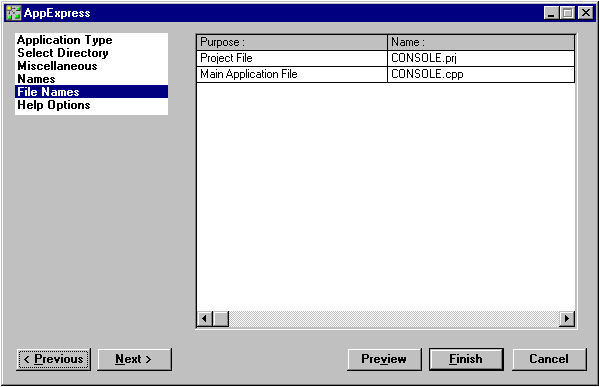
[Figure 4-5 File Names options]
Specifying help file names
To view or change the names of the files that the help compiler uses to generate online help files for your application:- Select Help Options from the steps list. The Help
Options options page opens as shown in Figure 4-6.
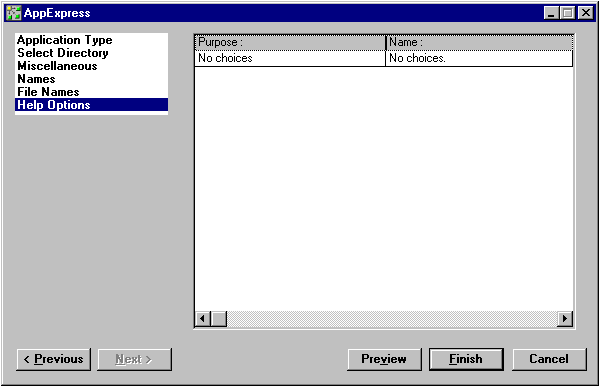
[Figure 4-6 Help Options options]
Note If you selected Quick Console or Dialog Box as the application type, or if Include Help is not selected in the Application Type options page, then you have no help options.
- Edit the filenames if you want. Note, however, that any changes could make it harder for someone else to identify the purpose of the file.
Generating an application framework
At this point, you have selected an application type and the directory in which the application project files will reside, and you may have customized various class names or filenames. AppExpress can now generate your application framework in the form of a skeleton program.Click on the Finish button in the AppExpress window. AppExpress generates the project and its source files, as you specified, hands it off to the project system, and closes.
Note If you checked the Include Help box among the Application Type options, then you will need to build the help file for your application. You do this by running the makehelp. bat file that AppExpress creates in your project directory.
Your skeleton program is ready. You can now build the program from within the IDDE, or you can add to your program by using other Digital Mars C++ tools. The next section shows how to enhance your application's C++ classes by using ClassExpress.
Building on a Framework with ClassExpress
AppExpress cuts the work involved at the beginning of the application-building process. ClassExpress, on the other hand, enhances productivity throughout the rest of the process. You use this tool to flesh out the skeleton application produced by AppExpress.Specifically, you can use ClassExpress to:
- Write message maps
- Create new classes derived from existing classes
- Create new class methods mapped to specific messages
- Create new class member variables (that is, data variables that are members of a class) mapped to specific user-interface objects
- Create new classes that can be OLE2 automation servers or clients
- Create new classes that act as interfaces to Visual Basic Custom Controls (also known as VBXs)
Message maps, defined in "What Is an Application Framework?" in this chapter, are discussed in greater detail in Chapter 17, "More about AppExpress."
You can use ClassExpress immediately after creating an application framework as well as at later points in development. For example, you probably want to wait until you have created some dialog boxes with ResourceStudio (see Chapter 7, "Adding Look and Feel with Resources" ) before mapping class member variables to user interface objects.
Launching ClassExpress
From the IDDE main menu, launch ClassExpress by choosing ClassExpress from the IDDE's Tools menu.Launching ClassExpress opens the window shown in Figure 4-7.
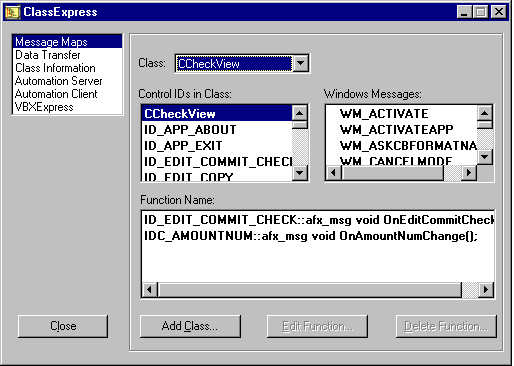
[Figure 4-7 ClassExpress window]
Looking at the ClassExpress window
The ClassExpress window contains:- A listbox at the upper left presenting the different kinds of code that ClassExpress can generate
- A pane on the right showing the page of options associated with each selection from the list at the upper left
Writing a message map with ClassExpress
Message maps are tied to particular C++ classes. In ClassExpress, you can add to an existing message map by adding new linkages between messages and class methods. Or you can add a new message map for an entirely new class.ClassExpress runs from within the IDDE or as a stand-alone application. If run from within the IDDE, ClassExpress will be loaded with the IDDE's open project if there is one; otherwise, it prompts to open an existing project (which also opens the project in the IDDE's project system).
As an example, the following steps demonstrate how to add a message handler to the CAboutDlg class of an SDI application generated by AppExpress:
- Select Message Maps from the listbox. (If you just started ClassExpress, this should already be selected.) The ClassExpress window is displayed as shown in Figure 4-7.
- Select the class CAboutDlg from the Class drop-down list.
The contents of the three other lists in the options pane
are updated to reflect the following selection:
- Control IDs in Class: This list contains all of the menu
links and control IDs for which this class can add
handlers. For example, IDOK is a universally defined
constant for an OK button. Because the CAboutDlg class
includes an OK button by default, the IDOK constant is
always predefined for this class.
Because this class represents a dialog box- which itself can respond to many Windows messages- the first item in the Control IDs in Class list is the name of the class itself (CAboutDlg).
- Windows Messages: This list contains all of the Windows messages that apply to the selected item in the Control IDs in Class list. For example, if you highlight IDOK in that list, two applicable messages (button notifications, in this case) are displayed in the Windows Messages list: BN_CLICKED and BN_DOUBLECLICKED. If a handler is defined for a message, a red box appears before the message name in this list.
- Function Name: This list contains all of the handlers that exist within the selected class. These are the methods that are linked to Windows messages.
- Control IDs in Class: This list contains all of the menu
links and control IDs for which this class can add
handlers. For example, IDOK is a universally defined
constant for an OK button. Because the CAboutDlg class
includes an OK button by default, the IDOK constant is
always predefined for this class.
- Select CAboutDlg from the Control IDs in Class list. The list of Windows messages changes, revealing a long list of messages to which your dialog box could respond.
- Double-click on WM_ACTIVATE. Notice that the method OnActivate (in its fully prototyped form) is added to the Function Name list.
Adding a new class to your application
Adding new classes to your application is as easy as creating a message map. To add a class:- Select Message Maps from the listbox. (If you just loaded ClassExpress, then this should already be selected.)
- Click on the Add Class button. The Add Class dialog box
shown in Figure 4-8 opens.
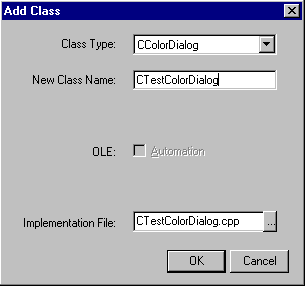
[Figure 4-8 Add Class dialog box]
- Select a class type from the Class Type drop-down list. This type specifies the base class from which your new class will be derived. The list displays names of MFC classes without the initial letter 'C', thereby allowing you to navigate rapidly within the list by typing the first letter of a class type. For example, typing 'V' selects the View class type.
- The New Class Name field becomes active, displaying a suggested name for the new class. Edit this name as appropriate.
- If you selected CDialog or CFormView, then the field Dialog ID is displayed. Move to this field and choose the resource ID of the dialog that you want to associate with the new class's window.
- Check the OLE Automation box if you want your new class to be a programmable OLE object. If you choose this option, any other Windows application that is an automation client can use the OLE interface you define for this object.
- If you check the OLE Automation box and you are deriving a new class from the CCmdTarget or CWnd class, the Creatable check box is displayed. Check this box if you want other applications to be able to create the OLE automation object that you are defining.
- If you check the OLE Automation check box and you are deriving a new class from the CCmdTarget or CWnd class, you must also type a name in the External Name field. This is the name that is exposed to other applications that may want to use your OLE automation object.
- Decide whether to edit the implementation filename of your new class (shown in the last field in the Add Class dialog box). By default, the base part of the filename is the name of your new class without the initial letter 'C', and truncated if necessary.
- Click OK to add the new C++ class to your application. If you want, you can create message mappings for your new class by using the steps outlined in the previous section.
In addition, ClassExpress can bind your classes to your dialog boxes and generate C++ wrapper classes for Visual Basic custom controls (VBXs). It also provides extensive support for building OLE servers and containers. For more information on these features, refer to Chapter 18, "More about ClassExpress."


