User Guide & Reference |
Welcome to the Digital Mars C++ for Windows 95, 98, ME, NT, 2000, XP,
Visa, 7,
Windows 3.1, DOS and DOS32.
For a list of the Digital Mars C++ features, see
features.
Table of Contents
This manual is divided into the following six parts:
- Part 1: "Welcome to Digital Mars C++"
- In addition to the current chapter,
introducing the
Integrated Development and Debugging
Environment (IDDE).
- Part 2: "Creating an Application with Digital Mars C++"
- Guide to creating a first application in
Digital Mars C++.
- Part 3: "Learning Digital Mars C++ by Example"
- Tutorial chapters on
building DOS and Windows hypertext
file reader applications.
- Part 4: "More about Creating Programs"
- IDDE settings, workspaces, the
application framework designers, the
class browsers, the text editor, and
version control.
- Part 5: "More about Testing Programs"
- Debugging features of Digital Mars C++.
- Part 6: "About Managing Resources"
- How to use the Digital Mars
ResourceStudio to create and edit
resources.
- Part 7: "Appendixes"
- Appendixes on
expression evaluation, the relationship
between IDDE settings and command-line
options, and the NetBuild feature.
Suggestions for the new users of Digital Mars C++
If you are new to Digital Mars C++, congratulations and welcome. We
hope you find our product powerful and easy to use.
Check out
Introducing the IDDE
and work through the
tutorials in Part 3 to become proficient with Digital Mars C++
quickly.
Suggestions for users new to Windows development
If you are starting to program for Windows, Digital Mars C++ is a great
platform. Read
Generating an Application Framework,
and
Adding Look and Feel with Resources.
Also you should read the tutorials in Part 3, which guide you
through the development of a Windows application.
Suggestions for users porting to Digital Mars C++
If you need to port your code from another compiler or from a
previous version of C++, read the
Switching to Digital Mars C++ chapter in the
Compiler & Tools Guide.
Suggestions for users upgrading to Digital Mars C++
If you are upgrading from a previous version of Digital Mars C++ and
want to learn about the new product features, read
Generating an Application Framework,
Defining Classes and Their Hierarchies,
Adding Look and Feel with Resources,
More about AppExpress,
and
More about ClassExpress.
The IDDE is the Integrated Development and Debugging Environment.
The IDDE comes with the
CD
version of the development system.
This chapter introduces the Digital Mars C++ development system. The
first part of the chapter describes the IDDE main window and
toolboxes. The second part introduces Part Two of this manual, and
outlines the steps involved in developing an application in the
IDDE.
Running Digital Mars C++ under Windows 3.1, Windows 95, and Windows NT
Digital Mars C++ ships with three different integrated development and
debugging environments (IDDEs), each tailored to a specific
operating system and target.
All IDDEs share
the same user interface, and can build applications for DOS,
Windows 3.1, Windows 95, Windows NT, and DOSX. Minor
differences between the three IDDEs are noted throughout this
manual, as appropriate. Not every IDDE can debug every kind of
executable. To debug a Windows NT program, for example, you
need the full 32-bit IDDE running under Windows NT.
Screen images in this manual may vary in appearance from one
operating system to another.
Starting and exiting the IDDEs
To start the IDDE from the Program Manager, make sure that
Digital Mars C++ is installed properly, then double-click on the
appropriate IDDE icon in the Digital Mars C++ program
group. The IDDE main window opens at the top of the screen.
To exit the IDDE, choose one of three commands from the IDDE
File menu: Exit, Exit & Save All, or Exit & Discard. Exit leaves the
IDDE and returns to the Program Manager. Exit & Save All exits and
saves all the changes to the current project and options. Exit &
Discard exits the IDDE without saving any changes to the current
project or options.
IDDE Windows and Toolboxes
You can create, edit, and debug an application within the
IDDE. The IDDE provides a variety of tools for use throughout the
development process.
Unlike most Windows applications, the IDDE offers more than a
single window in which to work. The IDDE is a feature-rich
environment in which you work with multiple windows and
toolboxes on the desktop. This section describes the general
characteristics of those windows and toolboxes.
IDDE main window
The IDDE main window, shown in Figure 2-1, is positioned at the
top of the desktop (workspace), which is the entire screen area.
From the IDDE main window, open other windows on the
desktop, load projects, set project options, and perform additional
tasks. Most of the actual work, such as editing program code, is done
in other windows on the desktop.
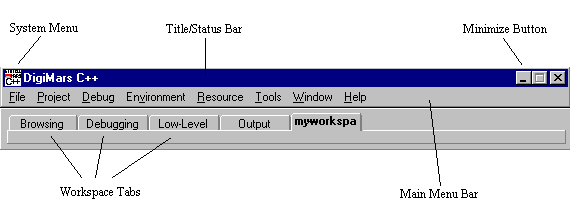
[Figure 2-1 IDDE main window]
As shown in Figure 2-1, the IDDE main window has the following
parts: system menu, title/status bar, main menu bar, and the
minimize button. (Also shown is the Workspace toolbox docked
below the main window. Docking means that the toolbox is attached
to the IDDE main window, or the desktop edge.) The system menu
and the minimize button are the standard Windows user interface
elements. The other elements of the main window as well as the
IDDE toolboxes are described in the following sections.
The title/status bar
The top line of the IDDE main window serves as both a title bar and
a status bar. When you start the IDDE, the title bar displays the
program name, Digital Mars C++. As actions occur in the IDDE, the title
bar changes to a status bar and displays the status of the session,
including the following information:
- The command description when a menu item is
highlighted
- The current project that is loaded, and whether the IDDE
is in debugging mode
- Various messages, the results of expressions, and other
status information from the IDDE
The menu bar
The IDDE main window menu bar is located below the title bar.
Table 2-1 summarizes the functions of the IDDE menus.
Table 2-1 The IDDE menu functions
| Menu | Function |
| File | Opening and closing text files, exiting the IDDE |
| Project | Opening, closing, and editing projects,
building the project, setting project
options |
| Debug | Switching into debugging mode,
controlling program execution while
debugging, setting debugging options |
| Environment | Creating and using workspaces,
customizing the IDDE |
| Resource | Creating and editing resources |
| Tools | Accessing AppExpress, ClassExpress,
Global Find, and your own tools |
| Window | Opening and arranging windows and
toolboxes |
| Help | Accessing online help |
For information on how to choose menu commands, see your
Windows, Windows 95, or Windows NT documentation.
The IDDE toolboxes
The IDDE includes the following four toolboxes:
- Views
- Build
- Debug
- Workspace
Open a toolbox through the IDDE's Window menu. If the toolbox's
name is checked, it appears in the workspace. If the name is not
checked, select it to open the toolbox. The following sections
describe the toolboxes in detail.
The Views toolbox
The Views toolbox, shown in Figure 2-2, is used to open the IDDE
windows. Each of the IDDE windows is represented by an icon in
the toolbox.
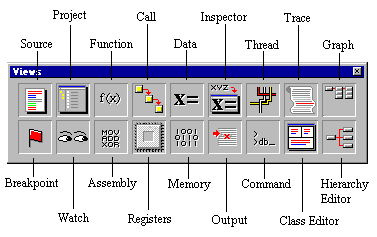
[Figure 2-2 Views toolbox]
To open a window from the Views toolbox, click and drag the
appropriate icon from the toolbox onto the desktop. Alternatively,
double-click on the icon to open the window. To replace one
window on the screen with another, drag the icon of the window
you want into a window on the desktop. Table 2-2 lists the IDDE
windows.
Table 2-2 IDDE windows and their functions
| Window name | Function |
| Assembly | Debugging; shows assembly-level source |
| Breakpoint | Debugging; used to work with breakpoints |
| Call | Debugging; shows call chain |
| Class Editor | Used to edit class hierarchies |
| Command Line | Debugging; provides CodeView-like interface to
the debugger |
| Data/Object | Debugging; shows local or global data |
| Function | Debugging; shows the functions in the
application |
| Graphic Data | Debugging; shows a graphic representation of a
data structure |
| Hierarchy Editor | Used to edit class hierarchies |
| Inspector | Debugging; shows local and global data |
| Output | Shows output of compiler, linker, and parser |
| Memory | Debugging; shows memory contents |
| Project | Displays the files in the project |
| Register | Debugging; shows contents of registers |
| Source | Used to create and edit source code |
| Spy | Debugging; used to view Windows messages |
| Thread | Debugging; shows the program's threads |
(Windows NT only)
| Trace | Debugging; shows trace messages |
| Watch | Debugging; used to work with watchpoints |
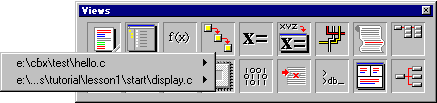
You can open multiple Data and Source windows. When you have
more than one Data or Source window open, and then minimize
more than one of them, the IDDE adds a pop-up menu to the Data
or Source icons in the Views toolbox (see Figure 2-3).
A small triangle in the lower-right corner of the icon indicates that a
Source or Data window is minimized.
[Figure 2-3 Pop-up menu in Source icon]
To open a minimized Data or Source window:
- Move the cursor over the triangle in the lower-right
corner of the Data or Source window icon.
- Click to open the pop-up menu.
- Choose the window title you want from the pop-up
menu. That window becomes active.
Alternatively, move the cursor over the window title in the pop-up
menu, then click and hold the mouse button. A window icon
appears to the right (see Figure 2-3). Drag the cursor over the icon,
then move the cursor over either the desktop or an open window
and release the mouse button.
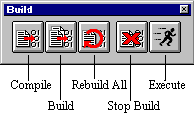
The Build toolbox
The Build toolbox, shown in Figure 2-4, provides quick access to
project build commands.
[Figure 2-4 Build toolbox]
To use the Build toolbox, click on the appropriate button in the
toolbox. These buttons perform the following tasks:
- Compile a single source file
- Build the project
- Rebuild the entire project
- Stop the build in progress
The Debug toolbox
Debug toolbox icons (shown in Figure 2-5) let you efficiently choose
debugging commands during a debugging session. The commands
available in the Debug toolbox correspond to the commands on the
IDDE Debug menu and are described in detail in the section "Debug
Toolbox Icons," in
Controlling and Configuring the Debugger.

[Figure 2-5 Debug toolbox]
The Workspace toolbox
When you first open the IDDE, the Workspace toolbox appears
docked below the IDDE main window menu bar. The Workspace
toolbox is used for switching between workspaces, which are
customized layouts of windows that you define. The Workspace
toolbox is shown in Figure 2-6.

[Figure 2-6 Workspace toolbox]
As you create new workspaces, their names appear on tabs in the
Workspace toolbox. To switch to a different workspace, click on its
tab. For more information on defining workspaces, see
Starting a Project and Defining Workspaces.
Using toolboxes
The IDDE's Window menu lists the names of all toolboxes. When a
checkmark is displayed next to the toolbox name, the toolbox
appears in the current workspace. To open a toolbox, select the
toolbox name from the IDDE's Window menu.
You can position a toolbox on the desktop by clicking on its title bar
and dragging the toolbox to the desired position on the screen. To
dock a toolbox, position it on the IDDE main window or on the
edge of the screen. To undock the toolbox, click on the toolbox and
drag it away from the IDDE main window or the desktop edge.
You can change the shape of a toolbox by clicking the toolbox edge
and dragging the outline of the toolbox to the desired shape.
If you want to remove an icon from a toolbox, right-click on the icon
you want to remove, drag it from the toolbox, and drop it.
Toolboxes can be configured with commands in their pop-up
menus. To access a toolbox's pop-up menu, right-click on an empty
part of the toolbox (as shown in Figure 2-7). When the first menu
item, Dockable, is checked, you can dock the toolbox. The next
three items (Small, Medium, and Large) let you change the size of
the toolbox and its icons. The last item on the menu, Reset Palette,
lets you restore any icons or buttons you have removed from the
toolbox.
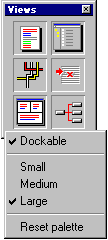
[Figure 2-7 toolbox pop-up menu]
To identify a toolbox icon, hold the mouse cursor over the icon for a
few seconds. A small yellow tag appears, showing the name of the
icon.
To close a toolbox, click on the Close box. Each
toolbox has a Close box in the upper-right corner, as shown in
Figure 2-8.
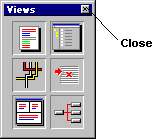
[Figure 2-8 Close box]
The IDDE windows
This section describes the general properties of the IDDE windows
and how to work with them.
Opening and closing windows in the IDDE
Digital Mars C++ supports both standard Windows methods and a few
unique methods for displaying and managing windows. In the IDDE,
open a window in any of the following ways:
- From the Views toolbox.
- Through the Goto View submenu of the IDDE's
Window menu. The Goto View submenu lists all of the
windows you can open, along with the shortcut keys that
open those windows.
- By choosing Window List from the IDDE's Window
menu or from the system menu of any IDDE window. A
dialog box listing all IDDE windows opens. Choose a
window name from the list and click OK.
When you open a Source window to edit a specific source file, the
filename is added to the Window List dialog box. You can then
activate this particular window from the Window List dialog box.
Each window has a Close box similar to that of a toolbox (see
Figure 2-8). Click on the box to close the window.
Using the drag-and-drop feature
The Digital Mars C++ IDDE provides a drag-and-drop feature that lets
you execute commands by dragging from one window onto another
or onto the desktop. For example, you can drag a module's name
from the project window onto the desktop in order to edit that
module in a Source window. When something cannot be dropped
on a particular window or the desktop, the cursor changes from that
icon to a "No" sign (a circle with a diagonal line through it). Most of
the drag-and-drop functionality is available in debugging mode and
is described in
Commands Available in Debugging Mode.
Using the IDDE
The following sections serve as an overview of Part Two of this
manual and introduce you to the process involved with creating an
application in the Digital Mars C++ environment.
Creating a project
Projects are integral to the Digital Mars C++ development system. You
cannot build an application without creating a project. A project is a
collection of source files, headers, resource files, and other
components that you need to build an application.
To help you create a new project, a new tool called ProjectExpress is
included. This tool lets you select the project target (the result of
your development efforts), the directory for the project files, and
other options. While in ProjectExpress, you can also use AppExpress
to generate the framework for the application.
AppExpress is a tool that automatically generates an application
framework. AppExpress lets you select from a variety of application
types, then creates a working skeleton of source code and resource
definitions. After the framework is generated, then concentrate
on customizing the framework and implementing the features of
the application.
Using workspaces
Because the IDDE provides a variety of windows used for
specialized tasks, you probably do not need all of them open
simultaneously. The IDDE workspaces provide a convenient way to
switch from one screen layout to another. Workspaces are task-oriented,
as opposed to project-oriented. You create workspaces for
different tasks, such as editing, browsing, or debugging, which you
perform in different projects. The Workspace submenu of the
IDDE's Environment menu provides access to workspace
commands.
Creating and editing your application
Once you have created a project, you can start working on the
program's code. This section introduces the IDDE tools.
Creating and editing resources
If writing a Windows application, you probably need to
create resources such as menus and dialog boxes. Commands on the
IDDE's Resource menu access the Digital Mars C++ ResourceStudio, a
powerful tool for creating and editing resources.
Binding resources to classes
ClassExpress is a tool for binding resources, such as dialog box
controls, to the classes in the program. This is needed in order
to be able to respond to user actions. Launch ClassExpress
by choosing ClassExpress from the IDDE's Tools menu, or from
within ResourceStudio.
Editing class hierarchies
The IDDE provides two tools for editing class hierarchies: Class
Editor and Hierarchy Editor. Open a Class or Hierarchy
Editor window from the Views toolbox, or from the Goto View
submenu of the IDDE's Window menu. Both editors have the same
functionality, but different interfaces. The Class Editor emphasizes
member editing, while the Hierarchy Editor emphasizes inheritance
relationships.
Editing code
While you can greatly reduce the amount of work needed to write a
complex application using the tools Digital Mars C++ provides,
eventually you need to edit the raw source code. The IDDE includes
a powerful, scriptable text editor with features such as customizable
key bindings, automatic token coloring, delimiter matching, and
other features. Edit code in the Source window, which can be
opened from the Views toolbox or the Goto View submenu of the
IDDE's Window menu.
Debugging your application
After writing most or all of the application's source code, it is time
to test and debug it. Do this by switching the IDDE into
debugging mode and using the commands on the IDDE's Debug
menu, the Debug toolbox, and various debugging windows
opened from the Views toolbox.
Using help
The following sections describe several ways to get online help in
the IDDE.
The title/status bar
When you click and hold on a command in a menu, the IDDE main
window title/status bar shows a brief description of the menu
command.
The IDDE Help menu
The IDDE provides several online help systems through the IDDE
Help menu. The first items on the IDDE Help menu access the
IDDE Help system, shown in Figure 2-9. To navigate the IDDE Help
system, click on the icon representing the type of help needed.
Alternatively, choose Search from the IDDE Help menu to find a
particular topic in the IDDE Help system.
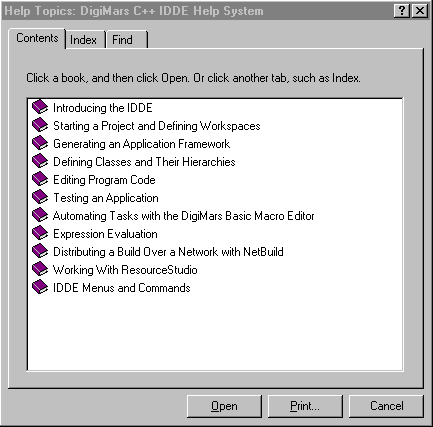
[Figure 2-9 IDDE Help system]
Other commands on the Help menu access Windows API and
Microsoft Foundation Class reference material.
Finally, the About Digital Mars C++ command on the IDDE Help
menu displays a dialog box with version information on the
Digital Mars C++ Development System.
Other ways to launch online help
To view help information for a run-time library
function, highlight the name of the function in a Text Editor
window and type CTRL+ALT+F1.
To view frequently used help topics without navigating
IDDE Help, associate specific .hlp files with key combinations.
(For example, to view help for ResourceStudio, map
rstudio.hlp with the key combination CTRL+ALT+F4.)
To associate a key combination with a help file, choose Edit/Browsing
Settings from the IDDE's Environment menu. Click
Text, then click Help files.
This chapter describes the initial steps involved in writing an
application: creating the project that defines your target and then
defining workspaces used in working on a project. These topics are
covered here in sufficient depth to get you started; more detailed
information is presented in
More about Projects and Workspaces.
What Are Projects and Workspaces?
A project is a collection of files from which an executable or library
is generated. The IDDE automatically generates a file (called the
makefile) that tracks the dependencies in your project. This makefile
is configured using the project option settings you specify. The IDDE
executes the makefile when you build your project. File extensions
are used to determine which tool is needed to build each
component. Project building is discussed in
Testing an Application.
Workspaces, which are among the IDDE's most useful features, are
window configurations used for particular tasks. To create a
workspace, you name and save the exact arrangement of windows
on your screen. Any time you need to perform a similar task, you
can instantly open that workspace, with the windows organized the
way you want them. For more information on workspaces, refer to
More about Projects and Workspaces.
Starting a Project
This section describes how to start a new project, how to open an
existing project, and how to edit the project contents.
Purpose of a project
The project is central to building an application with the IDDE. A
project is a container for the application you are building. It contains
the various components necessary for building an application or a
library, as well as information about how to build it.
Projects speed development time because they let you recompile
only the source files that have changed, or whose header files have
changed, since the last time the project was built. For example, if
your program has five source files and you have changed one of
them since the last build, only that file is recompiled when you build
the project. (You can, however, choose to recompile all the files.)
The project management system does this by automatically analyzing
the dependencies of the source files and constructing or updating
the makefile each time the project is built.
Contents of a project
A project can contain several different types of files, including C and
C++ source, assembly language source, resource scripts, object files,
libraries, and module definition files. And because a project is built
in a hierarchical manner, you can include projects within projects.
The IDDE stores information about a project on disk as a project file
with a .prj extension. Among other information, this file includes
a list of the source files contained in a project. When you build the
project, the IDDE constructs a makefile (.mak) or updates the
existing makefile based on the files the project contains. Project
options are stored in an option set file (.opn) that is referenced in
the project file. The option set file can be loaded into another
project, making it easy to transfer all option settings from one project
to another.
Creating a new project
To create a new project, choose New from the Project menu. The
ProjectExpress dialog box opens. ProjectExpress lets you specify
the project name, initial project options, and initial project contents
of the new project. The ProjectExpress dialog box contains four
pages of options, described in the following sections.
Naming the project
Initially ProjectExpress displays the Project Name page (see
Figure 3-1).
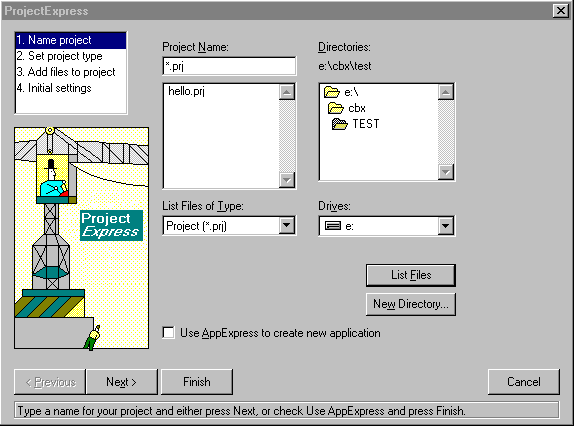
Figure 3-1 ProjectExpress Project Name page
Select the directory in which you want to create the project from the
Directories listbox, or click on New Directory to make a new
directory for this project. Enter the name of the new project in the
Project Name textbox.
If you select Use AppExpress to create new application, then click
on Finish, AppExpress will start. AppExpress is discussed in
Generating an Application Framework.
Setting the project type
To set the target operating system, target type, and other options,
click on Next, or select Set project type from the left listbox, to
switch to the Project Type page (Figure 3-2).
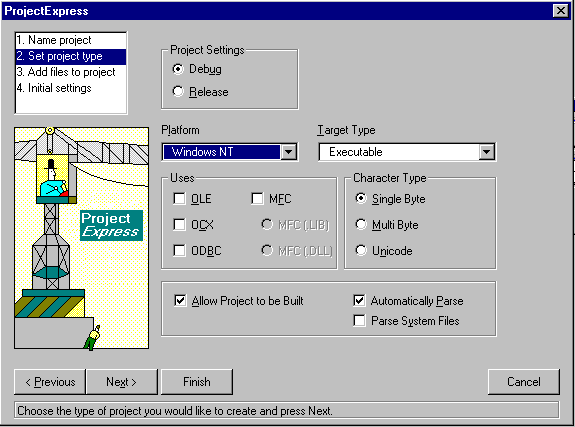
Figure 3-2 ProjectExpress Project Type page
After the project is created, you can modify these settings by
choosing Settings from the Project menu. These options are
discussed in more detail in
More about Projects and Workspaces.
Adding files to the project
To add pre-existing source, header, or other files to the new project,
click on Next, or select Add files to project from the left listbox, to
continue to the Project Edit page (Figure 3-3).

Figure 3-3 ProjectExpress Project Edit page
If you are creating a new project, you do not need to do anything on
this page. After the project is created, you can open a similar dialog
box by choosing Edit from the Project menu (see the section
"Adding and deleting project files" later in this chapter).
Setting defines and include directories
To define macros, specify search paths, or exclude a directory from
parsing, click on Next, or select Initial settings, to continue to the last
page of the ProjectExpress dialog box (Figure 3-4).
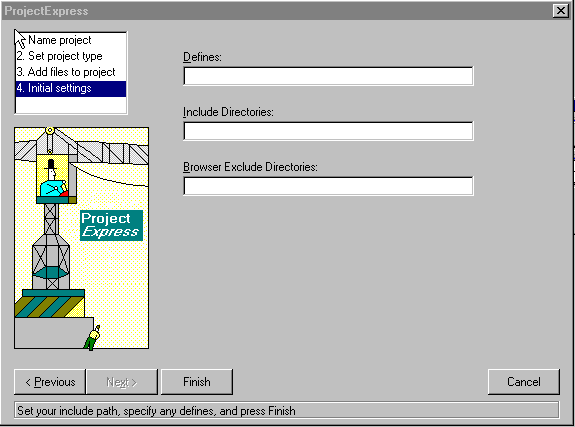
Figure 3-4 ProjectExpress Initial Settings page
To define a macro on the compiler command line, enter the macro
in the Defines textbox (for example, COLOR=1). Separate multiple
macro definitions with semicolons. Type any #include file search
paths you want on the compiler command line in the Include
Directories textbox. Type any directories to be excluded from
parsing in the Browser Exclude Directories textbox. (For more
information about parsing, see
Defining Classes and Their Hierarchies).
In general, you can leave these fields blank. You may change these
options later by choosing Settings from the Project menu.
After the project is set up the way you want, click on Finish to create
the new project.
Opening an Existing Project
To open a project that already exists, choose Open from the Project
menu. The IDDE displays the Open Project dialog box. Select the
desired project filename and click OK.
IDDE lets you work with only one project at a time. If you're already
working with a project when you open a new one, the IDDE closes
the project in process.
An additional method for opening existing projects is to choose one
from the list of projects at the bottom of the Project menu. Projects
are added to this menu as they're opened or created. This makes it
easier for you to switch back and forth between projects as you
work.
Adding and deleting project files
To add or remove files from your project, choose Edit from the
Project menu. The IDDE opens the Edit Project dialog box, shown
in Figure 3-5.
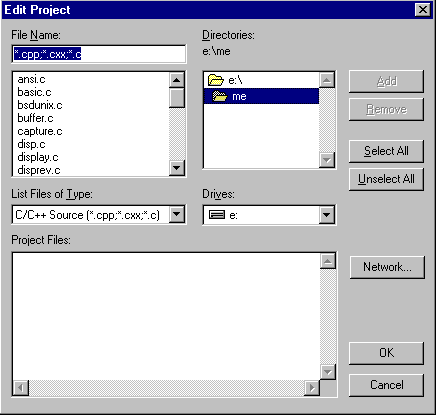
Figure 3-5 Edit Project dialog box
The Project Files listbox contains the files in your project.
- To add a file to your project, select the file from the File
Name listbox and click on Add, or double-click on the
name of the file.
- To add all the files in the File Name listbox, click in the
listbox, click on Select All, and then click on Add.
- To remove a file from the project, select it from the
Project Files listbox and click on Remove, or double-click
on the name of the file.
- To remove all the files from the project, click on the
Project Files listbox, click on Select All, and then click on
Remove.
To make the changes to your project, click OK. To leave your project
as it was before, click Cancel.
After you click OK, the IDDE checks your project for dependencies
and creates a makefile. While checking for dependencies, the IDDE
adds the additional files it needs to build your project. For example,
it adds all the header files that your source files reference with the
#include directive.
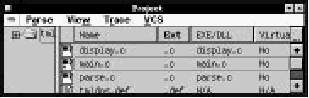
The Project window
The Project window, shown in Figure 3-6, displays a list of files in
the current project. You can open the Project window by choosing
Project from the Goto View submenu of the IDDE's Window
menu.
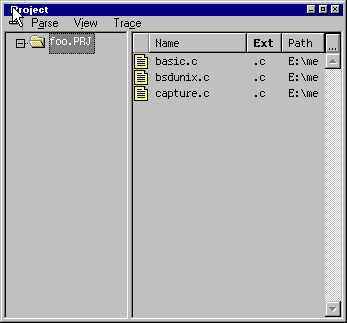
Figure 3-6 Project window
You can double-click on the name of a source file in the right pane
to open that file for editing in a Source window. (See
Editing Program Code,
for a description of text editing functions.)
You can see the current project's subprojects, or open a subproject,
by double-clicking on the project name in the left pane.
The icon to the left of each filename indicates certain properties of
the file. If the icon is blue, the file was explicitly added to the
project; if the icon is gray, the file is included in the project by a
dependency relationship or by parsing.
The icon next to each filename contains different information during
debugging. An asterisk indicates that the module contains debug
information. A "T" at the right of the icon indicates that tracing is
enabled in the module. Dots indicate that the module contains
breakpoints: a green dot indicates enabled breakpoints, and a red
dot indicates disabled breakpoints.
Closing a project
To close a project that is currently open, choose Close from the
Project menu. The project will be saved automatically.
Importing a Microsoft or Borland project
You can import an existing Microsoft or Borland project into the
IDDE project system, by using the other product's makefile.
First, choose Open from the Project menu. In the "List files of type"
listbox, choose Import Make. When you open a Microsoft or Borland
makefile, the IDDE lets you work with it as you would a Digital Mars
C++ project.
To build the project with the original Microsoft or Borland makefile,
use the Make page under the Build tab in the Project Settings
dialog box (see
More about Project Build Settings)
to
call the original makefile or batch file.
Defining Workspaces
This section describes how to set up and save your own workspaces.
The purpose of workspaces
The IDDE's workspace feature lets you set up multiple screen
configurations, each of which is optimized for a specific task. For
example, you can have a workspace for editing source files, another
for working with project resources, and another for debugging DLLs.
You can define up to five different workspaces.
Creating a workspace
To start a new workspace, choose New from the Workspace
submenu of the IDDE's Environment menu. Type the name of the
new workspace in the Workspace Name dialog box. This name
appears in the Workspace toolbox, as shown in Figure 3-7. You can
then configure the screen as you like by opening the windows you
need and positioning and sizing them to suit your requirements. You
can refine the workspace as you work; the IDDE automatically saves
changes to a workspace configuration when you exit the workspace.

Figure 3-7 Workspace toolbox
Selecting a workspace
To change workspaces, click on a tab in the Workspace toolbox, or
choose from the list of workspaces in the Environment menu.
Changing your workspace does not affect your project; it just
changes the way information is presented on the screen.
More options for workspaces
For more information on how to create, edit, clone, and delete
workspaces, and to find out how to change workspace options, refer
to
More about Projects and Workspaces.
This chapter introduces application frameworks and the steps
necessary to generate and build on such a framework. This process
uses two tools: AppExpress and ClassExpress.
Before reading this chapter, take look at the material in
Starting a Project and Defining Workspaces
in the IDDE.
AppExpress creates both an application framework (according to
specifications you provide) and the project in which that framework
resides.
More about AppExpress
and
More about ClassExpress
are the reference chapters for the AppExpress and
ClassExpress tools.
What Is an Application Framework?
An application framework is a standardized skeleton architecture for
an object-oriented application. The framework is composed of C++
classes derived from base classes in the Microsoft Foundation Class
(MFC) library.
Using a framework to build an application dramatically shortens its
development time. All the files needed to create the application are
included in the skeleton program. Standard user interface
components such as windows, menus, and toolbars are already
defined. Some of the necessary connections between the defined
C++ classes are established automatically.
With a framework as a starting point and using the MFC library, you
can build many different types of applications by:
- Adding or changing user interface components with
ResourceStudio (see
Chapter 7, "Adding Look and Feel with Resources")
- Creating new C++ classes, class methods, and class
member variables with ClassExpress
- Writing code
As you build application frameworks with AppExpress and
ClassExpress, you will become familiar with message maps. Message
maps summarize, within a data structure or table, all of the links
between Windows messages and the methods (also called functions)
of a particular class that process those messages. Each entry in a
message map is a pair, consisting of a message identifier and a
method that responds to that message. The method is said to handle
the message. Methods referenced in message maps are also called
message handlers, or simply handlers.
Because message maps are used by MFC to route Windows
messages to the messages' handlers, they provide the essential
translations needed to present the event-driven model of the
Windows API in an object-oriented guise. By automating the creation
and maintenance of message maps, AppExpress and ClassExpress
relieve you of much error-prone drudgery, and allow you to spend
more of your development time writing code that implements
functionality.
The following sample message map was automatically generated by
AppExpress for an MDI-style application framework:
    BEGIN_MESSAGE_MAP( CMainView, CView)
	//{{ AFX_MSG_MAP( CMainView)
	// NOTE -ClassExpress will add and
	// remove mapping macros here.
	// DO NOT EDIT what you see in these
	// blocks of generated code !
	//}} AFX_MSG_MAP
	// Standard printing commands
	ON_COMMAND( ID_FILE_PRINT, CView::OnFilePrint)
	ON_COMMAND( ID_FILE_PRINT_PREVIEW,
		CView:: OnFilePrintPreview)
	END_MESSAGE_MAP()
Creating a Framework with AppExpress
This section describes how to launch AppExpress and use it to
generate an application framework.
Launching AppExpress
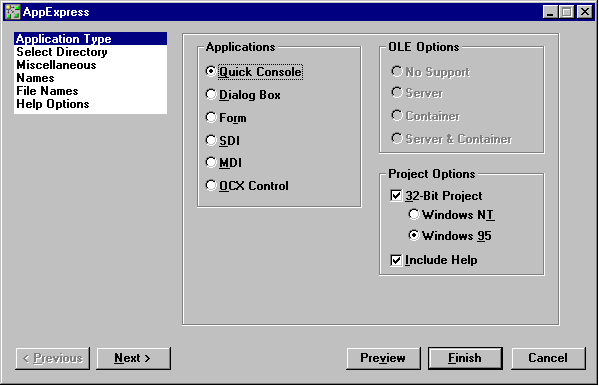
From the IDDE main window, choose AppExpress from the Tools
menu. This opens the window shown in Figure 4-1.
[Figure 4-1 AppExpress window]
Looking at the AppExpress window
The AppExpress window contains:
- A listbox at the upper left displaying the steps required
to create an application framework. The current selection
from this list determines which page of options is shown
in the larger pane to the right.
- A pane on the right showing the options associated with
the currently selected step.
- Buttons below the panes that you can use to navigate
among the steps, preview your work, or generate a
framework.
To navigate through the six pages of options, click on the name of a
step in the steps list, or click on the Next or Previous button.
Alternatively, press Control-n, where n is a number between 1 and 6
representing the selected step's position in the steps list.
Specifying an application framework
AppExpress divides the process of building a framework into six
steps:
- Select an application type
- Select a directory for the project
- Provide copyright information and project options
- Specify class names
- Specify source file names
- Specify help file names
These steps, which are briefly outlined here, do not have to be
completed in this order. However, you will find it convenient to
complete the first step specifying application type options before
proceeding to any other step. All later steps contain some options
that depend upon your choices in this step.
Selecting an application type
To select an application type:
- Select Application Type from the steps list in the
AppExpress window.
- Select an application type by clicking on a radio button
in the Applications group. There are six categories of
applications, two of which SDI and MDI can be made
OLE clients and/or servers.
Check the Include Help box if you want AppExpress to generate
files from which a Windows help file can be created. Check the 32-
Bit Project box if you are building a 32-bit application. See
Chapter 17, "More about AppExpress"
for the details of how the 32-Bit
Project check box combines with the selected application type to
determine what AppExpress generates.
Selecting application type options sets default options for many of
the other steps in AppExpress. For example, if you select Dialog
Box, AppExpress automatically creates three C++ classes with default
class names in your skeleton program. You can change these
defaults; for example, you can modify the default class names by
selecting Names from the steps list.
Selecting a directory for the project
To select a directory for your source files and project file:
- Select the Select Directory item from the steps list.
The Select Directory options page opens as shown in
Figure 4-2.
- Select the appropriate drive and directory. Or, click on
Create New Directory to create and name a new
directory. AppExpress suggests the project name as the
new directory name, but you may change that default.
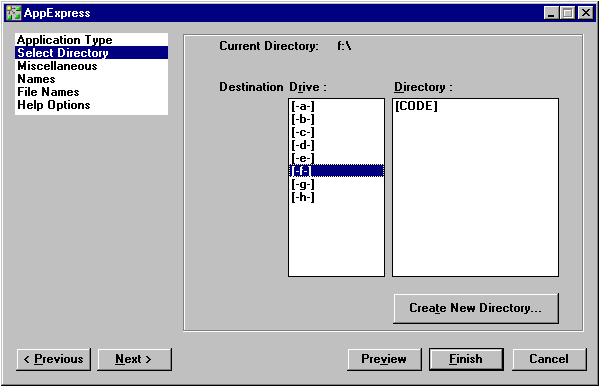
[Figure 4-2 Select Directory options]
Providing copyright information and project options
You can supply copyright information for your source code, and set
the project's name, stack size, and heap size as follows:
- Select Miscellaneous from the steps list. The
Miscellaneous options page opens as shown in
Figure 4-3.
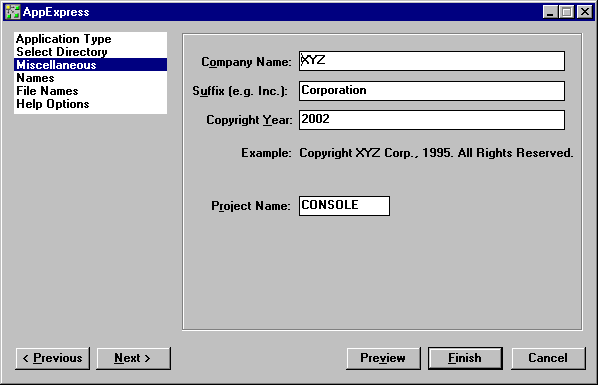
[Figure 4-3 Miscellaneous options]
- Provide copyright information in the appropriate fields.
AppExpress uses this information to write a copyright
notice in the comment header of all of your application's
source files, and to construct the application's About
dialog box.
- Specify the project name in the appropriate field. Stack
and heap sizes can be changed later in the Project
Settings dialog box.
Specifying class names
To view and change the names of C++ classes or their associated
source files:
- Select Names from the steps list. The Names options
page opens as shown in Figure 4-4.
- In the options pane, select a class from the Name drop-down
list automatically created by AppExpress. The class
names included in this list depend on the application
type you have selected.
- If you like, you can edit the selected class name. Note,
however, that C++ class names follow a standardized
naming convention. Using the default names allows your
program's structure to be easily understood by others.
- In the appropriate field, type the names of the header
and source files in which AppExpress should place the
class source code.
Note:
The CAboutDlg class, which represents your
application's About Box class, is always created in
the same header and implementation files as the
CWinApp-derived class (for example, CSDIAPP).
To discard any changes you have made on this page, click on the Set
Default Names button.
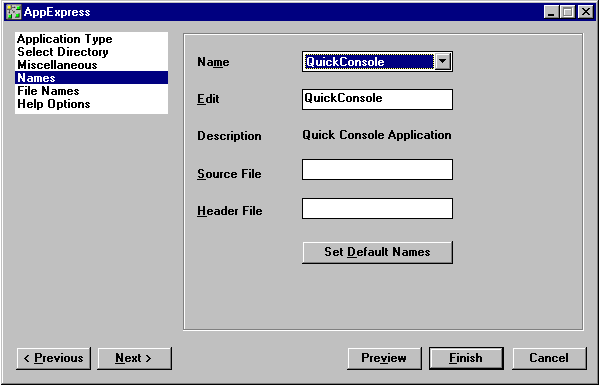
[Figure 4-4 Names options]
Naming source files
To edit filenames automatically generated by AppExpress:
- Select File Names from the steps list. The File Names
options page opens as shown in Figure 4-5.
- In the options pane, click on the filename you want to
change. The files listed depend on the application type
you have selected. Their names correspond to their
functionality within the application.
- Edit the filename, but remember that these changes
could make it harder for someone else to identify the
purpose of the file.
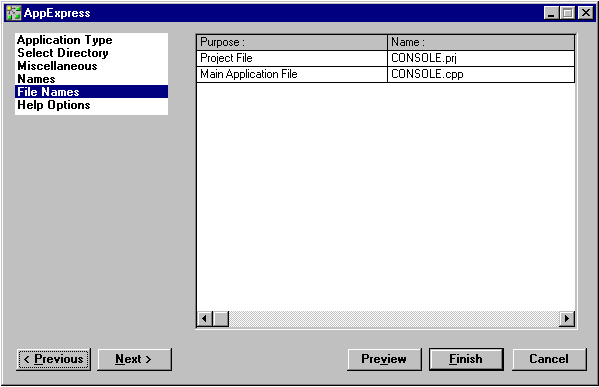
[Figure 4-5 File Names options]
Specifying help file names
To view or change the names of the files that the help compiler uses
to generate online help files for your application:
- Select Help Options from the steps list. The Help
Options options page opens as shown in Figure 4-6.

[Figure 4-6 Help Options options]
Note
If you selected Quick Console or Dialog Box as the
application type, or if Include Help is not selected
in the Application Type options page, then you
have no help options.
- Edit the filenames if you want. Note, however, that any
changes could make it harder for someone else to
identify the purpose of the file.
Generating an application framework
At this point, you have selected an application type and the directory
in which the application project files will reside, and you may have
customized various class names or filenames. AppExpress can now
generate your application framework in the form of a skeleton
program.
Click on the Finish button in the AppExpress window. AppExpress
generates the project and its source files, as you specified, hands it
off to the project system, and closes.
Note
If you checked the Include Help box among the
Application Type options, then you will need to
build the help file for your application. You do this
by running the makehelp. bat file that
AppExpress creates in your project directory.
Your skeleton program is ready. You can now build the program
from within the IDDE, or you can add to your program by using
other Digital Mars C++ tools. The next section shows how to enhance
your application's C++ classes by using ClassExpress.
Building on a Framework with ClassExpress
AppExpress cuts the work involved at the beginning of the
application-building process. ClassExpress, on the other hand,
enhances productivity throughout the rest of the process. You use
this tool to flesh out the skeleton application produced by
AppExpress.
Specifically, you can use ClassExpress to:
- Write message maps
- Create new classes derived from existing classes
- Create new class methods mapped to specific messages
- Create new class member variables (that is, data variables
that are members of a class) mapped to specific user-interface
objects
- Create new classes that can be OLE2 automation servers
or clients
- Create new classes that act as interfaces to Visual Basic
Custom Controls (also known as VBXs)
This chapter describes the first two of these options: writing message
maps and creating new classes derived from existing classes.
Message maps, defined in "What Is an Application Framework?" in
this chapter, are discussed in greater detail in
Chapter 17, "More about AppExpress."
You can use ClassExpress immediately after creating an application
framework as well as at later points in development. For example,
you probably want to wait until you have created some dialog boxes
with ResourceStudio (see
Chapter 7, "Adding Look and Feel with Resources"
) before mapping class member variables to user interface
objects.
Launching ClassExpress
From the IDDE main menu, launch ClassExpress by choosing
ClassExpress from the IDDE's Tools menu.
Launching ClassExpress opens the window shown in Figure 4-7.
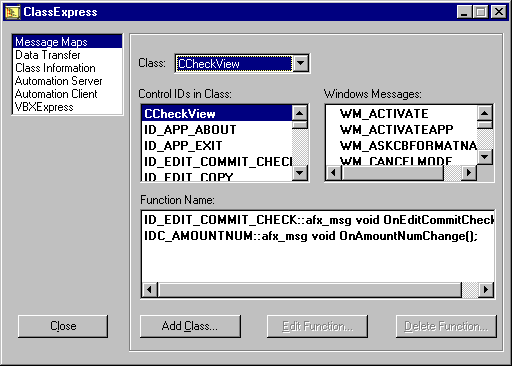
[Figure 4-7 ClassExpress window]
Looking at the ClassExpress window
The ClassExpress window contains:
- A listbox at the upper left presenting the different kinds
of code that ClassExpress can generate
- A pane on the right showing the page of options
associated with each selection from the list at the upper
left
To navigate through the selections, click on the name of a selection
in the list. Alternatively, use the key combination Control-n, where n
is a number between 1 and 6 representing the position in the
selections list of the selection to which you want to move.
Writing a message map with ClassExpress
Message maps are tied to particular C++ classes. In ClassExpress, you
can add to an existing message map by adding new linkages
between messages and class methods. Or you can add a new
message map for an entirely new class.
ClassExpress runs from within the IDDE or as a stand-alone
application. If run from within the IDDE,
ClassExpress will be loaded with the IDDE's open project if there is
one; otherwise, it prompts to open an existing project (which
also opens the project in the IDDE's project system).
As an example, the following steps demonstrate how to add a
message handler to the CAboutDlg class of an SDI application
generated by AppExpress:
- Select Message Maps from the listbox. (If you just started
ClassExpress, this should already be selected.) The
ClassExpress window is displayed as shown in Figure
4-7.
- Select the class CAboutDlg from the Class drop-down list.
The contents of the three other lists in the options pane
are updated to reflect the following selection:
- Select CAboutDlg from the Control IDs in Class list. The
list of Windows messages changes, revealing a long list
of messages to which your dialog box could respond.
- Double-click on WM_ACTIVATE. Notice that the method
OnActivate (in its fully prototyped form) is added to the
Function Name list.
Now, whenever your About dialog is activated, the OnActivate
method is called in response to the dialog window receiving the
message WM_ACTIVATE. With the four above steps, you have
created an association between the message WM_ACTIVATE and the
method OnActivate, and added it to the message map for the
CAboutDlg class.
Adding a new class to your application
Adding new classes to your application is as easy as creating a
message map. To add a class:
- Select Message Maps from the listbox. (If you just loaded
ClassExpress, then this should already be selected.)
- Click on the Add Class button. The Add Class dialog box
shown in Figure 4-8 opens.
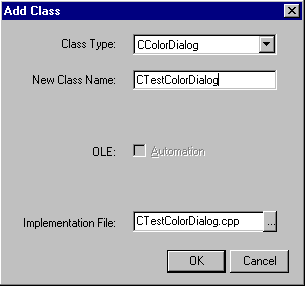
[Figure 4-8 Add Class dialog box]
- Select a class type from the Class Type drop-down list.
This type specifies the base class from which your new
class will be derived. The list displays names of MFC
classes without the initial letter 'C', thereby allowing you
to navigate rapidly within the list by typing the first letter
of a class type. For example, typing 'V' selects the View
class type.
- The New Class Name field becomes active, displaying a
suggested name for the new class. Edit this name as
appropriate.
- If you selected CDialog or CFormView, then the field
Dialog ID is displayed. Move to this field and choose the
resource ID of the dialog that you want to associate with
the new class's window.
- Check the OLE Automation box if you want your new
class to be a programmable OLE object. If you choose
this option, any other Windows application that is an
automation client can use the OLE interface you define
for this object.
- If you check the OLE Automation box and you are
deriving a new class from the CCmdTarget or CWnd
class, the Creatable check box is displayed. Check this
box if you want other applications to be able to create
the OLE automation object that you are defining.
- If you check the OLE Automation check box and you are
deriving a new class from the CCmdTarget or CWnd
class, you must also type a name in the External Name
field. This is the name that is exposed to other
applications that may want to use your OLE automation
object.
- Decide whether to edit the implementation filename of
your new class (shown in the last field in the Add Class
dialog box). By default, the base part of the filename is
the name of your new class without the initial letter 'C',
and truncated if necessary.
- Click OK to add the new C++ class to your application. If
you want, you can create message mappings for your
new class by using the steps outlined in the previous
section.
This section on ClassExpress showed how easy it is to write a
message map and to create a new class. By just clicking on a check
box, you can also add OLE automation support to your application.
In addition, ClassExpress can bind your classes to your dialog boxes
and generate C++ wrapper classes for Visual Basic custom controls
(VBXs). It also provides extensive support for building OLE servers
and containers. For more information on these features, refer to
Chapter 18, "More about ClassExpress."
Once you have produced an application framework,
customize the application by adding your own classes and functions.
The two tools designed specifically for object-programming are
the Class Editor and the Hierarchy Editor. They
simplify the design and maintenance of C++ projects by
working directly with the project's class hierarchy and members. The
editors themselves take care of many of the mundane details of file-oriented
program development, such as opening and closing files
and locating source code for particular member functions.
These tools are suited for developing a class hierarchy from scratch,
for adding classes to an application framework generated with
AppExpress, and for browsing and editing pre-existing class
hierarchies. They are especially useful for understanding the
architecture of unfamiliar source code.
The Class and Hierarchy Editors can perform the same operations on
classes and hierarchies; they differ only in their interface. The Class
Editor's interface emphasizes member editing; the Hierarchy Editor's
interface, through its graphical display, emphasizes inheritance
relationships. Use one or the other, or both simultaneously,
according to preference.
This chapter describes basic operations that may be performed with
the Class and Hierarchy Editors. For a complete reference on these
two tools, see
Class Editor Reference,
and
Hierarchy Editor Reference.
Parsing and Browsing
The Class and Hierarchy Editors are C++ class browsers. These tools
let you work with your source code in an object-oriented manner,
rather than in the traditional file-oriented manner. The Class and
Hierarchy Editors present you with a list of classes in your project,
allow you to view the members of each class, and let you edit the
member declarations and definitions directly, without performing the
overhead of opening and closing files and locating source code for
particular members. Changes made to classes or inheritance
relationships in the Class or Hierarchy Editors are automatically
changed in the underlying source code.
To present you with a list of classes and members, the IDDE must
parse the source code. By default, this is done automatically. When
the IDDE detects that source code or project settings have changed
since the last parse, it reparses the necessary files. If errors are
encountered during parsing, messages are displayed in the Output
window. You can double-click on the error message to open for
editing the appropriate file at the point at which the error was
detected.
How the class browsers expand macros
The parser used by the Class and Hierarchy Editors contains a fully
functional C preprocessor. One significant difference between this
parser and the Digital Mars C compiler is the way the parser expands
macros.
The parser treats an entire project as one "database" of code.
Consequently, preprocessor macros defined in any header will
expand in any subsequently parsed file. This can produce
unexpected errors. For example:
// foo1.h ------------------------------------
#define pBar (pIndirect->pBar)
// . . .

// foo1.cpp ----------------------------------
#include <foo1.h>


// foo2.cpp ----------------------------------
struct A
{   int *pBar;    // ERROR! Expands to: int *
    (pIndirect-> pBar);
};
To avoid errors of this type, undefine the macro at the top of the file
where the error occurs (foo2.cpp).
Browsing library source code
If browsing source code that is based on MFC or some other
large class library, it is convenient to turn off the display
of library classes. To do so:
- Choose Settings from the IDDE's Project menu.
- In the Project Settings dialog box, click the Directories
tab.
- In the Browser Exclude Directories textbox, type the
name of the directory containing the class library headers
(for example, c:\dm\mfc\include).
- Click OK.
Control the parsing of individual files from the Project window,
and enable or disable parsing for the entire project from the Target
page of the Project Settings dialog box. For more information, see
More about Projects and Workspaces.
Class Editor
The Class Editor provides a list-based view of the class hierarchy.
From within the Class Editor add classes, modify
inheritance relationships, and view and edit class member
declarations and definitions.
To open a Class Editor window, do one of:
- Choose Class Editor from the Window menu's Goto
View submenu.
- Click and drag the Class Editor icon from the Views
toolbox to an empty area of the desktop.
The Class Editor window (see Figure 5-1) is divided into three panes:
- The Classes pane, which contains a list of classes.
- The Members pane, which contains a list of members of
the current (highlighted) class.
- The Source pane, which displays member source code.
You can edit the source code in this pane as in the
Source window (see
Editing Program Code,
for a description of text editing features).
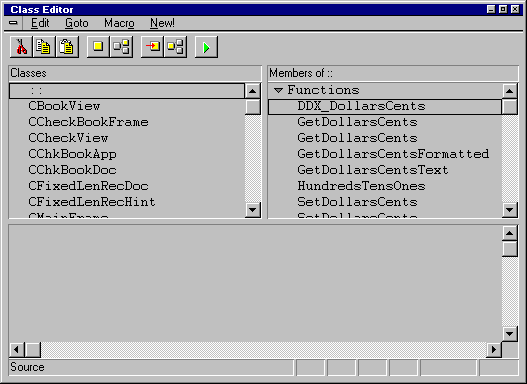
Figure 5-1 Class Editor window
The Class Editor window contains a standard menu bar and toolbar;
pop-up menus are available in each pane. You can set options for
the grouping, sorting, and display of classes and members in the
Classes and Members panes in the Editing/ Browsing Settings
dialog box. For a complete reference on Class Editor menus and
options, see
Class Editor Reference.
You can change the relative sizes of panes in the Class Editor
window by first positioning the cursor over the line separating the
panes. The cursor changes to a two-headed arrow. Press the left
mouse button and drag the separator to the desired location.
To select a class in the Classes pane, click on it. Additional classes
may be selected by holding down the Control key and clicking. By
default, classes are displayed hierarchically, with derived classes
below and indented relative to their bases. Classes with multiple
bases are displayed beneath each of the bases. Triangular buttons to
the left of base classes can be used to collapse and expand branches
of the hierarchy. You can set an option to display classes
alphabetically in the Editing/ Browsing Settings dialog box.
By default, class members in the Members pane are grouped into
Functions, Data, and Typedefs. The tree structure can be expanded
or collapsed by clicking on the triangular buttons to the left of the
category names. To select a class member, click on it. Additional
members can be selected by clicking while holding down the
Control key. You can display a member declaration or definition in
the Source pane by double-clicking on the member name.
Creating classes
You can create a class hierarchy consisting of new classes related to
other classes by inheritance (derived or sibling classes), or create
new top-level classes not related to any other class.
Creating a top-level class
To create a new class hierarchy, first create a top-level class to serve
as a base for the hierarchy.
To create a new top-level class:
- Choose Add Top from the pop-up menu in the
Classes pane. The Add Class dialog box is displayed
(Figure 5-2).
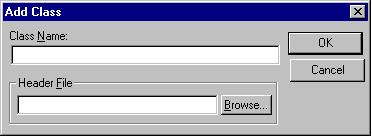
Figure 5-2 Add Class dialog box
- Type a name for the new class.
- Click OK.
The class declaration is placed in a new header file, and the header
file is added to the project. By default, the first eight letters of the
class name are used to derive the header filename. You may change
the header filename by typing an alternative name in the Header File
textbox of the Add Class dialog box.
Creating a derived class
After a base class exists, you may create derived classes- specialized
versions of the base class.
To create a new derived class:
- Select the base class of the new class.
- Choose Add Derived from the pop-up menu in the
Classes pane. The Create Derived Class dialog box
opens. (This dialog box is similar to the Add Class
dialog box.)
- Type a name for the new class.
- Click OK.
Creating a sibling class
You may also create a new derived class as a "sibling" to an existing
class. Siblings have the same base class with the same access
specifiers.
To create a new sibling class:
- Select the class whose base class will be the base class of
the new class.
- Choose Add Sibling from the pop-up menu in the
Classes pane. The Create Derived Class dialog box is
displayed.
- Type a name for the new class.
- Click OK.
Editing inheritance relationships
As your application evolves, you may want to restructure your class
hierarchy. The Class Editor lets you add and delete connections
between classes, as well as change the inheritance attributes.
When altering inheritance relationships, the Class and Hierarchy
Editors change only the class declarations. In particular, they do not
change references to base classes and their members in a derived
class's constructors or functions. If such references exist, you must
change them manually in the source file.
Connecting to a base class
You can connect a class to a base class to make it a derived class of
this base.
To make one existing class derive from another existing class:
- Select the class that will be the derived class.
- Choose Connect Base from the pop-up menu in
the Classes pane. The Add Base dialog box opens
(Figure 5-3).
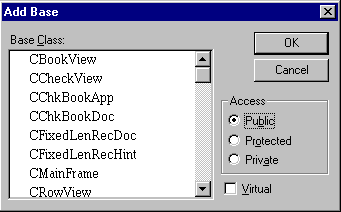
Figure 5-3 Add Base dialog box
- From the listbox, select the class (or classes) to be this
class's base class.
- Select the desired access specifier. Check Virtual if virtual
inheritance is desired.
- Click OK.
If the classes are displayed hierarchically, the derived class is
displayed below and is indented relative to the base class in the
Classes pane.
Deleting a connection
You can also disconnect a derived class from a base class.
To delete an inheritance relationship:
- Select a derived class.
- Choose Delete Base Connection from the pop-up
menu in the Classes pane.
- A message box requests confirmation. Click Yes to delete
the base connection.
In cases of multiple inheritance, select one inheritance relationship
to delete by clicking on the instance of the derived class below the
base to be removed. For classes derived from more than one base
class, multiselecting the inheritance relationships to be deleted lets
you delete all base connections simultaneously. If a class has all of
its base connections severed, it remains in the hierarchy at the top
level.
Editing inheritance attributes
You can change a derived class's base class access specifier and
virtual inheritance flag.
To edit the base class access specifier:
- In the Classes pane, select the derived class.
In cases of multiple inheritance, select the base
connection to edit by clicking on the instance of the
derived class below the appropriate base.
- Choose Edit Base Attributes from the pop-up menu in
the Classes pane.
The Edit Base Attributes dialog box opens (Figure 5-4).
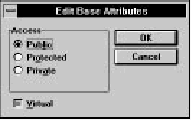
Figure 5-4 Edit Base Attributes dialog box
- Select the desired access specifier. Check Virtual if virtual
inheritance is desired. Click OK.
If you are editing several inheritance relationships simultaneously
and the access specifiers are not identical, a Don't Change option is
displayed. This lets you change the Virtual specifier without also
affecting the access specifiers. You may, however, select Public,
Protected, or Private, and all connections are given that access
specifier.
Working with class members
After creating a class, you can implement its functionality through
member data and functions. You may add, delete, and edit class
members through the Members pane and Source panes.
A list of the members of the currently selected class is shown in the
Members pane (Figure 5-5). By default, the member list is sorted into
three categories: Data, Functions, and Typedefs. Within each
category, items are sorted alphabetically. The colored diamond in
front of each member identifies the access as public (green),
protected (yellow), or private (red). Names of members defined as
macros appear in red.
Note:
Members that appear in red are not syntactically
verified before source changes are saved back to
the file.
The lists following each category header can be collapsed or
expanded by clicking on the triangular button to the left of the
category name.
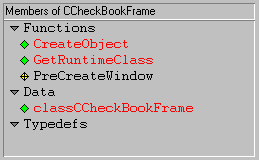
Figure 5-5 Members pane of Class Editor
Adding a class member
The first step in class implementation is to declare the data members
and member functions.
To add a class member:
- Choose Add from the pop-up menu in the Members
pane. The Add Member dialog box opens (Figure 5-6).

Figure 5-6 Add Member dialog box
- Type the member declaration. The member may be a
data item (for example, int nCats), a function (for
example, int NumCats()), or a typedef (for example,
typedef int CATCOUNT). Do not type any storage
specifiers into the declaration textbox; these are added
by the Class Editor.
- Select the desired access and storage specifiers. Check
the Inline check box for an inline function.
- Click OK.
The new member is added to the appropriate group in the Members
pane and to the class declaration in the header file. If the new
member is a function, an empty function is added to the appropriate
source file. If a new source file is created, it is added to the project.
By default, the first eight letters of the class name are used to derive
the source filename for new functions. You may change the file
name by entering an alternative name in the Source File textbox of
the Add Member dialog box.
Deleting a class member
Unneeded class members are easily removed.
To delete a class member:
- Select the class member to be deleted.
- Choose Delete from the pop-up menu in the Members
pane.
- When the message box requests confirmation, click Yes
to delete the member.
The declaration is removed from the header file and, if the member
was a function, the function definition is removed from the source
file.
Changing member attributes
As your class and hierarchy evolve, you may decide to change
certain member attributes. For example, you may want to make a
function virtual, or data private.
To change a member's access and storage specifiers:
- Select the member you want to change.
- Choose Edit Attributes from the pop-up menu in the
Members pane. The Change Member Attributes dialog
box opens (Figure 5-7).
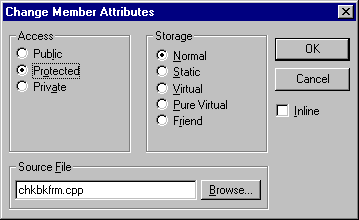
Figure 5-7 Change Member Attributes dialog box
- Select the desired access and storage specifiers. Check
the Inline check box for an inline function. Click OK.
The class declaration in the header file is modified and the Members
display is updated to reflect those changes.
If you are editing several members' attributes simultaneously and the
access specifiers are not identical, a Don't Change option is
displayed in the Access group box. Likewise, if the storage specifiers
are not identical, a Don't Change option is displayed in the Storage
group box. These options let you change other member attributes
without affecting the original access or storage of each member. You
may, however, select a particular access or storage specifier, and all
members are given that attribute. Also, when you are editing several
members' attributes, if the inline attributes are not the same, the
Inline check box changes to allow three states (checked, unchecked,
and grayed, indicating "Do not change") instead of the normal two-state
options.
Viewing and editing member source
After declaring your class members, you can extend your functions
by editing the function definitions in the Source pane. You also can
change data member types, array dimensions, and so on.
To view and edit member declarations and function definitions:
- Double-click on the member in the Members pane.
The member's declaration (for data items and pure
virtual functions) or definition (for other functions) is
displayed in the Source pane. If the source code is not
available (as with MFC libraries, for example), the
definition is displayed.
- Click in the Source pane to begin editing. Editing
operations here are identical to editing operations in
other Source windows.
- To save changes, choose Save from the pop-up menu in
the Source pane.
Changes made to a function's argument and return types in the
definition are updated automatically in the class declaration. The
Members pane is updated when the source is saved.
Note:
If you close the current project before you save a
source file you've modified with the Class Editor,
you cannot discard the changes or close the file
until you reopen the project.
Viewing and editing source files
At times it is useful to view and edit the entire file containing the
class declaration or the class's functions. It is necessary, for example,
to add the appropriate #include statements to the source files
before compiling.
To view and edit the header file containing the class declaration:
- Select the class in the Classes pane.
- Choose Show Header from the pop-up menu in the
Classes pane. A Source window containing the contents
of the class header file is displayed.
- Edit the class declaration as desired.
You may add or delete class members as you would
without the Class Editor. However, if you add functions
to the declaration, you have to add the function
definitions manually to the source file as well.
- Save your changes by choosing Save from the Source
window's File menu.
- To close the Source window, choose Close from the File
menu.
- Click on the Class Editor window. If you have made
changes to the header file, a message box asks whether
it is OK to reparse. Click Yes.
- Click on the class whose declaration you just edited to
see the member changes updated in the Members pane.
Note:
For non-inline functions, if you change the
function's signature (return type, argument types,
and so forth) in its declaration, you must make the
corresponding changes to its definition by hand, or
the Members pane will display two versions of the
function.
To view and edit the source file containing member function
definitions:
- Select a member function from the Members pane.
- Choose Show Source from the pop-up menu from the
Members pane. (Show Source is dimmed if the source
code is not available.)
The file containing the member function's source code is
opened for editing in a Source window.
- Edit the member functions as desired.
You may edit member functions as you would without
the Class Editor. However, if you change function
arguments or return types, or add new functions, you
must modify or add the function declarations manually in
the header file as well.
- Save your changes by choosing Save from the Source
window's File menu.
- To close the Source window, choose Close from the File
menu.
- Click on the Class Editor window. If you have made
changes to the source file, a message box asks whether it
is OK to reparse. Click Yes.
Hierarchy Editor
The Hierarchy Editor provides a graphical view of the class
hierarchy. From within the Hierarchy Editor, you may add classes,
modify inheritance relationships, and view and edit class member
declarations and definitions. With its graphical view of class
relationships, the Hierarchy Editor is an especially useful tool when
examining unfamiliar source code for the first time.
To open a Hierarchy Editor window, do one of the following:
- Choose Hierarchy Editor from the Goto View
submenu of the IDDE's Window menu.
- Double-click on the Hierarchy Editor icon in the Views
toolbox, or drag the icon to an empty area of the
desktop.
The Hierarchy Editor window opens. By default, only the graphical
display of class hierarchies is shown. To provide full functionality, it
is necessary to enable the editor's two child windows.
To enable the Hierarchy Editor child windows:
- Choose Settings from the Hierarchy Editor's pop-up
menu. The Editing/Browsing Settings dialog box
opens to the Hierarchy page.
- Check the items labeled Members and Source in the Pop-up
Windows group box.
- Click OK.
The Members and Source child windows open below the Hierarchy
Editor window (Figure 5-8).
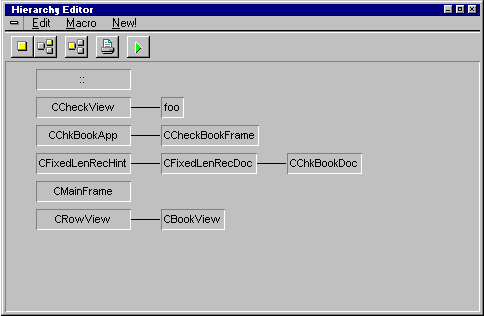
Figure 5-8 Hierarchy Editor window
Unlike the Members and Source panes of the Class Editor, Hierarchy
Editor windows are independent. They have their own menus and
may be positioned, sized, and closed separately. Otherwise, they
behave as do the corresponding panes of the Class Editor. For a
complete reference on Hierarchy Editor menus and options, see
Hierarchy Editor Reference.
Creating classes
A class hierarchy consists of a number of classes connected by
inheritance relationships. You can create new classes related to other
classes by inheritance (derived or sibling classes) or new top-level
classes not related to any other class.
Operations relating to class creation and the establishment of
hierarchical relationships are carried out in the Hierarchy Editor's
graphical display window.
Creating a top-level class
To create a new class hierarchy, first create a top-level class to serve
as a base for the hierarchy.
To create a new top-level class:
- Activate the Hierarchy Editor window.
- Choose Add Top from the pop-up menu. The Add Class
dialog box opens (Figure 5-9).
Figure 5-9 Add Class dialog box
- Type a name for the new class.
- Click OK.
The class declaration is placed in a new header file, the header file is
added to the project, and the new class is selected in the Hierarchy
Editor main pane. By default, the first eight letters of the class name
are used to derive the header file name. You may change the header
file name by typing an alternative name in the Header File textbox of
the Add Class dialog box.
Creating a derived class
After a base class exists, you may add a specialized version of that
class to the hierarchy by creating a derived class.
To create a new derived class:
- Select the class that will act as the base class of the new
class.
- Choose Add Derived from the pop-up menu.
You can also perform this step with the mouse. Hold the
left mouse button down and drag the cursor from the
selected class to an empty area of the window. A rubber
band line appears as you do this (Figure 5-10). Release
the mouse button.
The Create Derived Class dialog box opens (this dialog
box is similar to the Add Class dialog box).
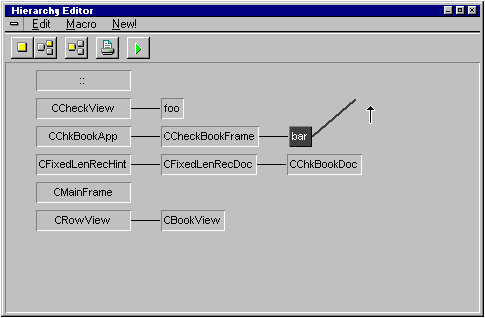
Figure 5-10 Creating a new derived class using the mouse
- Type a name for the new class.
- Click OK.
Creating a sibling class
You may also create a new derived class as a "sibling" to an existing
class. Sibling classes have the same base class with the same access
specifiers.
To create a new sibling class:
- Click on the class whose base class is to be the base class
of the new class.
- Choose Add Sibling from the pop-up menu. The Create
Derived Class dialog box is displayed.
- Type a name for the new class.
- Click OK.
Editing inheritance relationships
As your application evolves, you may want to restructure your class
hierarchy. You can add and delete connections between classes, as
well as change the inheritance attributes.
In altering inheritance relationships, Class and Hierarchy Editors
change only the class declarations, not references to base classes and
their members in a derived class's constructors or functions. If such
references exist, you must change them manually.
Connecting to a base class
You can connect a class to a base class, to make the former a
derived class of the latter.
To make an existing class a base of another existing class:
- Click on the class that is to be the derived class.
- Choose Connect Base from the pop-up menu. The Add
Base dialog box opens (Figure 5-11).
Figure 5-11 Add Base dialog box
- From the listbox, select the class (or classes) that will be
the derived class's base class.
- Select the desired access specifier. Check Virtual if virtual
inheritance is desired.
- Click OK. The display changes to show the new
inheritance relationship.
You can also connect to a base by using the mouse in the graphical
display. Click on the class that is to be the base class. Holding down
the mouse button, drag the rubber-band line to the class that is to be
the derived class. (The cursor changes to a universal "No" sign when
positioned over a class that cannot become a derived class of this
base.) Release the mouse button. The class is publicly derived from
the base.
Deleting a connection
Just as you can connect a class to a base class, you also can
disconnect a derived class from a base class.
To delete an inheritance relationship:
- Click on the line connecting the base and derived
classes. The line is highlighted to show that it is selected
(Figure 5-12).
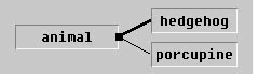
Figure 5-12 Highlighted base-derived connection
- Choose Delete Base Connection from the pop-up
menu.
- When the message box requests confirmation, click Yes
to delete the base connection.
Changing base class
You can move a base class connection to change the base of a
derived class.
To change a class's base class:
- Click on the line connecting the derived class and its
current base.
The line is highlighted to indicate that it has been
selected. Note that at the end nearest the base class,
there is a small black box (referred to as the line's
"handle").
- Click on the line's handle. Holding down the left mouse
button, drag the handle over the class that is to be the
derived class's new base class.
- When the message box requests confirmation, click Yes
to change the base connection.
Editing inheritance attributes
You can change a derived class's base class access specifier and
virtual inheritance flag.
To edit the base class access specifier:
- Click on the line connecting the base and derived
classes. The line is highlighted to show that it is selected.
- Choose Edit Base Attributes from the pop-up
menu. The Edit Base Attributes dialog box opens
(Figure 5-13).
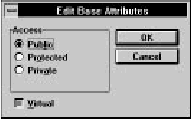
Figure 5-13 Edit Base Attributes dialog box
- Select the desired access specifier. Check Virtual if virtual
inheritance is desired. Click OK.
If you are editing several connections simultaneously and the access
specifiers are not identical, a Don't Change option becomes
available. This lets you change the Virtual specifier without affecting
the various access specifiers. You may, however, check Public,
Protected, or Private instead, and all connections are given that
access specifier.
Working with class members
After creating a class, you can implement its functionality through
member data and functions. You may add, delete, and edit class
members through the Members and Source child windows.
A list of members of the currently selected class is displayed in the
Members child window (Figure 5-14). By default, the member list is
sorted into three categories: Data, Functions, and Typedefs. Within
each of these categories, items are sorted alphabetically. The colored
diamond in front of each member identifies the access as public
(green), protected (yellow), or private (red). Lists following each
category header can be collapsed or expanded by clicking on the
triangular button to the left of the category name.
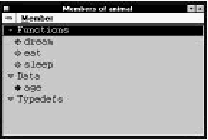
Figure 5-14 Members child window
Adding a class member
The first step in class implementation is to declare the data and
function members.
To add a class member:
- Activate the Members child window.
- Choose Add from the Member menu or from the
pop-up menu. The Add Member dialog box opens
(Figure 5-15).
Figure 5-15 Add Member dialog box
- Type the member declaration. The member may be a
data item (for example, int nDogs), a function (for
example, int NumDogs()), or a typedef (for example,
typedef int DOGCOUNT). Do not type any storage
specifiers into the declaration textbox; these are added
by the Hierarchy Editor.
- Select the desired access and storage specifiers. Check
the Inline check box for an inline function.
- Click OK.
The new member is added to the appropriate list in the Members
child window and to the class declaration in the header file. If the
new member is a function, an empty function is added to the
appropriate source file. If a new source file is created, that file is
added to the project.
By default, the first eight letters of the class name are used to derive
the source file name for new functions. You can change the file
name by entering an alternative name in the Source File textbox of
the Add Member dialog box.
Deleting a class member
Unneeded class members are easily removed.
To delete a class member:
- Select the class member to be deleted.
- Choose Delete from the Member menu or from the
pop-up menu.
- When the message box requests confirmation, click Yes
to delete the member.
The declaration is removed from the header file; if the member was
a function, the function definition also is removed from the source
file.
Changing member attributes
As your class and hierarchy evolve, you may need to change certain
member attributes. For example, you may want to make a function
virtual, or data private.
To change a member's access and storage specifiers:
- Select the member to be changed.
- Choose Edit Attributes from the Member menu or from
the pop-up menu. The Change Member Attributes
dialog box opens (Figure 5-16).
Figure 5-16 Change Member Attributes dialog box
- Select the desired access and storage specifiers. Check
Inline for an inline function. Click OK.
If you are editing several members' attributes simultaneously and
their access specifiers are not identical, a Don't Change option
becomes available in the Access group box. Similarly, if the storage
specifiers are not identical, a Don't Change option is displayed in the
Storage group box. These options allow you to change other
member attributes without affecting the original access or storage of
each member, respectively. You may, however, select a particular
access or storage specifier, and all members are given that attribute.
The class declaration in the header file is modified and the Members
display is updated to reflect the changes.
Viewing and editing member source
After declaring your class members, you can extend your functions
by editing the function definition in the Source child window. Also,
you can change data member types, array dimensions, and so on.
To view and edit member declarations and function definitions:
- Double-click on the member in the Members child
window.
The member's declaration (for data items and pure
virtual functions) or definition (for other functions) is
shown in the Source child window.
- Click in the Source child window to begin editing.
Editing operations here are identical to those in other
Source windows.
- To save changes, choose Save from the pop-up menu.
Changes made to a function's argument and return types are updated
automatically in the class declaration. The Members child window is
updated when the source is saved.
Viewing and editing source files
At times it is useful to view and edit the entire file containing the
class declaration or the class's functions.
To view and edit the header file containing the class declaration:
- Click on the class in the Hierarchy Editor window.
- Choose Show Header from the pop-up menu.
A Source window containing the contents of the class
header file opens.
- Edit the class declaration as desired.
You may add or delete class members as you would
without the Hierarchy Editor. However, if you add
function declarations, you must add the function
definitions to the source file manually as well.
- Save your changes by choosing Save from the Source
window's File menu.
- To close the Source window, choose Close from the File
menu.
- Click on the Hierarchy Editor window. If you have made
changes to the header file, a message box asks whether
it is OK to reparse. Click Yes.
- Click on the class whose declaration you just edited to
see the member changes updated in the Members
window.
To view and edit the source file containing member function
definitions:
- Select a member function from the Members child
window.
- Choose Show Source from the Member menu or from
the pop-up menu.
The file containing the member function's source code is
opened for editing in a Source window.
- Edit the member functions as desired.
You may edit member functions as you would without
the Hierarchy Editor. However, if you change function
arguments or return types, or add new functions, you
must modify or add the function declarations manually in
the header file as well.
- Save your changes by choosing Save from the Source
window's File menu.
- To close the Source window, choose Close from the File
menu.
- Click on the Hierarchy Editor window. If you have made
changes to the source file, a message box asks whether it
is OK to reparse. Click Yes.
Program code is edited in Source windows. The Source window is a
full-featured text editor, with many options and features
particularly useful when editing C and C++ source code.
Subsets of Source window functionality are also available in the
Source pane of
the Class Editor and in the Source child window of the Hierarchy
Editor.
In addition to its role in editing project code, use the
Source window for monitoring program execution while debugging.
See Chapter 24,
Commands Available in Debugging Mode,
for more information.
Chapter 21,
Text Editor Reference,
contains descriptions of all
Source window menu commands, toolbar icons, dialog boxes, and
options. Refer to it once you've read this chapter and you need more
details about specific aspects of the editor.
Refer to the Digital Mars C++ IDDE Help for the key combination
used to execute a particular editting command.
It
contains a reference to all key combinations for every key binding
set.
Role of the Text Editor
The purpose of the IDDE text editor is to create, examine, and
modify project source files. Because these files are standard
text files, any text editor to work with
them. However, the IDDE text editor is designed especially to edit C
and C++ source files and to work in concert with other IDDE tools.
Anyone familiar with Windows can get started quickly with the IDDE
text editor because it uses standard Windows editing commands. In
addition, the text editor has some features that make working with C
and C++ files easier. For example, the editor can automatically
indent or unindent after braces and can check delimiters.
The text editor can display keywords, preprocessor
directives, and comments in special font styles and colors. This
technique helps track errors in source code while editing.
For example, an unmatched comment (/* without a matching */)
turns a large part of the code a different color, making it obvious
where the problem lies. Keywords and preprocessor directives
are easier to spot when they are in a different color or font style.
Misspelled keywords can be caught immediately when they remain
displayed in the default font.
Source windows are an integral part of the IDDE environment and
work together with other IDDE windows to make application
development easier. For example, the IDDE automatically saves all
files open in Source windows when you rebuild your project. During
compilation, error messages are displayed in the Output window;
double-clicking on an error message opens a
Source window on the corresponding source file, if necessary, and
then jumps to the line in the source code that caused the error.
The Source Window
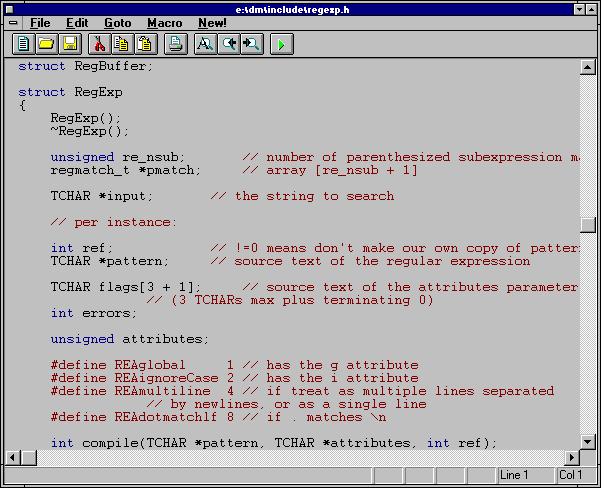
[Figure 6-1 Source window]
Most work with a Source window is in the editing area. This
is where text is displayed and edited, as described later in this
chapter. The Source window contains a typical IDDE window menu
and toolbar; a pop-up menu is available by right-clicking in the
editing area. Complete information about the menus and toolbar is
contained in Chapter 21,
Text Editor Reference.
The status bar, shown in Figure 6-2, provides information about the
current state of the file being edited.
[Figure 6-2 Source window status bar]
- Information string
- Displays information about the state of the current function. For
example, the message Pattern not found is displayed when the
Find command is unable to locate the specified pattern.
- Modification flag
- Displays Mod if the file has been modified since it
was last saved.
- Insertion mode
- Displays Ovr when the typing mode is set to overtype. When the
typing mode is set to insert, nothing is displayed in this field. Toggle
the insertion mode with the Insert key.
- Read-only flag
- Displays Rd when the file is set to read-only. When the file is in
read/ write mode, nothing is displayed in this field. The read-only
attribute is set in the Current Buffer Options dialog box described
later in this chapter.
- Line number
- Displays the line number of the insertion point.
- Column number
- Displays the column position of the insertion point.
File Manipulation
The IDDE lets you open as many different files as your computer's
memory allows. You can open multiple views of one file; changes
made in one window will be made in all.
Creating files
To create a new file, choose New from the IDDE's File menu. An
empty Source window opens, and you can begin typing. Note that
the new file is not actually created on disk until you save it.
Opening files
To open a source file (or any text file), choose Open from the
IDDE's File menu, or choose Open from a Source window's File
menu. A standard Windows File Open dialog box is displayed.
Select the file you want to edit and click OK. The file is opened for
editing in a new Source window.
There are additional ways to open a file for editing:
- Choose a file from the list of recently opened files at the
bottom of the IDDE's or Source window's File menu.
- Double-click on a filename in the Project window.
- Click New! in a Source window to open another view of
the same file.
- Choose Load from the Source window's File menu. The
file you select opens in the same Source window,
replacing the previous file.
Saving files
To save the file in the active window, choose Save from the Source
window's File menu. If the file is untitled, the editor displays the
File Save As dialog box to let you name it. Otherwise, it saves the
file under its current name. This procedure saves only the file in the
active Source window.
To save the files in all Source windows, choose Save All from the
Source window's File menu. The editor displays the Save As dialog
box for any untitled file.
To save an unnamed file or a named file under a new name, choose
Save As from the File menu. The text editor displays the File Save
As dialog box, as shown in Figure 6-3.
[Figure 6-3 File Save As dialog box]
Enter a name for the file and click OK.
Writing blocks of text to files
By choosing Write Block from the Source window's pop-up menu,
you can write the currently selected text block to a new file or
append the block to an existing file. This is useful when, for
example, you want to remove some functions from a file and place
them in a separate file.
Printing files
To print the file in the active window, choose Print from the Source
window's File menu. The Text Print dialog box opens, as shown in
Figure 6-4.
[Figure 6-4 Text Print dialog box]
The contents of the Text Print dialog box depend on the default
printer you specify in the Windows control panel. Make any
necessary changes in the dialog box, then click OK to print.
Closing files
To close a file in a Source window, choose Close from the Source
window's File menu, or click the close button. If you've edited the
file since the last time it was saved, the IDDE displays a dialog box
asking if you would like to save the file.
Text Editing
This section describes the text editing features available in the
Source window.
Typing mode
Source windows support two typing modes: overtype, which
replaces characters as you type; and insert, which adds new
characters to the file. You can toggle the typing mode between
overtype and insert modes by using the Insert key. (Press Alt+I if you
selected the Brief key binding set.) The typing mode is displayed in
the status bar. A change in typing mode applies to all open Source
windows, not just to the active window.
Word wrap
Because the editor is designed for source files, word wrap is not
enabled by default. You must press the Enter key to start a new line.
When you type past the right edge of the window, the text scrolls
horizontally. You can enable word wrap and set a right margin either
locally or globally using the text editor options.
Indentation
By default, the editor automatically indents a new line to the same
depth as the previous line. You can set several indentation options,
such as autoindent, tab width, and indent/ unindent after braces.
It also is possible to change the indentation of a selected block of
text by choosing Indent Block or Unindent Block from the
Format Text submenu of the Source window's pop-up menu.
Moving around in a file
You can move the insertion point in a file by using the mouse or
keyboard in the standard Windows text-editing manner. In addition,
you can jump to specific points in a file using commands from the
Source window's Goto menu.
Jumping to a matching delimiter
A common source of problems in C and C++ programming is
parentheses (()), brackets ([]), and braces ({}) that don't match.
To find the other half of a pair of these delimiters, position the
insertion point in front of one of the delimiters and choose
Matching Delimiter from the Goto menu. The insertion point then
moves to the front of the other half of the pair.
Delimiter checking can also be done automatically using the text
editor options described later in this chapter.
Note:
The IDDE editor looks for any parenthesis, bracket,
or brace, including text in strings and comments.
Jumping to a specific line
To jump to a specific line, choose Line from the Goto menu. The
Goto Line dialog box, shown in Figure 6-5, opens.
[Figure 6-5 Goto Line dialog box]
Type the line number in the textbox and click OK. The editor moves
the insertion point to the beginning of the specified line.
Jumping to a function
To jump to a specific function, choose Function from the Goto
menu. The Goto Function dialog box, shown in Figure 6-6, opens.
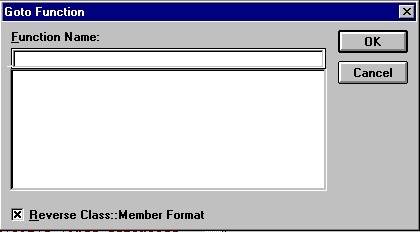
[Figure 6-6 Goto Function dialog box]
You can select a function name from the scrolling list or type in a
function name. The insertion point then moves to the beginning of
the specified function.
Jumping to a bookmark
The IDDE text editor lets you position bookmarks anywhere in your
files by choosing Bookmark from the Source window's Goto menu.
The Bookmarks dialog box, shown in Figure 6-7, opens.
[Figure 6-7 Bookmarks dialog box]
To use bookmarks, first position the insertion point where you want
the bookmark to be located. Then choose Bookmark from the Goto
menu, select a bookmark, and click on the Drop button. When you
want to return to this location, click on this entry's name in the list of
bookmarks, then click on Goto.
Selecting text
Text selection is accomplished using one of two standard
techniques: clicking and dragging the mouse or shift-clicking. The
IDDE text editor provides additional modes for text selection using
the Column and Line commands in the pop-up menu's Select
submenu.
Both commands require that you first select a block of text in the
standard manner. Column changes the currently selected text block
into a column-oriented select block; only the characters in the
columns between the start and end of the original text block are
selected. This is shown in Figure 6-8.
[Figure 6-8 A column select block]
Line changes the currently selected text block into a line-oriented
select block; all the lines from the start to the end of the original text
block, including the first and last lines, are selected.
This is shown in Figure 6-9.
[Figure 6-9 A line select block]
Choosing Normal from the Select submenu of the pop-up menu
changes a column-or line-oriented text block back to the original
selection. Cancel deselects the current selection block; this can also
be accomplished by clicking somewhere outside the selected text.
The text editor supplies standard Windows functions for cutting,
copying, pasting, and deleting text. These functions can be accessed
through either the Edit menu or the pop-up menu. In addition, by
clicking and dragging a block of selected text, you can reposition the
text anywhere in the buffer. Press the Control key while releasing
the block to copy rather than move the block. When you are
dragging text blocks around in this way, a small outlined box is
drawn next to the cursor to indicate this mode.
Searching and replacing
The IDDE editor has powerful text-based search and replace
functions that let you search open files for a string and replace one
string with another. In addition, you can search through any set of
source files, whether or not they are open or in your project.
Finding a string
To search for a string, choose Find from the Source window's Edit
menu. The dialog box shown in Figure 6-10 opens.
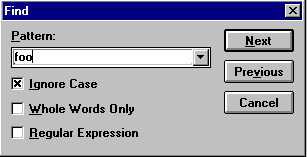
[Figure 6-10 Find dialog box]
If you select some text before opening the Find dialog box, the
selected text becomes the default search pattern. You can either use
this text as it appears, select a previous string from the drop-down
list, or type in a new string. Then click on the Next (or Previous)
button. The editor locates and selects the next (or previous)
occurrence of the string in the active file. You can repeat the search
in the same direction by choosing Repeat Find from the Edit menu.
If the pattern is not found, the editor returns to the current insertion
point and displays Pattern not found in the status line.
By checking Regular Expression in the Find dialog box, you can use
the wildcard characters ? and * in your search string. The ?
character matches any single character, while the * character
matches any string of consecutive characters. Regular expressions
permit more powerful text searches.
Replacing a string
To replace an occurrence of a string in your file with another string,
choose Replace from the Source window's Edit menu. The Replace
dialog box opens, as shown in Figure 6-11.
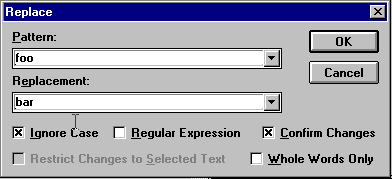
[Figure 6-11 Replace dialog box]
Type the search string or regular expression in the Pattern textbox,
just as you did in the Find dialog box described earlier. Then type
the replacement string in the Replacement textbox. Note that
wildcards cannot be used in the Replacement textbox. You can also
select previous search and replacement strings from the drop-down
list. Begin the replacement by clicking OK.
If you check the Confirm Changes option, the editor scrolls the
display to each occurrence of the search string, selects it, and asks
whether you want to replace it by displaying the Confirm
Replacement dialog box in Figure 6-12.
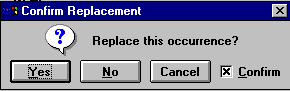
[Figure 6-12 Confirm Replacement dialog box]
Click on Yes to replace the string and continue searching, or click on
No to continue searching without replacing. Click on Cancel to stop
searching. If you do not check Confirm Changes, the editor replaces
all occurrences of the search string without confirmation messages.
You can use the Undo command to undo the entire set of
replacements of the search string.
Searching through multiple files
The text editor's global find feature provides a powerful means of
locating a string in any set of files. For example, this feature is useful
for:
- Locating undefined symbols
- Changing function, variable, or class names
- Fixing references to a function with changed parameters
To search for a string in multiple files, choose Global Find from the
Source window's Edit menu.
The Global Find dialog box opens, as shown in Figure 6-13.
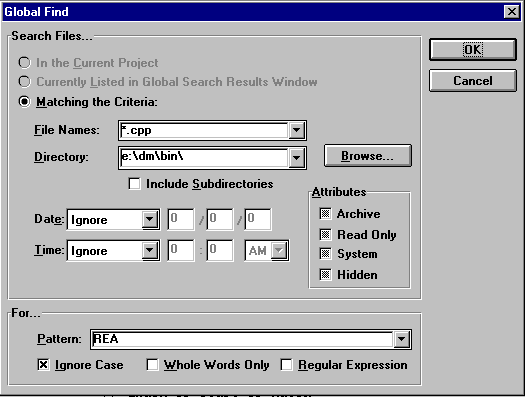
[Figure 6-13 Global Find dialog box]
To perform a global search, first specify the set of source files you
want to search. You can choose to search:
- All source files in the current project
- All files listed in the Search window (which opens after
the first search)
- All files matching the criteria you specify, including
filename, directory, date, time, and file attributes
Next, specify the string or regular expression to search for. (As with
the Find command, you can preselect the search text before
choosing Global Find.) When you click OK, the editor opens the
Search window. The editor searches through the indicated files and
lists the names of files containing a match in the Search window.
By double-clicking on a filename, you can open the file; the first
occurrence of the pattern is highlighted. You can continue searching
for your string or expression in that file by choosing Repeat Find
from the Source window's Edit menu. For more information, see
Chapter 21,
Text Editor Reference.
Undoing edits
You can undo typing, cutting, pasting, and string-replace operations
by choosing Undo from the Edit menu. Undo multiple edits by
repeatedly selecting the Undo command. You can set the number of
editing operations that can be undone in the text editor options.
Text Editor Options
Global text editor options are set in the Editing/Browsing Settings
dialog box, shown in Figure 6-14. To open this dialog box, choose
Text Settings from the Edit menu. (You can also choose Editing/Browsing Settings
from the Environment menu; in this case you
will have access to Class and Hierarchy Editor options as well.)

[Figure 6-14 Editing/ Browsing Settings dialog box]
The Editing/Browsing Settings dialog box is a tabbed dialog that
contains numerous options for different aspects of the text editor:
- The Text page contains options for indentation, cursor
styles, keyboard emulation, and text editor font.
- The C++ page lets you set options to enable C++ mode
globally, check delimiters, indent after braces, auto-align
comments, and add keywords to the keyword dictionary.
- The Keys page lets you customize key bindings and
assign key combinations to macros.
- The Display page lets you select special colors and font
styles for keywords, comments, and preprocessor
symbols.
- The Backup page lets you set options for backing up
files.
- The General page lets you set the maximum undo level
and select a key binding file.
Several text editor options can be set on a buffer-by-buffer basis. To
set these local options, choose Current Buffer Settings from the
Edit menu. The Current Buffer Options dialog box, shown in
Figure 6-15, opens.
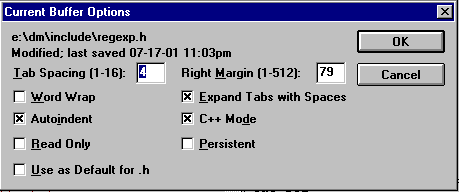
[Figure 6-15 Current Buffer Options dialog box]
This dialog lets you override global indentation options, set word
wrap, and set the buffer to read-only.
You can find detailed information about text editor options in
Chapter 21,
Text Editor Reference.
Macros
The text editor has powerful macro facilities. You can record a
sequence of keystrokes, save the sequence as a named macro, assign
a keyboard shortcut to the macro, place the macro in the Macro
menu, edit the macro, and so on. To record a macro, choose Record
Macro from the Macro menu; to end the macro, choose Stop
Recording. You can play back the stored sequence by choosing
Play Macro.
Compiling Files and Checking Errors
The IDDE makes it easy to iteratively edit and check your source
code. To save and compile the current buffer, choose Compile from
the Source window's File menu. The IDDE compiles the file using
the current project build settings. If the compilation is successful, the
file is marked as compiled. If the compilation generated errors, you
can quickly locate the line in your source code that generated the
error by double-clicking on the error in the Output window.
For more information about compiling files and building the project,
see Chapter 8,
Testing an Application.
Any application written for the Windows environment needs an
interface to the user that gives it the "look and feel" of a Windows
application. Various standard mechanisms are available to create this
look and feel, and resources are some of the most important of
these. Resources such as menus and dialog boxes define the
interface to an application.
ResourceStudio contains tools for creating and modifying the
resources. This chapter defines the different types of
resources and explains how to use ResourceStudio to create three
basic resources: menus, dialog boxes, and bitmaps. The final
section describes how to work with the identifiers by which
resources are referenced in the source code.
For more information about ResourceStudio, see
ResourceStudio Resource Editor.
For more information on resources and programming
with resources, refer to the following texts:
- Programming Windows 3.1 by Charles Petzold
- Microsoft Windows Programmer's Reference, Volume 4: Resources
What Are Resources?
Resources are structured data objects that define Windows user
interface elements. When you choose a command from a menu or
select options from a dialog box, for example, you are interacting
with an application's resources. Predefined resource types include
bitmaps, cursors, icons, fonts, dialog boxes, menus, accelerators,
strings, and version information.
An application's resources typically are defined in a resource script
file (.rc). Each resource definition contains information and data
relevant to that resource type, as well as the identifier by which the
resource is referenced in the source code. Resource script files are
created and edited with ResourceStudio.
Resources are compiled by a special resource compiler and are
linked to the Windows application separately from the application
code. This modular design enables you to modify the appearance of
an application without changing, or even accessing, the program
source code. Separating resources from code also makes it easier to
use the same resource definitions for multiple applications.
Resource Types
Create and edit the following resource types in ResourceStudio:
Bitmaps
Bitmaps are used by an application to display pictures on the screen.
Each bit, or group of bits, in a bitmap represents one pixel of the
image. Bitmaps may be any size you specify.
Cursors
Cursors are small bitmaps, usually 32 x 32 pixels in size, that
represent the mouse pointer. Cursor images may contain areas that
are transparent, allowing the screen background to show through
unused parts of the cursor image. Cursors also may contain inverted
areas in which the screen background color is reversed.
In addition to image information, a cursor resource also specifies the
cursor's hot spot, the exact pixel in the image that maps to the
mouse pointer's screen location.
Icons
Icons are small bitmaps, usually 32 x 32 or 16 x 32 pixels in size, that
represent applications or actions within an application. For example,
when you minimize a Windows application, an icon is displayed on
the screen to represent the minimized program. Like cursors, icons
may contain transparent and inverted areas.
Fonts
A font resource is a collection of up to 256 bitmaps of identical
height. A font typically represents a character set, but it also may be
used for more efficient management of bitmaps not representing
characters.
Dialog boxes
Dialog boxes are windows that communicate information and
receive user input. For example, a dialog box may let the user set
program options, or alert the user to an error and ask how to
proceed. To enter information and make selections in a dialog box, a
user manipulates graphical elements called controls. Commonly used
controls include buttons, check boxes, listboxes, textboxes, and
scroll bars.
A dialog box resource is a complex set of data describing each
control in detail, as well as general properties such as the dialog box
size and location.
Menus
Menus are hierarchical lists of program commands and options.
When a user chooses an item from a menu, either an action is taken
or another menu opens to provide additional commands. A menu
resource identifies the available commands, specifies their individual
styles and attributes, and determines the order in which they appear.
Accelerators
Accelerators are key combinations a user presses to perform a task in
an application and are frequently used as shortcuts to menu choices.
An accelerator resource contains a collection of key combinations
and associated commands.
Strings
Strings are text that an application may use in window titles, menus,
dialog boxes, error messages, and so on. A string resource is a table
of strings.
Version information
The Version Information resource contains version information for
Windows .exe and .dll files, such as version number, file
description, company name, and copyrights.
User-defined resources
User-defined resources contain data that you define and use in your
program in any manner you choose. For example, you may want to
attach a table of data or a block of text to your executable file.
ResourceStudio allows you to include these types of data in your
application's resources and to edit the data in hexadecimal format.
Using ResourceStudio
ResourceStudio can be used to:
- Create new resources in script or binary form
- Edit resources, even those already linked to an
executable or DLL
- Copy resources between files
This section explains how to start ResourceStudio and use it to create
resource files. Detailed steps are provided for creating three basic
resources: menus, dialog boxes, and bitmaps. This section also
outlines several useful features of ResourceStudio, such as drag and
drop.
Starting ResourceStudio
Start ResourceStudio using any one of several commands
available in the IDDE's Resource menu:
- Edit
- opens the current project's resource (.rc) file for
editing.
- New
- opens the current project's resource file. A dialog
box then opens, allowing you to create a new resource.
- Open
- opens a dialog box from which you can select for
editing any file that contains resources.
- Settings
- opens ResourceStudio to the Settings dialog
box, but does not load any resource file.
You can also double-click on a resource file in the Project window
to open that file for editing with ResourceStudio.
To create a new resource file, choose Open from the Resource
menu, and in the File Open dialog box click Cancel. Then, double-click
on the ResourceStudio icon on the desktop. The Resource
Studio Shell window opens (Figure 7-1).

Figure 7-1 Resource Studio Shell window
The Shell window is ResourceStudio's main window and contains
the main menu and toolbar. From this window, you can create and
open resource files and set ResourceStudio preferences.
Another window that will open as you work is the Property Sheet.
The Property Sheet does not open immediately, but rather opens
when it is first needed. While creating and editing resources, you can
use the Property Sheet to view and edit properties of the currently
selected object. (In this context, "object" refers to either a resource as
a whole or to an element within a resource, such as a dialog box
control or a menu item.) Some types of objects have multiple pages
of properties; to switch between pages, simply click on the tabs.
Creating a new resource file
Resources are contained in resource files. Use
ResourceStudio to create and edit most types of files that store
Windows resources. For example, you can edit the resources of
executable files even if you do not have the original source code.
|
To create a new resource file, choose New from the File menu. The
New File dialog box opens (Figure 7-2), listing the types of resource
files that can be created with ResourceStudio.
|
Figure 7-2 New File dialog box
|
Select the type of resource file you want to create (see Table 7-1).
Note that resource script (.rc) and binary resource (.res) files
usually contain more than one resource. If you are starting to create
resources for a new application, .rc is likely to be your choice of
file type. Resource scripts can contain any type of resource.
Table 7-1 Resource file types
| File Type | Extension | Contains |
|---|
| Resource script | .rc | Any type or combination of resources in text format |
| Binary resource | .res | Any type or combination of resources in binary format |
| Icon | .ico | A single icon resource in binary format |
| Cursor | .cur | A single cursor resource in binary format |
| Bitmap | .bmp | A single bitmap resource in binary format |
| Font | .fnt | A single font resource in binary format |
Resources such as icons can be contained either in individual icon
resource files (.ico) or with other resources in a resource script file.
Some resources, such as dialog boxes and menus, are contained
only in .rc or .res files. Thus, these resource options do not
appear separately in the New File dialog box.
The Platform option in the New File dialog box lets you create
resource files that are compatible with Windows 3.1, Windows NT,
or Windows 95. You can also elect to create resources for an MFC
application by checking Support MFC.
Warning: If dialog boxes for NT come out with a white background,
select Windows 95 as the target platform. This is because the
Windows NT target is for NT 3.51, an old version.
After selecting a type of resource file, click OK. The window that
opens next depends on the type of file you specified. If you selected
one of the file types containing a single resource (icon, cursor,
bitmap, or font), that resource type's editor opens in a separate
window.
If you selected Resource Script or Binary Resource, the Browser
window opens (Figure 7-3).
Figure 7-3 Browser window
The Browser window has three main areas:
- Resource Types:
- A listbox containing all the resource
types found in the current file.
- Resources:
- A listbox containing resources of the currently
selected type.
- Preview/Edit:
- A display of the selected resource.
Resources also are opened for editing in this area when
created, or by choosing Edit Resource from the File
menu.
When a new resource file is first opened, the Resource Types and
Resources listboxes are both empty.
Note:
ResourceStudio has several subprograms, each of
which is used to edit a particular resource type. In
this chapter, for example, you will use the Menu
editor, Dialog box editor, and Bitmap editor. Each
individual resource editor can either be opened in a
separate window or can use the right pane of the
Browser window from which it is launched. The
latter is the default behavior in most circumstances.
Editing a resource file
Besides the resource files listed in the previous section, you can edit
the resources of executable files, even though you don't have the
original source code. By choosing Open from the Shell window's
File menu, you can open files of any type listed in Table 7-1, plus
files of the following types:
- Windows executable (.exe): Bound resources of any type
- Dynamic-link library (.dll): Bound resources of any type
Warning: Do not modify or save the resources of a running
application. Saving a resource usually changes the
locations of the resources within the file.
Creating a new menu resource
The main interface between the user and a Windows application is
generally the application's menu. The IDDE's Resource menu is a
good example, as shown in Figure 7-4.
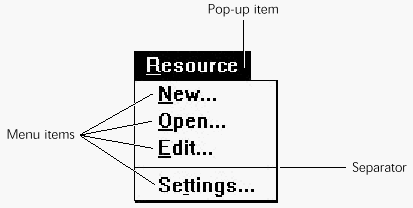
Figure 7-4 A typical menu
A menu is a hierarchical structure containing pop-up items, menu
items, and separators.
- Pop-up items open a drop-down menu box containing
menu items and additional pop-ups. The top-level items
that are displayed on the window's menu bar are usually
pop-up items. A pop-up item can be thought of as a
container for other items (including other pop-ups).
- Menu items usually constitute the majority of items in
drop-down menus. When a menu item is chosen,
Windows sends a message containing the item's
command identifier to the application.
- Separators are lines that divide the menu into logical
groups.
To create a new menu resource, choose New Menu from the
Resource menu of the Browser window. The Menu editor opens in
the right pane of the Browser window (Figure 7-5).
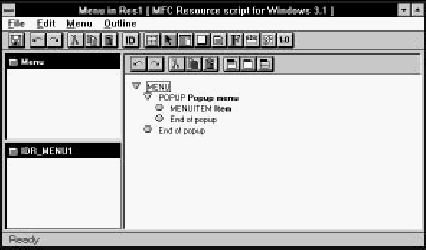
Figure 7-5 Menu editor open in Browser window
Note:
While a resource editor is open in the Browser
window, the Browser window's menu is replaced
by that of the particular resource editor. The editor's
toolbar is displayed at the top of the right pane,
below the Browser window's toolbar.
The new menu resource initially contains a single pop-up item and a
menu item. The list of items is indented to show the hierarchy. Pop-up
items are labeled POPUP, menu items are labeled MENUITEM,
and separators are labeled SEPARATOR. The currently selected item
is enclosed in a box; to select any item, click on it. The Property
Sheet shows properties of the selected item.
The Test menu window (Figure 7-6) opens at the same time. You
can test the menu in progress at any time in this window.
Figure 7-6 Test menu window
Adding a pop-up item
Start creating a menu by adding a new pop-up item to the
menu bar. To do so, click on Menu at the head of the item list. Then
choose New Popup from the Menu menu. The new pop-up item is
inserted at the start of the list.
The Property Sheet displays the properties of the new pop-up item
(Figure 7-7). At this point, you probably want to change only the
menu name, which is contained in the Text field.
Figure 7-7 Properties of a Pop-up menu
When changing the menu name, you can also assign an activation
key to the menu. Put an ampersand (&) in front of the corresponding
letter in the text.
Adding a menu item
To add one or more menu items to a drop-down menu, first make
sure that the pop-up item is selected. Then choose New Item from
the Menu menu. The new menu item is inserted into the hierarchy.
The Property Sheet displays the properties of the new menu item
(Figure 7-8). You can change the item's text and add an activation
key. As with pop-up items, you add an activation key by typing an
ampersand (&) in front of the corresponding letter in the text.
Figure 7-8 Properties of a menu Item
The ID field contains the command ID, which is sent to the
application when the user chooses this menu item. New command
and resource IDs are assigned automatically to new objects when
they are created; you can also change ID names and numerical
values as desired. For more information on resource IDs, see the
section "Managing Resource IDs" later in this chapter.
Adding separators
Separators enhance the readability of menus. To insert a separator
after the currently selected item, choose New Separator from the
Menu menu.
Editing menus
The normal editing operations (cut, copy, paste, and delete) work
with items in a menu. Note that when you perform one of these
operations on a pop-up item, all of the items it contains are affected
as well.
Rearrange menu items quickly by clicking and dragging. To
move an item, drag the item to the location where it should be
inserted. If you hold down the Control key while dragging, a copy of
the selected item is inserted. The copy is given a new, unique
resource ID.
You can also rearrange menus with the arrow keys. To move an item
up or down within its present level in the hierarchy, press Ctrl+Up
Arrow or Ctrl+Down Arrow. To move an item horizontally, use
Ctrl+Right Arrow or the Ctrl+Left Arrow.
Closing the menu editor
After you have arranged your new menu, close the Menu editor by
choosing Close Editing from the File menu. The Browser window
is updated to show the new resource (Figure 7-9).
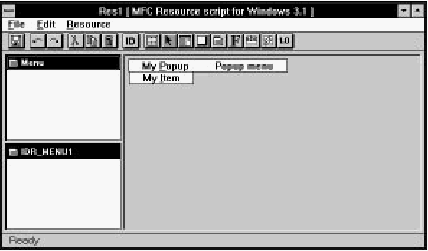
Figure 7-9 Browser window after creating menu resource
The Resource Types list contains an entry called Menu to show that
you have at least one menu resource. The Resources list contains the
ID of your menu resource. The Preview/ Edit area shows a preview
of the new menu.
The Property Sheet displays the menu resource's ID and memory
options (Figure 7-10).
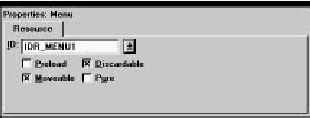
Figure 7-10 Properties of a menu resource
To edit a menu resource, double-click on its ID in the Resource list,
or select the resource and choose Edit Resource or Edit in
Separate Window from the File menu.
Creating menus with accelerators and item help
As you create menus, you usually want to assign accelerator key
combinations and item help strings at the same time. To do so, you
must set up the string and accelerator tables before adding menu
items, as outlined here:
- Create a string table resource by choosing New String
Table from the Browser window's Resource menu.
- Close the String Table editor by choosing Close Editing
from the File menu.
- Create a new accelerator table resource by choosing
New Accelerator Table from the Browser window's
Resource menu.
- Close the Accelerator Table editor by choosing Close
Editing from the File menu. Note the accelerator table's
resource ID.
- Create a new menu resource by choosing New Menu
from the Browser window's Resource menu.
- Make the new menu's resource ID the same as that of the
accelerator table resource. In the Property Sheet, select
the accelerator table resource's ID from the drop-down
list in the ID field. You now can add menu items with
accelerators and item help.
To set a menu item's accelerator, click on the Connect tab in the
Property Sheet, then click on the Next Key. You are prompted to
press the key combination that is used as the accelerator. When you
do so, the accelerator is stored in the associated accelerator table. To
set a menu item's help string, type the string into the Prompt field in
the Property Sheet. The string is automatically placed in the string
table.
To show which key combination is associated with each menu item,
add the accelerator to the item text. For readability, the accelerator is
usually separated from the command name with a tab. For example,
if you want Ctrl+F to be the accelerator for a command called Find,
enter Find\tCtrl+F into the Text field of the menu item's
Property Sheet (Figure 7-11).
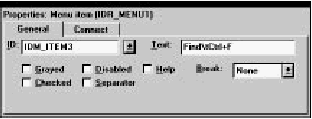
Figure 7-11 Menu item text
Simple guidelines for creating menus
When creating a menu, keep in mind the following points:
- Place frequently chosen options near the top of the
menu to make them more accessible to the user.
- Group related options under specific menu titles.
- Follow standard conventions to make the application
easier to use.
Windows users are accustomed to certain menu arrangements. For
example, the File menu is usually the first menu in the menu bar
and contains commands such as New, Open, and Save.
Choose commands from the Menu menu to quickly create standard
File, Edit, and Help menus.
Creating a new dialog resource
A dialog box is a window that communicates information and
receives user input. It contains graphical elements called "controls."
Figure 7-12 shows a typical dialog box.
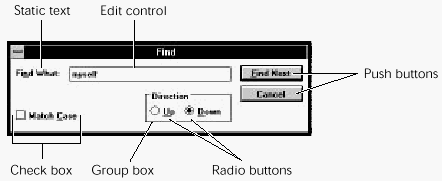
Figure 7-12 A typical dialog box
The following types of controls can be included in your dialog
boxes:
- Push buttons send command codes to your application
when the user clicks on them. They trigger an immediate
action.
- Check boxes are rectangular buttons that turn options on
or off. Text describing the option is displayed to the left
or right.
- Radio buttons provide a set of options, only one of
which may be selected. They are generally arranged in
logical groups of two or more.
- Edit controls (or textboxes) are rectangular boxes used
for text entry.
- Listboxes contain a list of items, usually in text form. The
user can browse through the list and select one or more
items.
- Comboboxes combine the features of an edit control and
a listbox; they let the user select an item from a list or
type a selection into the textbox.
- Scroll bars let the user specify a numerical option with an
analog control. (Edit controls and listboxes have their
own scroll bars and do not need a stand-alone scroll
bar.)
- Group boxes are rectangular frames with an optional
caption, used to group other controls together visually.
- Static text is used to convey information or to label
controls that do not have captions (such as edit controls).
- Pictures are used for decorative purposes. Picture types
include empty frames, solid boxes, and icons.
- Custom controls are user-defined controls implemented
in a DLL.
- User controls are user-defined controls that are not
implemented in DLLs, or whose implementation is non-standard.
(ResourceStudio treats VBX controls as user
controls.)
- The following Windows 95 controls are supported:
Animate controls, Tab controls, Tree View controls, List
View controls, Hotkey controls, Track Bars, Progress
controls, and Up/ Down controls.
To create a new dialog box resource, choose New Dialog Box from
the Resource menu of the Browser window. The DialogExpress
dialog box opens (Figure 7-13).
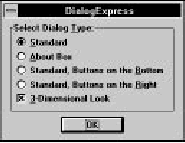
Figure 7-13 DialogExpress dialog box
DialogExpress gives you several options for simple dialog boxes
that you may use as a starting point for your own dialog box. Select
Standard and click OK. The Dialog editor opens in the right pane of
the Browser window (Figure 7-14).
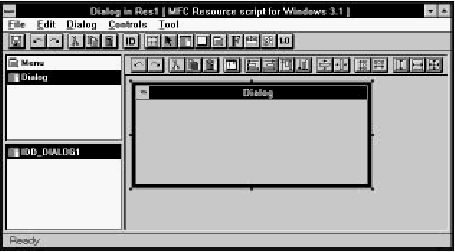
Figure 7-14 Dialog editor open in Browser window
At the same time, the Dialog editor toolbox (Figure 7-15) opens. This
toolbox provides shortcuts to commands in the Tool menu that let
you create the different types of dialog box control.
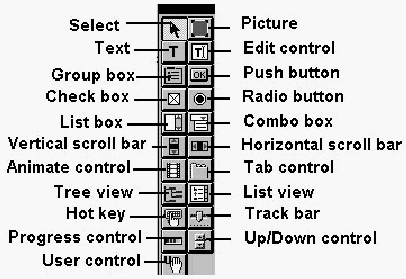
Figure 7-15 Dialog editor toolbox
The Property Sheet shows the General, Styles, and Look properties
of the dialog box (Figure 7-16). You may want to start by changing
the dialog box title.
Type the new title into the Text field of the General properties page.
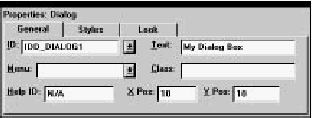
Figure 7-16 Properties of a dialog resource
Adding a push button
Initially, a new Standard dialog has no controls. To create a new
push button:
- Choose Push Button from the Tool menu or click on
the corresponding icon in the toolbox.
- Click in the dialog box on the point at which you want
to position the upper-left corner of the new button. Hold
down the left mouse button and drag the cursor. A
rubber-band rectangle appears.
- Release the left mouse button when the rectangle is the
proper size for the new button. A new push button is
placed in your dialog box (Figure 7-17).
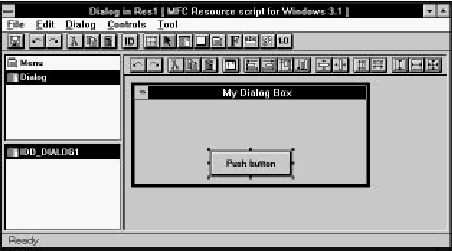
Figure 7-17 Dialog box resource with new push button
The new push button is selected and highlighted. Then
move and resize the new push button control with the mouse.
- To move a control, click and drag it to a new location.
- To resize a control, click and drag one of the eight
"handles" that appear along its edges.
You also may center the selected control in the dialog box. Choose
Vertical or Horizontal from the Center submenu of the Controls
menu.
The Property Sheet lets you modify push button properties (Figure
7-18). To change the button text, for example, change the Text field
to the desired text. As with items in menus, you can set the
activation key of a button or other control by typing an ampersand
(&) before the corresponding letter in the text.
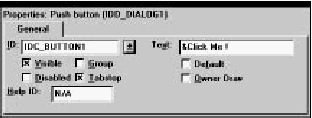
Figure 7-18 Properties of a push button control
Adding static text
To add static text to a dialog box (for example, an informational
message), choose Text from the Tool menu or click on the
corresponding icon in the toolbox. Then click in your dialog box
and drag the rubber-band box to the desired size.
The Property Sheet shows the properties of the static text (Figure
7-19). To change the text, edit the Text field. After entering the text,
you can resize the static control to the size of the text by dragging
the handles.
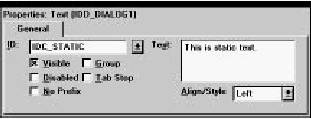
Figure 7-19 Properties of a static text control
To center the text within the control, select Center from the drop-down
list in the Align/ Style property. Center the control
within the dialog box by choosing Horizontal from the Center
submenu of the Controls menu.
A static text control may contain multiple lines of text. While typing
text into the Caption field, press Ctrl+Enter to start a new line.
Likewise, insert tab characters by pressing Ctrl+Tab.
Testing the dialog box
Test the dialog box resource without leaving
ResourceStudio. To open the new dialog box for testing, choose Test
Dialog from the Dialog menu (Figure 7-20).
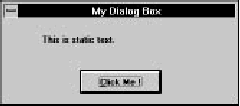
Figure 7-20 Testing the new dialog box
When you are testing the dialog box, ResourceStudio does not
function; you must close the test dialog box by pressing Alt+F4
before continuing.
Aligning controls
Commands are available to align controls, to space them evenly, and
to make them the same size. The following steps illustrate the three
operations:
- Add a few odd-sized buttons to your dialog box, using
the procedure described in the section "Adding a push
button" earlier in this chapter. Place them in a horizontal
row.
- Select all the buttons at once by clicking on one, then
holding down either the Shift or Control key as you click
on the others. You can also choose Select from the Tool
menu and drag a rubber-band box around the controls.
- Establish one button as the "standard." Hold down
Control and click on this button. The standard button is
highlighted in blue on your screen. Figure 7-21 shows
what your dialog box might look like. In the example,
the button labeled "# 2" has been selected as the
standard.

Figure 7-21 Multiple selection of controls
Now you can perform any of the following alignment operations
from the Controls menu:
- To make all the buttons the same size as the standard,
choose Both from the Make Same Size submenu.
- To align the tops of the buttons with the top of the
standard, choose Top from the Align submenu.
- To even out the horizontal spacing between the buttons,
choose Horizontal from the Space Evenly submenu.
You also can move the selected controls as a unit by holding down
the left mouse button and dragging them to a new location.
Closing the dialog box editor
After finishing with a dialog box, close the Dialog editor
by choosing Close Editing from the File menu. The Browser
window is updated to show the new resource (Figure 7-22).
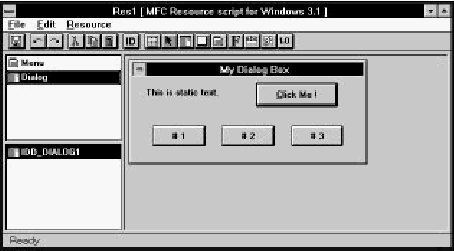
Figure 7-22 Browser window after creating dialog box resource
After creating a dialog box resource, you can use ClassExpress to
create a corresponding dialog box class, set up the class's message
map, and implement dynamic data exchange and validation.
ClassExpress can be run directly from the Browser window's File
menu. For further information, see
Chapter 18, More about ClassExpress, as well as
Chapter 13, Lesson 4: Add Messages with ClassExpress and
Chapter 14, Lesson 5: Add a Dialog Box with ClassExpress.
Creating a new bitmap resource
A bitmap is a picture that may be used for informational or
decorative purposes. The Bitmap editor contains the functionality of
a typical paint program, allowing you to create pictures of any size
in 2, 16, or 256 colors.
To create a new bitmap resource, choose New Bitmap from the
Resource menu of the Browser window. The BitmapExpress dialog
box opens (Figure 7-23).
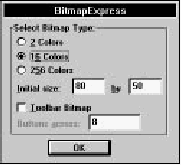
Figure 7-23 BitmapExpress dialog box
BitmapExpress allows you to set the number of colors and the initial
size of the bitmap. If you are creating a bitmap for an MFC toolbar,
you also can specify the number of buttons. For now, accept the
defaults and click OK. The Bitmap editor opens in the right-most
pane of the Browser window (Figure 7-24).
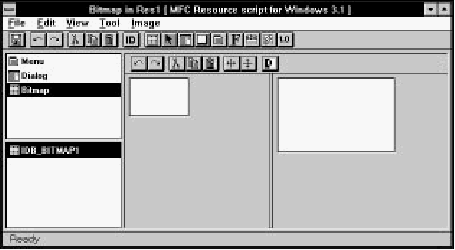
Figure 7-24 Bitmap editor open in Browser window
The Bitmap editor window is divided into two panes. Draw
in either. To change the relative sizes of the panes, click and drag
the bar separating the panes.
The Bitmap editor toolbox (Figure 7-25) also opens. This toolbox
lets you choose graphics tools (also available in the Tool menu), set
foreground and background colors, and select the line width and
background pattern.
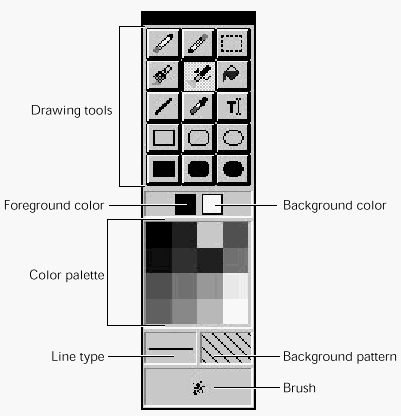
Figure 7-25 Bitmap editor toolbox
The Property Sheet shows the General and Palette properties of the
bitmap (Figure 7-26). Page between the two groups of
properties by clicking on the tabs. The File field specifies the bitmap
file; bitmaps are included in resource scripts by reference. If you
want to change the bitmap file's name, type a new name into the
File textbox.
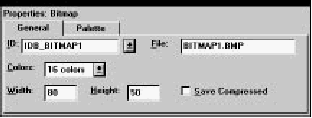
Figure 7-26 Properties of a bitmap resource
Changing bitmap size
To change the bitmap size, change the width and height in the
Property Sheet or resize the bitmap directly by dragging one of the
handles along the right and bottom edges of the bitmap.
Selecting colors and patterns
Select drawing color and patterns from the toolbox in the
following way:
- Foreground color: Click on the color in the color palette
with the left mouse button.
- Background color: Click on the color in the color palette
with the right mouse button.
- Line type: Click in the line type display and select a line
type from the pop-up menu.
- Background pattern: Click in the background pattern
display and select a pattern from the pop-up menu.
- Brush: Click in the brush display and select a paintbrush
or spray brush from the pop-up menu. The menu is only
available when the Paintbrush or Spray brush tool is
selected; it is also available by right-clicking on these
tools.
Drawing tools
These drawing tools are available in the toolbox or in the
Tool menu:
- Eraser: Removes all or part of the image
- Pen: Draws individual pixels or freehand lines
- Selection tool: Selects a rectangle that may be cut,
copied, flipped, or inverted
- Brush: Paints freehand lines with the selected brush
- Spray brush: Paints patterns of pixels
- Paint can: Floods an area with color
- Line: Draws straight lines
- Eye-dropper: Picks up a color from the image
- Rectangles and ovals: Draw outlines or solid shapes
To select a drawing tool, click on the tool in the toolbox. To use a
tool, click or click and drag (as appropriate) with either the left or
the right mouse button. Tools make use of the current line type and
background pattern whenever possible. Using the right mouse
button to click or click and drag reverses the roles of foreground and
background colors.
Zoom and grid
Work with an image at normal size or zoom by factors of 2,
4, or 8. To zoom, click in the pane containing the image, then
select a Zoom command from the View menu.
Set one image at normal size for reference and a second image at
a larger size for easier drawing.
To help finish the details of the image, you can display a pixel grid
in the image. A pixel grid can be displayed only when the zoom
factor is 4 or 8. To show a pixel grid, choose Grid from the View
menu.
Closing the bitmap editor
After finishing with the bitmap, close the Bitmap editor by
choosing Close Editing from the File menu. The Browser window
is updated to show the new resource (Figure 7-27).
Figure 7-27 Browser window
Useful ResourceStudio features
A number of ResourceStudio features are useful for
creating and editing different resources. These include toolbars, the undo
and redo functions, and the dragging and dropping of items.
Toolbars and pop-up menus
ResourceStudio makes extensive use of toolbars. Toolbar icons offer
quick access to frequently used menu items. For a list of toolbar
commands, see the "ResourceStudio Reference."
In many parts of ResourceStudio, clicking with the right mouse
button opens a pop-up menu. The contents of the menu depend on
the item clicked and on the current mode or tool. Pop-up menus are
a convenient way to access commands available from the main
menu.
Undo and redo
ResourceStudio can undo any operation or redo any operation that was undone.
To undo the previous
operation, choose Undo from the Edit menu or click on the Undo
icon in the toolbar. Notice that the operation that will be undone is
noted within the Undo menu item. To instead redo an
action that was just undone, choose Redo from the Edit menu.
Operations that you have performed are saved in lists. To set the
number of operations that are saved (and thus that can be undone or
redone), choose Preferences from the Shell window's Edit menu.
Each Browser window and each resource type's editor keeps its own
undo and redo list.
To view a list of stored operations, click the right mouse button on
the Undo or Redo toolbar icon. Select one or more
operations from the list (see Figure 7-28).
Figure 7-28 List of stored operations in Bitmap editor
Clipboard and drag and drop
ResourceStudio supports cut, copy, and paste of resources and of
objects within resources, such as dialog box controls and menu
items.
ResourceStudio also supports drag and drop of all items that can be
cut, copied, and pasted. To move a resource or resource element,
click and drag it to the new location. For example, to move
resources from one file to another, open a Browser window for each
file, then drag the resources from the first file to the second. To copy
rather than move the element, hold down the Control key until you
have released the item.
Managing Resource IDs
Windows programs identify resources by a resource name, which
can be a string or a number. Windows programs also use numbers to
identify commands resulting from menu selections and accelerators
and to identify dialog box controls. The number of identifiers used in
a single application easily can run into the hundreds. One of the
major features of ResourceStudio is its ability to automatically create
and manage resource IDs.
Resource ID field
Many property pages contain an ID field for the current resource or
resource element. There are three types of resource IDs in
ResourceStudio:
Textual IDs
Textual IDs are allowed only for certain resource types. To specify a
textual ID, enclose the text in the ID field in double quotes.
ResourceStudio warns you if you try to assign a textual ID to a
resource type for which it is not allowed.
Symbolic IDs
Symbolic IDs are names that correspond to numbers. By using this
type of ID, you work with names that are meaningful, leaving
ResourceStudio to keep track of the numbers that match the names.
Symbols and their corresponding numbers are saved in the resource
header file as #define statements. Thus the same symbols can be
used to refer to the resources in your application code.
Assign a symbolic ID either by typing the name into the ID
field or by selecting a pre-existing ID from the drop-down list. If you
enter a new symbol, ResourceStudio automatically assigns a unique
numeric value. If you want to specify the numeric value, follow the
symbolic name with an equal sign and the value (for example,
IDD_ TEST= 451). Reassign the value of an existing symbol
in the same way.
Numeric IDs
Numeric IDs should not be used in new resource script (.rc) files;
use symbolic IDs instead. If you create a binary resource file (.res),
or edit the resources in an existing .exe or .dll file, you see the
resource IDs as numbers, because the symbolic information is not
saved for these file types. Assign a numeric ID by typing the
number into the ID field.
Note:
When editing resources in .exe or .dll files,
remember that the compiled source code refers to
resources and commands by the numeric (or
textual) ID; reassigning or changing IDs may result
in incorrect behavior.
Automatic creation of resource IDs
ResourceStudio automatically creates a new resource ID every time
one is needed. The new ID is unique within its context: for resource
elements, the ID is unique within the resource and, for resources,
unique within the resource file.
When assigning values to new symbols typed in by the user or
created automatically, ResourceStudio uses different ranges for
various purposes:
- Resource item range (100-1999)
- Used for resources within a resource file
- User range (2000-2999)
- Used for resource IDs created by
the user from within the Resource ID Browser dialog
box (see below)
- Control range (3000-31999)
- Used by the Dialog editor for dialog controls
- Command range (32000-65535)
- Used by menu and accelerator editors for menu commands
Resource ID browsing
To browse and modify resource IDs, choose Edit Resource IDs
from the File menu.
The Resource ID Browser dialog box opens (Figure 7-29).
Figure 7-29 Resource ID Browser dialog box
The upper listbox shows all the symbolic resource IDs in the
resource file. Symbols can be sorted by name, value, or used/ unused
state. Click on an ID to show a list of resources using the ID in the
lower listbox. Open a resource shown in the lower listbox
by double-clicking on it, or by selecting it and clicking View Usage.
The remaining buttons are:
- New
- Opens the New Resource ID dialog box. Here
you can create a new symbol and assign a value. By
default, the value is in the User range (2000-2999).
- Delete
- Deletes the currently selected symbol. A symbol
may only be deleted if it is not in use.
- Change
- Opens the Change Resource ID dialog box.
Here you can change the symbol name or value.
- Renumber
- Performs a renumbering operation on all
symbolic IDs. Each symbol is examined and a new value
is assigned based on how it is used. If a symbol is used
by items whose values are usually in different ranges, a
dialog box asks for the range in which to
place the value.
This chapter provides an overview of building, running, and
debugging an application in Digital Mars C++. Whenever you finish
making any significant addition or change to the source files of an
application, it is wise to test the result and verify that you have
achieved your goals. To do so, you must first build (or rebuild) the
executable so that it incorporates your modifications. Then you must
observe its behavior- either by tracing through modified sections, or
at least by running the application under the control of the
debugger.
This entire phase of the development cycle can be carried out in the
IDDE. Because all debugging in Digital Mars C++ takes place within
the IDDE, you do not have to leave the IDDE and run a separate
debugger. The IDDE itself provides a wealth of tools for examining
all facets of your application's structure and behavior.
Two other chapters present detailed information about the
debugging capabilities of Digital Mars C++.
Controlling and Configuring the Debugger
describes the commands you use
when debugging, and the options available in the IDDE for
configuring the debugging environment.
Commands Available in Debugging Mode,
describes the commands available in
each of the debugging windows.
Debugger Highlights
The integrated debugger:
- Provides a Windows graphical user interface
- Debugs Windows applications under Windows on the
same screen
- Debugs DOS applications running in a DOS box under
Windows 3.1
- Takes advantage of virtual memory, letting you debug
large DOS applications under Windows 3.1
- Debugs Win32s applications (in the Win32s IDDE,
scw32s.exe) under Windows 3.1
- Debugs 32-bit Windows and character-mode console
applications (in the Win32 or 32-bit IDDE, scw32.exe)
- Provides a graphical representation of data structures
- Supports high-speed, hardware watchpoints, and
breakpoints
- Lets you drag and drop to execute commands
Choosing an Environment for Debugging
There are three versions of the IDDE included with Digital Mars C++.
An icon for each version you install is available in your Digital Mars
C++ program group. These different versions of the IDDE are
essentially identical, except that they allow you to debug different
kinds of executables:
- To debug a Win32 executable under Windows 95 or
Windows NT, use the Win32 IDDE (scw32.exe).
- To debug a 16-bit executable, use the 16-bit IDDE
(scw.exe).
- To debug Win32s executables under Win32s, use the
Win32s IDDE (scw32s.exe).
Building a Project
To test an application, you must first build the executable file, which
is the file you test. Your project specifies the source and library files
needed to build the executable, as well as options that control the
build process. Windows executables also incorporate such resources
as menus, dialog boxes, icons, and bitmaps; these are defined in
resource files. The building process begins by compiling the source
files into object files. Object files are then linked with library files to
create the executable file.
Selecting the project type
You must specify the type of executable you plan to build. You do
so by choosing Settings from the Project menu and clicking on the
Target tab to select the Target page, as shown in Figure 8-1.
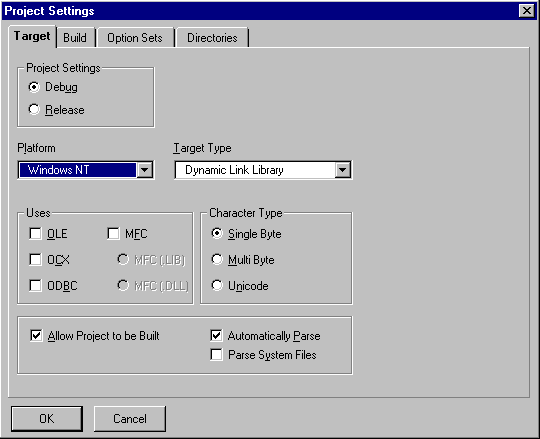
[Figure 8-1 Target page of the Project Settings dialog box]
On this page, choose the operating system your target executable
will run on, and the target type. Not all target types are available
with all operating system types.
The Target page also presents the option of building a Debug or
Release version of the executable. If you want to debug your
executable, select the Debug option.
For more information on the Target page of the Project Settings
dialog box refer to
More about Projects and Workspaces.
Setting compiler and linker options for debugging
When you indicate that a debugging version should be built, the
IDDE sets the appropriate compiler and linker options, and also
prevents debugging information already in object files from being
discarded.
To verify that the these settings are appropriate, choose Settings
from the Project menu, and then click on the Build tab to select the
Build page of the Project Settings dialog box. Select the Debug
Information subpage by clicking on that label in the left listbox. The
Debug Information subpage is shown in Figure 8-2.

[Figure 8-2 Debug Information options]
For more information about project, compiler, and linker options,
see
More about Projects and Workspaces.
Building executable files
The IDDE provides three ways to build executable files from your
project: by performing a standard build, by rebuilding the entire
project, or by linking the existing object files.
Performing a standard build
This is the most common of the three build options. To begin,
choose Build from the Project menu. The IDDE recompiles only
those files that changed since you last compiled them, then links the
project. The IDDE displays any errors in the Output window.
The IDDE Make facility is used by default to determine the steps
needed to build your project. It is functionally identical to the DOS
command-line Make utility SMAKE, included with Digital Mars C++. If
you need to use a different, DOS command-line Make utility, such as
NMAKE or PolyMake, you can do so; see
More about Project Build Settings,
for details on how to use an external Make
program.
Rebuilding the project
If you want to recompile every file in your project- even those files
that are up-to-date- choose Rebuild All from the Project menu.
The IDDE recompiles all files in your project, whether they've been
edited recently or not, then links the project.
Typical situations in which you use the Rebuild All command
include:
- When you have changed some of the project options
- When you suspect corrupted object .obj files
- When you want to create a final build
Linking the project
If you want to build a program with the existing object files but
without recompiling your source files, choose Link from the Project
menu. The IDDE links the object files.
Typical situations in which you use the Link command include:
- When you have added a new library .lib file
- When you wish to build from object .obj files only
- When you have changed linker options
Other project options
The Build page of the Project Settings dialog box offers additional
settings that you may find useful for precompiling headers and
generating an assembly listing.
Precompiling headers
The Header Files subpage lets you precompile one or all of the
header files that are included by source files in your project.
Precompiling a header is useful when the header file changes
infrequently or not at all between builds, or when a header file is
included by most of the source files in a project. Precompiled
headers speed up the build process, especially with large header
files. For example, windows. h can be beneficially precompiled
because it is large and is not likely to change.
Generating an assembly listing
The Assembly Listing (.COD) check box on the Output subpage lets
you create a .cod file that contains the assembly language code into
which the compiler converts your source code. In this file, C++
source statements are preserved as assembly language comments.
Each commented statement precedes the assembly language code to
which it corresponds.
Running a Project
You can run the application that your project produces without
leaving the IDDE. Commands that run your application ask you to
build it if required.
If your program requires no command-line arguments, choose
Execute Program from the Project menu. The IDDE launches your
application.
If your program requires arguments, first choose Arguments from
the Project menu. The IDDE displays the dialog box in Figure 8-3.
[Figure 8-3 Run Arguments dialog box]
Enter your arguments -- not the program name -- in the dialog box.
For example, entering:
*.* /s
launches your program with the arguments *.* and /s.
After specifying the arguments, click OK. Then run your application
as described above.
Quick Start: Debugging an Application
This section provides a brief description of how to perform common
debugging tasks. You can find a complete presentation of the
debugging capabilities of Digital Mars C++ in
Controlling and Configuring the Debugger,
and in
Commands Available in Debugging Mode.
In Chapter 23, see especially the
sections "Commands on the Debug Menu" and "Debug Toolbox Icons."
After building your project, you can enter debugging mode by
choosing Start/Restart Debugging (F4) from the Debug menu.
(That is, you may either choose this command from the menu, or
type its keyboard shortcut given in parentheses.) Alternatively, you
can click on the Restart Debugging icon in the Debug toolbox. Any
open Source windows change to debugging mode. Your application
executes to the breakpoint set automatically on WinMain (for
Windows applications) or main (for DOS applications and 32-bit
console applications).
Other debugging windows, such as the Function window and Data/
Object window, can be opened as needed from the Views toolbox
or from the Goto View submenu of the IDDE's Window menu.
In debugging mode, the Start/Restart Debugging command on the
Debug menu remains available. This command restarts the program.
The Stop Debugging command on the Debug menu exits
debugging mode, and returns the IDDE to editing mode.
Stepping through code
To step to the next source code statement, choose Step Into (F8)
from the Debug menu. Alternatively, you may click on the Step Into
icon in the Debug toolbox. If the current line is a function call, and
debugging information is available for that function, you will trace
into that function. To step over a function call, choose Step Over
(F10) from the Debug menu, or click on the Step Over icon in the
Debug toolbox.
Note:
If you accidentally step into a function call when
you meant to step over it, you can move to where
you intended to be- the statement following the
call- by choosing Return from Call from the
Debug menu. This command executes to the
current function's return address (unless a
breakpoint or watchpoint is encountered before
control reaches that point).
Setting and clearing breakpoints
Setting a breakpoint on a source code statement causes your
program to stop when execution reaches that statement. The
debugger regains control, and you may again perform any
debugging mode actions.
To set a breakpoint on a statement, first click on that statement in the
Source window to make it the selected line. Then choose Set/Clear
Breakpoint (F9) from the Source window pop-up menu (which
appears when you click the right mouse button in the Source
window), or click on the Toggle Breakpoint icon in the Debug
toolbox. These commands act as toggles; repeating them clears the
breakpoint.
The Source window pop-up menu, as it appears in debugging mode,
is shown in Figure 8-4.
[Figure 8-4 Source window pop-up menu in debugging mode]
A breakpoint symbol in the left margin of the Source window
indicates a breakpoint on the adjacent line. You can also clear a
breakpoint by dragging the symbol out of the Source window.
Executing up to a statement
To execute up to the currently selected line, choose Go Until Line
from the Source window pop-up menu. Double-clicking on any line
in the Source window causes your program to run until execution
reaches that line.
Viewing a list of functions
The Function window lists the functions in the current module or in
all modules. Toggle the display by choosing Current Module or All
Modules from the View menu. Double-click on any function to
view that function in a Source window.
You can easily set a breakpoint at the beginning of a function from
within the Function window by choosing the Set/Clear Breakpoint
(F9) command from the Bpt menu.
Examining the values of variables
The Data/Object window lets you view either global data or the
variables local to a function. The Show menu of the Function
window has commands Global Data and Local Data that select the
type of data displayed in the Data/Object window. If you choose
Local Data, the Data/Object window shows the local variables for
the function currently selected in the Function window, provided
that function is in the call chain. (If a function is not in the call chain,
it has no local data.) The display can also be toggled by choosing
Local/Global Data from the View menu of the Data/Object
window.
Examining the call chain
The Call window displays the stack of function calls in your code
that have not yet returned. The list is presented in reverse
chronological order from most to least recent; thus, WinMain (or
main) is at the bottom of the list.
The Call window's Show menu contains commands that let you
zoom in on a particular function in the chain. For example:
- The Source command updates the Source window and
displays the statement that is executing within the
selected function.
- The Data command updates the Data/Object window
and displays local data for the selected function.
Setting watchpoints
A watchpoint specifies that execution of your program should stop
when a particular variable or memory location is written to or read
from. This capability is essential for detecting problems arising from
wild pointers, for example, which can manifest themselves in
extremely elusive and seemingly random behavior.
Digital Mars C++ debuggers are designed to take advantage of
hardware watchpoints provided by 386 and higher microprocessors.
The Digital Mars C++ installation program may install the file
SCWDEBUG. 386 in the [386Enh] section of system. ini if your
system needs it to allow the use of hardware watchpoints. Because
watchpoints are implemented with hardware assistance, using this
powerful tool imposes no speed penalty on program execution.
Setting a watchpoint on a variable
Using the methods described in the sections above, make sure that
the desired variable is displayed in the Data/Object window. Click
on the line referencing the variable to select it; the line should be
highlighted. Choose Set Watchpoint (Ctrl+ W) from the Watch
menu of the Data/Object window. This opens the Set Watchpoint
dialog box, shown in Figure 8-5.
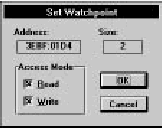
[Figure 8-5 Set Watchpoint dialog box]
The debugger maintains information about the type of variables and
their location in memory. The selected variable's type determines the
size of the watchpoint. The Set Watchpoint dialog box displays the
address and size of the watchpoint as noneditable fields, and
provides options for breaking on a Read access, Write access, or
both. To clear the watchpoint, choose Clear Watchpoint from the
Watch menu of the Data/Object window.
Warning Exercise caution when setting a watchpoint on an
automatic variable (that is, a local, nonstatic
variable). If you attempt to set such a watchpoint,
the debugger warns you by displaying a message
on the status line. You should clear the watchpoint
by the time the function whose local variable you
are watching returns. If you don't, Windows itself
can use the stack location subsequently, thus
triggering the watchpoint and causing Windows to
crash.
In addition to setting watchpoints on variables, watchpoints can also
be set on locations in memory using the Memory window, whose
Watch menu is identical to that of the Data/Object window.
Letting your program run until the next breakpoint
You can make your program run until execution reaches a
breakpoint by choosing Go until Breakpoint (F5) from the IDDE's
Debug menu, or by clicking on the Go until Breakpoint icon in the
Debug toolbox. You can use the Breakpoint window to see at a
glance where breakpoints have been set.
Letting your program run until it terminates
You can make your program run until it terminates -- ignoring any
breakpoints -- by choosing Go until End from the Debug menu.
Interrupting execution of the debugged application
Use the Ctrl+Alt+SysRq key combination to break execution of the
application being debugged and return control to the debugger. It
may be necessary to press this key combination a few times before
the debugger regains control. (If you use this key combination to
break execution when control is within Windows itself, it may be
difficult for the debugger to step out of Windows code.)
The technique is most useful when you suspect that your own code
is hung. Returning to the debugger lets you examine your program's
state, which may be one that you thought impossible. Inspecting the
values of variables and the call chain can suggest how to identify
and eliminate the source of the error.
Note:
Use Ctrl+Alt+F11 to break execution of Win32s
applications.
Welcome to Digital Mars C++. This section of the manual
contains a tutorial designed to introduce you to the important
components and features of the Integrated Development and
Debugging Environment (IDDE) -- the "shell" within which most of
your application development takes place.
The tutorial is designed to complement Part Two, "Creating an
Application with Digital Mars C++." The tutorial provides a quick tour
of the IDDE that shows you how to perform the most common tasks.
Part Two contains more in-depth information, to show you
procedures for less common tasks and alternative ways of
accomplishing things.
Prerequisite Knowledge
This tutorial assumes that you are familiar with the Windows
environment -- that you can start applications from the Program
Manager, move and resize windows, operate menus and dialog
boxes, and perform simple text editing tasks (such as cut, copy, and
paste). The tutorial also assumes some familiarity with C, C++, and
Windows programming basics. You need not know anything about
the Microsoft Foundation Class (MFC) library; MFC basics are
introduced here.
For more information, consult the references listed in Chapter 1,
Introducing Digital Mars C++.
The Tutorial Application
The application built in the tutorial lets you read and navigate
through hypertext. Two versions are built: a DOS version (in Lesson
1) and a Windows 3.1 version (in Lessons 2-5). Most of the code for
the application has been written; the tutorial just shows you certain
stages in the development process to familiarize you with IDDE
tools.
The hypertext files that the tutorial applications accept as input are
text files containing simple commands that control document
formatting and show images as well as commands that define links
to other such documents. The markup language recognized by the
tutorial applications, referred to throughout the tutorials as TML, is a
subset of the Hypertext Markup Language (HTML). HTML is a format
that has become a standard for information interchange on the
World-Wide Web (WWW), a distributed hypermedia system
accessible through Internet connections.
Special WWW browser programs enable users worldwide to access
and share text, graphics, audio, and other data. The tutorial
applications only hint at the richness of full-featured WWW
browsers. The DOS TML Reader built in Lesson 1 is called TMLDOS;
the Windows version of Lessons 2 through 5 is called TMLRead.
Tutorial Structure
The tutorial comprises five lessons that include instructions for
performing various tasks. Following these instructions will teach you
basic procedures and familiarize you with IDDE tools. Each lesson
builds on concepts and procedures introduced in previous lessons,
so it is best to work through the lessons in order.
-
Lesson 1
teaches you the basics: how to start the IDDE, open Source
windows for editing text, and compile and run a program. In
addition, the first lesson shows you how to run in debugging mode
and perform fundamental debugging tasks. The example program in
Lesson 1 is a DOS application; however, the skills you learn are
equally applicable to Windows application development.
-
Lesson 2
shows you how to use AppExpress to generate an
application framework for a Windows program. You also learn to
use precompiled headers and to use TRACE calls within your
program to track its progress. Lesson 2 concludes with a brief
introduction to MFC and describes the classes that constitute the
application framework you generated.
-
Lesson 3
Lesson 3 teaches you how to use the ResourceStudio. You modify
the menu and accelerator table generated by AppExpress, and attach
a new toolbar bitmap to your application's resources. You then edit
the source code to make use of the new toolbar.
-
Lesson 4
shows you how to use ClassExpress to add message
handlers to your application. You add handlers for Windows
messages, such as scrolling, mouse button clicks, and keypresses,
then monitor the message handlers as the application framework
calls them.
-
Lesson 5
returns to the ResourceStudio, with which you add a menu
item to open a simple Preferences dialog box. You use
ClassExpress to create a new class for the dialog box and add
message handlers. Finally, you add code to connect the menu item
to the dialog box and to exchange information between the dialog
box and the main program.
Tutorial Source Code
The source code for the tutorial is located in samples\tutorial,
under the directory in which you installed Digital Mars C++ (by default,
this is c:\dm\samples\tutorial). The samples\tutorial
directory contains a subdirectory corresponding to each lesson
(these subdirectories are named lesson1, lesson2, lesson3,
lesson4, and lesson5).
Each lesson's subdirectory (except lesson2) contains three
subdirectories, named start, finish, and backup.
- The start subdirectory is your working directory
during the tutorial; it contains the project and source
code that you change as part of the lesson.
- The finish subdirectory contains the project as it
should appear after the steps in the lesson are performed
correctly.
- The backup subdirectory is a copy of the initial contents
of the start subdirectory. If you want to redo the
lesson from scratch, delete the contents of the start
subdirectory and copy all the files in the backup
subdirectory to the start subdirectory.
The subdirectory for Lesson 2 contains only a finish subdirectory.
The start subdirectory is created as part of the lesson.
The source and executable of the final DOS version of the TML
Reader is contained in tutorial\tmldos. The source and
executable of the final Windows version is located in
tutorial\tmlread.
In this chapter you learn basic procedures for using the Integrated
Development and Debugging Environment (IDDE) while building a
DOS version of the TML Reader. This lesson teaches you to:
- Start the IDDE and load a project
- Edit source code
- Build and run the application
- Create a debugging workspace
- Run the application in debugging mode
Most of the code for the application has already been written; during
the lesson you will add a few final lines. At the end of the lesson,
you will have a DOS executable that can read and display TML files.
Starting the IDDE and Loading a Project
To start the IDDE:
First, start the IDDE. If you haven't yet installed Digital Mars C++,
please see the Getting Started Guide for installation instructions.
- Double-click on the Digital Mars C++ 16-bit group icon in
the Windows Program Manager. (If the Digital Mars C++
16-bit group is already open, you may omit this step.)
- Double-click on the Digital Mars C++ icon. The IDDE main
window opens at the top of the screen (see Figure 10-1).

[Figure 10-1 The IDDE main window and Workspace toolbox]
The IDDE main window contains a title bar and a menu bar. Below
the main window is the Workspace toolbox, used to switch between
workspaces (described later in this chapter). The Workspace toolbox
is currently docked under the IDDE menu bars. Additional IDDE
windows open below the main window and Workspace toolbox.
You can open other IDDE windows by selecting their names from
the Goto View submenu of the Window menu; close any window
by clicking the Close button in its upper-left corner.
Next, you must load the DOS TML Reader project. (A project is a
collection of source and other support files from which an
executable is generated.) To open the project:
- Choose Open from the IDDE's Project menu.
- Use the Open Project dialog box to find
samples\tutorial\lesson1\start\tmldos.prj,
located under the directory in which you installed
Digital Mars C++.
- Click OK.
You can view the project's source file list in the Project window. If
the Project window is not already open, choose Project from the
Goto View submenu of the Window menu.
In the next section you edit one of the source files.
Editing Source Code
The DOS TML Reader's source code needs a minor addition before
compilation. To add the missing lines, you must edit the source code
in a Source window.
- In the Project window, double-click on display.c.
A Source window opens, showing the contents of the
source file (see Figure 10-2).

[Figure 10-2 Source window]
- Choose Function from the Source window's Goto
menu. The Goto Function dialog box opens.
- Select Display from the Function Name listbox, then
click OK. The editor moves to the start of Display().
- Choose Find from the Edit menu. The Find dialog box
opens.
- In the Pattern textbox, type LESSON 1.
- Click on Next.
- You should see the following line in the source code:
/* INSERT CODE FOR LESSON 1 HERE! */
Just after this comment, but before the procedure's
closing brace, insert the following two lines of code:
	disp_move(disp_numrows - 1, 0);
	disp_eeol();
- Choose Save from the File menu.
The DOS TML Reader is now ready to be compiled.
In the next section you learn to build and run the project, and you
look at a sample document.
Building and Running the Application
To build and run the DOS TML Reader:
- From the IDDE's Project menu, choose Rebuild All.
The Output window opens automatically. This window informs you
of build progress and displays any warning or error messages. If no
errors exist, you see the message "Successful build." (You can still
work in the IDDE while the build is in progress, because the process
of building is multitasked. The Output window can be behind other
IDDE windows, even when messages are being written to it.)
- From the IDDE's Project menu, choose Arguments.
The Run Arguments dialog box opens.
- Type sample.tml into the textbox and click OK.
- From the Project menu, choose Execute Program.
The TML Reader opens in full-screen mode, showing the formatted
contents of sample.tml (see Figure 10-3). You can use Page Up,
Page Down, and the arrow keys to scroll through the file. To execute
a hyperlink, position the cursor over text shown in reverse video and
press Enter. Press Escape to exit the program and return to the IDDE.
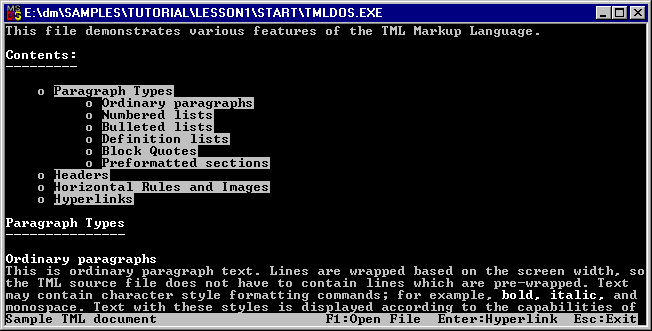
[Figure 10-3 The DOS TML Reader]
The DOS TML Reader is believed to be without any significant bugs.
However, most applications have bugs during at least some of their
development phase. To help you locate and correct incorrect code
as quickly as possible, the IDDE has powerful debugging features.
The following sections show you how to set up a workspace for
debugging and debug your source code.
Setting Up a Workspace for Debugging
A workspace is an arrangement of windows on the screen. You can
set up several useful configurations of IDDE windows, then switch
between them by clicking on workspace names in the Workspace
toolbox.
The IDDE predefines a workspace named Debugging, which
contains a configuration of windows useful for typical debugging
sessions. Here, however, we define a new workspace specific to this
lesson, to show you how this is done and to avoid disturbing any
customizations you may have already made to the Debugging
workspace.
To create a workspace for debugging:
- Choose New from the Workspace submenu of the
IDDE's Environment menu.
- When prompted for a workspace name, type Lesson1.
- Click OK.
The IDDE creates a new workspace and adds the workspace name
to the Workspace toolbox. Initially the new workspace is empty,
with the exception of a few toolboxes that are not needed here. To
close the toolboxes, click the Close buttons in the upper-left corners.
Next, you need to add windows to the workspace. During
debugging, the Source window follows program execution, the
Function window views a list of functions in a particular program
module, the Data/ Object window views program data, and the Call
window displays the program call chain.
- To open the Project window, press Ctrl+Shift+P.
- In the Project window, double-click on main.c. A
Source window opens.
- To open the Function window, press Ctrl+Shift+F.
- To open the Data/Object window, press Ctrl+Shift+D.
- To open the Call window, press Ctrl+Shift+L.
Other debugging windows are available as well; see Chapter 24,
Commands Available in Debugging Mode,
for more information.
Arrange the windows the way you want them (one example is
shown in Figure 10-4), then choose Save Workspace Set from the
Workspace submenu of the IDDE's Environment menu.
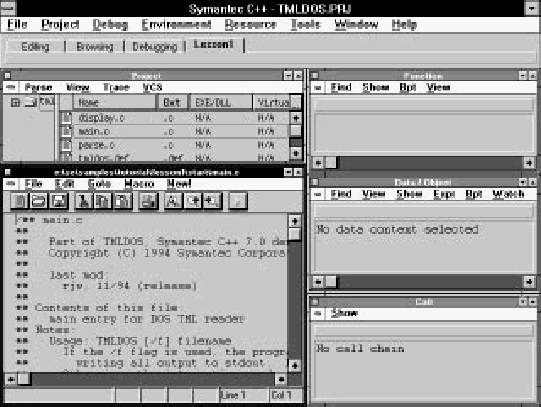
[Figure 10-4 A possible Lesson 1 workspace]
Now that the workspace is ready, you can begin debugging. The
following section shows you how to run the application in
debugging mode and how to set a breakpoint on a function, how to
view program data, and how to step through code.
Running in Debugging Mode
To execute the application in debugging mode, click in the Source
window, then choose Start/Restart Debugging from the IDDE's
Debug menu. Several things happen:
- The IDDE opens a window (the Digital Mars Application
Window), in which the application runs. This window
may be behind other windows.
- The application is executed to the start of main.
- The Source window changes to debugging mode (see
Figure 10-5). Arrows indicating execution points within
functions, and flags indicating breakpoints are shown in
the left margin. You cannot edit the code while in
debugging mode.
[Figure 10-5 Source window in debugging mode]
- The Project window changes to debugging mode (see
Figure 10-6). The icons next to the source module names
change to indicate their status:
- The Function window is updated to show a list of
functions in the program (see Figure 10-6). An arrow
next to main indicates that it is in the call chain; a
diamond indicates that a breakpoint is set.

[Figure 10-7 Function window]
- The Call window is updated to show the call chain and
execution status (see Figure 10-8).
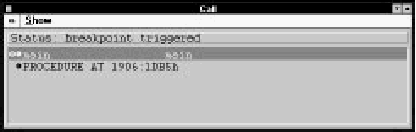
[Figure 10-8 Call window]
You can now perform the following simple debugging tasks.
Setting and running to breakpoints
To set a breakpoint on a function and execute to it:
- Click and drag display.c from the Project window to
the Source window.
- Choose Set/Clear Breakpoint from the Bpt menu. A
breakpoint is set at the start of ShowScreen.
- Choose Go Until Breakpoint from the IDDE's Debug
menu. The program is executed to the start of
ShowScreen.
The Source window shows the line at which execution stopped. The
Call window shows functions in the call chain (see Figure 10-9).
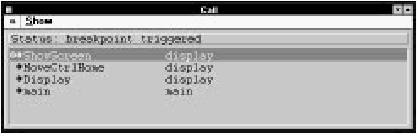
[Figure 10-9 Call chain to function ShowScreen]
Viewing data
You can view program data using the following commands:
- Choose Data from the Show submenu of the Source
window's pop-up menu. The Data/Object window is
updated to show the local data in ShowScreen (see
Figure 10-10).
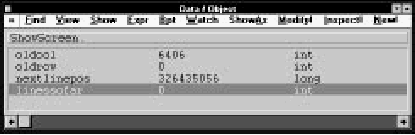
[Figure 10-10 Data/Object window showing local data]
- In the Call window, click on main, then choose Data
from the Show menu. The Data/Object window is
updated to show the local data in main.
- Choose Local/Global Data from the Data/Object
window's View menu. The Data/Object window is
updated to display global data accessible in the current
module. Choose Local/Global Data again to resume
display of local data.
Stepping through code
To step through the source code line-by-line:
- Choose Step Into from the IDDE's Debug menu (or
press F8) seven times. The IDDE executes seven lines of
code. The seventh step takes execution into ShowLine;
at that point the Call window adds ShowLine to the call
chain, and the Data/Object window is updated to display
the function's local data.
- Choose Return from Call from the IDDE's Debug menu
to execute the rest of ShowLine and return to the
calling function.
- Choose Step Over from the IDDE's Debug menu (or
press F10) several times. The IDDE executes some lines
of code in the function, but it does not step into
subroutines. ShowScreen is in a loop that writes lines
to the screen one-by-one. The results appear in the
Digital Mars Application Window.
Running to the end
To execute the rest of the program, ignoring breakpoints, choose Go
Until End from the IDDE's Debug menu. Bring the Digital Mars
Application Window to the front and test the program as usual. You
can press Alt+Ctrl+SysRq to break to the debugger, or let the
program terminate before resuming your debugging session. (In the
DOS TML Reader, you must press Escape to end the program.)
Ending the debugging session
To exit debugging mode, choose Stop Debugging from the IDDE's
Debug menu. You can do this at any time during debugging; you
don't have to choose Go Until End first.
In this chapter you have learned how to start the IDDE, load a
project, edit source code, build and run the application, and run in
debugging mode. These are the fundamental tasks you perform
repeatedly as you develop your own applications, whether you are
developing in C or C++, for DOS or for Windows. In the following
lessons, you learn about the IDDE's more advanced features, many
of which are designed specifically for Windows application
development in C++.
In this chapter you begin the process of building a Windows version
of the TML Reader. This version is built around a Microsoft
Foundation Class (MFC) version 2.5 Single Document Interface (SDI)
framework. In this lesson you:
- Use AppExpress to generate a new project containing the
SDI framework
- Build and run the bare application framework, a
standardized skeleton composed of C++ classes derived
from MFC library base classes.
- Use precompiled headers to speed build time
- Add calls to the TRACE macro with Class Editor
- Follow TRACE output in the Trace Messages window
At the end of the lesson you will have a working application
framework with menus, a toolbar, and a status bar. The framework
itself will respond to certain commands, but the functionality needed
to read and display TML files is not yet included. In subsequent
chapters you modify the user interface for the TML Reader and add
the necessary file input and display routines.
There are many ways to create an application framework. This
lesson provides the most straightforward way.
Generating the Framework
In this lesson you use AppExpress to generate a new project
containing an application framework. To start AppExpress:
- Start the IDDE and close any open project by choosing
Close from the Project menu.
- Start AppExpress by choosing AppExpress from the
Tools menu.
The AppExpress window opens (shown in Figure 11-1).
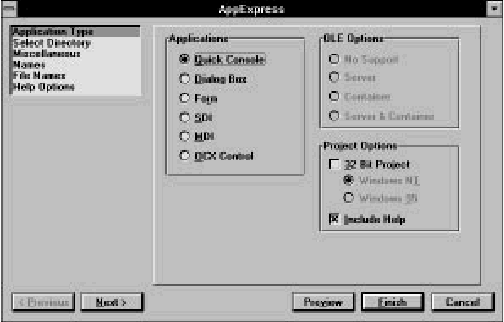
[Figure 11-1 Setting up an SDI application with AppExpress]
AppExpress contains six pages of options that together define the
project to be generated. You define these options in six steps, listed
in the upper-left portion of the window. For this project, you need to
change options on only four of the six pages. Set up the project
options as follows:
- On the Application Type page (shown when AppExpress
is started), select SDI.
- Deselect Include Help to suppress generation of
Windows Help support.
- Click on Next to switch to the Select Directory page.
Change to the samples\tutorial\lesson2
directory under the directory in which you installed
Digital Mars C++, then click on Create New Directory.
- Type start in the textbox and click Create.
Note:
To avoid filename conflicts, it is a good idea to keep
each project you create in a separate directory.
- Click on Next to switch to the Miscellaneous page. Type
your company name and suffix (or your own name) in
the appropriate textboxes. This information is displayed
in the automatically generated About dialog box, and in
comments at the beginning of each source file.
- In the Project Name textbox, type TMLRead.
- Click on Next to switch to the Names page. You can
customize the names of automatically generated classes
here. From the Name drop-down list, select
CTMLReadApp. In the Edit textbox, type CTMLReadApp.
- Click Finish.
AppExpress generates a new project in the directory you created.
The directory contains:
- Source and header files for the MFC-derived classes
- Resource script and binary files
- Project options and other support files
After generating the project, AppExpress closes and control returns
to the IDDE. The new project is loaded automatically. The IDDE
parses the new project's source files for browsing with the Class and
Hierarchy Editors; parsing progress is displayed in the Output
window.
Building and Running the New Project
Next you build the project and learn what the default application
framework can do.
- From the IDDE's Project menu, choose Rebuild All.
- From the Project menu, choose Execute Program.
The IDDE minimizes itself and the TMLRead application opens
(shown in Figure 11-2).
[Figure 11-2 New application framework generated by AppExpress]
At present, default functionality for several menu commands is
provided by the MFC base classes. For example, if you choose Open
from the File menu, a standard Windows File Open dialog box
opens. You can select a file in this dialog box, but the code needed
to read data from the file is not yet installed.
To close TMLRead and return to the IDDE, choose Exit from the
File menu.
The project can take a considerable amount of time to compile. Next
you learn how to decrease compilation time by using precompiled
headers.
Using Precompiled Headers
In the last section, over 70,000 lines of code were read during
compilation. Many of these lines are in Windows and MFC header
files that are changed infrequently (if ever), but still must be included
by almost every source file. To speed compilation, you can
precompile header files; thereafter, the symbols generated by the
compiler can be loaded directly.
To precompile the Windows and MFC header files:
- Choose Settings from the Project menu. The Project
Settings dialog box opens.
- Click on the Build tab.
- In the left listbox, click on Header Files.
- In the Precompile section of the right pane, select
Specific Header.
- In the textbox below the Specific Header selection, type
stdafx.h.
Note:
You can specify multiple specific headers to
precompile by entering in this textbox a list of their
names separated by semicolons or spaces.
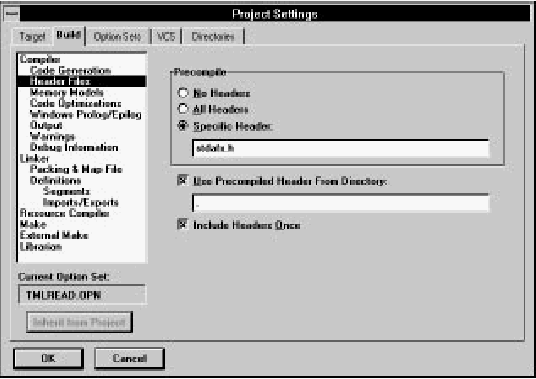
[Figure 11-3 Using precompiled headers]
- Click OK.
- An Editor/Browser message box is opens, noting that
project settings have changed and asking if you want to
reparse all files. Click No, because you are about to build
in the next step, which will stop any parse in progress.
- From the IDDE Project menu, choose Rebuild All.
During the rebuild, the header file stdafx.h is precompiled, then
the source files are compiled using the precompiled symbol table.
You should notice a significant reduction in the number of lines
compiled, as well as a corresponding increase in compile speed.
Now that you have created, compiled, and executed the application
framework, the rest of the chapter helps you to understand the
framework's structure. The following three sections are optional.
Adding TRACE Calls with Class Editor
In the remainder of this chapter, you investigate calls to member
functions of the MFC-derived classes created by AppExpress to
understand the structure of the application framework and the
relationships between the classes. To do this, you use the Class
Editor to insert calls to the MFC global TRACE macro into the
member functions, then watch the output in the Trace Messages
window.
To add a TRACE call to the application class's constructor:
- Choose Class Editor from the Goto View submenu of
the IDDE Window menu. The Class Editor window
opens (see Figure 11-4).
- Under Classes, click on CTMLReadApp. The application
class's members appear in the Members list.
- Under Members, double-click on CTMLReadApp. The
application class constructor's source code is shown in
the source pane.
- Add the following line to the constructor:
TRACE("CTMLReadApp::CTMLReadApp()\n");
The constructor should now appear as follows:
	//////////////////////////////////////////////////////////////////
	// CTMLReadApp construction

	CTMLReadApp:: CTMLReadApp()
	{
	    TRACE("CTMLReadApp::CTMLReadApp()\n");
	    // TODO: add construction code here,
	    // Place all significant initialization in InitInstance
	}
- Press Ctrl+S to save the modified constructor.

[Figure 11-4 Adding TRACE calls with Class Editor]
You can add similar TRACE calls to these other member functions:
- CTMLReadApp::InitInstance()
- CMainFrame::CMainFrame()
- CMainFrame::~CMainFrame()
- CMainFrame::OnCreate()
- CTMLReadDoc::CTMLReadDoc()
- CTMLReadDoc::~CTMLReadDoc()
- CTMLReadDoc::OnNewDocument()
- CTMLReadDoc::Serialize()
- CTMLReadView::CTMLReadView()
- CTMLReadView::~CTMLReadView()
- CTMLReadView::OnDraw()
When you have finished, choose Build from the IDDE Project
menu to recompile the source files you have changed.
In the next section you execute the application and watch the
TRACE output in the Trace Messages window.
Watching TRACE Output in the Trace Messages Window
To watch TRACE output, first you must set up the Trace Messages
window to receive and display TRACE messages.
- Choose Trace Messages from the Goto View submenu
of the IDDE's Window menu. The Trace Messages
window opens.
- Choose Output to Window from the Options menu of
the Trace Messages window.
- Choose MFC Debug Messages from the Options menu.
The MFC Trace Debug Options dialog box opens.
- Check Enable Tracing and uncheck any other options
that are checked. Click OK.
You are now prepared to run the application and view the output of
the TRACE macro calls.
- Choose Execute Program from the IDDE's Project
menu.
- The IDDE is minimized and the application window
opens. Double-click on the IDDE icon to reopen the
IDDE windows. Position the windows so you can watch
the Trace Messages window while the program executes.
The Trace Messages window has already received several messages
from the application's class constructors and initialization code
(Figure 11-5). You see more messages if you choose Open or New
from TMLRead's File menu, or when the window needs to be
repainted.
When you close TMLRead, the Trace Messages window receives
messages from the application's class destructors.
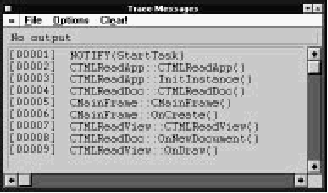
[Figure 11-5 TRACE output in the Trace Messages window]
The next section gives an overview of the classes in the application
framework and explains the messages you see in the Trace Messages
window.
The Application Framework and MFC Classes
In this chapter, you have used AppExpress to build an application
framework, a skeleton on which you can build a Windows
application, consisting of C++ classes contained in and derived from
classes in the Microsoft Foundation Class (MFC) library.
The MFC library is a C++ class library that supports programming for
Windows. It encapsulates most of the Windows Application
Programming Interface (API), and provides additional C++
programming support such as container and string classes. The MFC
library makes it easy to work with Windows elements in an object-oriented
manner. For example, MFC library classes exist to represent
objects such as windows, dialog boxes, controls, device contexts,
Graphic Device Interface (GDI) objects, and so on. Windows API
functions are implemented as member functions of the classes with
which they are logically associated.
TMLRead is built on a Single Document Interface (SDI) framework.
The SDI framework contains five fundamental objects:
- Document:
- The document contains data, reads the data
from disk, and provides access to the data. In TMLRead,
the document is an object of type CTMLReadDoc,
derived from the MFC library class CDocument.
- View:
- The view displays the data contained by the
document. In TMLRead, the view is an object of type
CTMLReadView, derived from the MFC library class
CView (which is, in turn, derived from CWnd, the base
class for all types of windows).
- Document Template:
- The document template defines the
association between document and view classes. In an
SDI application, this is an object of type
CSingleDocTemplate.
- Frame Window:
- The frame window object is the
application's main window. In TMLRead it contains a
toolbar, a status bar, and the view. The frame window is
an object of type CMainFrame, derived from the MFC
library class CFrameWnd.
- Application:
- The application object creates and controls
the other objects, and takes care of general program
initialization and cleanup. In TMLRead the application is
an object of type CTMLReadApp, derived from the MFC
library class CApplication.
The framework itself provides standard user-interface
implementations for some commands (for example, file open and
save); you must add support for certain framework functions (such
as file input and output), as well as add other command and
message-handling capability specific to your application.
The TRACE output from the previous section lets you see the
creation, use, and destruction of objects in the application. For
example, when you start the application, you see the following
messages:
	[00001] NOTIFY(StartTask)
	[00002] CTMLReadApp::CTMLReadApp()
	[00003] CTMLReadApp::InitInstance()
	[00004] CTMLReadDoc::CTMLReadDoc()
	[00005] CMainFrame::CMainFrame()
	[00006] CMainFrame::OnCreate()
	[00007] CTMLReadView::CTMLReadView()
	[00008] CTMLReadDoc::OnNewDocument()
	[00009] CTMLReadView::OnDraw()
The application object is created first. Using a document template,
the application object creates the document, frame window, and
view objects. It then calls the document object to set up a new
document. Finally, when the window is shown, the framework calls
the view's OnDraw() function to repaint the window.
If you choose New from TMLRead's File menu, you see the
following messages:
	[00010] CTMLReadDoc::OnNewDocument()
	[00011] CTMLReadView::OnDraw()
Or, if you choose Open from the File menu, then select a file, you
see:
	[00012] CTMLReadDoc::Serialize()
	[00013] CTMLReadView::OnDraw()
The document object is called either to create a new document or to
read a document from a file, depending on the menu item that was
chosen. Note that neither the document object nor the view object is
destroyed; in an SDI application, they are reused continually.
When you choose Exit from TMLRead's File menu, the application's
objects are destroyed in reverse order in which they were created.
You see these messages in the Trace Messages window:
	[00014] CTMLReadView::~CTMLReadView()
	[00015] CMainFrame::~CMainFrame()
	[00016] CTMLReadDoc::~CTMLReadDoc()
	[00017] NOTIFY(ExitTask)
	[00018] NOTIFY(DelModule)
There is no message from the application object's destructor,
because it is not defined explicitly in the framework.
You may find it useful to continue to add TRACE calls to the
application as it is built. It is often difficult to follow the workings of
a message-driven system; the Trace Messages window, however, acts
as a kind of passive debugger that keeps you informed of the
internal workings of your application.
In the next chapter, you begin to shape the application framework to
the specific needs of the application. The first step in this process is
to customize the user interface with the Resource Editor.
After an application framework has been generated with AppExpress,
it is usually necessary to customize the user interface. This typically
is an ongoing process; as your application evolves, you can add and
remove interface elements. In this lesson you perform the initial
stage of customization. You will:
- Use ResourceStudio to customize TMLRead's menu and
toolbar
- Edit the code that sets up the toolbar
AppExpress generates an SDI application framework with a full set
of resources. TMLRead needs only a subset of the standard user
interface, so most of the work in this lesson involves trimming down
the interface. At the end of the lesson you will have a modified
version of TMLRead, supporting only the commands that are needed.
Before starting this lesson, start the IDDE and open the project
tmlread.prj found in directory
samples\tutorial\lesson3\start.
Launching ResourceStudio
An application's resources are contained in a resource script file,
which includes descriptions of menus, dialog boxes, and other user
interface elements. The resource script file is edited with
ResourceStudio. To launch ResourceStudio:
- Open the Project window by pressing Ctrl+Shift+P.
- In the Project window, double-click on tmlread.rc.
- When asked if you want to use ResourceStudio to edit
this file, click Yes. ResourceStudio starts, with its Shell
window minimized. (The Shell window is a control
center from which you can create and open resource
files. You will use it later in this lesson.)
The Browser window of ResourceStudio opens (Figure 12-1).
The window controls editing of the resources within an individual
resource file. On startup, its upper-left pane contains a list of
resource types found in tmlread.rc.
[Figure 12-1 The Browser window of ResourceStudio]
The TML Reader is only able to read and display TML files; it cannot
edit or write them. Thus, you can remove menu items related to
editing and saving.
Customizing the Menu
In this section you customize TMLRead's menu.
Within ResourceStudio are several individual editors, each capable of
editing a single type of resource. For example, the Dialog editor is
used to edit dialog box resources, and the Menu editor to edit menu
resources. By default, the editors use the right pane of the Browser
window.
To start the Menu editor:
- Click on Menu in the Browser window's upper-left pane.
- Double-click on IDR_MAINFRAME in the lower-left pane.
The Menu editor opens in the Browser window (Figure 12-2). Its
menu replaces the Browser window's menu, and its toolbar appears
at the top of the right pane.
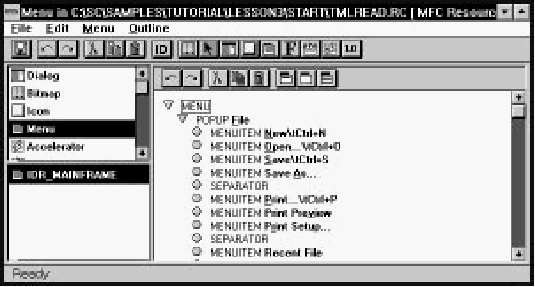
[Figure 12-2 The Menu editor in the Browser window]
As the Menu editor opens, the Property Sheet also opens (Figure
12-2). This window is used to edit resource and resource element
properties and options.
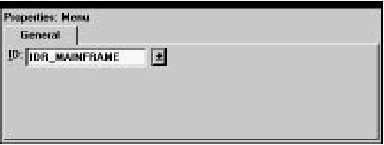
[Figure 12-3 The Property Sheet]
The Test Menu pop-up window also opens simultaneously with the
Menu editor (Figure 12-2). It is a top-level window whose menu is
identical to the one you are editing. This window does nothing
when you choose menu items that are not top-level menu items or
submenus.
Because changes you make to the menu in the Browser window are
immediately reflected in the menu of the Test Menu window, you
can verify your changes as you make them.
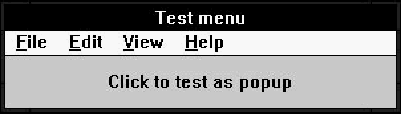
[Figure 12-4 The Test Menu window]
Now you can remove unnecessary menus and menu items.
- Click on "MENUITEM New" to select this menu item.
- Press Delete.
- Repeat the above steps to delete:
- "MENUITEM Save"
- "MENUITEM Save As"
- "POPUP Edit"
- "MENUITEM Index"
- "MENUITEM Using Help" and the following "SEPARATOR"
If you make a mistake, you can correct it by choosing Undo from
the Edit menu.
To close the Menu editor, choose Close Editing from the File menu,
or press Escape. The Browser window menu and toolbar return. The
right pane shows a preview of the menu.
Although we have removed menu items for commands that will not
be supported, at present it would still be possible to access some of
those commands through their accelerators. In the next section we
remove those commands from the accelerator table.
Customizing the Accelerator Table
To start the Accelerator Table editor:
- Click on Accelerator in the Browser window's upper-left
pane.
- Double-click on IDR_MAINFRAME in the lower-left pane.
The Accelerator Table editor opens in the Browser window (shown
in Figure 12-5). As with the Menu editor, the Accelerator Table
editor's menu replaces the Browser window's menu, and its toolbar
appears at the top of the right pane.
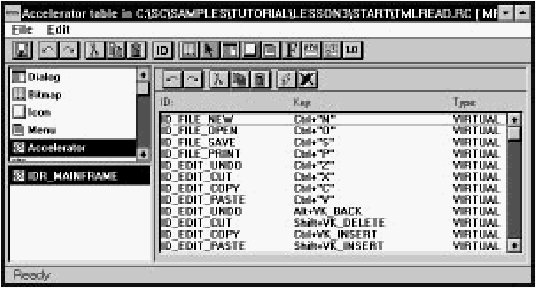
[Figure 12-5 The Accelerator Table editor in the Browser window]
Removing accelerators is quite similar to removing menu items. To
remove the unnecessary accelerators:
- Click on ID_FILE_NEW.
- Press Delete.
- Repeat the above steps for all the accelerators, leaving
only ID_FILE_OPEN and ID_FILE_PRINT.
As in the Menu editor and elsewhere in ResourceStudio, if you make
a mistake, you can correct it by choosing Undo from the Edit menu.
To close the Accelerator Table editor, press Escape.
Commands may be sent to TMLRead in one other way: by clicking
on buttons in the toolbar. In the next section we replace the toolbar
bitmap with one containing only commands that are supported by
TMLRead.
Importing a New Toolbar Bitmap
Before importing a new toolbar bitmap, delete the current toolbar
bitmap:
- Click on Bitmap in the Browser window's upper-left
pane.
- Click on IDR_MAINFRAME in the lower left-pane.
- Press Shift+ Delete.
You must now copy a bitmap from another resource script file. To
do this, you open a second Browser window to view the contents of
a resource script file containing the new toolbar bitmap. Then you
copy the bitmap to the clipboard and paste it into tmlread.rc.
- Double-click the ResourceStudio icon to restore the Shell
window.
- In the Shell window, choose Open from the File menu.
- Select the file newbar.rc and click OK.
- In the upper-left pane of the new Browser window, click
on Bitmap.
- In the lower-left pane, click on IDB_NEWBAR. A
preview of the bitmap appears in the right pane
(Figure 12-6).

[Figure 12-6 New toolbar bitmap]
- Choose Copy from the Edit menu. The bitmap is copied
to the clipboard.
- Choose Close from the File menu. The second Browser
window closes. Activate the Browser window containing
tmlread.rc by clicking on it.
- Choose Paste from the Edit menu. The bitmap is added
to your application's resources.
The new toolbar does not presently have the correct resource ID.
For the application framework to use it correctly, this toolbar's
resource ID must be identical to that of the application's menu and
accelerator table resources. To set the new bitmap's resource ID:
- Click on the Property Sheet to bring it to the front. The
Property Sheet shows the resource ID and memory
options for the bitmap resource.
- From the ID drop-down list, select IDR_MAINFRAME.
The initial resource customization is now complete. Next you exit
ResourceStudio and make a minor adjustment to update the source
code that loads the toolbar.
Exiting ResourceStudio
To save your work and exit Resource Studio:
- Choose Save from the Browser window's File menu.
- Choose Close from the File menu. The Browser window
closes, but the Shell window and Property Sheet remain
open.
- Choose Exit from the Shell window's File menu.
Setting Up the New Toolbar
The MFC framework uses a single bitmap to represent a set of
toolbar buttons. The correspondence between the button images in
the bitmap and the commands they represent is established in an
array in the source code. Because you have replaced the original
toolbar bitmap, you also must update this array.
- In the Project window, double-click on mainfrm.cpp.
A Source window opens, displaying the frame window
class's source code.
- Scroll downward a few lines until you find the following
code:
	// toolbar buttons -IDs are command buttons
	static UINT BASED_CODE buttons[] = {
		// same order as in the bitmap 'toolbar. bmp'
		ID_FILE_NEW,
		ID_FILE_OPEN,
		ID_FILE_SAVE,
		ID_SEPARATOR,
		ID_EDIT_CUT,
		ID_EDIT_COPY,
		ID_EDIT_PASTE,
		ID_SEPARATOR,
		ID_FILE_PRINT,
		ID_APP_ABOUT,
		ID_CONTEXT_HELP,
	};
- Remove and rearrange lines until the array looks like
this:
	// toolbar buttons -IDs are command buttons
	static UINT BASED_CODE buttons[] = {
		// same order as in the new toolbar bitmap
		ID_FILE_OPEN,
		ID_SEPARATOR,
		ID_FILE_PRINT,
		ID_SEPARATOR,
		ID_APP_ABOUT,
	};
- Save the code by choosing Save from the Source
window's File menu.
The buttons[] array now contains the command IDs of the three
toolbar buttons. The ID_SEPARATOR entries indicate where spaces
should be placed between the button images when drawing the
toolbar.
In the last section you build the application and view the results of
your labor.
Building and Running the Application
To build and run the application, choose Execute Program from
the IDDE Project menu. Because no executable has yet been built,
the IDDE automatically builds TMLRead and then runs it. (When you
try to run an existing executable that needs to be rebuilt, the IDDE
asks if you want to rebuild the program before running it.)
The source files are recompiled, the resource script is compiled by
the resource compiler, and all the object files and resources are
linked together to create the final application. Then the IDDE
minimizes itself and executes the application (Figure 12-7).
You can verify that the changes you made to the menu and toolbar
are correct. To close the application, choose Exit from the File
menu.
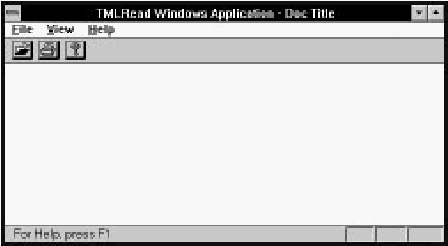
[Figure 12-7 TMLRead with customized menu and toolbar]
You now have completed initial customization of TMLRead's
resources. You deleted excess menu items and accelerators and
installed a new toolbar bitmap. More changes to the application's
resources can be made as the need arises; in Lesson 5, for example,
you will return to ResourceStudio to add support for a Preferences
dialog box. In the next lesson, though, you will use ClassExpress to
install functions to handle Windows messages, such as those
generated by key presses and button clicks.
In Lessons 2 and 3, you learned how to generate an application
framework and customize its user interface. However, the behavior
of the resulting application is still generic, because it is supplied
entirely by methods of MFC base classes. The inherited methods that
handle Windows messages, in particular, often do nothing more than
call DefWindowProc.
In this lesson, you use ClassExpress to expand the functionality of
the TML Reader and add member functions that handle Windows
messages announcing user actions. Member functions that handle
Windows messages are called message handlers, or just handlers.
You can think of them as callbacks, which are called by MFC when
the message they are intended to process is received. A message
handler is called in response to only one message.
The Windows message stream is the lifeblood of a Windows
application, regardless of whether the application is constructed in
an object-oriented or a procedural way. A well-behaved Windows
application can interact with the user only if it taps into the message
stream and responds to messages in nondefault ways. Using
ClassExpress to add MFC message handlers demonstrates how easy it
is to enhance the behavior of your MFC application.
In this lesson, you:
- Launch ClassExpress from the IDDE
- Use ClassExpress to add message handlers
- Edit message handlers in the IDDE Source window
- Rebuild and run the application
At the conclusion of this lesson, you will have:
- Seen how Windows messages are handled in an MFC
application
- Used ClassExpress to perform the purely administrative
chores associated with handling Windows messages
The next section provides a brief introduction to Windows message
handling in MFC to help you understand how messages are handled
in TML Reader.
Windows Message Handling in MFC
Regardless of how it is written, a Windows application receives
messages that inform it of user actions and their consequences,
changes in the state of other applications, or changes in the state of
Windows itself. MFC transforms this message-driven model into the
object-oriented model defined by its class hierarchy, thereby
introducing several improvements to the design of applications. To
discuss this transformation and its benefits, it is necessary first to
review how messages are handled in a traditional Windows
program, and to identify the shortcomings of that approach.
Message handling in a traditional Windows application
In a traditional Windows program written in C, you handle a
Windows message by adding code directly to the window procedure
to which that message is dispatched by your application's message
loop. The window procedure usually consists of a large switch
statement whose cases are different messages.
For example, to handle the WM_SIZE message, you must add a
case WM_SIZE to the switch.
The statements following that case
statement must have to unpack and coerce the window procedure's
parameters, wParam and lParam, into constituent parts in a way
that is specific to the WM_SIZE message. The result would look
much like the following:
	LRESULT CALLBACK WndProc(HWND hwnd, UINT msg, WPARAM wParam, LPARAM lParam)
	{
	    // local and static variables...
	    switch (msg)
	    {
		// ...
		case WM_SIZE:
		{
		    UINT nType = (UINT) wParam;
		    int cx = LOWORD(lParam);
		    int cy = HIWORD(lParam);
		    // Now do what you really want to do
		    // ...
		}
		break;
		// ...
		default:
		    break;
	    }
	    return DefWindowProc(hwnd, msg, wParam, lParam);
	}
The switch statement usually sprawls across several pages, and the
bodies of case statements often spill over the right margin of the
page. Data that must be preserved across messages or shared
between cases is usually stored in automatic or static variables visible
to every case. The result enjoys none of the benefits of
encapsulation or data hiding afforded by C++, and it is difficult to
read, comprehend, and maintain.
MFC's design
In MFC, window procedures are part of MFC itself; you do not edit
them. Instead, the window procedures route each message to a
handler- a member function of some class- whose purpose is to
process that message. MFC provides default handlers, which
collectively define the default behavior of an MFC application. You
supply handlers only for those messages you want to process. Each
handler you supply is a member function of one of your derived
classes and overrides the inherited handler in the base class.
However, you will sometimes find that your handler can call the
inherited handler to perform the bulk of its work.
For example, to handle the WM_SIZE message, use ClassExpress to
add a handler for this message to your View class. (By convention,
the handler for the WM_SIZE message is named OnSize.)
Whenever a WM_SIZE message is received by a window represented
by an object of your View class, your handler is called. The
prototype of this handler is as follows:
void OnSize(UINT nType, int cx, int cy);
Notice that the parameters of OnSize contain the same information
that the WM_SIZE message bears in the wParam and lParam
window procedure arguments, but in an immediately usable form.
No unpacking or typecasting is required. In general, the signature of
each handler- its return type, the number of its arguments and their
types- is specific and appropriate to the message it processes. MFC
parses the messages before calling the handler.
To route Windows messages to handlers, MFC consults tables, called
message maps, that pair Windows messages with the member
functions that handle them. You never have to edit message maps
manually because AppExpress and ClassExpress create and maintain
them for you. AppExpress creates message maps when you generate
an application framework. Their definitions are placed in the
implementation (.cpp) files of your derived classes. When you use
ClassExpress to add a handler to a class, the message map is updated
automatically with a new entry associating the chosen message with
your handler. Furthermore, ClassExpress adds a prototype for the
new handler to the class's header file and inserts a stub for the
member function into the implementation file. All you need to do is
to add code to the body of the handler.
Note:
This introduction to MFC message handling has
necessarily been brief and has glossed over several
topics you will want to learn more about. For a
definitive discussion of how MFC works, see the
expository chapters of the Microsoft Foundation
Class Library Reference.
Because you used AppExpress in Lesson 2 to generate an application
framework for the TML Reader, message maps have already been
created for your derived classes. During the course of this lesson,
ClassExpress updates them. ClassExpress can be run either
separately- from a Program Manager icon- or from within the
IDDE. Because you will be using the Source window to edit the
code that ClassExpress generates, you will launch ClassExpress from
within the IDDE.
Launching ClassExpress
To launch ClassExpress from the IDDE:
- If you are not already in the IDDE, launch it.
- Open the project tmlread.prj in directory
samples\tutorial\lesson4\start.
- Choose ClassExpress from the Tools menu. This
launches ClassExpress and automatically loads the
project tmlread.prj.
The ClassExpress window features a multipage interface. Its left
column presents a list of the six different pages that can be displayed
in the area to the right. You will work on the Message Maps page,
which is selected automatically when you launch ClassExpress. The
ClassExpress window is displayed, as in Figure 13-1.

[Figure 13-1 ClassExpress, displaying the Message Maps page]
The lists on the Message Maps page
The drop-down combobox at the top of the page labeled Class
contains a list of all derived classes in the TML Reader application.
The class selected here directly determines the contents of two lists
beneath it- those labeled Control IDs in Class and Function Name.
The list labeled Control IDs in Class contains an entry for the class
itself, as well as the names of any commands and controls that the
selected class could potentially handle.
The list labeled Function Name contains a list of message handlers
already generated for the selected class by AppExpress. These
methods are referenced in the class's message map.
The contents of the list labeled Windows Messages depends on what
you select in the Control IDs in Class list. If you select the class name
in the Control IDs list, then the Windows Messages list contains a list
of Windows messages. However, if you select a control ID, the
Windows messages list contains notification messages appropriate to
that type of control. If you select a command ID (usually
corresponding to a menu item), the rightmost list contains names of
potential message map entries for commands.
Because the TML Reader handles messages that signal user input, the
handlers must be added to the class corresponding to the window
that receives those messages. Thus, you will add the handlers to the
View class, CTMLReadView.
Adding Message Handlers
The requirements of the TML Reader dictate the messages you will
add handlers for.
- WM_SIZE
- Detect when the window is resized, so it can recompute word-wrapping
- WM_VSCROLL
- Permit scrolling through a document using the vertical scrollbar
- WM_KEYDOWN
- Permit scrolling through a document using the keyboard
- WM_SETCURSOR
- Change the cursor when it is positioned over a hyperlink
- WM_LBUTTONDOWN
- Detect clicks on hyperlink jumps so it can change its display
- WM_ERASEBKGND
- Repaint the window background
Adding a handler for WM_SIZE
To add a handler for WM_SIZE to your View class:
- From the drop-down list labeled Class, select the name
of the View class, CTMLReadView.
- Use the scrollbar to move through the Windows
messages list until the message WM_SIZE is visible.
- Double-click on WM_SIZE.
Notice that a new entry appears in the Function Name list:
afx_msg void OnSize(UINT nType, int cx, int cy);
This is the prototype of a handler for the WM_SIZE message, as it
would appear within a class declaration.
Also notice that a solid square appears to the left of the message
name, WM_SIZE, indicating that a handler now exists for that
message.
The ClassExpress window is displayed, as in Figure 13-2.
[Figure 13-2 ClassExpress after adding a WM_SIZE handler]
Adding other message handlers
Follow the procedure described in Steps 2 and 3 in the previous
section to add a handler for each of the messages WM_VSCROLL,
WM_KEYDOWN, WM_SETCURSOR, WM_LBUTTONDOWN and
WM_ERASEBKGND: use the scrollbar of the Windows messages list to
scroll to the message, then double-click on the message. Again,
notice that for each message you double-click on, a new prototype is
added to the Function name list, and a solid square appears to the
left of the message name.
What you have just done
When you add a handler for a message WM_messagename,
ClassExpress generates code in three places.
For example, when you add a handler for WM_SIZE, ClassExpress
generates the following:
- The prototype for OnSize is added to the declaration of
the class CTMLReadView in tmlrdvw.h.
- An entry ON_WM_SIZE() is added to the message map
for the class CTMLReadView in its implementation file,
tmlrdvw.cpp.
- A stub function for CTMLReadView::OnSize is added
to the file tmlrdvw.cpp. The body of the function just
calls the base class handler CView::OnSize.
Now, whenever a CTMLReadView window receives a WM_SIZE
message, the member function OnSize is called to handle it.
Saving Your Work
To save your work and return to the IDDE, click Close at the bottom
of the ClassExpress window.
Clicking Close updates your project files and returns you to the
IDDE. To observe the handlers in action and confirm that they are
indeed called when you expect them to be, you can add code that
notifies you when they are called.
Adding Code to Handlers
To add code to the OnLButtonDown and OnSize handlers, follow
these steps:
- Open the file tmlrdvw.cpp in a Source window.
- Find the function CTMLReadView::OnLButtonDown.
- Add the following line to the top of the function:
AfxMessageBox("Left button clicked!");
- Now find the function CTMLReadView::OnSize.
- Add the following line to the top of the function:
::MessageBeep(-1);
- Type Ctrl+S to save your changes.
After the project is rebuilt, you'll want to confirm that the appropriate
statement executes whenever you click in the client area or resize
the window.
Building and Running the Project
To see the effect of what you've done, perform these steps:
- Choose Build from the Project menu to update the
executable.
- Choose Execute Program from the Project menu to
run the program.
- With the mouse cursor in the client area of the program's
window, press the left mouse button. A box containing
the message "Left button clicked!" is displayed
(Figure 13-3). This message is displayed each time you
press the left mouse button in the client area. It is not
displayed when you release the left mouse button, move
the mouse, or click with the right mouse button. To
remove the message box, click OK.

[Figure 13-3 TML Reader running, with message box displayed]
- Now resize the window by dragging a corner of the
window's border to a different position. You hear a beep
when you release the mouse button.
Note:
You will already have heard beeps during the initial
sequence of messages received by the View
window. This is normal: the window receives
multiple WM_SIZE messages early in its life-cycle.
- After you have confirmed to your satisfaction that the
handlers are called when, and only when, they ought to
be called, quit the program by choosing Exit from
TMLRead's File menu.
Summary
In this lesson, you have learned:
- How Windows messages are handled in an MFC
application
- How to launch ClassExpress from the IDDE and use it to
add message handlers
- How to verify that the message handlers are called in
response to the messages they handle
In the next lesson, you implement a Preferences dialog box. You
learn how MFC and ClassExpress make it easy to create a dialog box,
validate its data, and exchange data between the dialog box and
your application. In TML Reader's present state, the only preference
one could have would be for the application to actually do
something. Toward that end, we have added code to the result of
this lesson so that your starting point in the next lesson is a
functioning TML Reader.
In Lesson 4, you learned how to use ClassExpress to add handlers for
Windows messages. The application from that lesson is still skeletal.
Its interface is complete, and it receives the Windows messages it
needs to act upon, but every user action ultimately results in a call to
a stub function. After completing Lesson 4, the next step is writing
code that supplies functionality.
This lesson shows you how to use some additional, powerful
features of Digital Mars C++. To accomplish this, a body of code that
supplies some substantial functionality has been added to the
application you built in Lesson 4. In between the end of Lesson 4
and the start of this lesson, only the Source window has been used
to create or change C++ files in the project. That is, none of the new
code has been automatically generated; it has all been manually
entered.
Start this lesson with the project
samples\tutorial\lesson5\start\tmlread.prj,
located in the directory where you installed
Digital Mars C++. The first task you will perform is to build that project.
Once you have done so, you will have a fully functional TML
Reader.
In the remainder of the lesson, you will implement a Preferences
dialog box. In addition to supplying C++ code for the start of this
lesson, we have also already used ResourceStudio to create a dialog
resource that defines the Preferences dialog box. However, this
dialog box is not yet connected to the application. It lies dormant
within tmlread.rc. You will perform all the tasks necessary to
animate it and make it fully functional.
Specifically, you'll use ResourceStudio to:
- Add a new menu item for invoking the Preferences
dialog box
- Launch ClassExpress
Within ClassExpress, you'll:
- Create a new class that represents the Preferences
dialog box
- Add a handler for the new menu item
- Add a handler to this new class for one of the buttons in
the dialog box
- Add data members to the new class that transfer
information between the application's data and the
controls in the dialog box. You will also specify
validation criteria for the values that the user enters in
the dialog box, so that MFC can perform automatic data
validation.
Finally, within the IDDE, you will:
- Add code for the two new handlers
- Rebuild the project and examine the results of your
efforts
After completing this lesson, you will have:
- Added a new menu command
- Used MFC and ClassExpress to implement a dialog box,
validate its data, and exchange data between the dialog
box and your application
The next section walks you through building and running the TML
Reader. It also discusses how the Reader displays files and how to
create a Preferences dialog box which lets the user configure how
the files are displayed.
Building and Exploring the TML Reader
This section acquaints you with the major features of the TML
Reader. After building the Reader, you will use it to read sample files
that contain TML formatting strings.
Before building the Reader, you must first copy the file
viewhdrs.h from the tutorial\tmlread directory to the
tutorial\lesson5\backup directories. Various TMLRead
modules include this header file, and cannot be compiled without it.
Building the Reader
Follow the first four steps to build the TML Reader.
- If you are not already in the IDDE, launch it.
- Open the project tmlread.prj in the directory
samples\tutorial\lesson5\start located
beneath the directory where you installed Digital Mars C++.
- Choose Build from the Project menu.
- Choose Execute Program from the Project menu to run
the program. The IDDE minimizes, and TMLRead is
launched. No file is yet displayed.
Exploring the capabilities of the Reader
Now use the Reader to browse two sample files that illustrate the
kinds of formatting that the Reader can display.
- Choose Open from TMLRead's File menu.
- In the File Open dialog box, select the file
sample.tml in the
samples\tutorial\lesson5\start directory,
then click OK. TMLRead reads, parses, and displays the
file.
- Scroll within the document using the arrow keys and the
Page Up and Page Down keys. Code within
CTMLReadView::OnKeyDown causes the scrolling to
occur.
- Now scroll by using the vertical scroll bar. In this case,
code within CTMLReadView::OnVScroll is
responsible for the scrolling.
- Drag either the left or right border of the window to
resize it. Notice that the ends of lines are automatically
adjusted so that paragraphs wrap properly, filling almost
all of the window's width. The handler
CTMLReadView::OnSize causes rewrapping to occur.
- If you are not now displaying the beginning of the file,
press the Home key. The heading "Contents" announces
the table of contents of this document, presented as a
hierarchical bulleted list of the major sections of
sample.tml. Each line in the table of contents is
underlined and displayed in green. These properties of
the text indicate that it is a hyperlink. Place the cursor
over any hyperlink; the cursor changes to a hand with an
extended index finger, a visual cue that you can
meaningfully click on the text. Move the cursor so that it
is not over a hyperlink; the cursor reverts to the default
cursor. This behavior is provided by
CTMLReadView::OnSetCursor after a necessary
initialization by CTMLReadView::PreCreateWindow.
- Click on the last hyperlink in the Contents section,
named "Hyperlinks," with the left mouse button. This
displays the last section of the file. The method
CTMLReadView::OnLButtonDown handles the mouse
click by determining whether or not it occurred on a
hyperlink; if a hyperlink is clicked, the jump occurs.
- At the end of the last paragraph, there is the following
hyperlink phrase: "here is a link to another sample
document." Click on this phrase. The file complex.tml
is read and displayed. Again,
CTMLReadView::OnLButtonDown causes the jump to
occur.
- Choose Previous File from TMLRead's File menu to
return to sample.tml.
- Examine each section of sample.tml by clicking each
hyperlink in the document's contents at the top of the
file. This will give you a good sense of the features of
TML, the subset of HTML (HyperText Markup Language)
recognized by the Reader.
- Choose Print Preview from TMLRead's File menu to see
a WYSIWYG display of how sample.tml would look if
it were printed on the current default printer. The
presence and functionality of the buttons at the top of
the Print Preview window has been supplied almost
entirely by MFC. When you finish looking at the Print
Preview display, click Close to return to the main view of
the Reader.
- Choose Exit from TMLRead's File menu. This closes the
Reader and returns you to the IDDE.
Turning aspects of the Reader's display into preferences
A few numerical quantities that help determine how TMLRead
displays documents are at present hard-coded. These numbers are
stored as int data members of CTMLReadView and are described
in the following table:
- nParVSpace
- Vertical space between paragraphs
- nMargin
- Amount of horizontal space between the document and
the edges of the window
- nIndent
- Amount by which items in a list are offset from the left margin
The CTMLReadView constructor calls
CTMLReadView::SetDefaultPrefs to initialize these data
members with default values provided by the following enum
constants (defined in the class declaration):
	eDftParVSpace = 12
	eDftMargin = 10
	eDftIndent = 40
The Preferences dialog box lets the user alter these values, as
shown in Figure 14-1.
[Figure 14-1 The Preferences dialog box]
Of course, the user should be allowed to configure many other
aspects of the Reader's display, such as colors and fonts. However,
implementing this simple Preferences dialog box gives you the
fundamental skills needed to realize more ambitious designs using
the Digital Mars C++ tools.
Before you connect the Reader's data with the controls of the
Preferences dialog box, you need to first outfit the user interface
with a way to call the dialog box. In the next section, therefore,
you'll use ResourceStudio to add a menu item to TMLRead.
Using ResourceStudio to Add a Menu Item
To add a Preferences item to the View menu of TMLRead, launch
ResourceStudio from within the IDDE so that it loads tmlread.rc.
To do this, follow these steps:
- Open the Project window if it is not already open.
- Double-click on tmlread.rc in the Project window.
When asked if you want to use ResourceStudio to edit
this file, click Yes.
The Browser window of ResourceStudio opens, as
shown in Figure 14-2.
[Figure 14-2 The Browser window of ResourceStudio]
- Select the item named Menu in the upper-left pane. The
lower-left pane now displays the ID of the TMLRead
menu, IDR_MAINFRAME.
- Double-click on IDR_MAINFRAME in the lower-left
pane. The pane on the right now contains a
representation of the TMLRead menu, shown in
Figure 14-3.
The Property Sheet and the Test menu window also
open; they are described in Chapter 12, "Lesson 3:
Customize the Interface."
[Figure 14-3 ResourceStudio displaying the TMLRead menu]
- In the right pane, click on the item MENUITEM Status
Bar to select it. This item is the last one belonging to the
POPUP View item. When a new menu item is added, it
will appear beneath this one.
- Choose New Item from the Menu menu in the Browser
window. This inserts a new item whose text is Item, and
creates a new ID for it. The Property Sheet, shown in
Figure 14-4, shows these settings.
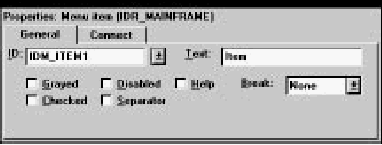
[Figure 14-4 The Property Sheet after adding a new item]
- Click on the Property Sheet to make it active.
- Click on the General tab near the top of the window to
ensure that the General page is displayed.
- In the ID textbox, type ID_VIEW_PREFS to change the
ID name.
- In the text textbox, type &Preferences....
- Click on the Connect tab.
- On this page, type the string Customize the
appearance of the view. This prompt will appear
in the status bar whenever the Preferences item is
selected.
- Save your work by choosing Save from the Browser
window's File menu.
- Close the Browser window, close the ResourceStudio
Shell window (and with it, the Property Sheet), and
return to the IDDE.
You have now created the desired menu item. However, TMLRead
does not yet contain a command handler for ID_VIEW_PREFS. In
the next section, you will add one using ClassExpress, in which the
bulk of the remaining work will take place.
Two command handlers must be added- one for ID_VIEW_PREFS,
the other for the Default button of the Preferences dialog box.
Thus, a class must be created that represents the Preferences dialog
box in the same way that CAboutDlg represents the About dialog
box. The handler for the Default button will be a method for this
new class. In the next section, you use ClassExpress to add the
CPrefDialog class.
Using ClassExpress to Create a New Dialog Class
Follow these steps to create a class that corresponds to the
Preferences dialog box:
- Launch ClassExpress by choosing ClassExpress from
the IDDE's Tools menu.
- Click the Add Class button. The Add Class dialog box
opens, as shown in Figure 14-5. ClassExpress detects that
a new dialog box has been added to the project, and
assumes that you want to create a corresponding class.
It initializes the selections in the Class Type and Dialog
ID drop-down lists to reflect this assumption: Class Type
is set to Dialog, and Dialog ID to IDD_PREFDIALOG.
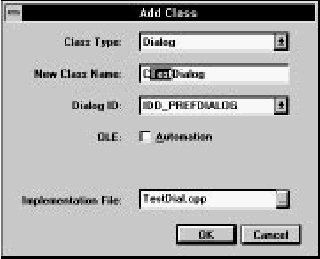
[Figure 14-5 The Add Class dialog box]
The focus is in the New Class Name editbox.
ClassExpress has suggested the name CTestDialog
and has selected the substring Test so that you can
change it just by typing. It has also suggested
TestDial.cpp as the name of the implementation file.
- Type Pref to change the name of the dialog class to
CPrefDialog. Notice that ClassExpress accordingly
changes the suggested name of the implementation file
to PrefDial.cpp.
- Click OK in the Add Class dialog box to accept the
settings. ClassExpress confirms the operation with a
message box.
- Click OK to close this message box. This returns you to
the ClassExpress window, which displays the Message
Maps page, as shown in Figure 14-6.
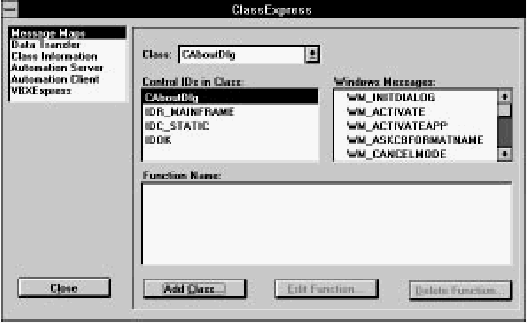
[Figure 14-6 ClassExpress displaying the Message Maps page]
Using ClassExpress to Add Methods
In this section, you'll add two methods that respond to user actions.
One opens the Preferences dialog box when the Preferences
menu item is chosen, and updates the Reader's display if the OK
button is clicked in the dialog box. The other method handles the
clicking of the Default button in the Preferences dialog box. You
will see later why it is unnecessary to add handlers for the OK and
Cancel buttons.
First you'll add a method that handles the command generated when
Preferences is chosen from the View menu. This method also is
responsible for updating the application to reflect any changed
preferences. Then, you'll add a method that responds to a click on
the Default button of the Preferences dialog box.
The procedure in each case is similar to the one that you used in
Lesson 4. The results of your actions also will be similar:
ClassExpress adds these methods to class declarations, add entries to
Message Maps, and create stub functions for the methods. When you
return to the IDDE, you will only need to write the code for these
two methods.
Creating a handler for the Preferences command
You will use ClassExpress to bind the ID_VIEW_PREFS command
ID to a new method that creates and initializes an object of class
CPrefDialog, and then uses this object to display the dialog box.
When the user closes the dialog box, this method determines
whether the user clicked OK or Cancel. If OK was clicked,
application data must be updated, and the view must be redrawn.
This method needs access to data members of CTMLReadView in
order to initialize the dialog box and to update those data members
if the user clicks OK. Because of these requirements, the method is
added to the class CTMLReadView.
- Select the class CTMLReadView in the Class combobox
on the Message Maps page.
- In the Control IDs in the Class listbox, select
ID_VIEW_PREFS, the ID of the command issued when
the Preferences item in the View menu is chosen. The
listbox on the right, Windows Messages, now contains
the two items, COMMAND and UPDATE_COMMAND_UI.
- Double-click on COMMAND in the Windows Messages
listbox. The Method Name dialog box opens, asking
you for a name for the method that is called when
Preferences is chosen. ClassExpress suggests the name
OnViewPrefs for this method.
- Click OK in the Method Name dialog to accept the
name OnViewPrefs.
ClassExpress adds this method to the declaration of class
CTMLReadView in the header file for the class. It also updates the
class implementation file by adding an entry to the class's Message
Map, and by adding a stub function
CTMLReadView::OnViewPrefs.
Creating a handler for the Default button of the Preferences dialog box
You will now add a method to CPrefDialog for handling clicks on
the Default button in the Preferences dialog box. This method must
update the values displayed in the controls of the dialog box with
the same default values used to initialize the CTMLReadView data
members nParVSpace, nMargin, and nIndent. Because the
default values are public enum constants, this method requires no
access privileges to CTMLReadView.
Follow these steps to add this method:
- Select the class CPrefDialog in the Class combobox
on the Message Maps page.
- In the Control IDs in Class listbox, select
ID_PREFS_DEFAULT, the ID of the Default button. The
listbox on the right, Windows Messages, now contains
the two items BN_CLICKED and BN_DOUBLECLICKED.
Note:
These so-called messages are actually notifications
that the button sends to its parent, the Preferences
dialog box, via WM_COMMAND messages. BN_xxx
stands for Button Notification. The BN_xxx
identifiers are defined in windows.h.
- In the Windows Messages listbox, double-click on
BN_CLICKED, the notification sent when the Default
button is clicked. The Method Name dialog box opens,
suggesting OnClickedPrefsDefault for the method
name.
- Change this name to OnDefault.
- Click OK in the Method Name dialog box to return to
the ClassExpress main window.
As it did when you added CTMLReadView::OnViewPrefs,
ClassExpress adds a prototype for OnDefault to the declaration of
the class CPrefDialog in the class's header file. It also updates the
class implementation file by adding an entry to the class's Message
Map. It also adds a stub function CPrefDialog::OnDefault.
Once you are back in the IDDE, you must write code to implement
these two handlers. To have the handlers to perform their intended
tasks, you must first make it possible to transfer data into and out of
the controls of the Preferences dialog box. MFC and ClassExpress
make it surprisingly easy not only to transfer data to and from a
dialog box, but also to validate data that the user has entered into a
dialog's controls. Adding these capabilities is addressed in the next
section, the last one in which you use ClassExpress.
Adding Dialog Data Exchange and Validation
Windows programs written in C traditionally exchange data with
dialog boxes by fetching data from each control in a manner
particular to the control type (edit control, radio button, check box,
and so on) and particular to the intended type of the data (string,
integer, long integer, and so on). Then, the extracted data is usually
stored in static storage. Also, there are rarely any general-purpose
facilities from Windows API for validating data that the user enters in
a dialog box- placing another burden on the programmer.
MFC and ClassExpress add order, simplicity and elegance to this
situation. To use the MFC model of dialog box data exchange and
validation, you must first add data members to the dialog class. (This
replaces the ad hoc collection of static data favored by the
traditional approach.) You use ClassExpress to associate data
members with controls in the dialog box. MFC then automates the
transfer of data between the dialog's controls and the dialog class
data members. When adding a data member with ClassExpress, you
also specify its type and the validation criteria in the associated
control. MFC uses this information to perform its automatic data
validation.
In the next step, you'll add data members to the CPrefDialog
class using the Data Transfer page of ClassExpress. After you
complete this task, there is a review of the changes that ClassExpress
has made to the CPrefDialog source files, and an explanation of
how MFC accomplishes data exchange and validation.
Throughout this section, you'll work with the CPrefDialog class
on the Data Transfer page of ClassExpress. Perform the following
steps to set up ClassExpress for this part of the lesson:
- In the upper-left listbox, select the second item, Data
Transfer. ClassExpress opens the Data Transfer page in
the larger pane on the right, as shown in Figure 14-7.
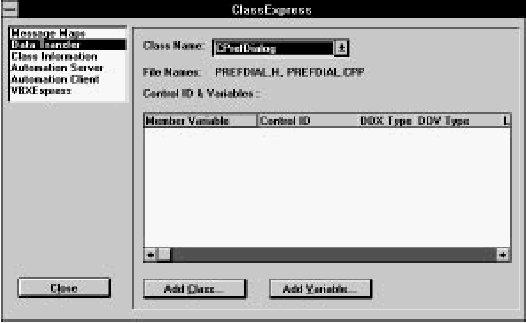
[Figure 14-7 ClassExpress displaying the Data Transfer page]
- Be sure that CPrefDialog is selected in the Class Name
combobox at the top of the Data Transfer page.
Adding data members to CPrefDialog
To add data members, to CPref Dialog, carry out the following steps:
- Click on the Add Variable button. The Add Member
Variable dialog box opens, as shown in Figure 14-8.
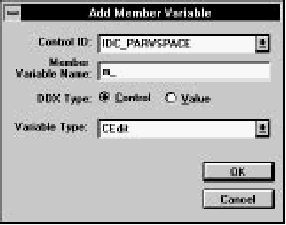
[Figure 14-8 The Add Member Variable dialog box]
- Select IDC_PARVSPACE from the Control ID combobox.
- Change the Member Variable Name to nParVSpace.
(For simplicity, you can name the member variables of
CPrefDialog the same as the members of CTMLReadView
to which they correspond.)
- For the DDX Type option, select Value.
In fact, the Control Name combobox does not contain
symbolic indentifiers for the three edit controls in the
Preferences dialog box. Rather, you see only the integer
resource ids of these controls. Select 3001, the resource
id of the Paragraph Spacing edit control.
- In the Variable Type combobox, select int. Two new
textboxes, Minimum Value and Maximum Value, appear
at the bottom of the dialog box, as shown in Figure 14-9.
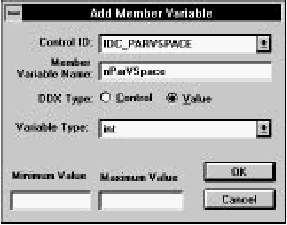
[Figure 14-9 Add Member Variable with Variable Type set to int]
- Type 0 in the Minimum Value field.
- Type 100 in the Maximum Value field.
- Click OK in the Add Member Variable dialog box. The
Data Transfer page now reflects this additional data
member and its validation criteria in the Control ID and
Variables list, as shown in Figure 14-10.
[Figure 14-10 The Data Transfer page after adding nParVSpace]
- Follow the procedure described in steps 3 through 10 of
the previous task to add an int variable named
nMargin associated with the control IDC_MARGIN. Set
its minimum and maximum values to 0 and 50,
respectively.
In fact, the Control Name combobox does not contain
symbolic identifiers for the three edit controls in the
Preferences dialog box. Rather, you see only the integer
resource ids of these controls. Therefore, add a data
member corresponding to the control 3004, the resource
id of the Margin edit control.
- Then, follow steps 3 through 10 to add a final int
variable, nIndent, associated with the control
IDC_INDENT. Sets its minimum and maximum values to
0 and 120, respectively.
In fact, the Control Name combobox does not contain
symbolic identifiers for the three edit controls in the
Preferences dialog box. Rather, you see only the integer
resource ids of these controls. Therefore, add a data
member corresponding to the control 3005, the resource
id of the Indent edit control.
To return to the IDDE, click the Close button. The IDDE's Project
window now lists the source file prefdial.cpp.
Seeing the changes in the CPrefDialog source files
As a result of adding data members to CPrefDialog, ClassExpress
makes various changes to the header and implementation files of the
class CPrefDialog including:
Changes to the class definition
ClassExpress added the following lines to the declaration of
CPrefDialog in prefdial.h:
	// Dialog Data
	    //{{ AFX_DATA(CPrefDialog)
	    enum { IDD = IDD_PREFDIALOG };
	    int nParVSpace;
	    int nMargin;
	    int nIndent;
	    //}} AFX_DATA

	// Implementation
	protected:
	    virtual void DoDataExchange(CDataExchange* pDX); // DDX/ DDV support
The comments help ClassExpress find where subsequently added
data members should be declared. (The variables that ClassExpress
adds are public.) The enum constant IDD is used by the
CPrefDialog constructor as an argument to the constructor of its
base class, CDialog.
Changes to the constructor
ClassExpress changes the CPrefDialog constructor so that it
appears as follows:
	CPrefDialog::CPrefDialog(CWnd* pParent /*= NULL*/)
	   : CDialog(CPrefDialog::IDD, pParent)
	{
	    //{{ AFX_DATA_INIT(CPrefDialog)
	    nParVSpace = 0;
	    nMargin = 0;
	    nIndent = 0;
	    //}} AFX_DATA_INIT
	}
The AFX_DATA_INIT comments are used by ClassExpress to
delimit the location within the constructor where data members
participating in data exchange and validation should be initialized.
All the data members that you added are set to 0. Therefore, before
it displays the Preferences dialog box, the handler
CTMLReadView::OnViewPrefs first sets these CPrefDialog data
members to the values of the CTMLReadView data members to
which they correspond.
Changes to the DoDataExchange function
The protected member function DoDataExchange is the
workhorse that transfers data between the added data members and
the controls of the Preferences dialog box. It also validates the
values entered into the controls when the user clicks OK. (The
acronym DDX stands for Dialog Data eXchange; DDV stands for
Dialog Data Validation.) ClassExpress also writes the
DoDataExchange function, using the information you gave it when
you added each variable. The implementation of the function, in
PrefDial.cpp, looks like this:
	void CPrefDialog::DoDataExchange(CDataExchange* pDX)
	{
	    CDialog::DoDataExchange(pDX);
	    //{{ AFX_DATA_MAP(CPrefDialog)
	    DDX_Text(pDX, IDC_PARVSPACE, nParVSpace);
	    DDV_MinMaxInt(pDX, nParVSpace, 0, 100);
	    DDX_Text(pDX, IDC_MARGIN, nMargin);
	    DDV_MinMaxInt(pDX, nMargin, 0, 50);
	    DDX_Text(pDX, IDC_INDENT, nIndent);
	    DDV_MinMaxInt(pDX, nIndent, 0, 120);
	    //}} AFX_DATA_MAP
	}
Again, the AFX_DATA_MAP comments serve only as delimiters used
by ClassExpress when adding data members.
The overloaded DDX_xxx and DDV_xxx functions are declared in the
MFC include file afxdd_.h. These functions all take a pointer,
pDX,
to a CDataExchange object. This object contains two public data
members that enable the functions.
The CDataExchange data member m_bSaveAndValidate
informs the functions of the direction of the transfer. If
m_bSaveAndValidate is TRUE, then the transfer is from the
controls to the data members; if this data member is FALSE, the
transfer is from the data members to the controls. The DDX_xxx
functions perform the appropriate transfer in each case. If
m_bSaveAndValidate is TRUE, each DDV_xxx validation function
checks whether the data meets the validation criteria it implements.
If the data fails to meet the criteria, the validation function opens a
message box informing the user, and sets the focus to the control
containing the invalid value. If m_bSaveAndValidate is FALSE,
the validation functions do nothing.
The CDataExchange data member m_pDlgWnd is a pointer to the
CWnd whose data is being transferred and validated. The presence of
this data member saves DoDataExchange from having to pass the
this pointer to every DDX_xxx and DDV_xxx function.
Note:
Because DoDataExchange is a CWnd member
function and m_pDlgWnd is a CWnd*, DDX and
DDV can be used with any window, and not just
with those derived from CDialog.
DoDataExchange is called by the UpdateData function
whenever data exchange must take place. You never call it directly.
In particular, DoDataExchange is called when a window or dialog
box is first opened to initialize its controls. It is also called by the
CDialog member function OnOK when a user clicks on a button in
the dialog box with an ID of IDOK. Thus in the Preferences dialog
box, the inherited handler for the OK button already performs data
transfer and validation, so you do not need to supply an override.
Similarly, the CDialog member function OnCancel simply
terminates a dialog box- behavior completely suitable for the
Preferences dialog box.
With these concepts in mind, you can clearly see the purpose and
effect of the handlers that you supply in the next task.
Writing Code for the New Handlers
Now, the only task left is to provide implementations of the handlers
CTMLReadView::OnViewPrefs and
CPrefDialog::OnDefault. Both handlers are straightforward.
Implementing CTMLReadView::OnViewPrefs
Carry out these steps to create the handler:
- In the Project window, double-click on tmlrdvw.cpp.
This opens a Source window in which you can edit the
file tmlrdvw.cpp.
- Find the group of #include statements toward the top
of the file. Add this line after the last #include
statement:
#include "prefdial.h"
- Find the function CTMLReadView::OnViewPrefs. (It
is at the bottom of the file.)
- Edit the function by entering the following code. (You
may omit the lengthy comments.)
	void CTMLReadView::OnViewPrefs()
	{
	    CPrefDialog dlgPref;

	    // Initialize dlgPref data members with
	    // current values from CTMLReadView
	    //
	    dlgPref.nParVSpace = nParVSpace;
	    dlgPref.nMargin = nMargin;
	    dlgPref. nIndent = nIndent;

	    // Display the dialog modally.
	    // If user clicks OK, DoDataExchange
	    // will be called to validate data in
	    // the controls. If the controls hold valid
	    // values, their contents will be
	    // transferred to the CPrefDialog data
	    // members. In that case, we must transfer
	    // the values to the corresponding
	    // CTMLReadView data members.
	    //
	    if (dlgPref. DoModal() == IDOK)
	    {
		// Transfer the data to our view class
		//
		nParVSpace = dlgPref.nParVSpace;
		nMargin = dlgPref.nMargin;
		nIndent = dlgPref.nIndent;

		// Make sure that the view is redrawn
		// to reflect the new preferences
		//
		bWordsWrapped = FALSE;
		OnUpdate(NULL, 0L, NULL);
	    }
	}
- Save your work by choosing Save from the File menu of
the Source window.
- Close the Source window by clicking on the close box in
the upper-left corner of the window (on the caption bar).
Implementing CPrefDialog::OnDefault
This handler is even simpler. To create it, perform these steps:
- In the Project window, double click on prefdial.cpp.
This opens a Source window in which you can edit the
file prefdial.cpp.
- Find the group of #include statements, toward the top
of the file. Add this statement to the end of the group:
#include "viewhdrs.h"
- Find the function CPrefDialog::OnDefault. (It is at
the bottom of the file.)
- Edit the function by entering the following code. (You
may omit the lengthy comments.)
	void CPrefDialog::OnDefault()
	{
	    // Set data members to default values
	    //
	    nParVSpace = CTMLReadView::eDftParVSpace;
	    nMargin = CTMLReadView::eDftMargin;
	    nIndent = CTMLReadView::eDftIndent;

	    // Transfer these values to the controls.
	    // UpdateData calls DoDataExchange to effect
	    // the transfer. The argument determines the
	    // direction of the transfer:
	    // TRUE causes values to move from the
	    // controls to the data members;
	    // FALSE, used here, transfers the values of
	    // the data members to the controls.
	    // UpdateData uses its argument to set the
	    // m_bSaveAndValidate data member of the
	    // CDataExchange object whose address
	    // it passes to DoDataExchange.
	    //
	    UpdateData(FALSE);
	}
- Save your work by choosing Save from the File menu of
the Source window.
You have now completed all the tasks necessary for the
Preferences dialog box to be fully functional. To conclude this
lesson, you will rebuild TMLRead and test the dialog box.
Rebuild and Test TMLRead
To verify that your work has achieved the desired goal, rebuild and
run the Reader, making it a point to use the new features. To do this,
follow these steps:
- Choose Build from the Project menu to incorporate the
changes you have made into the executable file
tmlread.exe.
- Choose Execute Program from the Project menu to
run the Reader.
- Choose Open from the File menu of TMLRead. Again,
load the file sample.tml.
- Choose Preferences from the View menu of TMLRead.
- Enter 25 into all three edit controls.
- Click on the Default button to verify that the
CPrefDialog data members are set to default values
by CPrefDialog::OnDefault.
- Click Cancel. You should see no change in the display of
sample.tml.
- Again, choose Preferences from the View menu of
TMLRead.
- Change the values to 150, 40, and 10, respectively.
- Click OK. Observe the message box informing you of
invalid data.
- Click OK to close the message box. The focus returns to
the editbox containing 150.
- Continue experimenting with the Preferences dialog
box, eventually clicking OK when valid data is entered in
the controls. After you have confirmed that the dialog
box is performing as you want, exit the program by
choosing Exit from the Reader's File menu. This returns
you to the IDDE.
Summary
In this lesson, you learned:
- How to use the ResourceStudio to add a new menu item
- How to use ClassExpress to add a handler that responds
to the choice of that menu item
- How to use ClassExpress and MFC to implement a dialog
box, validate its data, and exchange data between the
dialog box and your application
This concludes the tutorial section. These lessons have been an
instructive introduction to the capabilities of Digital Mars C++. By this
point, you will have acquired the techniques and knowledge you
need to apply the features of Digital Mars C++ to your own projects.
This chapter continues the discussion of projects and workspaces that
began in Chapter 3, "Starting a Project and Defining Workspaces."
Here you find a detailed description of all commands and options
associated with workspaces and projects. The first part of the chapter
discusses the Environment menu and workspace options; the
remainder of the chapter covers project files, the Project menu,
project options, and the Project window.
Environment Menu Commands
The IDDE's Environment menu (Figure 15-1) contains commands
with which you can modify the IDDE work environment.
[Figure 15-1 Environment menu commands
A list of available workspaces is added to the end of the
Environment menu. The current workspace is checked. Choosing a
name in this list is equivalent to clicking on the workspace tab in the
Workspace toolbox.
- Workspace
- The Workspace submenu (Figure 15-2) contains commands for
creating and editing workspaces.
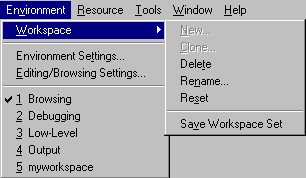
[Figure 15-2 Workspace submenu]
- New
- Opens the Workspace Name dialog box.
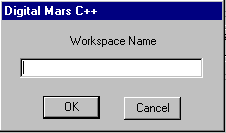
[Figure 15-3 Workspace Name dialog box]
To create a new empty workspace, type a name for the workspace
and click OK. The Build and Views toolboxes open automatically.
The New command is disabled if you already have five workspaces.
- Clone
- Opens the Workspace Name dialog box. To create a copy of the
current workspace, type a name for the new workspace and click
OK.
The Clone command is disabled if you already have five
workspaces.
- Delete
- Deletes the current workspace from the workspace set. The last
remaining workspace cannot be deleted.
- Rename
- Opens the Workspace Name dialog box. Type a new name for the
current workspace and click OK.
- Reset
- Resets the current workspace to the configuration it had when you
started the session or when you last saved it during the current
session with Save Workspace Set.
- Save Workspace Set
- Saves the current workspace configurations. These configurations
can be restored with the Reset command.
- Environment Settings
- This command opens the Environment Settings dialog box with
which you specify various environment options. Two pages of
options are available: Workspace and Color.
Workspace
This page (Figure 15-4) provides options for controlling workspaces.
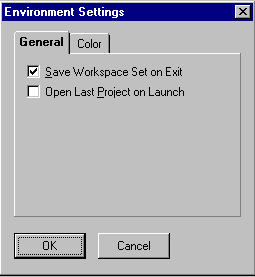
[Figure 15-4 Workspace page of the Environment Settings dialog box
Save workspace set on exit
Saves the workspace set when the IDDE is closed.
Open last project on launch
When the IDDE is launched, automatically opens the project that
was open when the IDDE was last closed.
Color
This page (Figure 15-5) provides options with which to customize
the IDDE windows' colors.
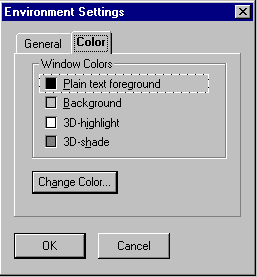
[Figure 15-5 Color page of the Environment Settings dialog box
To change an item's color, first click on the item name. A dashed
box appears around the item name. Then click on Change Color.
You may then choose a new color from a Windows Color dialog
box.
- Editing/Browsing Settings
- Opens the Editing/Browsing Settings dialog box, with which you
can view and change the IDDE's editing and browsing options. For
more information, see Chapter 19, "Class Editor Reference," Chapter
20, "Hierarchy Editor Reference," and Chapter 21, "Text Editor
Reference."
More about Projects
This section continues the discussion of projects that began in
Chapter 3, "Starting a Project and Defining Workspaces."
What a project contains
The project file contains a list of all the files in your project. It also
contains information on how these files depend on one another.
When the project manager creates a makefile (a file that builds your
program), it uses a file's extension to decide what kind of file it is.
The files you can put in a project are described here, along with how
the IDDE uses them to build a program.
C and C++ files
The IDDE compiles C and C++ source files to produce object files
and links the object files to produce the target.
C source files have the .c extension; C++ source files have either the
.cpp or the. cxx extension. When compiled, they all generate
object (.obj) files.
Header files
You do not need to add header files to a project; they are added
automatically by the project system. See the section "Dependency
tracking" later in this chapter.
If you do add a header file explicitly, it is flagged automatically for
precompilation. See the description of the Header Files page of the
Project Settings dialog box in Chapter 16, "More about Project
Build Settings."
The header files that are included by C/C++ source files to provide
common interface definitions are identified by the file extensions
.hpp, .hxx, and .h.
In some situations, a C/C++ source file may be included by another
source file. In this case, you probably do not want a separate object
file created from that included source file. Do not add the file to the
project. When you compile the target, the project system adds the
included file but tracks it as an included object that should not be
compiled or linked independently.
Assembly files
Your project may contain assembly source and header files.
Assembly language source files are identified by the file extension
.asm. Assembly language header files are identified by the file
extension .inc.
Note:
For assembly files to be built as part of a project,
MASM must be in a directory specified by the PATH
environment variable. For a NetBuild project, MASM
must be in a directory specified by the PATH
environment variable of every buildserver, and the
buildclient.
Object files
Your project can include pre-existing object files- files for which
you do not have the source or that were compiled outside the IDDE.
Such object files are identified by the file extension .obj. These
objects are linked into your executable.
Resource and dialog script files
Your project can include resource script files, dialog script files, and
other binary resource files. The IDDE compiles these script files to
produce a resource file. After the IDDE links the object files, it binds
the resources from the resource files into the executable.
The resource file types are:
- .rc
- Source scripts of resource files that are
compiled by the Digital Mars C++ resource
compiler
- .ico, .cur, .bmp
- Binary resources
- .res
- Compiled binary resources
Libraries
Your project can include libraries. The IDDE links the libraries with
the project's object files to produce the executable file. If your
program uses a dynamic link library (DLL), don't add the DLL to the
project file. Instead, add the DLL's import library (.lib).
Libraries or library interfaces to a DLL that you want to link into your
executable are identified by the file extensions .lib.
Linker definition files
Your project can include a linker definition (sometimes called
module definition) file. Use a linker definition file to indicate to the
linker how to build a library or executable. These files are identified
by the file extension .def.
If you have your own .def file, you can include it in the project.
The IDDE automatically modifies the .def file to change a linker
option if necessary. If you do not specify a .def file, one is
generated and maintained automatically for you.
Project files
The IDDE automatically generates and maintains project files. Project
files can be nested to form a hierarchical project structure. Project
files are identified by the file extension .prj.
Option set
You can include your own option set. Option sets that you create are
identified by the file extension .opn.
Batch and makefiles
You can include a batch or makefile. Batch files are identified by a
.bat file extension, and makefiles by a .mak file extension.
When you add a batch file or a makefile to a project, the Build
Order dialog box (accessible via the Build Order button on the
Make page under the Build tab of the Project Settings dialog box)
becomes available to specify when to execute your batch files and
makefiles.
Project-generated files
The project system generates and maintains files with these
extensions:
- .prj
- The project file that contains information
on the base directory of the project, the
option set, the Version Control System
(VCS) configuration location, and each
of the files and its attributes.
- .mak
- The makefile generated from the project
options and files. You don't have to
write and maintain a makefile- the
project system does it for you.
- .def
- The linker definition (module definition)
file. You can specify your own .def file
or let the project system generate and
maintain one for you.
- .dep
- The file that keeps the dependency
listing.
- .opn
- The file in which project options are
stored.
- .lnk
- A resource file that directs the linker to
build your target. It is generated and
maintained by the project system.
Hierarchical project structure
You can include projects within projects (to any depth) to create a
hierarchical project structure. Hierarchical projects have many uses.
You can use hierarchical projects if you need to build more than one
target as part of a system. For example, if your system includes an
executable and a DLL, you can create a separate project for the DLL
and include this new subproject in the master project. The library is
built automatically when (and if) necessary. (Note that, since
Windows relies on the module name to determine the uniqueness of
modules, you need to give your targets different names. For
example, do not name the executable generated by a project
mymod.exe and name a DLL created by a subproject mymod.dll;
an error results.)
In other cases, some files may need different compiler settings. You
have two options. You can put those files in a separate subproject,
setting compile options for the project as necessary. Or, you can
override compile options on a file-by-file basis. To do this, right-click
on the file in the Project window, and choose Settings from the
pop-up menu. You can then set compile options for that file.
If you have a special preprocessing or translation step in your build
process, you can create a subproject (a project within another
project) for that make step. To accomplish the preprocessing, use
the Make page under the Build tab in the Project Settings dialog
box (see Chapter 16, "More about Project Build Settings") to call your
own makefile or batch file.
Use hierarchical projects to handle different releases or versions of a
project. To build all the variants in one simple step, create a master
project that contains only projects. When you build the master, each
of the variants is built.
These examples show that the hierarchical project system can be
used in a variety of ways to customize the build process. Note that
dependency tracking still works for subprojects- they are built as
needed, before the master project is built.
Note:
When you build a project that has a hierarchical
structure, all subprojects are rebuilt with either the
Debug or Release setting, whichever is applied to
the master project. To ensure that each subproject is
linked with the correct libraries (Debug or Release),
you need to rebuild each subproject's .lnk file.
Dependency tracking
The project system automatically tracks dependencies among the
components of a project. Dependency information is updated with
each successive compilation. As you add or remove include files, for
example, the corresponding dependencies are updated. You have
the option of turning this tracking off.
The IDDE also tracks changes made to build options and determines
how much of the project needs to be rebuilt based on those
changes. For example, if you change a compiler setting, all the
sources are rebuilt. If you change a resource compiler option, only
the resource compiler and link steps are executed. If you change a
link option or library directory, only the linker is run. By tracking
these changes, the project system supports efficient and accurate
builds.
In the Windows 3.1 version of the IDDE, the project system can track
files in the project with respect to version control. For more
information on project and source code control, see Chapter 22,
"Using Version Control."
Project menu commands
The IDDE's Project menu (see Figure 15-6) contains commands to
create, open, edit, and close projects; to build projects, to run the
application; and to set project options. At the end of the menu, the
IDDE adds the names of the most recently opened projects so that
you can switch between projects as you work.
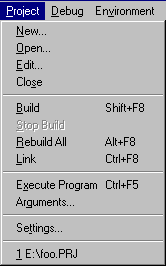
[Figure 15-6 Project menu commands]
- New
- Opens the ProjectExpress dialog box, as described in Chapter 3,
"Starting a Project and Defining Workspaces."
- Open
- Opens the Open Project dialog box, as described in Chapter 3,
"Starting a Project and Defining Workspaces."
- Edit
- Opens the Edit Project dialog box, as described in Chapter 3,
"Starting a Project and Defining Workspaces."
- Close
- Closes the current project.
- Build
- Builds your project. The IDDE examines all files in the project to
determine whether they are up-to-date and recompiles only the
necessary files.
- Stop Build
- Stops a build in progress. You can also stop a build by choosing
Stop! from the Output window's menu bar.
- Rebuild All
- Rebuilds all files in your project, regardless of whether they are
up-to-date.
- Link
- Links all object files and libraries. Use Link instead of Build when
adding .lib or .obj files to a project or subtracting them from a
project. You can also use this command if you know all files are up-to-
date. There is no dependency checking with Link, so linking is
faster than building. Also, you would use Link rather than Build if
you changed source code but you wanted to generate an .exe with
existing .obj files.
- Execute Program
- Executes your application. Command-line arguments may be set
with the Arguments command.
- Arguments
- Opens the Run Arguments dialog box (Figure 15-7).
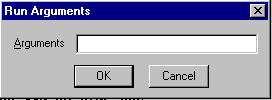
[Figure 15-7 Run Arguments dialog box
Type the command-line arguments that you want passed to an
application when you choose Execute Program.
- Settings
- Opens the Project Settings dialog box. This dialog box lets you set
project options that specify how the IDDE builds a project. The
following pages are available by clicking on the tabs at the top of the
dialog box: Target, Build, Option Sets, VCS, and Directories.
Target settings
The options on the Target page (Figure 15-8) specify the target and
platform for your project.
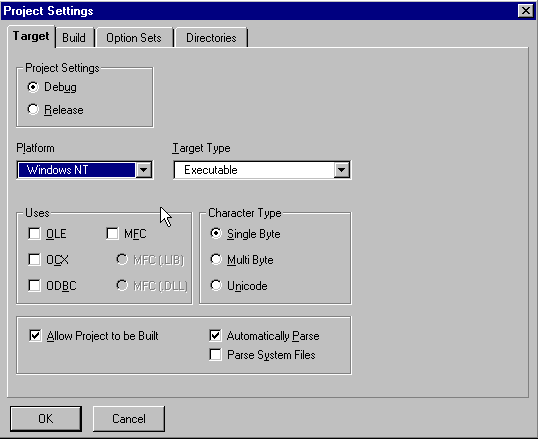
[Figure 15-8 Target page of the Project Settings dialog box
Operating system
This set of options determines the target system for your project.
Depending on the selection of the target system, different Target
Type options become available. The target system can be one of the
following:
- Windows 95
- Windows NT
- Win32s
- Windows 3.1
- DOS
- DOSX
All the systems are self-explanatory except DOSX. This option selects
the DOSX 32-bit DOS Extender (which comes with Digital Mars C++)
as the target operating system.
Target type
This set of options determines what your project will actually be: an
executable, a library, a Windows DLL, or a simple console. The
target type can be one of the following:
- Executable
- Builds an executable program (.exe).
Dynamic Link Library: Builds a Windows DLL. This option is not
available when Operating System is set to DOS or DOSX.
- Static library
- Builds a static library (.lib) -- that is, a library a
program links to at compile time- as opposed to DLL, which links at
run-time.
- COM
- Builds a DOS executable .com file. This option is only
available when Operating System is set to DOS.
- Console
- Builds a Windows console program. In Windows 3.1 (and
Win32s) this creates an SDI application in which the standard input
and output functions are carried out through the SDI window. In
Windows 95 and Windows NT, this creates an executable that runs
as a console application, simulating an old-style teletype.
Uses
These options let you select the extension libraries that are linked to
the executable.
- MFC (Microsoft Foundation Class Library)
- Links the libraries needed
for an application that uses classes from the MFC. Two methods of
linking are available: static library (.lib) or dynamic link library
(DLL).
- OLE (Object Linking and Embedding)
- Links the libraries needed for
creating an application that uses OLE.
- VBX (Visual BASIC Control)
- Links the libraries needed to create a
Visual Basic control.
- OCX (OLE Control)
- Links the libraries for building an OLE control.
- ODBC (Open Database Connectivity)
- Links the libraries needed to
access an ODBC data source.
Project settings
Two options determine whether debugging information is included
in the executable.
- Debug
- The executable contains debugging information and can be
debugged by the IDDE debugger.
- Release
- The executable contains no debugging information. It
cannot be debugged.
Allow project to be built
If this option is selected, the application can be built. Deselect this
option if a project should not be built (for example, if you don't
want a subproject rebuilt when you choose Rebuild All in the
parent project).
Parse for browsing
If this option is selected, the project is automatically parsed. Deselect
if you don't want the Browser to parse the source code. See Chapter
5, "Defining Classes and Their Hierarchies," for more information.
Build settings
The options on the Build page control how your project is compiled
and linked. See Chapter 15, "More about Projects and Workspaces."
Option sets
The Option Sets page (Figure 15-9) lets you save and retrieve project
options. This feature makes it easy to define options once for a
particular kind of target and apply them later to another project.
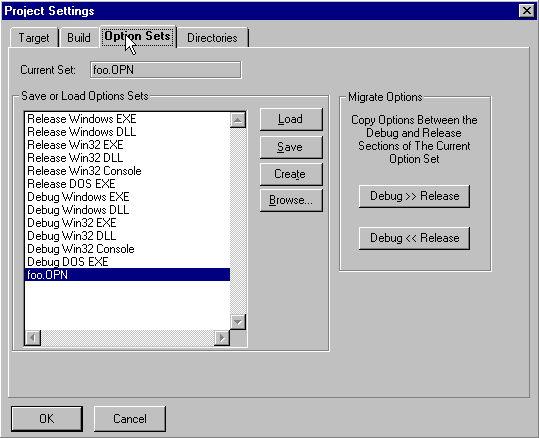
[Figure 15-9 Option Sets page of the Project Settings dialog box
When you exit the IDDE or close a project, current options are saved
in the project option file (. opn). This file has the same name as the
project. For example, if the project name is test. prj, the option
set associated with that project is named test. opn.
The list of option sets includes sets you define and several
predefined option sets. Click on an option set name to select the
option set; double-click on an option set name or click on Load to
load the option set.
The predefined option sets are useful starting points for defining
your own custom options. When you load one of these option sets,
save any changes to another option set so the defaults are intact for
later use. These option sets are named according to the target type
and whether debugging information is placed in the executable.
The four buttons on the dialog box have the following functions:
- Load
- Loads the selected option set.
- Save
- Saves the current option set.
- Create
- Creates a new option set. You are prompted for the new
set's name.
- Browse
- Opens the Option Set Name dialog box, from which you
can select an option set file to load.
VCS options
The options on the VCS page control the version control system.
These options are only available in the 16-bit IDDE. For information
about version control see Chapter 22, "Using Version Control."
Directories
The options on the Directories page (Figure 15-10) specify various
directories used by the compiler, linker, and browser.
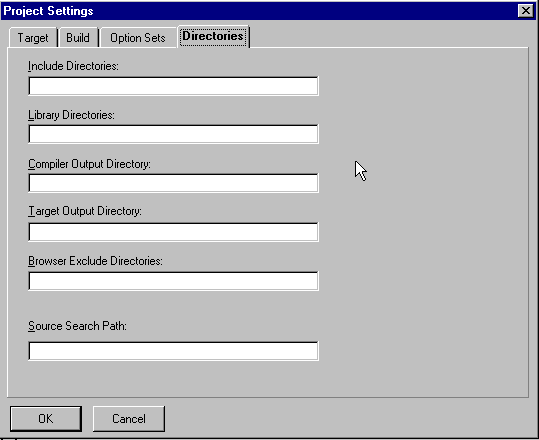
[Figure 15-10 Directories page of the Project Settings dialog box
Include directories
Specifies directories to be searched for included files. You may
specify multiple directories by separating each pathname with a
semicolon. These directories are searched after those specified by
the INCLUDE environment variable.
Library directories
Specifies which directories to search for libraries. You may specify
multiple directories by separating each pathname with a semicolon.
These directories are searched after those specified by the LIB
environment variable.
Compiler output directory
Specifies the directory in which object files (.obj) are placed.
Target output directory
Specifies the directory in which the linked target is placed.
Browser exclude directories
Specifies the directories that are excluded from parsing by the
browser. Use this option, for example, to exclude the MFC header
file directory, and thus prevent the display of MFC classes in the
Class and Hierarchy editors.
Source search path
Specifies which directories to search for source files while
debugging.
The Project Window
This section describes all the menu commands available from the
Project window.
Parse menu commands
The Parse menu (Figure 15-11) contains commands to control the
parsing of source files. Parse information (information about the
project's C++ classes and class members) is stored in a global pool
that is accessible to and used by the Class and Hierarchy Editors.
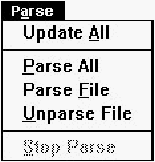
[Figure 15-11 Parse menu commands
- Update All
- Parses all unparsed files in the project.
- Parse All
- Parses all files in the project.
- Parse File
- Parses the selected file, adding information about classes and
members in the file to the global parse information.
- Unparse File
- Unparses the selected file. It removes classes and members in the file
from the global parse information.
- Stop Parse
- This command cancels a parse operation in progress. You can also
stop a parse by choosing Stop! from the Output window's menu bar.
View menu commands
In debugging mode, commands in the View menu update other
IDDE windows to show information pertaining to the selected file.
For more information on this menu refer to Chapter 24, "Commands
Available in Debugging Mode."
Trace menu commands
The Trace menu controls whether the debugger can step into, set
breakpoints in, or watch data in a particular source file in debugging
mode. See Chapter 24, "Commands Available in Debugging Mode,"
for more information.
VCS
The VCS menu controls the Version Control System operation.
Version control options are only available in the 16-bit IDDE. The
VCS menu commands and their functions are described in Chapter
22, "Using Version Control."
Project window left pane pop-up menu commands
This menu (Figure 15-12) contains commands that operate on the
current project.
[Figure 15-12 Left pane pop-up menu commands
- New Subproject
- Opens the New Sub-Project dialog box, in which you select a
project to be a subproject of the currently selected project.
- Link
- Links the project. This is the same as choosing Link from the IDDE's
Project menu.
- Build
- Builds the project. This is the same as choosing Build from the
IDDE's Project menu.
- Rebuild All
- Rebuilds the entire project. This is the same as choosing Rebuild All
from the IDDE's Project menu.
- Parse
- Parses all files. This is the same as choosing Parse All from the
Parse menu.
- Edit Project
- Opens the Edit Project dialog box, as described in Chapter 3,
"Starting a Project and Defining Workspaces." This is the same as
choosing Edit from the IDDE's Project menu.
- Settings
- Opens the Project Settings dialog box. This is the same as choosing
Settings from the IDDE's Project menu.
Project window right pane pop-up menu commands
This menu (Figure 15-13) contains commands that operate on the
selected file.
[Figure 15-13 Right pane pop-up menu commands
- Compile
- Compiles the selected file.
- Parse
- Parses the selected file. This is the same as choosing Parse File from
the Parse menu.
- Other
- Opens the Other submenu, which contains the Preprocess,
Disassemble, and Precompile commands.
- Preprocess
- Preprocesses the selected file.
- Diassemble
- Disassembles the selected file.
- Precompile
- Precompiles the selected file.
- Get
- Is the same as choosing Get from the VCS menu.
- Put
- Is the same as choosing Put from the VCS menu.
- Remove
- Removes the selected file from the project. You can also remove a
selected file from the project by pressing Delete.
- Attributes
- Sets read/write attributes for the selected file. They are mutually
exclusive, so only one can be selected. A checkmark is displayed
next to the selected item.
- Read Only
- Sets the attribute to read only.
- Read/Write
- Sets the attribute to read/ write.
- Don't Show
- Filters the display of the project's files.
- Modules
- Does not list modules added by the debugger.
- Parsed
- Does not list files added by the parser.
- Dependencies
- Does not list files included through dependency relationships.
- Settings
- Lets you set certain compiler options for an individual source file,
overriding those specified for the project as a whole. Choosing this
command opens the Project Settings dialog box with only the Build
tab available (see Chapter 16, "More about Project Build Settings").
Only the compiler-related subpages (Compiler, Code Generation,
Header Files, Code Optimizations, Output, Warning, and Debug
Information) are available. The Inherit from Project button resets this
source file's individual options to those of the project.
"..." pop-up menu commands
This menu (Figure 15-14) is opened by clicking on the "..." box
above the vertical scroll bar in the right pane of the Project window.
[Figure 15-14 "..." pop-up menu commands
Use this menu to set up the display of project file information in the
right pane. Information that can be displayed includes:
- Name
- Displays the filename.
- Ext
- Displays the file extension.
- Path
- Displays the file path.
- Date
- Displays the modification date.
- Time
- Displays the modification time.
- Parsed
- Displays whether or not the file has been parsed.
- EXE/DLL
- Displays to which EXE or DLL the module belongs (in debugging
mode).
- Virtual
- Displays whether the module is virtual (in debugging mode).
For more information about the EXE/DLL and Virtual columns, see
"The Project Window," in Chapter 24, "Commands Available in
Debugging Mode."
Columns of information are removed from the display by dragging
the column heading out of the column heading area. (The item then
becomes available on the "..." pop-up menu.) The order of the
columns can be changed by dragging the column headings to a new
position.
Project window mouse functions
Use the mouse to open projects, select project files, open source
windows, drag project files to other windows, open pop-up menus,
and change the relative sizes of the right and left panes.
To resize the panes, first position the cursor on the dividing line
between panes. The cursor changes to a two-headed arrow. Then
click the left mouse button and drag the separator to the desired
location.
The right mouse button opens the pop-up menus (see the sections
"Project window left pane pop-up menu commands" and "Project
window right pane pop-up menu commands" earlier in this chapter).
Click on a project or subproject in the left pane to open that project.
Double-click on the current project in the left pane to toggle
(expand or collapse) the display of its subprojects.
Click on a project file in the right pane to select it. Double-click on a
file in the right pane, or drag it to an empty part of the workspace, to
open the Source window to view and edit the file. (Double-clicking
on a subproject in the right pane opens that subproject.)
You can drag files from the right pane to Source windows, Function
windows, Data/ Object windows, and Assembly windows.
Finally, to eliminate a column of information from the right pane,
click on the title at the top of the column and drag it outside the
column heading area. Columns of information are restored from the
"..." pop-up menu, to the right of the column titles. To rearrange
columns of information, drag the title at the top of the column to a
new position. You can make columns wider or narrower by
dragging the column title's right edge to the right or left. Clicking on
a column title re-sorts the list of project files according to that
column.
This chapter details the options for controlling how a project is
built continuing from
Chapter 15, More about Projects and Workspaces.
It lists and explains the options on the Build
page of the Project Settings dialog box. Access these options
by selecting Settings from the Project menu, then clicking on the
Build tab.
The Build page of the Project Settings dialog box is composed of
18 subpages. The subpages are displayed in a listbox on the left of
the window. To access a particular subpage, click on its name. The
options displayed on the right change with each subpage. Subpages
are organized hierarchically, as shown in the listbox.
This chapter covers all the subpages on the Build page of the
Project Options dialog box. The first section introduces the
build settings and the Project Settings dialog box, and the later
sections describe the subpages in the order in which they are listed
on the Build page.
For more detailed information on how each of these options affects
the compilation of code, refer to the
Compiler and Tools Guide.
Appendix B, IDDE Settings and Command-Line Options,
details
how each of these options map to the corresponding DMC, Optlink,
Make, or Librarian command line options.
Introducing Build Settings
Choose the Settings command from the IDDE's Project menu to
open the Project Settings multipage dialog box. Using the tabs at
the top of the dialog box, select different pages, each of
which presents a set of options.
Click on the Build tab in the dialog box to open the Build page. The
Build page is composed of subpages of options. Select a subpage by
clicking on its name in the listbox on the left of the Build page. The
following subpages are available:
The Compiler subpage (Figure 16-1) contains a variety of parameters
controlling compilation.
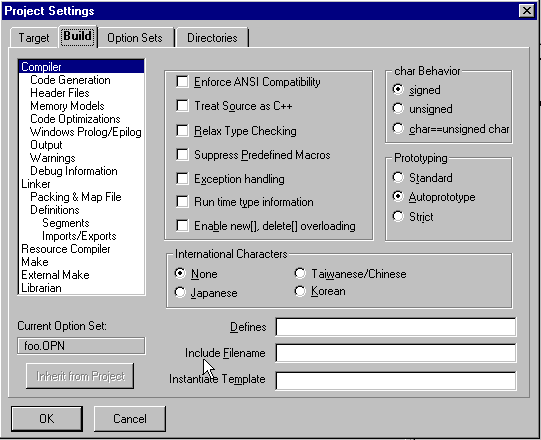
[Figure 16-1 Compiler subpage]
Enforce ANSI compatibility
Establishes the necessary parameters so the compiler accepts only C/C++
code that conforms to ANSI standards. Refer to the Compiler and
Tools Guide for information on the restrictions that take effect.
Treat source as C++
With this option selected, the compiler treats C source files as C++
files. The option is useful for:
- Compiling the file to take advantage of type-safe linkage
- Linking a C file to a C++ file without changing it or giving it
a C++-compatible extension
This option also works on C++ header files with the .h
extension.
Relax type checking
Causes the compiler to use relaxed (non-ANSI) type checking. The
following data types are then treated as equivalent:
- char == signed char == unsigned char
- short == unsigned short
- long == unsigned long
In addition, for 16-bit compilations:
- int == unsigned == enum == short
And for 32-bit compilations:
- int == unsigned == enum == long
The option is useful for quickly porting code from compilers that do
not obey the full set of ANSI type-checking rules.
Suppress predefined macros
Suppresses the definition of the non-ANSI predefined macros.
Exception handling
Enables implementation of exception handling.
Run-time type information
Enables implementation of run-time type information.
Enable new[], delete[] overloading
Enables overloading of operator new[] and operator delete[]. It
also sets the predefined macro _ENABLE_ARRAYNEW to 1.
Compiling with Enforce ANSI compatibility automatically enables
this option.
char behavior
This option controls the way the compiler treats a char type. By
default, the compiler treats char types as signed. Set this option to
unsigned to quickly port code that depends on unsigned char
types. Note that the behavior of the run-time library routines is not
affected by this option unless they are also recompiled.
- signed:
- Makes char types behave as signed char types.
- unsigned:
- Makes char types behave as unsigned char types.
- char == unsigned char:
- Changes the type of char to be unsigned.
Prototyping
This option specifies how the compiler handles function prototypes.
New code should always be fully prototyped, due to the
requirements of type-safe linkage and the support for alternative
linkage conventions.
There are three prototyping possibilities: Standard, Autoprototype,
and Strict.
- Standard:
- Turns off autoprototyping and strict prototyping.
- Autoprototype:
- Enables the compiler to generate a prototype
according to the way the function is used, even if one is not
specified for a function. Subsequent uses are checked against the
generated prototype. This is especially useful when compiling old C
code that is not completely prototyped.
- Strict:
- Requires that all functions be declared (prototyped) before
being used. This declaration provides the compiler with the function
name, return type, and storage class of a function, as well as the
number and type of arguments that may be passed to it. Once the
compiler encounters a function prototype, it can check each function
call in the source file against that prototype and flag an error for the
calls that do not match it.
International characters
This option specifies how the compiler interprets 2-byte Asian
language character codes within character constants and strings. That
is, if a character code represents the first byte of a 2-byte sequence,
the second byte is not checked to see whether it is a backslash or a
closed quote. The second byte cannot be a NULL (0), a carriage
return (0x0D), or an end-of-file (0x1A).
- None:
- Allows no 2-byte sequences.
- Japanese:
- Signals the 2-byte sequence with a value in the range
0x81 ... 0x9F and 0xE0 ... 0xFC
- Taiwanese/Chinese:
- Signals the 2-byte sequence with a value in
the range 0x81 ... 0xFC
- Korean:
- Signals the 2-byte sequence with a value in the
range 0x81 ... 0xFD
Other options
The options below direct the compiler to define a macro, include a
header file, or instantiate a template.
Defines
Specify macro definitions on the compiler command
line. Separate multiple Defines with a semicolon (;).
Include filename
Directs the compiler to include a header file for all modules in the
project.
Instantiate template
Creates an instance of a template in the program.
The Code Generation subpage, shown in Figure 16-2, contains
parameters that control how the compiler generates code.
[Figure 16-2 Code Generation subpage
Pointer validation
Makes the resulting program validate each pointer as it is
dereferenced; if the pointer is invalid, a run-time error occurs. This
slows and slightly increases the size of the resulting code.
Generate stack frame
Generates a stack frame for each function. The stack frame is
generally for the use of the debugger.
Check stack overflow
Inserts stack overflow checking at the beginning of each function.
The resulting program aborts with an error message if it detects a
stack overflow.
Fast floating point
Directs the compiler to produce the fastest possible floating-point
code. No compatibility checking is performed.
Generate inline 8087 code
Causes the compiler to generate inline 80x87 instructions. It
significantly speeds up floating-point code, reduces its size, and
improves its accuracy.
Generate virtual function tables in far data
Affects Compact and Large memory models only. It causes the virtual
function tables to be placed in far data segments rather than in the
code segment.
Use Pascal calling convention
Makes Pascal, instead of cdecl, the default linkage for all functions
and global data. Because all C library routines have cdecl linkage,
they must be prototyped as such before being called. Therefore,
include the appropriate header files. The main() function
must also be declared cdecl for the linker to find it.
Using Pascal as the default linkage type results in a roughly 3% code
size reduction and a corresponding speed up in generated code.
Use Stdcall calling convention
Makes stdcall the default linkage for all functions and global data,
instead of cdecl.
Note:
Under Windows 95 and Windows NT, Digital Mars's
name mangling scheme now appends the string
"@nn" to the names of all stdcall functions (where
nn is the number of bytes in parameters to the
function). Previous versions of Digital Mars C++ did
not append this string to mangled names.
Enable function-level link
Directs the compiler to encapsulate functions in initialized common
blocks (COMDAT records). This allows the linker to perform
function-level linking, which results in a smaller executable.
No default library
Prevents the compiler from embedding the default library record in
the object file. This option can result in a significant decrease in
program size when generating a large library.
Set data threshold
Places large arrays in far data segments. The threshold size is set in
the adjacent textbox.
Code segment
These options govern the ways in which code segments are handled.
Generate new segment for each function
Causes the compiler to start a new code segment each time it
encounters a global far function. The name of the segment is the
name of the function with _TEXT appended.
Override default code segment name
Overrides the default code segment name. Type the new name in
the Name textbox.
Put switch tables in code segment
Places switch tables in the code segment rather than in the data
segment. It is useful when data segment space is critical. Do not use
this option when the code segment in a Small or Compact model
program is close to overflowing.
Put expression strings in code segment
Puts expression string literals into the code segment rather than
wasting space in a group.
Struct alignment
Sets the boundaries for structure alignment. The
default is to align members within a structure on word boundaries
for 16-bit programs. This maximizes speed on computers with a 16-bit
bus (such as a PC-AT). The default in 32-bit DOS programs is to
align on double-word boundaries to maximize performance.
- Byte:
- Aligns structures on byte boundaries.
- Word:
- Aligns structures on word boundaries.
- Double Word:
- Aligns structures on double-word boundaries. This is
the default for 32-bit DOS applications.
- Quad Word:
- Aligns structures on boundaries that are multiples of
four words. This is the default for Win32 applications.
Target CPU
Generates code tailored for the instruction
set of a specific CPU.
- 88:
- Generates 16-bit code using the 8088 instruction set.
- 286:
- Generates 16-bit code using the 80286 instruction set. Programs
compiled with this option will not run on an 8088 or 8086 processor.
- 386:
- Generates code optimized for machines with an 80386 CPU.
Programs compiled with this option require an 80386, 80486, or
Pentium processor.
- 486:
- Generates code optimized for machines with an 80486 CPU.
Programs compiled with this option require a 32-bit DOS extender or
32-bit operating system, and an 80386, 80486, or Pentium CPU.
- Pentium:
- Generates code for the Pentium instruction set.
The Header Files subpage (Figure 16-3) specifies compiler header
file options.
[Figure 16-3 Header Files subpage
Precompile options
If using a large header file or numerous small headers,
the compiler spends considerable time compiling the same source
code over and over again. To reduce compile time, use precompiled header files;
the compiler can load a precompiled header
faster than it can a text header file. It is especially useful to
precompile large header files that seldom change, such as
windows.h.
No headers
Disables generation and use of precompiled headers.
All headers
In most cases, using precompiled headers is convenient and fast.
The All Headers option automatically precompiles all header files
defined in the project source files into the file scph. sym. The file
scph. sym is always in the current directory or in the directory
specified as the compiler output directory.
Setting the All Headers option causes the compiler to generate the
file scph.sym when it does not exist. If the scph.sym file does
exist, the compiler assumes it is a precompiled header. The compiler
will then test the header file to see whether all the headers it
contains are older than the header file itself. If any are newer, or if
the compiler flags have changed, a new scph.sym file is created;
otherwise, the old file is loaded as a precompiled header. Setting the
All Headers option also causes all files being compiled to use
scph.sym as their precompiled header.
The compiler writes out the precompiled header when the first line
in the top-level source file is encountered, and when that line is not
a comment or an #include statement.
To avoid problems with precompiled headers:
- Do not write any declarations that cross boundaries of
header files. Each header file should be self-contained.
- Do not write any extern "C" constructs that start in
one file and end in another.
- Do not depend on header files being included more than
once.
- Do not write any code or data definitions in header files,
only declarations.
To maximize compile speed, set the directory to a RAM disk.
There are two circumstances in which using precompiled headers is
not recommended:
- The file being compiled causes scph.sym to be
regenerated, but that file contains a subset of the header
files that other files also contain.
- Included files are wrapped in #if blocks or extern
"C" blocks. (The extern "C" statement is a non-include
statement, so the precompiled header is written
out prior to the extern "C" block.) Embed the extern
"C" blocks in the included files themselves.
Specific header
Selects a header file to precompile individually. Type the
header file name into the textbox.
Use precompiled headers from directory
Tells the compiler to use precompiled headers from a specific
directory. In the textbox, type the name of the directory in which the
precompiled headers reside. If this directory is empty, no additional
directories, other than the current or path directories, are searched.
Include headers once
Tells the compiler to include each header file only once, even if it is
named in more than one source file. Otherwise, header files are
included whenever they are named in a source file. This option can
be used with or without precompiled headers.
The Memory Models subpage (Figure 16-4) specifies the memory
model to be used.

[Figure 16-4 Memory Models subpage
Memory model
Controls the memory model the compiler uses by specifying its size:
- Tiny:
- Tells the compiler to create a .com file active only for DOS
compilations.
- Small:
- Generates code with near pointers for the code segment and
the data segment.
- Medium:
- Generates code with far pointers for the code segment and
near pointers for the data segment.
- Compact:
- Generates code with near pointers for the code segment
and far pointers for the data segment.
- Large:
- Generates code with far pointers for both the code and data
segments.
- Flat:
- Generates code for a Win32 compilation; that is active only for
Win32s and DOSX compilations.
Data segment
These options control the way the compiler treats the data segment
register.
Assume SS==DS
Causes the compiler to generate code that assumes SS equals DS.
Always reload DS
Causes the compiler to generate code that reloads DS at the
beginning of each function call.
Options on the Code Optimizations subpage (Figure 16-5) control
how the compiler optimizes code.
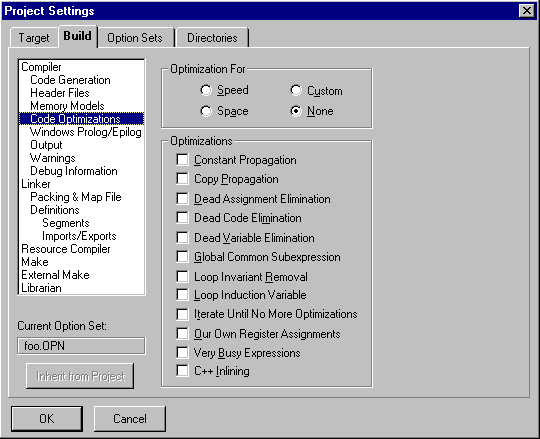
[Figure 16-5 Code Optimizations subpage
Optimization for
These radio buttons control the type of optimization.
Optimize for speed or space, select a custom set of optimizations, or
disable optimization.
- Speed:
- Optimizes code for speed at the expense of program size.
The code uses all optimizations.
- Space:
- Optimizes code for space at the expense of execution speed.
The code uses all optimizations.
- Custom:
- Allows selection of optimizations using the Optimization
check boxes.
- None:
- Turns off all Optimization check boxes. No optimization is
performed.
Optimizations
The Optimization check boxes control the individual optimizations.
These options relate only to the Custom radio button.
For more information on how Digital Mars C++ optimizes code, see the
Compiler and Tools Guide.
C++ inlining
Controls inline function expansion in C++. When debugging
C++ files, the presence of inline code can present considerable
problems to most symbolic debuggers. This option suppresses the
production of inline code.
The Windows Prolog/Epilog subpage (Figure 16-6) specifies the type
of Windows prolog and epilog code that the compiler attaches to
each far function in a compilation.
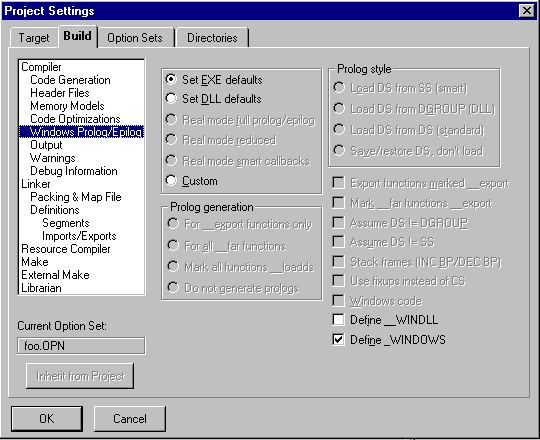
[Figure 16-6 Windows Prolog/Epilog subpage
The first group of radio buttons selects from predefined sets of
prolog/epilog options.
Set EXE defaults
Sets options to generate prologs and epilogs for a protected-mode
Windows application, with callback functions all marked as
_export.
Set DLL defaults
Sets options to generate prologs and epilogs for a protected-mode
Windows DLL, with callback and exported functions all marked as
_export.
Real mode full prolog/epilog
Sets options to generate prologs and epilogs for a real or protected-mode
Windows application or DLL.
Real mode reduced
Sets options to generate prologs and epilogs for a real or protected-mode
Windows application or DLL with exported and callback
functions (marked with _export).
Real mode smart callbacks
Sets options to generate prologs and epilogs for a real or protected-mode
Windows application with smart callbacks. In smart callbacks,
the compiler compiles far functions with a smart prolog and epilog
that loads the data segment from the stack segment. Use smart
callbacks only with applications in which the data segment is the
same as the stack segment (DS== SS). Do not use it with DLL files.
Custom
Specifies a nonstandard set of prolog/epilog options.
The remaining options on the Windows prolog/epilog subpage are
discussed in the Compiler and Tools Guide.
The Output subpage (Figure 16-7) controls the output generated by
the compiler.
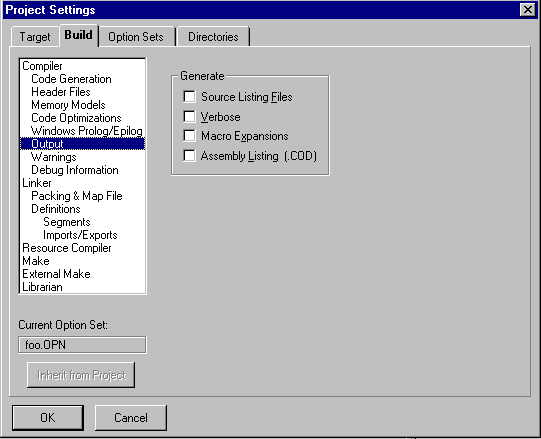
[Figure 16-7 Output subpage
Source listing files
With this option on, the compiler creates a source listing file; its
name is that of the source file with the extension .lst. The
compiler inserts error messages and line numbers in the listing file.
Verbose
Displays source and header file names, classes, function prototypes,
and time of execution during compilation.
Macro expansions
Tells the compiler to create macro expansions in error listings.
Assembly listing (.cod)
Causes the compiler to generate a .cod file containing an assembly
language representation of the program.
The options on this subpage, shown in Figure 16-8, control how the
compiler produces warnings and enables the compiler to
generate only specific warnings.
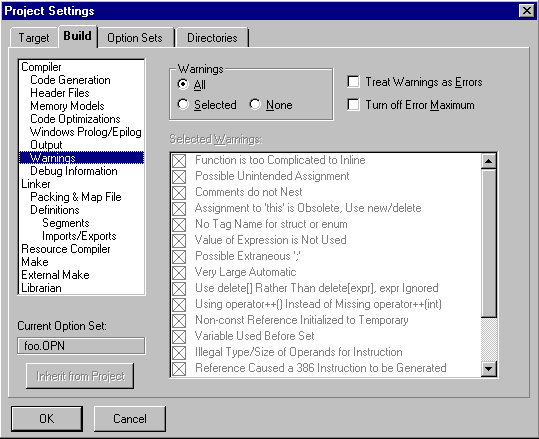
[Figure 16-8 Warnings subpage]
Warnings
Determines the warning messages that are produced:
- All:
- All warnings are produced. Turns on all warnings in the Selected
Warnings group.
- Selected:
- Only warnings that have been checked in the Selected
Warnings area are produced.
- None:
- No warnings are produced. Turns off all warnings in the
Selected Warnings group.
Treat warnings as errors
Causes the compiler to promote warnings to errors. Setting this
option allows using the error window to find warnings in the
source file.
Turn off error maximum
Makes the compiler continue rather than stop when its error limit is
reached. The compiler processes the entire source file and displays
all errors it has detected.
Selected warnings
Determines the warning messages that are produced. For more
information on the specific warnings, refer to the Compiler and Tools
Guide.
The Debug Information subpage (Figure 16-9) controls the
information the compiler places into the code for debugging. These
options specify the level of debugging, debug information, and other
conditions.
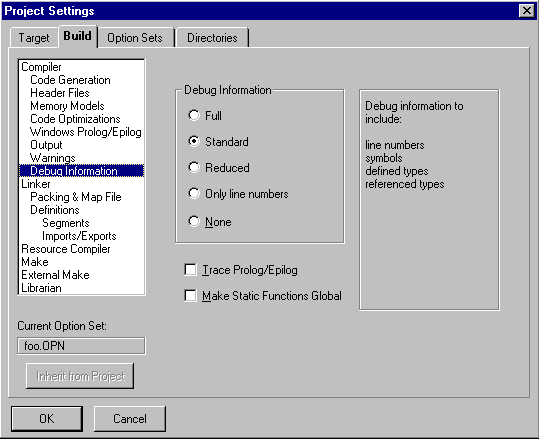
[Figure 16-9 Debug Information subpage
Debug information
These radio buttons select from predefined sets of debug
information options.
- Full:
- Turns on all debug information. Use this set when the
application uses a class library or DLL.
- Reduced:
- Turns on the most frequently needed debug information.
Use this set for most other programs.
- Custom:
- Select the debug information to be included.
- None:
- Turns off all debug information.
Trace prolog/epilog
Adds the user-defined function calls __trace_pro_f and
__trace_epi_f to the prolog and epilog, respectively, for each
function. The prolog function is called after the stack frame is set up;
the epilog function is called just before the stack frame is destroyed.
Line numbers
Places line numbers corresponding to the source into the code. Line
number information significantly increases the size of the object file.
Symbolic debug information
Includes symbol information for all public symbols. Symbols
significantly increase the size of the object file.
Three additional options become available when Symbolic Debug
Information is checked:
- Unreferenced types:
- Generates symbols for unreferenced types
(for example, typedefs).
- All referenced classes:
- Forces symbols for all classes that are
referenced in DLL files and class libraries to be generated.
- Dynamic C++ types:
- Adds dynamic C++ class type information to
classes with virtual functions. To force the production of typing
information for a class with no virtual functions, add a dummy
function such as virtual void dummy(){} to the class
definition.
Make static functions global
Makes all static functions global. The linker then can enter the names
of these functions into the map file and place global debugging
information in the executable.
The Linker subpage (Figure 16-10) governs the overall behavior of
the linker.

[Figure 16-10 Linker subpage
Debug information
Places debugging information in the executable file. This is the
normal option for linking an executable for debugging using the
IDDE.
No default library
Causes the linker to ignore libraries specified in object files.
Case sensitive
Causes the linker to be case sensitive.
Far call translation
Causes the linker to convert intrasegment far calls to near calls.
Reorder segments
Places like segments in contiguous locations.
Export by ordinal
For 32-bit output, causes the linker to export symbols by ordinal. For
16-bit output, when this option is on, the name text for every
exported symbol is moved from the resident name table to the
nonresident name table.
Don't export names
Eliminates storage of name text for symbols exported by ordinal.
Export, case sensitive
Makes the linker treat the import and export symbols as case
sensitive.
Export, uppercase
Forces the linker to convert import and export symbols to
uppercase.
DOSSEG ordering
Causes the linker to perform the special segment ordering used by
Microsoft high-level languages.
No null DOSSEG
Causes the linker not to offset the first segment by 10.
Warn if dups
Causes the linker to warn if there are duplicate symbols in the code.
Delete EXE/DLL on error
Deletes target executable if a link error occurs.
Create ImpDef
Forces the linker to generate a .din file, which combines export
information from source, definition file, and options.
Fix DS
Turning this option on has the same effect as putting a FIXDS
directive in the .def file.
Keep segments in .def order
Causes the linker to keep segments in the order in which they
appear in the .def file (Windows only).
Requires Windows 3.0
Causes the linker to tag the executable as requiring Windows 3.0 or
later to run.
Requires Windows 3.1
Causes the linker to tag the executable as requiring Windows 3.1 or
later to run.
Generate import library
Directs the linker to build an import library (.lib) describing the
exported symbols available to be imported from a DLL.
Import lib page size
Sets the page size for the Generate Import Library option.
Alignment
In conventional MS-DOS executables, causes the header to be
rounded up to the specified size. In segmented .exe files, this
option governs the page size.
Base
Sets the base address of the executable.
Entry point
Specifies the program entry point for Win32 applications.
The Packing & Map File subpage (Figure 16-11) controls the linker's
output of cross-reference and map files.
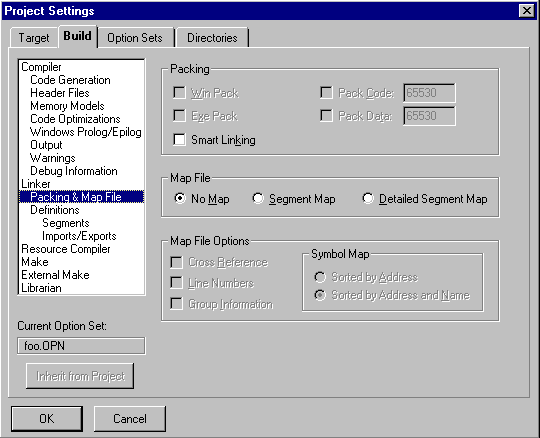
[Figure 16-11 Packing & Map File subpage
Packing
This group of options controls target packing.
Win pack
Packs Windows programs.
EXE pack
Compresses the executable file.
Smart linking
Enables smart linking of object files containing COMDAT records;
only referenced COMDAT records are retained.
Pack code
Causes the linker to combine code segments. The size textbox
specifies the maximum code segment size.
Pack data
Causes the linker to combine data segments. The size textbox
specifies the maximum data segment size.
Map file
These options generate a file containing a list of segments, in the
order of their appearance in the module. This group of options
controls map file generation.
- No map:
- No map file generated.
- Segment map:
- Generates a list of segments, in the order of their
appearance in the module.
- Detailed segment map:
- Includes more detail about segment type,
the modules that were added, the number of bytes per segment, and
where each module begins.
Map file options
These options control the contents of the map file.
Cross reference
Causes the linker to generate a cross-reference list in the map file.
Line numbers
Controls whether line-number information is contained in the map
file.
Group information
Enables output of group information.
The Definitions subpage (Figure 16-12) contains the parameters
necessary to create the .def file for an application.
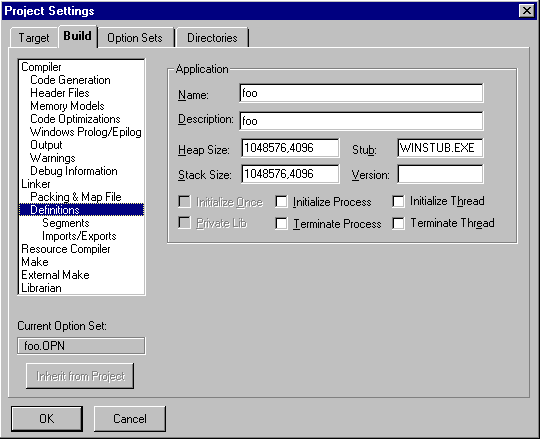
[Figure 16-12 Definitions subpage
Name
Defines the name of the application, which is used by Windows to
identify the application. A name is required for all Windows
applications.
Description
Contains a description of the application. This optional string is
placed in a Windows executable. It can be used for version control
or to otherwise help identify the application.
Heap size
Specifies the size of the application's local heap. The default is 4096.
If the application frequently uses the local heap, specify a larger
heap size.
For Windows 3.1, heap size is a single text field. For Win32s, the
field has two parts: Reserve and Commit, where Reserve is optional.
Reserve tells Win32s how much heap space to try to get for this
application. Commit specifies the amount of heap space the
application actually needs. The two fields are separated by a comma
(,). For example, 100000, 4096 would specify 100000 for Reserve and
4096 for Commit.
Stack size
Defines the size, in bytes, of the executable's stack. The default is
4096 bytes. The stack is used for storing function arguments.
It's common to need to increase the stack size, especially for applications
containing heavily recursive functions.
For Windows 3.1, stack size is a single text field. For Win32s, the
field has two parts: Reserve and Commit, where Reserve is optional.
Reserve tells Win32s how much stack space to try to get for this
application. Commit specifies the stack size the application actually
needs.
Stub
Specifies an optional file that defines the executable stub to be
placed at the beginning of the executable. When a user tries to run
the application from DOS, the stub is executed instead. Many
applications use the winstub.exe file supplied with the Windows
SDK. Any DOS or DOSX executable can be used.
Version
Contains optional version information that becomes part of the
executable file.
Initialize once
The DLL's initialization routine is called only when the module is
initially loaded into memory.
Private lib
Creates a private DLL that is called.
Initialize process
The DLL's entry point is called when a process attaches.
Terminate process
The DLL's entry point is called when a process terminates.
Initialize thread
The DLL's entry point is called when a thread attaches.
Terminate thread
The DLL's entry point is called when a thread terminates.
This subpage, shown in Figure 16-13, provides segment information
for the .def file.

[Figure 16-13 Segments subpage
Segment Type
This option toggles between two option sets: one for code segment,
and one for data segment.
- Code Segment:
- Shows options for the code segment.
- Data Segment:
- Shows options for the data segment.
Attributes
These options define the attributes for the application.
Conforming
Turns on the conforming bits for the segment. This attribute can be
set for code segments only.
Discardable
Lets the system flush the segment from memory. This attribute can
be set for code segments only.
Shared
Lets multiple applications use this segment simultaneously (DLLs
only). This attribute can be set for both code and data segments.
Preload
Loads the segment when the executable file or library is loaded. This
attribute can be set for both code and data segments.
I/O privilege
Turns on the I/O privilege bit for the segment. This attribute can be
set for code segments only.
Moveable
Lets the segment be moved when memory is compacted. This
attribute can be set for both code and data segments.
Access Rights
Select access privileges for a segment.
Execute Read
Lets an executable read from or execute a segment, but not write to
a segment.
Execute Only
Lets an executable execute, but not read or write, the segment. This
attribute can be set for code segments only.
Read Write
Lets an executable read from a segment, or write to a segment, but
not execute a segment.
Read Only
Lets an executable read from a segment, but not write to or execute
the segment. This attribute can be set for data segments only.
Instance
Select the type of data segment generated.
Multiple data segments
Forces the generation of multiple data segments.
Single data segment
Forces the generation of a single data segment.
Mode
Select the type of executable file generated.
Protected mode
Causes the application to run in protected mode.
Real mode
Causes the application to run in real mode.
The Imports/Exports subpage (Figure 16-14) defines the
names of routines in DLLs that the executable can use. It also
defines the names of routines that the target (which must be a
library) exports to other programs. The IMPORTS and EXPORTS
statements are placed in the .def file.
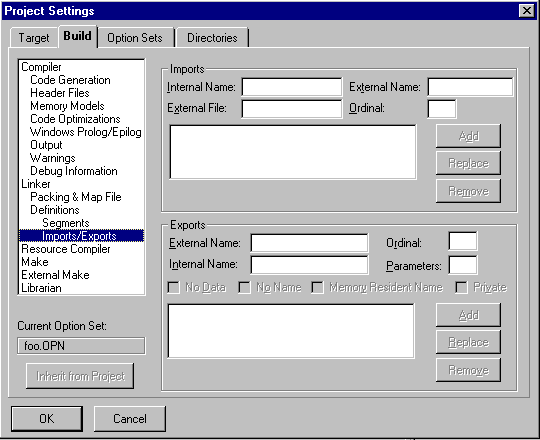
[Figure 16-14 Imports/Exports subpage
Imports
This section defines the names of routines in DLLs that the
application can use.
Internal name
Contains the name by which the imported routine is called
internally. If omitted, the internal name is the same as the external
name.
External file
Contains the name of the DLL from which the routine is imported.
External name
Contains the name of the DLL routine to be imported.
Ordinal
Specifies the ordinal number in the DLL of the routine to be
imported. Specify the ordinal or the external name, but not
both.
Add, Replace, Remove
Clicking on the Add button adds the routine to the list of imported
routines. Clicking on the Replace button uses the routine to replace
the currently selected routine in the list. Clicking on the Remove
button removes the currently selected routine from the list.
Exports
This section defines the names of routines that can be exported from
the DLL.
External name
Contains the name by which the DLL routine will be known to other
applications.
Internal name
Contains the name of the DLL routine to be exported.
Ordinal
Specifies the ordinal number by which the DLL can be referenced in
other applications. This is optional unless No name is set.
Parameters
Specifies the total number of words occupied by the function's
parameters. This option applies only to protected-mode functions
with I/O privilege.
No data
Specifies that this function does not reference any data. This option
applies only to real-mode Windows functions with I/O privilege.
No name
Specifies that the function can only be referenced by ordinal
number.
Memory resident name
Makes the function name memory resident, even though an ordinal
number is specified.
Private
Causes PRIVATE to be added to the names in the module definition
file; this directs the IMPLIB utility to ignore the EXPORTS statements.
Add, Replace, Remove
Clicking on the Add button adds the routine to the list of exported
routines. Clicking on the Replace button uses the routine to replace
the currently selected routine in the list. Clicking on the Remove
button removes the currently selected routine from the list.
The Resource Compiler subpage (Figure 16-15) contains options to
control the resource compiler.
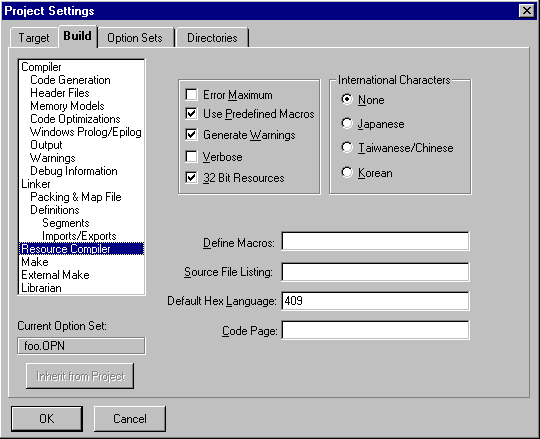
[Figure 16-15 Resource Compiler subpage
Error maximum
Makes the resource compiler stop when its error limit is reached. If
this option is off, the resource compiler processes the entire source
file and displays all errors that have been detected.
Use predefined macros
Directs the resource compiler to use all predefined macros for the
resource file.
Generate warnings
Shows warning messages.
Verbose
Shows greater detail when compiling resources.
32-bit resources
Specifies creation of 32-bit resource files.
Define macros
Specifies macros that should be defined for the resource compilers.
Source file listing
Specifies the name of the output listing file to create from the .res
script.
Default hex language
Specifies the default hexadecimal language for 32-bit resources.
Code page
Specifies the code page used to convert strings in 32-bit resources to
Unicode (currently unused).
International characters
This option specifies how the resource compiler interprets 2-byte
Asian language character codes within character constants and
strings. That is, if a character code represents the first byte of a 2-byte
sequence, the second byte is not checked to see whether it is a
backslash or a closed quote. The second byte cannot be a NULL (0),
a carriage return (0x0D), or an end-of-file (0x1A).
- None:
- Allows no 2-byte sequences.
- Japanese:
- Signals the 2-byte sequence with a value in the range
0x81 ... 0x9F and 0xE0 ... 0xFC.
- Taiwanese/Chinese:
- Signals the 2-byte sequence with a value in
the range 0x81 ... 0xFC.
- Korean:
- Signals the 2-byte sequence with a value in the range
0x81 ... 0xFD.
The Make subpage (Figure 16-16) sets Make options for the IDDE
built-in Make.
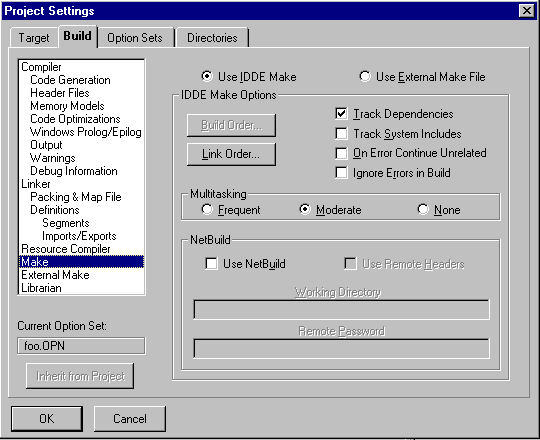
[Figure 16-16 Make subpage
The radio buttons at the top of the dialog box control the Make
program that will be run when the IDDE builds the project.
- Use IDDE make:
- Use the built-in IDDE make tool.
- Use external make file:
- Use an external Make
program.
IDDE make options
This group of options governs the IDDE Make.
Build order
Opens the Build Order dialog box (see Figure 16-17).
Link order
Opens the Link Order dialog box (see Figure 16-18).
Track dependencies
Specifies whether or not to track dependencies (enabled by default).
More time is required to track dependencies for large projects with
many include files. The most effective way to use this option to
establish the correct dependencies is to turn it on when first
building a project. Then turn it off, except when changing the
dependency structure (by changing #include statements, for
example).
If dependencies are tracked, the dependent files are shown in the
Project window.
Track system includes
Specifies whether to track dependencies in system include files
(disabled by default).
On error continue unrelated
Causes the IDDE Make to continue to build modules that are not
dependent on the module in which the error occurred.
Ignore errors in build
Directs the IDDE Make to ignore errors and continue to build the
target.
Multitasking
Affects the responsiveness of the system to a command to execute
another task within Windows while the project is being built.
- Frequent:
- Causes the IDDE to frequently give up time slices so
other applications can execute faster.
- Moderate:
- Causes the IDDE to give up some of the time to other
applications.
- None:
- Turns off multitasking.
Other applications are suspended
while the IDDE is building a project.
Netbuild
The IDDE allows the build process to be distributed among one or
more remote servers. For more information, see Appendix C, "Using
NetBuild."
Use NetBuild
Enables distributed builds.
Use remote headers
Allows the remote server to use the header files provided with
Digital Mars C++ on the build server. When this option is off, the build
server takes the files from the local machine.
Working directory
Specifies the working directory on the remote server.
Remote password
Specifies the password for logging on to the remote server.
Build order
The Build Order button is only enabled when .prj,
.bat, or .mak files are in the project.
Clicking on this button opens
the Build Order dialog box, shown in Figure 16-17.
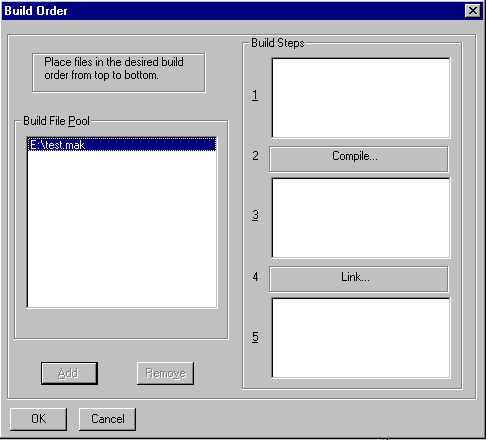
[Figure 16-17 Build Order dialog box]
The Build Order dialog box specifies the stage of the build in
which the .prj, .bat, or .mak files are executed.
Do this by selecting a file from the Build File Pool list, clicking on one of
the build steps on the right, then clicking on Add. The selectable steps are:
- Step 1:
- Happens before any compilation takes place.
- Step 3:
- Happens after the files have been compiled
into object
files, but before they have been linked to make the target.
- Step 5:
- Happens after the final executable has been linked.
Return any of the files to the Build File Pool list by selecting
the filename in one of the steps and clicking on Remove.
When done with the build order, click OK to return to the
Make subpage.
Link order
The Link Order button opens the Link Order dialog box, shown in
Figure 16-18.
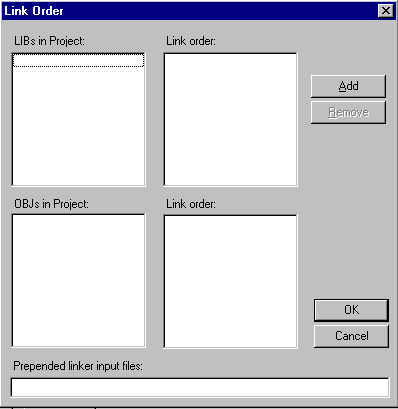
[Figure 16-18 Link Order dialog box]
The Link Order dialog box specifies the order in which
libraries and object files added explicitly to the project are linked.
Do this by iteratively selecting files from the LIBs in Project or
the OBJs in Project listbox, then clicking Add to move the files to the
Link Order listbox.
Return a file to the LIBs in Project or the OBJs in Project
listbox by selecting the filename and clicking on Remove.
The libraries added explicitly to the project are linked before other
libraries. The object files added explicitly to the project are by
default linked after the object files generated by compiling source
files in the project. To specify object files to be linked before
any other object files use the Prepended linker input files textbox.
When done with the link order, click OK to return to the
Make subpage.
The options on this subpage govern the use of a make utility other
than IDDE Make. Figure 16-19 shows the External Make subpage.
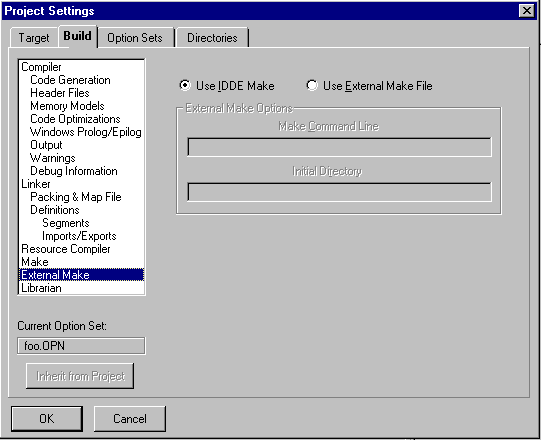
[Figure 16-19 External Make subpage]
Using external make
To use a separate external Make program:
- Select Use External Make File.
- Specify the .exe name of the Make program in the
Make Command Line textbox, followed by any arguments.
The IDDE expects the program's directory to be in
the PATH environment variable.
- To set the Make's default directory, enter
the change in the Initial Directory box. By default, this is
the directory that contains Make.
- Use a Windows PIF file to further customize the
way Make behaves.
The next time the Build or Rebuild All command is selected,
the IDDE runs the external Make program from a DOS command-line window,
which closes when Make is done.
The radio buttons at the top of the dialog box control the Make
program that will be run when the IDDE builds the project:
- Use IDDE make:
- Use the built-in IDDE make tool.
- Use external make file:
- Use an external Make
program.
Make command line
The Make Command Line textbox holds the .exe name of the external
Make program followed by any arguments.
Initial directory
Use this textbox to specify the directory from which the Make utility
will run.
The Librarian subpage (Figure 16-20) specifies options for building a
library.
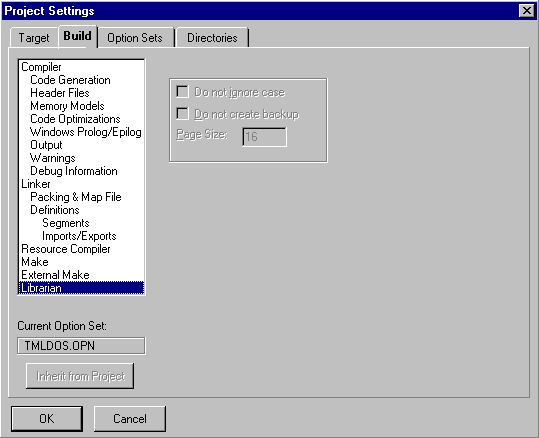
[Figure 16-20 Librarian subpage]
Ignore case
Directs the librarian utility to ignore case in symbols.
Do not create backup
Keeps the librarian utility from backing up the original library. When
this option is turned off, the original library is saved in a backup file.
Page size
Specifies the library page-swapping size.
Chapter 4, "Generating an Application Framework," defines an
application framework and outlines the steps for generating a
skeleton application using AppExpress. This companion reference
chapter provides further detail concerning application types,
program detail, program architecture, message maps, as well as
generating and examining source files.
Selecting an Application Type
Select Application Type from the list of steps at the upper left of the
AppExpress window. The options pane at the right contains three
groups of controls, labeled Applications, OLE Options, and Project
Options.
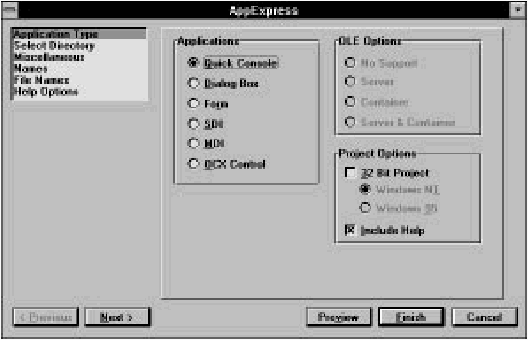
[Figure 17-1 AppExpress application type options
Applications
The group of Applications radio buttons contains six categories of
applications. Of these, only Quick Console does not use the MFC
library. These categories are:
- Quick Console: The kind of application generated is
determined by whether the 32-Bit Project box in the
Project Options group is checked. See the information on
the Project Option group later in this section.
- Dialog Box: This standard Windows dialog box can be
either modal or modeless and can include dialog box
controls such as push buttons, textboxes, and listboxes.
- Form or Database: This is a window with the
functionality of a dialog box enhanced with scroll bars. It
is appropriate for dialog boxes that have more than one
screen of controls.
- Single Document Interface (SDI): This application uses a
single window in which the application data is displayed.
The OLE Options group of controls is enabled if this
application type is selected.
- Multiple Document Interface (MDI): This application lets
you display more than one window of data within a
parent frame window. The OLE Options group of
controls is enabled if this application type is selected.
- OCX Control in MFC: This template is for a custom
control that is an OLE2 object.
The application types vary in the amount of functionality that
AppExpress generates as part of the skeleton program. For example,
SDI applications contain only one window, while MDI applications
contain a main window and a variable number of child windows.
OLE Options group
The OLE Options group is enabled only if you select the SDI or MDI
application type. The group contains four radio buttons:
- No Support: The application is not OLE-aware: it is
neither a server nor a container. This option is the
default.
- Server: The generated application acts as an OLE2 server.
An OLE2 server can create or edit data, which OLE2
containers can link to or embed.
- Container: A host application. The generated application
can contain OLE2 server data elements (OLE2 objects)
within this host application's data.
- Server & Container: The generated application acts as
both an OLE2 server and as an OLE2 container.
Project options group
The Project Options group contains two check boxes, Include Help
and 32-Bit Project.
Checking Include Help tells AppExpress to generate the files
necessary to build a Windows Help file for the specified application
type. AppExpress creates a Help subdirectory named hlp beneath
the project directory, which contains those files. It also creates the
file makehelp.bat, which you run to compile a Windows Help file
from the files AppExpress provides.
For all application types other than Quick Console, checking the 32-
Bit Project box causes the MFC 3.0 to be used instead of the 16-bit
MFC 2.5.
For Quick Console, leaving the box unchecked results in a skeleton
WINIO program being generated. WINIO is a library that allows you
to write simple Windows programs that perform input/output using
standard C library functions (in other words, those functions
prototyped in stdio.h.). If the 32-Bit Project box is checked, a
Win32 console application is generated. Win32 console applications
can only be run under Windows NT and Windows 95 (and not under
Win32s).
If you check the 32-Bit Project box, your application can call the
Win32 API.
Providing Miscellaneous Information
Selecting Miscellaneous in the steps list opens the Miscellaneous
options page. This page lets you provide copyright information as
well as a name for the project.
- In the first three fields, provide a company name, suffix,
and copyright year.
- In the Project Name field, type a name for the project. (This
name is also referred to as the Windows module name.)
Note:
The module name is recorded in the module
definition file generated by AppExpress. It can be
changed by using the Project Settings dialog box,
opened from within the IDDE by choosing Settings
from the Project menu.
The Document/View Architecture
The MFC library provides a number of C++ classes that, when used
together, create the object-oriented structure for your application.
These are the document, view, frame window, and document
template classes. The Form or Database, SDI, and MDI application
types all use document/view architecture. This section introduces the
MFC classes that implement this program structure.
Frame window
The frame window contains views on the data used by the
application. In an SDI application, there is only one frame window,
which is derived from the MFC class CFrameWnd. In an MDI
application, there is a main frame window derived from
CMDIFrameWnd, as well as document frame windows derived from
CMDIChildWnd.
In addition to containing child view windows, the frame window
handles all window management- for example, minimizing,
maximizing, and closing the window. A standard toolbar and status
bar also are displayed in this window.
View
Each frame window can contain a view on the data used by the
application. A view is a C++ class derived from the class CView.
Your application interacts with the user through this view class.
In the SDI frame window, AppExpress generates a child view
window that takes up the client area of the frame window. (The
client area refers to the part of the window in which the program's
data is displayed. It excludes the window border, caption, and
menu.) In an SDI application, this view window is given the default
class name CSDIAPPView. All display and printing of the
application's data is done using this view window and its class. The
user's manipulation of the data is also done through the view.
Document
A document is a C++ class, derived from CDocument, that represents
the data in your application. For example, a standard Windows
application has a File menu that is a variant of the one shown in
Figure 17-2.
[Figure 17-2 Standard Windows file menu]
When you choose Open from this menu, you are telling the
program to open a document.
Note:
The word document refers to whatever type of data
is used by the application. It does not necessarily
mean a text-based word processing document.
As the developer of the application, you write code in a CDocument-derived
class to handle the operations on the File menu. An
example of a skeleton CDocument-derived class follows.
	class CSDIAPPDoc : public CDocument
	{
	protected: // create from serialization only
	    CSDIAPPDoc();
	    DECLARE_DYNCREATE(CSDIAPPDoc)
	// Attributes
	public:
	// Operations
	public:
	// Implementation
	public:
	    virtual ~CSDIAPPDoc();
	    virtual void Serialize(CArchive& ar);
	#ifdef _DEBUG
	    virtual void AssertValid() const;
	    virtual void Dump( CDumpContext& dc) const;
	#endif
	};
Notice that no member variables are included with this class. It is up
to you as the developer to add whatever data you need for your
application.
In the example above, a Serialize method is included in the
Implementation section of the class definition. This method,
inherited from the base class, CDocument, performs object storage
and retrieval to and from a disk file. In fact, the framework generated
by AppExpress already handles the File Open, File Save,
and File
Save As operations by automatically calling the Serialize method
in your CDocument-derived class. You can use the Serialize
method to implement object persistence- the ability to preserve the
complete state of objects across multiple executions of the program.
When you add your own member variables to this class, you should
also override the Serialize method to read and write the added
variables.
Pulling it all together: the document template
Creating and managing an application's frame window, views, and
documents is the job of another C++ class, derived from the
CDocTemplate class. In an SDI application, the CSingleDocTemplate
class is used; in an MDI application, the CMultiDocTemplate class is
used.
For more information, refer to the Microsoft Foundation Class
Library Reference.
More about Message Maps
This section outlines the purpose of message maps and identifies the
different parts of a message.
The rationale for maps
Using message maps saves you development time. The reason for
this productivity improvement lies in the event-driven nature of
Windows applications.
As a user of a Windows application clicks on buttons, selects menus,
drags the mouse to highlight text, or performs any other mouse or
keyboard action, the application is notified of this action through a
Windows message. This message contains pertinent contextual
information such as the screen coordinates at which the mouse was
clicked, or an identifier indicating the button that was clicked.
The application developer decides which messages the application
should respond to and how. If the developer decides not to write
code to handle a particular message, the message can still be passed
back to Windows to perform default processing.
If you write a Windows application using the Windows SDK, these
decisions are most likely implemented as a switch statement in the
main window procedure (usually referred to as a WndProc). For
example, your window procedure might look like this:
	LRESULT CALLBACK WndProc(HWND hwnd,
		UINT message, WPARAM wParam, LPARAM lParam)
	{
	    switch (message)
	    {
		case WM_PAINT:
		    PAINTSTRUCT ps;
		    BeginPaint(hwnd, &ps);
		    MyPaintProc(hwnd, ps. hdc);
		    EndPaint(hwnd, &ps);
		    return(0);
		case WM_CREATE:
		    hmenu = GetSystemMenu(hwnd, FALSE);
		    AppendMenu(hmenu, MF_SEPARATOR, 0, (LPSTR) NULL);
		    AppendMenu(hmenu, MF_STRING, IDM_ABOUT, "About...");
		    break;
		case WM_DESTROY:
		    PostQuitMessage(0);
		    return(0);
	    }
	    return DefWindowProc(hwnd, message, wParam, lParam);
	}
If your application must respond to many types of messages, the
window procedure can get quite large and become difficult to
maintain. One of the advantages of the MFC library is the use of
message maps, which drastically reduce the amount of code
required to process messages.
Components of the message map
A message map is composed of the three components described in
this section.
BEGIN_MESSAGE_MAP, END_MESSAGE_MAP macros
All message maps must begin and end with these macros. At run-time,
the expanded macro sets up the message mapping between
events and the code to handle the events.
ClassExpress-specific comment sections
AppExpress and ClassExpress add special-purpose comments to the
message map so that ClassExpress knows where to add or remove
mapping macros. Because ClassExpress provides an easy-to-use
interface to your C++ class mappings, you should not manually edit
the comments or code in a message map.
Message-mapping macros
If a C++ class has a method (that is, a class member function) to
respond to a message, ClassExpress writes a message-mapping
macro for that message in the class's message map. This macro
begins with the prefix ON_, usually followed by the macro name for
the Windows message. The mapping macro takes two parameters:
- The message identifier.
- The method that is called when the message event
occurs at run-time.
For example:
ON_COMMAND(ID_FILE_PRINT, CView::OnFilePrint)
This macro sets up a linkage between the Windows
message WM_COMMAND and the method OnFilePrint.
This method is only called, however, if the WM_COMMAND
parameter (in this case, the wParam) is equal to
ID_FILE_PRINT. This mapping macro is equivalent to
the following case statement in a window procedure:
		case WM_COMMAND:
		    if (wParam == ID_FILE_FORMAT)
			CView::OnFilePrint();
Having the Express tools generate message maps lets
you concentrate on the specific function of the
application without having to worry about syntactical
issues.
Generating and Examining the Source Files
Generating the source files of the application framework is as easy as
clicking on a button. After the files are generated, you may want to
examine the header and implementation files. AppExpress typically
generates one header and one implementation file for each class. (An
exception is the CAboutDlg class, which shares files with the
application class.) Examining a few generated files in the IDDE,
setting breakpoints on methods, and tracing through their code will
help you understand the internal workings of the frameworks that
AppExpress generates. At that point you will then be ready to edit
the code in order to enhance it as needed.
To generate and examine sample source files:
- Launch AppExpress from the IDDE Tools menu, and
make all the selections necessary to create an SDI
application. When you click on Finish, AppExpress
generates all the source files for this skeleton program.
When it is done, AppExpress gives control to the IDDE
(with the new project open), and then closes.
- Open the Project window in the IDDE by clicking the
Project View icon and dragging it onto the desktop, or by
pressing Ctrl+ Shift+ P.
- Double-click on the filename mainfrm.h. A Source
window opens containing the header file mainfrm.h.
(For more information on Source windows, see
Chapter 2, "Introducing the IDDE.")
This file, which AppExpress generated, contains the definition of the
class CMainFrame. It is reproduced in its entirety below.
	// mainfrm.h : interface of the CMainFrame class
	//
	// Copyright (c) XYZ Corporation, 1994. All Rights Reserved.
	//
	//
	class CMainFrame : public CFrameWnd
	{
	protected: // create from serialization only
	    CMainFrame();
	    DECLARE_DYNCREATE(CMainFrame)
	// Attributes
	public:
	// Operations
	public:
	// Implementation
	public:
	    virtual ~CMainFrame();
	#ifdef _DEBUG
	    virtual void AssertValid() const;
	    virtual void Dump(CDumpContext& dc) const;
	#endif
	protected: // control bar embedded members
	    CStatusBar m_wndStatusBar;
	    CToolBar m_wndToolBar;
	// Generated message map functions
	protected:
	    //{{ AFX_MSG(CMainFrame)
	    afx_msg int OnCreate(LPCREATESTRUCT lpCreateStruct);
		// ClassExpress will add and remove member functions here.
		// DO NOT EDIT these blocks of generated code !
	    //}} AFX_MSG DECLARE_MESSAGE_MAP()
	};
The file contains:
- A file header that uses the company name, suffix, and
copyright year that you specified in AppExpress
- The CMainFrame class declaration
In the class declaration, notice that the status bar and toolbar are
represented by class member variables, each of which is an instance
of yet another C++ class. When writing code to manipulate the
toolbar and status bar, reference these member variables.
In the protected section of the class declaration is a prototype for a
function that is called as part of the class's message map. As
indicated, do not edit the code in this section because it is
reserved for ClassExpress.
AppExpress also generates a .cpp, or implementation, file for the
CMainFrame class. This file has the same base name, mainfrm, as
the class header file, but has the .cpp extension. To examine
mainfrm.cpp, open this file in an IDDE Source window. This
implementation file contains the following components:
- A file header.
- Preprocessor include statements for the required header
files.
- A declaration of the CMainFrame message map
containing a single entry (for the Windows WM_CREATE
message).
- Static array data for initialization of the toolbar and status
bar.
- The definitions of the CMainFrame constructor and
destructor functions. Notice the comment in the
constructor indicating where to add member initialization
code. Edit these functions to insert initialization
and shutdown code for object instantiation.
- The definition of the class's method, OnCreate, for
handling WM_CREATE messages.
- The definitions of two functions- AssertValid and
Dump- that may be used during debugging.
- A final comment indicating where ClassExpress will add
stub methods for new entries in the CMainFrame
message map.
The next chapter covers ClassExpress, one of the
tools (along with the Resource Studio) used to enhance
an application generated by AppExpress.
Chapter 4 defined the concept of an application framework and
outlined the steps for building on your skeleton application using
ClassExpress. This companion reference chapter provides more
detail about using ClassExpress, including:
- Deriving a class to handle user interface events in your
program
- Working with Dialog Data Exchange (DDX) and Dialog
Data Validation (DDV)
- Enabling a C++ class as an OLE2 automation server or
client
- Deriving a C++ class from an existing Visual Basic
custom control (VBX)
Deriving a Class to Handle User Interface Events
With ClassExpress, you can derive a new class designed to handle
user interface events such as menu selections and button clicks
directly from a Microsoft Foundation Class (MFC) library class.
Suppose, for example, that you want to add a new dialog box to
your application. To derive a class from the CDialog class using
ClassExpress, follow these steps:
- Create an application framework for a standard SDI
program using AppExpress (for details, see Chapter 4,
"Generating an Application Framework").
- Use ResourceStudio to create a new dialog box resource
(see Chapter 7, "Adding Look and Feel with Resources").
- Launch ClassExpress from ResourceStudio or from the
IDDE's Tools menu.
- Add a new class to your program by clicking on the Add
Class button. (Follow the instructions in Chapter 4,
"Generating an Application Framework.") Be sure to
derive the new class from the Dialog class type.
In ClassExpress, all of the base classes from which you
derive new classes are themselves derived from the MFC
class CCmdTarget. The MFC Library Reference defines
CCmdTarget as the base class for the message map
architecture. Any class derived from CCmdTarget inherits
the ability to respond to user interface events such as
menu and toolbar selections and dialog box actions.
- In the ClassExpress main window, verify that your class
has been created by browsing through the Class drop-down
list.
- Select the new class name from the Class list. Note that
the list of Control IDs and Windows messages for your
derived dialog box class is different from the list for non-dialog
classes.
Note:
ClassExpress filters out the Control IDs and
Windows messages that do not apply for the
selected class name. For example, dialog box
classes can handle the WM_INITDIALOG message,
but this message is not handled by any class derived
from CFrameWnd.
The ability to add new classes that derive specialized message-handling
functionality from the base MFC classes is one of the
benefits of using ClassExpress. The following material summarizes
the type of functionality that a new class inherits if it is derived from
CCmdTarget. For more information on any of these base classes,
refer to the Microsoft Foundation Class Library Reference.
- CmdTarget:
- The base class for all MFC classes that offer
support for Windows message handling. You probably
will not derive a new class directly from CmdTarget;
instead, use the other base classes in this list.
- Dialog:
- This class implements dialog boxes, either modal
or modeless. It usually is associated with a dialog box
resource template created in ResourceStudio. Member
variables of this class typically are mapped to fields or
controls in the dialog box. For details on how this
mapping is established, see the next section, "Working
with Data Transfer: DDX and DDV."
- Document:
- The application's data is represented by the
document class. The data can be anything the
programmer chooses. All file input and output should be
handled within the document class.
- FormView:
- A class of views that has built-in support for
scrolling and for child controls. FormViews typically are
combined with a dialog box resource template. One way
in which the FormView class differs from the Dialog class
is its added support for scrolling.
- FrameWnd:
- The main window class for single document
interface (SDI) applications.
- MDIChildWnd:
- The child document window class for
multiple document interface (MDI) applications.
- ScrollView:
- A class of view window that supports
scrolling.
- View:
- The base class that provides the connection
between the document class representing the program
data and the user interface to that data.
- Wnd:
- The base class for any window, including dialog
boxes, frame windows, views, and dialog box controls.
Because this class is used to derive many of the other
classes listed here, choose Wnd as a base for a new class
if other choices do not satisfy your programming
requirements.
- Splitter:
- This special type of window can contain
multiple panes. A pane is usually a window that is
associated with a View-derived class in the application.
Working with Data Transfer: DDX and DDV
The previous section discussed the architecture classes that you use
to build an object-oriented Windows program with the MFC library.
The application, document, view, template, and frame window
objects are the key components of a standard Windows, MFC-based
application.
This section describes MFC library support for data transfer between
dialog boxes or other windows and your C++ objects that store that
data. This is referred to as Dialog Data Exchange (DDX) and Dialog
Data Validation (DDV). You use the Data Transfer options of
ClassExpress to bind class member variables to dialog box or
window controls.
Note:
Data transfer using DDX/DDV can be applied to
any window that is derived from the MFC base
class, CWnd. It is not restricted to dialog boxes
derived from CDialog.
Dialog Data Exchange with Windows 95 Common
Controls is also supported.
Implementing Dialog Data Exchange (DDX) using ClassExpress
To implement DDX using ClassExpress, use the following steps.
Before performing these steps, generate a dialog box application
with AppExpress, then:
- Add a few edit controls to your skeleton dialog box
using ResourceStudio.
- Launch ClassExpress from ResourceStudio or from the
IDDE's Tools menu. ClassExpress loads the project and
displays the Message Maps options.
- In the upper-left listbox, click on Data Transfer. From the
Class drop-down list, select the CMainDialog class.
The ClassExpress window should look similar to that
shown in Figure 18-1.

[Figure 18-1 Data Transfer page in ClassExpress
- Click on the Add Variable button. The Add Member
Variable dialog box shown in Figure 18-2 opens.
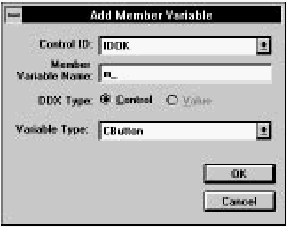
[Figure 18-2 Add Member Variable dialog box
- From the Control ID drop-down list, select a dialog box
control that you want to map to a class member variable.
- Edit the Member Variable Name to specify the name of a
variable to be mapped to the selected Control ID. The
variable does not have to exist in the class. (ClassExpress
adds it automatically to the class for you.)
Note:
Nonstatic class member variable names are usually
prefixed with m_for easy identification; however,
you are not required to follow this convention.
- For DDX Type, select Control to map the control ID and
variable name to a control class (such as CButton or
CEdit). Select Value to map to a CString or to a numeric
type.
- Select a Variable Type for this member variable from the
Variable Type drop-down box. The available types
depend on the type of control being mapped and the
DDX Type option.
- If you selected Value from the Type radio buttons, one
or two additional fields are displayed along the bottom
of the dialog box. If the added member variable is of a
numerical variable type, two fields are displayed, which
allow you to set the minimum and maximum ranges for
the variable's value. If the variable type is CString, then
only one field is displayed, in which you specify the
maximum number of characters that the CString can
contain. (You cannot specify a minimum number of
characters.)
Figure 18-3 shows an example using a CString
variable type.
[Figure 18-3 Adding a CString member variable
- Click OK. You are now back in the ClassExpress
window, and the member variable you just added is
displayed in the spreadsheet. If you added minimum or
maximum values for your member variable, a dialog data
validation function name is displayed in the DDV type
field.
Understanding data transfer at the source code level
The procedure in the preceding section instructs ClassExpress to
establish a link between your CMainDialog class and a control within
a dialog box. In the implementation file maindlg.cpp are calls to
virtual functions that CMainDialog inherits from other MFC classes.
These functions perform the dialog data exchange and validation
(DDX/DDV) for your program.
This section explores the source code generated by ClassExpress and
explains the implementation of data transfer- the first step in how
DDX functions bind member variables to dialog box objects to
transfer data between the variables and the controls. Next, the
validation of values entered into dialog box controls is explained.
The third section describes how data transfer functions are invoked
by the UpdateData function.
Dialog Data Exchange (DDX)
To implement DDX, follow these steps:
- Select Open from the IDDE's Project menu to open the
dialog box project you created earlier.
- Open the maindlg.cpp file in a Source window. Either
double-click on maindlg.cpp in the Project window or
open an empty Source window, then open the source
file using the Open command in the File menu.
- From the Edit menu, choose Find and search for
DoDataExchange. Look at the definition for the
method CMainDialog::DoDataExchange.
ClassExpress has overridden the CWnd method
DoDataExchange in your CMainDialog class. A sample
implementation of DoDataExchange follows.
	void CMainDialog::DoDataExchange(CDataExchange* pDX)
	{
	    CDialog::DoDataExchange(pDX);
	    //{{ AFX_DATA_MAP(CMainDialog)
	    DDX_Control(pDX, IDABOUT, m_About);
	    DDX_Control(pDX, IDOK, m_OKButn);
	    DDX_Control(pDX, IDCANCEL, m_CancelButn);
	    DDX_Control(pDX, IDHELP, m_Help);
	    //}} AFX_DATA_MAP
	}
DDX lets you copy data easily from class member variables to dialog
box controls, then from the controls back to the member variables.
This is accomplished by implementing an override for the
CWnd::DoDataExchange method in your dialog box class. For
each control that is mapped to a member variable, ClassExpress
generates a call to a DDX function. There are four DDX function
calls in the code sample shown above.
DDX functions take the form:
DDX_xxx(pDX, nIDC, Data);
where:
- pDX is a pointer to a CDataExchange object. This
object contains context information such as the dialog
box instance and whether the data exchange is from the
member variable to the control or vice versa.
- nIDC is the dialog box control ID.
- Data is the member variable in your dialog class.
Note:
DDX functions that exchange data with Visual Basic
custom controls (VBXs) take an additional
parameter, nPropIndex- the property index being
exchanged. This parameter is shown before the
Data parameter.
The preceding sections cover how ClassExpress prompts you for
new member variables, then generates code that performs automatic
data exchange between those variables and their respective dialog
box or window controls. The next section describes how to enhance
data exchange by using data validation.
Dialog Data Validation (DDV)
When adding a new variable using the Data Transfer options in
ClassExpress, you can define minimum and maximum values for
numeric variables and maximum lengths for CString variables. This is
illustrated in Figure 18-4 below.
[Figure 18-4 Adding a numeric member variable
In this example, the member variable m_PayTo is defined as an
integer and is limited to values between 100 and 5000. This variable
is bound to a dialog box edit control identified by IDC_PAYTO. The
user of the application is not allowed to enter a value in that control
that is outside the minimum and maximum bounds.
You do not have to write a single line of code to enforce this rule.
The DDV functions in the MFC library do this for you. After adding
the variable m_PayTo, as shown earlier, and clicking Close in
ClassExpress's main window, ClassExpress writes the following lines
to the DoDataExchange method of your dialog box class:
	DDX_Text(pDX, IDC_PAYTO, m_PayTo);
	DDV_MinMaxLong(pDX, m_PayTo, 100, 5000);
The first line binds the edit control to your m_PayTo member
variable. This uses a DDX function, as discussed earlier in this
chapter. The second line is the DDV function that limits values in the
textbox control to between 100 and 5000.
Note:
For each member variable, the DDV function call
should immediately follow the DDX function call in
your DoDataExchange function. This is a
requirement of the application framework and is
enforced when ClassExpress writes new DDX/DDV
function calls to the source code file.
DDV functions take the following form:
DDV_xxx(pDX, Data, ...);
where:
- pDX is a pointer to a CDataExchange object. This
object contains context information such as the dialog
box instance and whether the data exchange is from the
member variable to the control or vice versa.
- Data is the member variable in your dialog class.
- ... indicates the remaining arguments: minimum and
maximum values for numerical variables, and maximum
number of characters for strings.
Calling UpdateData
Your dialog class's DoDataExchange method is called by another
CWnd method, UpdateData, whose prototype follows:
BOOL UpdateData(BOOL fSaveOrValidate);
If the parameter to UpdateData is FALSE, then the function
updates the dialog box controls with data from class member
variables that have been mapped to the controls. If the parameter is
TRUE, then the member variables are updated with data from the
controls and validated.
You call UpdateData from the places in your program at which
you want to exchange data with the dialog box. UpdateData is
called for you automatically in only one place in the dialog
initialization.
In response to the WM_INITDIALOG message, the
CDialog::OnInitDialog method calls UpdateData with a
parameter equal to FALSE, indicating that the controls are being set.
Initialize the values of a dialog class's member variables in your
OnInitDialog method. For example:
	BOOL CMainDialog::OnInitDialog()
	{
	    m_ColorIsRedCheckBox = TRUE;
	    m_Filter = FILTER_NONE;
	    CDialog::OnInitDialog();
	}
Here two member variables, m_Color and m_Filter, are set to
initial values. When the CDialog::OnInitDialog method is
called, it uses those values to set the state of the dialog box controls
mapped to these member variables.
Making Your Application an OLE Automation Server
This section covers the following topics:
- The definition of an OLE automation server
- The difference between creating an automation server in
ClassExpress and a standard OLE server in AppExpress
- The mechanics of creating an OLE automation server
using ClassExpress
- The source code that ClassExpress generates to
implement OLE automation
Note:
Use of the acronym OLE (object linking and
embedding) in this section refers to version 2 of
OLE, which includes automation support.
What is an OLE automation server?
OLE automation is an architecture that allows programs to
manipulate objects within other applications. The application that
defines the objects is called the automation server. Any application
that uses OLE to manipulate another application's objects is called an
automation client. For example, Microsoft Excel is an automation
server, and Microsoft Visual Basic is an automation client. From
within Visual Basic, you can write a program that loads an Excel
spreadsheet, runs Excel macros, and saves the spreadsheet.
OLE automation server vs. OLE server
OLE automation is an extension of the original object linking and
embedding technology that originated in version 1 of OLE. The
linking and embedding features determine how data from one
application is used in another. For example, you can embed a
spreadsheet document within a word processing document, or link a
word processing document to a spreadsheet document that exists in
a file.
Note:
An embedded object's data is saved as part of the
client application's data. A linked object's data is
saved independently of the client's data; the client's
data contains a reference to the filename of the
linked data.
In these examples, the application that is the container for the
spreadsheet is called an OLE client or a container application. The
application that originally created the spreadsheet and that is used to
edit the spreadsheet is called the OLE server application. The server
application is responsible for creating and maintaining data objects
embedded in or linked to another application.
When you create an OLE server application with AppExpress, you
are making it possible for your application's data to be embedded in
or linked to another application's data.
OLE automation was introduced in the second version of the OLE
technology. Automation has nothing to do with embedding or
linking to data objects. It is used to manipulate objects that an OLE
automation server has created.
Using OLE automation to manipulate an object allows you to do
some or all of the following:
- Query and change the properties of an object
- Call functions that are defined in the object
- Be notified when an object triggers a specific event
Although an OLE server might provide embedding, linking, and
automation support, all three options do not have to be provided.
For example, you could create an automation server that only
performs mathematical calculations, has no user interface, and is
accessible only by function calls through the OLE automation
interface. In this case, you only need an OLE automation server.
Linking and embedding technology, which is packaged in a standard
OLE server, is not required.
Enabling your application to be an OLE automation server
This section assumes that you have generated a sample MFC-based
application framework with AppExpress. You use that framework in
this section.
To enable your application to be an OLE automation server:
- With the project containing your sample application
framework loaded in the IDDE, launch ClassExpress by
choosing it from the Tools menu in the IDDE's main
window.
- To act as an OLE automation server, your application
needs a C++ class that defines an automation object. In
ClassExpress, you take care of this by adding a class.
Click on the Add Class button.
- Select a Class Type. This specifies the MFC class from
which your new class is derived.
- Type the name of the class in the New Class Name
textbox.
- Check the OLE automation box. If your class is derived
from CCmd Target or CWnd, the Creatable check box
and the External Name textbox become visible.
- For CCmdTarget-and CWnd-derived classes, if you want
OLE client applications to be able to create instances of
your OLE automation object, check the Creatable box as
well.
- For CCmdTarget-and CWnd-derived classes, enter an
External Name that will be used by OLE automation
client applications to identify your automation object.
- Click OK. At this point, ClassExpress generates the new
class in your project's source code and reports that the
classes were generated correctly. You are returned to the
main ClassExpress window.
Completing these steps creates the basic source code structure for
your OLE automation class. However, you may also want to take
advantage of ClassExpress's ability to add functions and properties to
your class that will be exposed by OLE automation.
Adding exposed functions to an automation server class
First, select the class from the Class Name drop-down list. To add a
function, follow these steps:
- Click the Add Function button on the Automation Server
page of ClassExpress. The Add Function dialog box
opens.
- In the External Name textbox of Add Function, type the
name by which automation clients will refer to the new
function. As you type, the Internal Name textbox mirrors
the name you are entering.
- If you want your new function to have an Internal Name
different from its External Name, type the desired
Internal Name in that textbox. The Internal Name is the
name the function will have in your source code.
- Select the function's Return Type from the drop-down list
with that label. In addition to the standard types void,
short, long, float, and double, this list contains the
OLE types CY, DATE, LPDISPATCH, SCODE, BOOL,
VARIANT, and LPUNKNOWN. If you are unfamiliar with
these latter types, consult the OLE2 Programmer's
Reference for their definitions.
- If your function takes arguments, add them one at a time
by clicking on the Add button at the bottom of the
Parameters List listbox. The Add Parameter dialog box
that is displayed lets you specify the Name and Type of a
parameter. Enter the parameter's name in the Name
textbox. Select its type from the Type drop-down list.
(The Type list contains more OLE types. See the OLE2
Programmer's Reference for details.) Click OK. You are
returned to the Add Function dialog box, in which the
parameter you just specified is displayed in the
Parameters List listbox.
Follow the procedure just described to add any other
parameters the function requires.
- Click OK in the Add Function dialog box. You are
returned to the Automation Server page of ClassExpress.
The function you just created is added to the Name
listbox, and is referred to using its external name. When
this function is selected in the Name listbox, the
Implementation listbox displays the prototype of the
function that ClassExpress generates to implement it.
Adding properties to an automation server class
First, select the class from the Class Name drop-down list. To add a
property, follow these steps:
- Click the Add Property button on the Automation Server
page of ClassExpress. The Add Property dialog box
opens.
- Select one of the radio buttons to the right of the
Implementation label. If you want to grant automation
clients read-only access to the property you are adding,
select Variable. If you want to grant read/write access to
the property, select Get/Set Function.
- In the External textbox, type the name by which
automation clients will refer to this property.
As you type, the values of the Get Function and Set
Function fields are automatically filled in using the
external name extname you specify. If you are creating a
read-only property, it will be implemented as a member
variable in your automation class. The Get Function
textbox will contain the proposed name of that variable,
m_extname. If you are creating a read/write property, it
will be implemented by a pair of member functions- a
Get and a Set function- in your automation class. The
Get Function and Set Function textboxes will contain the
proposed names of those functions, Getextname and
Setextname.
- Select the Type of the property from the drop-down list
with that label. In addition to the standard types short,
long, float, and double, this list contains the OLE
types CY, DATE, LPDISPATCH, SCODE, BOOL,
VARIANT, and LPUNKNOWN. If you are unfamiliar with
these latter types, consult the OLE2 Programmer's
Reference for their definitions.
- If you want, change the names of the Get and Set
Function.
- Click OK in the Add Property dialog box. You are
returned to the Automation Server page of ClassExpress.
The property you just created is added to the Name
listbox and is referred to using its external name. When
this item is selected in the Name listbox, the
Implementation listbox displays the member variable or
the pair of functions that ClassExpress generates to
implement the property.
OLE automation server source code
This section examines some of the source code generated by
ClassExpress that enables an application to be an OLE automation
server.
As explained in the previous section, you create a new class using
ClassExpress and indicate that the class should support OLE
automation. When the source code is generated, the constructor for
your new class contains the following code:
	EnableAutomation();
	// To keep the application running as long as
	// an OLE automation
	// object is active, the constructor calls
	// AfxOleLockApp.
	AfxOleLockApp();
OLE automation is first enabled for this object using the MFC
function EnableAutomation. This function should only be called
if there is a dispatch map declared for the class (discussed in more
detail below). If your new class objects are creatable by other
applications, then the MFC function AfxOleLockApp is called in
your constructor.
This function increments a global count of the number of times this
object has been activated by OLE clients. It is the MFC library's way
of ensuring that an object is not destroyed by one OLE client, if it is
in use by another client. In the destructor for your class,
ClassExpress has written a call to the function AfxOleUnlockApp,
which decrements the global count for this object.
ClassExpress also creates a new macro structure called a dispatch
map, as shown in the following example:
	BEGIN_DISPATCH_MAP(COLEAutoObject, CCmdTarget)
	    //{{ AFX_DISPATCH_MAP(COLEAutoObject)
		// NOTE -the ClassExpress will add and
		// remove mapping macros here.
	    //}} AFX_DISPATCH_MAP
	END_DISPATCH_MAP()
As you can see, a dispatch map is similar to a message map, the MFC
library macro for routing Windows messages to your class methods.
Like message maps, you do not edit the dispatch map directly;
AppExpress and ClassExpress do that for you. The dispatch map is a
macro that generates dispatch table information used by the MFC
library's OLE classes to route automation requests.
In addition to the OLE initialization code in the constructor and the
dispatch map, ClassExpress optionally writes the following macro to
your class implementation file (.cpp):
	IMPLEMENT_OLECREATE(COLEAutoObject,"MYOBJ",
		0xd73cfd60, 0x3cea, 0x101b, 0x80, 0x60,
		0x4, 0x2, 0x1c, 0x0, 0x94, 0x2)
This macro is written if you selected the Creatable check box when
you added the new class in ClassExpress. The macro allows your
OLE automation object, as defined by your new C++ class, to be
created dynamically by an OLE client application. If you do not have
this macro, your automation object would have to be created by
your application before any OLE client could manipulate it using the
automation interface.
The IMPLEMENT_OLECREATE macro takes these arguments:
- The new class name
- The external name of the object
- The components of the class's OLE class ID
The last parameters, the components of the OLE class ID, together
represent a 128-bit value that uniquely defines the OLE object within
Windows.
Another source code file created by ClassExpress has a filename
consisting of the project name with the extension .odl. This file
contains the Object Description Language implementation for your
automation object class. You run the utility program
mktyplib.exe, passing the .odl file as an argument. The result is
a type library file with an extension of .tlb.
The type library file is used by OLE automation clients to query the
objects, properties, and functions exposed by your application.
This section has given you a view of the source code generated for
an OLE automation server. OLE automation has many more facets
that you should explore. Refer to the Microsoft Foundation Class
Library Reference and the OLE2 Programmer's Reference for
additional details.
Making Your Application an OLE2 Automation Client
The Automation Client selection of ClassExpress lets you make an
application an OLE2 automation client for type libraries that export
an OLE2 automation interface. ClassExpress creates a C++ class in
your program that acts as an interface to the type library class.
This section uses the OLE2 sample type library hello.tlb, found
in samples\ole16\hello below your Digital Mars C++ installation
directory. If you do not have this sample file installed, you can select
any other type library file that exports an OLE2 automation interface.
Otherwise, you should install the OLE2 samples.
To make your application an OLE2 automation client:
- Launch ClassExpress and, if necessary, open a project.
For this example, the application type of the project does
not matter.
- Select Automation Client from the list at the upper left of
the ClassExpress window.
- Click the "..." button to the right of the Type Library File
field. The Open dialog box is displayed.
Note:
This dialog box has filtered out all filenames that do
not end with .tlb or .olb. These extensions are
used for OLE type library files.
- Browse to the type library file
samples\ole16\hello\hello.tlb within the
Digital Mars C++ installation directory.
- Click OK in the Open dialog box. The type library file
should now be displayed in the Type Library File field in
the ClassExpress window.
Note:
Class names representing exported OLE2
automation interfaces in the type library are
displayed in the Class list.
- Select _DHello from the Class list.
- ClassExpress fills in the New Header File and New
Implementation File fields with the suggested file names
for the new C++ class that will be generated in your
framework.
- Click on the Generate button. ClassExpress creates the
header and implementation file for your new class.
The C++ class _DHello that was generated by ClassExpress
represents the client OLE automation interface to the _DHello type
defined in hello.tlb. This class provides a number of methods
that simplify the processes of attaching to and detaching from an
OLE automation dispatch connection. ClassExpress generates
additional methods that simplify the interface to
IDispatch::Invoke. If you are not familiar with the OLE
automation architecture, refer to the OLE2 Programmer's Reference.
Creating a C++ Wrapper Class for an Existing VBX
The VBXExpress section of ClassExpress lets you incorporate VBX
controls into an MFC application. ClassExpress makes it easy to use a
VBX by generating a C++ wrapper class through which you can
directly program the VBX. The wrapper class makes use of the MFC
base class CVBControl, which provides access to VBX properties and
events.
You can use VBXExpress with any 16-bit MFC application. (The
restriction arises because VBXs themselves are inherently 16-bit.)
Follow these steps to create a wrapper class for a VBX and add it to
the class hierarchy of a project:
- Launch ClassExpress- either from the IDDE or
standalone. If you launch ClassExpress standalone,
specify your project in the Open dialog box.
- Select VBXExpress from the list at the upper left of the
ClassExpress window.
- The control labeled VBX File displays the name of the
currently selected VBX file. Click the button labeled "...",
to the right of the control. An Open dialog box is
displayed. Select a VBX file and click OK.
VBX File displays the name of the file selected.
ClassExpress examines the VBX file to determine the
name and capabilities (events and properties supported)
of every VBX control contained in the file. (There can be
more than one.) The drop-down list labeled VBX
contains the names of all VBXs in the file. The
capabilities of the control selected from this list are
displayed in the Property and Event list.
- In the textbox labeled ClassName, specify the name of
the C++ wrapper class that will be generated for the
currently selected VBX control. In the textboxes labeled
Header File, specify the names of the C++ files that will
contain the definition and implementation of the class.
Default names are provided in all three fields; you don't
have to change them.
- Repeat the above step for each VBX control in the VBX
file.
- Click on the Generate button. ClassExpress creates the
C++ wrapper classes.
Examine the interface to the VBX control(s) generated by
ClassExpress by opening the header file in an IDDE source window.
You will see that the methods of the C++ class correspond in a
natural way to the properties and events of the VBX.
Summary
This chapter covers ClassExpress in detail discussing these main
points:
- Deriving a new class in an application from one of the
many MFC library base classes
- Establishing links between class member variables and
dialog box or window controls, and validating user entry
without having to write a single line of code
- Manipulating objects within an application from any OLE
client application
- Conversely, enabling an application to manipulate OLE
automation objects in other applications
- Extending the power of an application with Visual Basic
custom controls, without having to write the control
yourself
With this information, you are able to add significant new
functionality in a short period of time to the skeleton application
framework that AppExpress generates.
This chapter describes menu operations and mouse functions
available in the Class Editor. For an introduction to this tool, see
Chapter 5, "Defining Classes and Their Hierarchies."
The Class Editor Window
There are several ways to open a Class Editor window:
- Choose Class Editor from the Goto View submenu of
the IDDE's Window menu.
- Double-click on the Class Editor icon in the Views
toolbox, or drag the icon from the toolbox to the
desktop.
- Choose New! from another Class Editor window's menu
bar.
- Double-click on a class in the Hierarchy Editor graphical
display.
- In the Class pane, move the cursor towards the left
margin until its orientation changes and it points to the
right. Then highlight one or more classes and drag them
onto the desktop.
- In the Members pane, move the cursor towards the left
margin until its orientation changes and it points to the
right. Then highlight one or more members and drag
them onto the desktop.
- Double-click on an entry in the Query Implementors
window.
- In the Query Implementors window, move the cursor
towards the left margin until its orientation changes and
it points to the right. Then highlight one or more entries
and drag them onto the desktop.
Multiple instances of the Class Editor may be open at the same time.
These windows share data among themselves and with Hierarchy
Editor windows, so changes made in one window are transmitted
instantly to the others.
Edit menu commands
With one exception, the commands in the Edit menu (Figure 19-1)
operate on text in the Source pane and are identical in function to
the corresponding Edit menu commands in Source windows. For a
description, see Chapter 21, "Text Editor Reference."
[Figure 19-1 Edit menu commands
Global Undo
Cancels the last operation performed in the Class Editor or Hierarchy
Editor (such as Add Class or Add Member). The text of this menu
item changes to reflect the previous operation performed in the Class
Editor.
Goto menu commands
The commands in the Goto menu (Figure 19-2) are used to move
around within the Source pane and are identical to the
corresponding Goto menu commands in Source windows. For a
description, see Chapter 21, "Text Editor Reference."
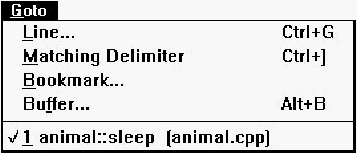
[Figure 19-2 Goto menu commands
Macro menu commands
The commands in the Macro menu (Figure 19-3) are identical to
Macro menu commands in Source windows. For a description, see
Chapter 21, "Text Editor Reference."
[Figure 19-3 Macro menu commands
New! command
This command opens another Class Editor window.
Classes pane pop-up menu commands
The Classes pane pop-up menu (Figure 19-4) contains commands to
add and modify classes and inheritance relationships, and to access
Class Editor options.
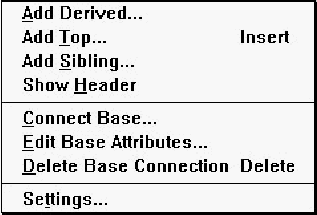
[Figure 19-4 Classes pane pop-up menu commands
Add Derived
Opens a dialog box (Figure 19-5) that lets you add a new class to the
hierarchy. The new class is a derived class of the currently selected
class(es), whose name is shown in the dialog box's title.
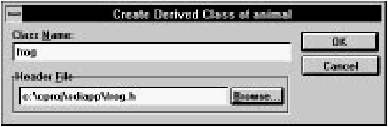
[Figure 19-5 Create Derived Class dialog box
Class name
Specifies a name for the new class.
Header file
Contains the name of the header file into which the class declaration
is placed. By default, the first eight characters of the class name (with
.h appended) are used as the header file name. You may type an
alternative filename into the textbox, or click on Browse to select a
filename from the Class Header File dialog box.
Add Top
Adds a top-level (baseless) class. The dialog box that opens as a
result of selecting this command is identical in function to the one
that opens when you choose the Add Derived command.
Add Sibling
Adds a class that is a sibling of (derived from the same base class as)
the currently selected class. The dialog box that opens as a result of
selecting this command is identical in function to the one that opens
when you choose the Add Derived command. You cannot add
siblings to classes with multiple base classes.
Show Header
Opens a new Source window to edit the header file containing the
declaration of the currently selected class.
Note:
You can also perform this action by moving the
cursor towards the left margin of the Class pane
until its orientation changes and it points to the
right. Then select a class and drag it onto the
desktop while holding down the Control key.
Connect Base
Opens the Add Base dialog box (Figure 19-6) that lets you add a
base class to the selected class.
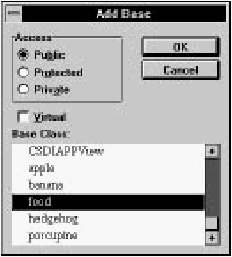
[Figure 19-6 Add Base dialog box
Access
These options indicate the base class access specifier:
- Public:
- Public members of the base class are public members of the
derived class, and protected members of the base class are protected
members of the derived class.
- Protected:
- Public and protected members of the base class are
protected members of the derived class.
- Private:
- Public and protected members of the base class are private
members of the derived class.
Virtual
Specifies the base class to be virtual.
Base class
Specifies the class that is made a base of the selected class. You can
select more than one class to make a base class by holding down the
Control key while clicking on the class name, or by holding down
the Shift key while selecting a range of classes.
Edit Base Attributes
Opens the Edit Base Attributes dialog box (Figure 19-7) with which
you change the attributes of the connection between the selected
class and its base class.
This command is disabled if classes are sorted alphabetically rather
than hierarchically.
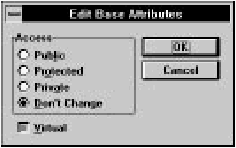
[Figure 19-7 Edit Base Attributes dialog box
Access
These options indicate the base class access specifier:
- Public:
- Public members of the base class are public members of the
derived class, and protected members of the base class are protected
members of the derived class.
- Protected:
- Public and protected members of the base class are
protected members of the derived class.
- Private:
- Public and protected members of the base class are private
members of the derived class.
- Don't change:
- Appears only if you are editing the attributes of more
than one connection and the base class access specifiers are not all
identical. It means that the base class access specifiers are not
altered. It lets you change the Virtual specifier of all connections
without affecting their individual access specifiers.
Virtual
If selected, this option specifies the base class to be virtual. If grayed,
the virtual setting is left unchanged.
If the selected class is derived from multiple bases, only the
attributes of the connection with the base class immediately above in
the Classes pane are changed.
Delete Base Connection
Deletes the connection between the selected class and its base class.
If the class is derived from multiple bases, only the connection with
the base class immediately above it in the Classes pane is removed.
You will be prompted to confirm this if the Confirm Inheritance
Changes option on the General page of the Editing/Browsing
Settings dialog box is selected.
This command is disabled if classes are sorted alphabetically rather
than hierarchically.
Settings
Opens the Editing/Browsing Settings dialog box, in which you set
general Class Editor and text editor options. Details of this dialog
box are discussed in "Class Editor Settings," later in this chapter.
Members pane pop-up menu commands
The Members pane pop-up menu (Figure 19-8) contains commands
to add, delete, and modify class members, and to access Class Editor
options.
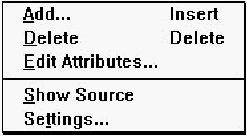
[Figure 19-8 Members pane pop-up menu commands
Add
Opens the Add Member dialog box (Figure 19-9). The new member
is added to the class whose members are currently displayed in the
Members pane.
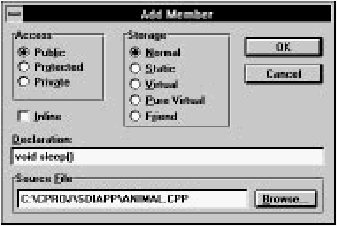
[Figure 19-9 Add Member dialog box
Access
These options specify the member access control:
- Public:
- Public members are accessible from outside the member's
class.
- Protected:
- Protected members are accessible only within the
member's class, derived classes, and their friends.
- Private:
- Private members are accessible only within the member's
class and its friends.
Storage
These options specify the member storage class:
- Normal:
- The member has no storage modifiers.
- Static:
- Only one copy of the member exists; it is shared by all
objects of the member's class.
- Virtual (functions only):
- The function may be overridden in derived
classes.
- Pure virtual (functions only):
- The function must be overridden in
derived classes; the class is abstract.
- Friend (functions only):
- The named function is allowed access to
the class's private and protected members.
Inline
Requests inline implementation of a function. Causes its definition to
be placed in the .h file.
Declaration
Contains the member declaration. For data items, enter the type and
member name (for example, int nCats). For functions, enter the
return type, function name, and argument types (for example, void
AddCats(int)). Do not precede the declaration with storage
specifiers; use the option buttons above. Trailing semicolons are
optional.
Source file
Contains the name of the source file into which the member
definition is placed. By default, the first eight characters of the class
name (with .cpp appended) are used as the source file name. You
may type an alternative filename into the textbox, or click on Browse
to select an alternative filename from the Member Source File
dialog box.
The member declaration is placed in the class declaration. If the
specified source file does not already exist, it is created and added to
the project. By default, empty definitions of inline functions are
placed in the header file. Empty definitions of normal, static, and
virtual functions, as well as static data members, are placed in the
source file.
Delete
Deletes the currently selected member. If the Confirm Member
Delete option on the General page of the Editing/Browsing
Settings dialog box is selected, you are asked to confirm the
deletion. The member's declaration and definition (if applicable) are
removed from the header and source files.
Edit Attributes
Opens the Change Member Attributes dialog box (Figure 19-10),
which you use to edit access and storage specifiers of the selected
member.
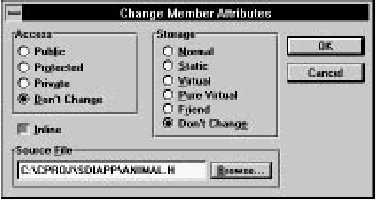
[Figure 19-10 Change Member Attributes dialog box
Access
These options specify the member access control:
- Public:
- Public members are accessible from outside the member's
class.
- Protected:
- Protected members are accessible only within the
member's class, derived classes, and their friends.
- Private:
- Private members are accessible only within the member's
class and its friends.
- Don't change:
- Only appears if you are editing the attributes of more
than one member and their access controls are not all identical. It
means that the access control is not altered. It lets you change other
member attributes without also affecting their individual access
controls.
Storage
These options specify the member storage class:
- Normal:
- The member has no storage modifiers.
- Static:
- Only one copy of the member exists; it is shared by all
objects of the member's class.
- Virtual (functions only):
- The function may be overridden in derived
classes.
- Pure virtual (functions only):
- The function must be overridden; the
class is abstract.
- Friend (functions only):
- The named function is allowed access to
the class's protected and private members.
- Don't change:
- Only appears if you are editing the attributes of more
than one member and their storage classes are not all identical. It
means that the storage class is not altered. It lets you change other
member attributes without affecting their individual storage classes.
Inline
Requests inline implementation of a function. If grayed, the current
setting is left unchanged.
Source file
If applicable, this option contains the name of the source file holding
the member definition. You may change the filename in the textbox,
or click on Browse to select an alternative filename from the
Member Source File dialog box.
Show Source
Opens a new Source window to show the source file containing the
definition of the currently selected member.
If you add new functions or static data definitions to the source file
or alter function argument or return types, you must update the class
header to reflect the changes.
Settings
Opens the Editing/Browsing Settings dialog box that lets you set
general Class Editor and text editor options. Details of this dialog
box are discussed in "Class Editor Settings," later in this chapter.
Source pane pop-up menu commands
With one exception, commands in the Source pane pop-up menu
(Figure 19-11) are identical to the corresponding commands in
Source windows. For a description, see Chapter 21, "Text Editor
Reference."

[Figure 19-11 Source pane pop-up menu commands
Save
Saves the program code shown in the Source pane and places it in
the appropriate source or header file.
Changes to static data and to function argument and return types
made in the source code are updated automatically in the class
declaration and Members pane.
Class editor mouse functions
The mouse is used to select classes and members, perform editing
operations, open pop-up menus, and change the relative sizes of
Class Editor panes. As mentioned in "The Class Editor Window"
above, drag and drop operations are supported.
To resize the panes, first position the cursor over the dividing line
between panes. The cursor changes to a two-headed arrow. Then,
press the left mouse button and drag the separator to the desired
location.
Classes pane
The right mouse button opens the pop-up menu (see "Classes pane
pop-up menu commands," earlier in this chapter).
Select a class by clicking on it. Several classes may be selected by
clicking on each one while holding down Control. The members of
the class last selected appear in the Members pane. You may drag
and drop a class into the source pane; the class name is inserted into
the buffer.
Members pane
The right mouse button opens the pop-up menu (see "Members
pane pop-up menu commands," earlier in this chapter).
Select a member by clicking on it. Several members may be selected
by clicking on each one while holding down Control.
Double-clicking on a member causes its definition (if appropriate) or
declaration to appear in the Source pane. If the source is not
available, the declaration is displayed.
You may drag and drop a member into the source pane; the member
declaration is inserted into the buffer.
Note:
In addition to clicking on it, you can select a
member when the Members pane is active by
typing its name. As you type, the Class Editor
attempts to automatically complete the name.
(Depending on the rate at which you type, it may
consider a character to be the first character of a
new selection, rather than the next character in the
current select operation.)
Source pane
The right mouse button opens the pop-up menu (see "Source pane
pop-up menu commands," earlier in this chapter).
The source pane supports typical Source window mouse and cursor
operations, as described in Chapter 21, "Text Editor Reference."
Toolbar commands
The Class Editor toolbar (Figure 19-12) offers quick access to several
menu options.
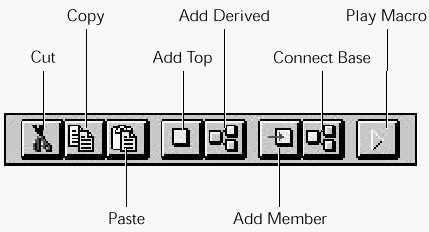
[Figure 19-12 Class Editor toolbar
These options are the same as those in other menus:
- Cut:
- Same as choosing Cut from the Edit menu.
- Copy:
- Same as choosing Copy from the Edit menu.
- Paste:
- Same as choosing Paste from the Edit menu.
- Add top:
- Same as choosing Add Top from the Classes pane pop-up
menu.
- Add derived:
- Same as choosing Add Derived from the Classes pane
pop-up menu.
- Add member:
- Same as choosing Add from the Member pane pop-up
menu.
- Connect base:
- Same as choosing Connect Base from the Classes
pane pop-up menu.
- Play macro:
- Same as choosing Play from the Macro menu.
Class Editor Settings
You can access Class Editor settings by choosing Text Settings from
the Edit menu, or Settings from the Classes or Members pane pop-up
menus. These commands open the Editing/Browsing Settings
dialog box, a workspace with tabs along the top margin. The tabs
are used to switch between several sets of options. The Class,
Member, and General options are discussed in this section; the
remaining options pertain to text editing and are discussed in
Chapter 21, "Text Editor Reference."
General options
The General options set (Figure 19-13) contains options for undo
levels, class/member bar confirmations, output window actions, and
key bindings, as well as some options related to the text editor.
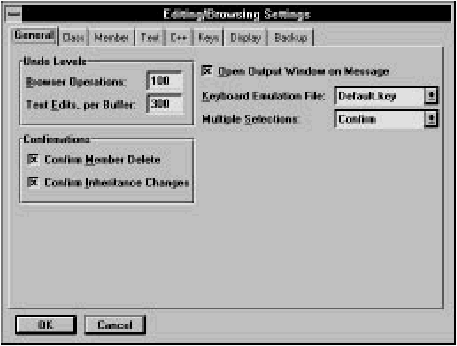
[Figure 19-13 General options
Browser operations
Specifies the number of operations that can be undone in the Class
and Hierarchy Editors with the Global Undo command.
Text edits, per buffer
Specifies the number of edit operations that can be undone, per
buffer.
Confirmations
These options enable confirmation requests for various operations in
the Class and Hierarchy Editors. You can enable confirmations of:
- Member deletions
- Inheritance changes
Open output window on message
Lets the IDDE open an error window whenever there is an error of
any kind (during compilation, during parsing, and so on.)
Keyboard emulation file
Specifies the key bindings set to be used by the text editor.
Multiple selections
This option enables multiple selections in lists in the Class and
Hierarchy editors:
- Yes:
- Multiple selections are allowed.
- No:
- Multiple selections are not allowed.
- Confirm:
- Multiple selections are allowed, but a confirmation request
is displayed each time an operation is performed on multiple classes
or members.
Class options
The Class options set (Figure 19-14) lets you specify the display
order and font of classes in the Classes pane.
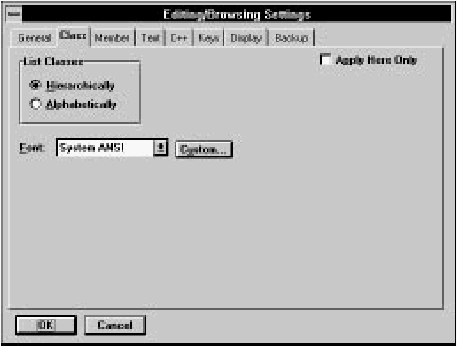
[Figure 19-14 Class options
List classes
This option defines how classes are arranged in the Classes pane:
- Hierarchically:
- Base classes are arranged alphabetically, with
derived classes placed below and indented relative to their base
classes. If a class has multiple bases, that class is listed below each
base class.
- Alphabetically:
- Classes are arranged in alphabetical order, and each
class is listed only once.
Font
Specifies the font used to display class names in the Classes pane.
You can select a predefined font from the drop-down list, or you
may click on Custom and select any installed font from a Windows
Font dialog box.
Apply here only
Indicates that the settings specified here should be applied only to
the current Class Editor window.
Member options
The Member options set (Figure 19-15) lets you specify the display
parameters of class members in the Members pane.

[Figure 19-15 Member options
Grouping
This option indicates how class members are grouped. Any or all of
the following options may be selected:
- By access:
- Members are grouped into Public, Protected, and Private.
If By Access is not selected, each member is preceded by a colored
diamond indicating its access specifier (green for public, yellow for
protected, red for private).
- By file:
- Members are grouped by the source file containing their
definitions. When this option is selected, only functions and static
data are shown.
- By kind:
- Members are grouped into Data, Functions, and Typedefs.
If more than one Grouping option is selected, members are grouped
by kind within files, and by files within access category.
Sorting
This option indicates how members are arranged within each group:
- Order defined:
- Members are arranged in the order they are
declared in the class header.
- Alphabetical:
- Members are arranged alphabetically.
Show full method names
Specifies that member names are displayed with their type specifiers
and (if a method) their parameter type list (for example, int
Multiply(int, int, int)). If this option is not selected, only
the identifier name is displayed (for example, Multiply).
Font
Specifies the font used to display member names in the Members
pane. You can select a predefined font from the combo box, or you
may click on Custom and select any installed font from a Windows
Font dialog box.
Apply here only
Indicates that the settings specified here should be applied only to
the current Class Editor window. Otherwise, the settings are applied
to all Hierarchy and Class Editor windows.
This chapter describes menu operations and mouse functions
available in the Hierarchy Editor. For an introduction to this tool, see
Chapter 5, "Defining Classes and Their Hierarchies."
The Hierarchy Editor Window
To open a Hierarchy Editor window you have several choices:
- Choose Hierarchy Editor from the Goto View
submenu of the IDDE's Window menu.
- Double-click on the Hierarchy Editor icon in the Views
toolbox, or drag the icon from the toolbox to the
desktop.
- Choose New! from another Hierarchy Editor window's
menu bar.
Multiple instances of the Hierarchy Editor may be open at the same
time. These windows share data among themselves and with Class
Editor windows, so changes made in one window are transmitted
instantly to the others.
Edit menu commands
Commands in the Edit menu (Figure 20-1) let you undo Hierarchy
Editor operations and print the graphical display.
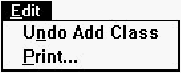
Figure 20-1 Edit menu commands
Global Undo
Cancels the last operation performed in the Hierarchy Editor (such as
Add Class or Add Member). The text of this menu item changes to
reflect the previous operation performed in the Hierarchy Editor.
Print
Opens the Print dialog box. See Chapter 21, "Text Editor
Reference."
Macro menu commands
The commands in the Macro menu (Figure 20-2) are identical to
Macro menu commands in Source windows. For a description, see
Chapter 21, "Text Editor Reference."
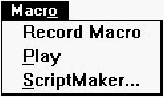
Figure 20-2 Macro menu commands
New! command
Opens another Hierarchy Editor window.
Pop-up menu commands
Contains commands to add and modify classes and inheritance
relationships, and to access Hierarchy Editor options.

Figure 20-3 Hierarchy Editor pop-up menu commands
Add Derived
Opens a dialog box (Figure 20-4) that lets you add a new class to the
hierarchy. The new class is a derived class of the currently selected
class, whose name is shown in the dialog box's title.

Figure 20-4 Create Derived Class dialog box
Class name
Specifies a name for the new class.
Header file
Contains the name of the header file into which the class declaration
is placed. By default, the first eight characters of the class name (with
.h appended) are used as the header file name. You may type an
alternative filename into the textbox, or click on Browse to select a
filename from the Class Header File dialog box.
Add Top
Adds a top-level (baseless) class. The dialog box that opens as a
result of selecting this command is identical in function to the one
that opens when you choose the Add Derived command.
Add Sibling
Adds a class that is a sibling of (derived from the same base classes
as) the currently selected class. The dialog box that opens as a result
of selecting this command is identical in function to the one that
opens when you choose the Add Derived command.
Show Header
Opens a new Source window to edit the header file containing the
declaration of the currently selected class.
Connect Base
Opens the Add Base dialog box (Figure 20-5), with which you can
add a base class to the selected class.

Figure 20-5 Add Base dialog box
Access
These options indicate the base class access specifier:
- Public:
- Public members of the base class are public members of the
derived class, and protected members of the base class are protected
members of the derived class.
- Protected:
- Public and protected members of the base class are
protected members of the derived class.
- Private:
- Public and protected members of the base class are private
members of the derived class.
Virtual
Specifies the base class to be virtual.
Base class
Specifies the class that is made a base of the selected class. You can
select more than one class to make a base class by holding down the
Control key while clicking on the class name.
Edit Base Attributes
Opens the Edit Base Attributes dialog box (Figure 20-6), with
which you can change the attributes of the selected connection
between a derived class and its base class.
Figure 20-6 Edit Base Attributes dialog box
Access
These options indicate the base class access specifier:
- Public:
- Public members of the base class are public members of the
derived class, and protected members of the base class are protected
members of the derived class.
- Protected:
- Public and protected members of the base class are
protected members of the derived class.
- Private:
- Public and protected members of the base class are private
members of the derived class.
- Don't change:
- Appears only if you are editing the attributes of more
than one connection and the base class access specifiers are not all
identical. It means that the base class access specifiers are not
altered. It lets you change the Virtual specifier of all connections
without affecting their individual access specifiers.
Virtual
If selected, this option specifies the base class to be virtual. If grayed,
the virtual setting is left unchanged.
Delete Base Connection
Deletes the selected connection between a derived class and its base
class.
You are prompted to confirm this if the Confirm Inheritance Changes
option on the General page of the Editing/Browsing Settings
dialog box is selected.
Settings
Opens the Editing/Browsing Settings dialog box, in which you set
global Hierarchy Editor and text editor options. Details of this dialog
box are discussed in "Hierarchy Editor Settings," later in this chapter.
Mouse functions
The right mouse button opens the pop-up menu.
A class is selected by clicking on it. Additional classes may be
selected by clicking while holding down Control. Members of the
class last selected appear in the Members child window.
Double-clicking on a class opens a Class Editor window.
A connection is selected by clicking on it. Additional connections
may be selected by clicking while holding down Control.
A new derived class is added by clicking on the base class and
dragging the cursor to an empty area of the display.
A new base-to-derived connection is made by clicking on the base
class and dragging the cursor to the derived class.
A derived class's connection to a base may be moved to a different
base by clicking the connection, then dragging the connection's
handle to the new base class. (This is a shortcut for deleting one
connection, then establishing a new one.)
Toolbar commands
The Hierarchy Editor toolbar (Figure 20-7) offers quick access to
several menu choices.
Figure 20-7 Hierarchy Editor toolbar
The following options are the same as those on other menus:
- Add top:
- Same as choosing Add Top from the pop-up menu.
- Add derived:
- Same as choosing Add Derived from the pop-up
menu.
- Connect base:
- Same as choosing Connect Base from the pop-up
menu.
- Print:
- Same as choosing Print from the Edit menu.
- Play macro:
- Same as choosing Play from the Macro menu.
Members Child Window
The Hierarchy Editor's Members child window is enabled by setting
the Members option on the Hierarchy page of the
Editing/Browsing Settings dialog box. You can open this dialog box by
choosing Settings from the Hierarchy Editor's pop-up menu.
Member menu commands
The Member menu (Figure 20-8) contains commands to add, delete,
and modify class members, and to access Hierarchy Editor options.
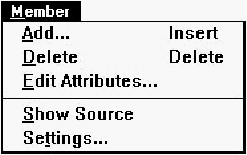
Figure 20-8 Member menu commands
Add
Opens the Add Member dialog box (Figure 20-9). The new member
is added to the class whose members currently are displayed in the
Members child window.
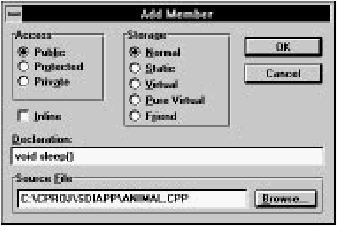
Figure 20-9 Add Member dialog box
Access
These options specify the member access control:
- Public:
- Members are accessible from outside the member's class.
- Protected:
- Members are accessible only within the member's class,
derived classes, and their friends.
- Private:
- Members are accessible only within the member's class and
its friends.
Storage
These options specify the member storage class:
- Normal:
- The member has no storage modifiers.
- Static:
- Only one copy of the member exists; it is shared by all
objects of the member's class.
- Virtual (functions only):
- The function may be overridden in derived
classes.
- Pure virtual (functions only):
- The function must be overridden in
derived classes; the class is abstract.
- Friend (functions only):
- The named function is allowed access to
the class's private members.
Inline
Requests inline implementation of a function.
Declaration
Contains the member declaration. For data items, enter the type and
member name (for example, int nCats). For functions, enter the
return type, function name, and argument types (for example, void
AddCats(int)). Do not precede the declaration with storage
specifiers; use the option buttons above. Trailing semicolons are
optional.
Source file
Contains the name of the source file into which the member
definition is placed. By default, the first eight characters of the class
name (with .cpp appended) are used as the source filename. You
can type an alternative filename into the textbox, or click on Browse
to select an alternative filename from the Member Source File
dialog box.
The member declaration is placed in the class declaration. If the
specified source file does not already exist, it is created and added to
the project. By default, empty definitions of inline functions are
placed in the header file. Empty definitions of normal, static, and
virtual functions, as well as static data members, are placed in the
source file.
Delete
Deletes the currently selected member. If the Confirm Member
Delete option on the General page of the Editing/Browsing
Settings dialog box is selected, you are asked to confirm the
deletion. The member's declaration and definition (if applicable) are
removed from the header and source files.
Edit Attributes
This command opens the Change Member Attributes dialog box
(Figure 20-10), which you can use to edit access and storage
specifiers of the selected member.
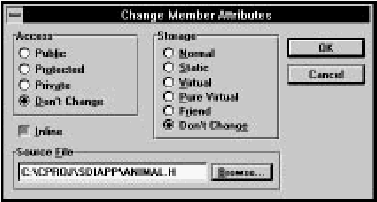
Figure 20-10 Change Member Attributes dialog box
Access
These options specify the member access control:
- Public:
- Members are accessible from outside the member's class.
- Protected:
- Members are accessible only within the member's class,
derived classes, and their friends.
- Private:
- Members are accessible only within the member's class and
its friends.
- Don't change:
- Appears only if you are editing the attributes of more
than one member and their access controls are not all identical. It
means that the access control is not altered. It lets you change other
member attributes without also affecting their individual access
controls.
Storage
These options specify the member storage class:
- Normal:
- The member has no storage modifiers.
- Static:
- Only one copy of the member exists; it is shared by all
objects of the member's class.
- Virtual (functions only):
- The function may be overridden in derived
classes.
- Pure virtual (functions only):
- The function must be overridden; the
class is abstract.
- Friend (functions only):
- The named function is allowed access to
the class's protected and private members.
- Don't change:
- Appears only if you are editing the attributes of more
than one member and their storage classes are not all identical. It
means that the storage class is not altered. It lets you change other
member attributes without affecting their individual storage classes.
Inline
Requests inline implementation of a function. If grayed, the current
setting is left unchanged.
Source file
If applicable, this option contains the name of the source file holding
the member definition. You may change the filename in the textbox,
or click on Browse to select an alternative filename from the
Member Source File dialog box. If you change the source file, the
member definition moves.
Show Source
Opens a new Source window to show the source file containing the
definition of the currently selected member.
If you add new functions or static data definitions to the source file,
or alter function argument or return types, you must update the class
header to reflect the changes.
Settings
Opens the Editing/Browsing Settings dialog box, in which you set
global Hierarchy Editor and text editor options. Details of this dialog
box are discussed in "Hierarchy Editor Settings," later in this chapter.
Pop-up menu commands
The Members child window pop-up menu is identical to the
Member menu.
Mouse functions
The right mouse button opens the pop-up menu.
Select a member by clicking on it. Additional members may be
selected by clicking on them while holding down Control.
Double-clicking on a member causes its definition (if appropriate) or
declaration to be displayed in the Source child window.
You may drag and drop a member into the Source child window; the
member declaration is inserted into the buffer.
Source Child Window
The Hierarchy Editor's Source child window is enabled by setting the
Source option on the Hierarchy page of the Editing/Browsing
Settings dialog box. You can open this dialog box by choosing
Settings from the Hierarchy Editor's pop-up menu.
Edit menu commands
Commands in the Edit menu (Figure 20-11) are used to perform text
editing operations, and are identical to the corresponding Edit menu
commands in Source windows. For a description, see Chapter 21,
"Text Editor Reference."
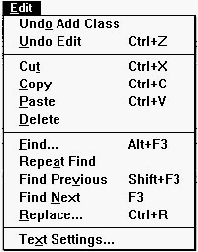
Figure 20-11 Edit menu commands
Goto menu commands
The commands in the Goto menu (Figure 20-12) are used to move
around within the Source child window and are identical to the
corresponding Goto menu commands in Source windows. For a
description, see Chapter 21, "Text Editor Reference."
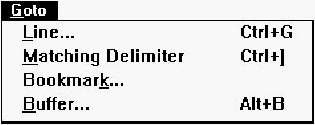
Figure 20-12 Goto menu commands
Pop-up menu commands
With one exception, commands in the Source child window pop-up
menu (Figure 20-13) are identical to the corresponding commands in
Source windows. For a description, see Chapter 21, "Text Editor
Reference."

Figure 20-13 Pop-up menu commands
Save
Saves the program code shown in the Source child window and
places it in the appropriate source or header file.
Changes to static data and to function argument and return types
made in the source code are updated automatically in the class
declaration and Members child window.
Mouse functions
The right mouse button opens the pop-up menu.
The Source child window supports typical source window mouse
and cursor operations, as described in Chapter 21, "Text Editor
Reference."
Hierarchy Editor Settings
You can access Hierarchy Editor settings by choosing Settings from
the Hierarchy Editor pop-up menu, Settings from the Members child
window Member or pop-up menus, or Text Settings from the
Source child window Edit menu. These commands open the
Editing/Browsing Settings dialog box, a workspace with tabs
along the top margin.
The tabs are used to switch between several sets of options. The
Hierarchy, Member, and General options are discussed in this
section; the remaining options pertain to text editing and are
discussed in Chapter 21, "Text Editor Reference."
General options
The General options set (Figure 20-14) contains options for undo
levels and confirmations, as well as options related to the text editor.
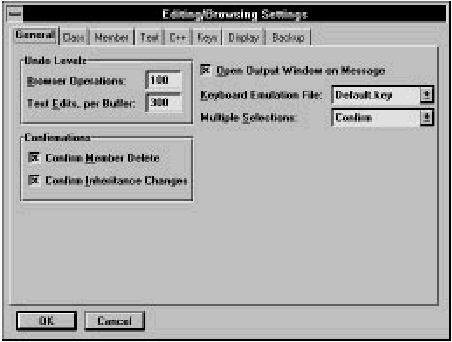
Figure 20-14 General options
Browser operations
Specifies the number of operations that can be undone in the Class
and Hierarchy Editors.
Text edits, per buffer
Specifies the number of edit operations that can be undone per
buffer.
Confirmations
These options enable confirmation requests for various operations in
the Class and Hierarchy Editors. You can enable confirmations of:
- Member deletions
- Inheritance changes
Open output window on message
Lets the IDDE open an error window whenever there is an error of
any kind (during compilation, during parsing, and so on.)
Keyboard emulation file
Specifies the key bindings set to be used by the text editor.
Multiple selections
Enables multiple selections in lists in the Class and Hierarchy editors.
- Yes:
- Multiple selections are allowed.
- No:
- Multiple selections are not allowed.
- Confirm:
- Multiple selections are allowed, but a confirmation request
is displayed each time an operation is performed on multiple classes
or members.
Hierarchy options
The Hierarchy options set (Figure 20-15) lets you enable the
Members and Source child windows and specify the font used in the
graphical display.
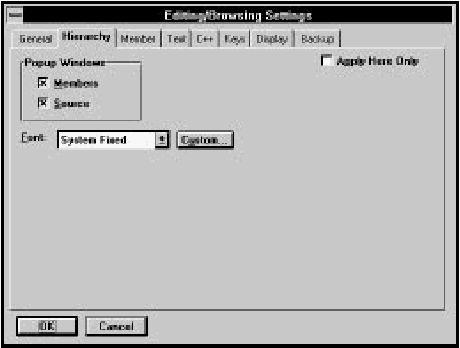
Figure 20-15 Hierarchy options
Pop-up windows
These options enable the Hierarchy Editor child windows:
- Members:
- Enables the Members child window.
- Source:
- Enables the Source child window.
Font
Specifies the font used to display class names. You can select a
predefined font from the drop-down list, or you can click on Custom
and select any installed font from a Windows Font dialog box.
Apply here only
Indicates that the specified settings should be applied only to the
current Hierarchy Editor window.
Member options
Lets you specify the display parameters of class members in the
Members child window.
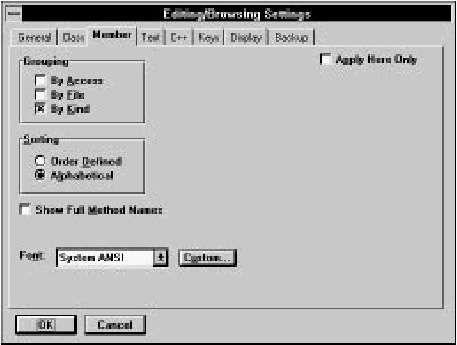
Figure 20-16 Member options
Grouping
Indicates how class members are grouped. Any or all of the
following options may be checked:
- By access:
- Members are grouped into public, protected, and private.
If By Access is not selected, each member is preceded by a colored
diamond indicating its access specifier (green for public, yellow for
protected, red for private).
- By file:
- Members are grouped by the source file containing their
definitions. When this option is selected, only functions and static
data are shown.
- By kind:
- Members are grouped into Data, Functions, and Typedefs.
If more than one Grouping option is selected, members are grouped
by kind within files and by files within access category.
Sorting
Indicates how members are arranged within each group.
- Order defined:
- Members are arranged in the order in which they
are declared in the class header.
- Alphabetical:
- Members are arranged alphabetically.
Show full method names
Specifies that member names are displayed with their type specifiers
and (if a method) their parameter type list (for example, int
Multiply(int, int, int)). If this option is not selected, only
the identifier name is displayed (for example, Multiply).
Font
Specifies the font used to display member names in the Members
child window. You can select a predefined font from the combobox,
or you can click on Custom and select any installed font from a
Windows Font dialog box.
Apply here only
Indicates that the specified settings should be applied only to the
current Hierarchy Editor window. Otherwise, the settings are applied
to all Hierarchy and Class Editor windows.
This chapter describes commands and options available in the text
editor, including global search functions, key binding options, and
macro functions. For an introduction to text editing, see Chapter 6,
Editing Program Code.
To open a Source window, you have several choices:
- Choose New or Open from the IDDE's File menu.
- Choose Source from the Goto View submenu of the
IDDE's Window menu.
- Double-click on the Source icon in the Views toolbox, or
drag the icon from the toolbox to the desktop.
- Double-click on a filename in the Project window.
- Choose Show Source or Show Header from pop-up
menus in the Class and Hierarchy Editors.
- Double-click on an error message in the Error window.
- Choose New or Open from another Source window's
File menu.
- Choose New! from another Source window's menu bar.
- Select text in one Source view, then drag it onto the
desktop. This results in an untitled Source window
containing the selected text.
The Hierarchy Editor's Source child window, as well as the Source
pane of the Class Editor, contain a subset of the standard Source
window functionality. See Chapter 5,
Defining Classes and Their Hierarchies,
Chapter 19,
Class Editor Reference,
and Chapter 20,
Hierarchy Editor Reference.
File menu commands
The File menu (Figure 21-1) contains commands to open, save, and
print files, as well as other useful file-related commands. Note that
the Save and Add to Project command changes to Add to Project,
Save and Parse, or Parse, depending on whether the file is part of
the project, up to date, or parsed.
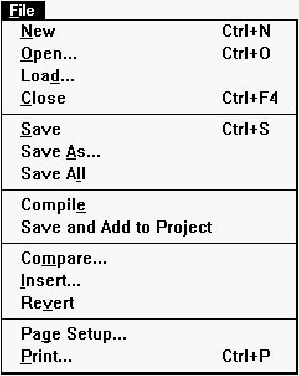
[Figure 21-1 File menu commands
New
Opens a new, empty, and untitled Source window.
Open
Opens a Windows File Open dialog box, then creates a new Source
window containing the selected file. If the Open command is
chosen from an untitled, unmodified Source window, the selected
file is opened in that Source window.
Load
Opens a Windows File Open dialog box, then loads the selected file
into the current Source window. If there are unsaved changes in the
previous file, you are asked if you would like to save the changes
before loading the new file.
Close
Closes the Source window. If there are unsaved changes, you are
asked if you would like to save the changes before closing the file.
Save
Saves the current buffer to disk. If the file is untitled, this command
executes Save As.
Save as
Saves the current buffer using the Windows File Save As dialog box.
This dialog box contains a check box- Add to Project, which lets
you add the file to the current project.
Save All
Executes Save for every open Source window.
Compile
Saves the buffer and compiles the file.
Save and Add to Project
Saves the file to disk, adds the file to the project, and reparses all
files in the project.
The Save and Add to Project command changes to Add to Project,
Save and Parse, or Parse, depending on whether the file is part of
the project, up to date, or parsed. These are the four changes:
- A new source file is created but not saved, or flagged as
modified since the last save. The menu reads "Save and
Add to Project."
- A source file which has not been added to the project is
saved. The menu reads "Add to Project."
- A source file which exists in a project is loaded in the
source editor. The menu reads "Parse."
- A source file exists in a project and has been flagged or
modified. The menu read "Save and Parse."
Add to Project
Adds the file to the project and reparses all files in the project.
Save and Parse
Saves the file to disk and reparses all files in the project.
Parse
Reparses all files in the project.
Compare
Opens the Compare Files dialog box (Figure 21-2), which lets you
select two files to compare.

[Figure 21-2 Compare Files dialog box
File 1 and File 2
Specifies the files to be compared. You may type the file names,
select names from the drop-down lists, or click on Browse to select
files from standard Windows filename dialog boxes.
If either file is open in a Source window, the editor uses the version
in memory rather than the one in the disk file.
Line
Specifies the line number at which the comparison starts.
Display
Specifies the arrangement of the windows in which the two files are
displayed:
- Horizontal:
- The files are displayed one above the other.
- Vertical:
- The files are displayed side-by-side.
The editor performs the comparison on a line-by-line basis. When it
finds a mismatch, it highlights the appropriate lines in both files. The
Compare dialog box (Figure 21-3) indicates where the mismatch
was found.
[Figure 21-3 Compare dialog box showing mismatch
- Next match:
- Click on this button to resynchronize the
comparison. The editor highlights the next set of matching lines
and the Compare dialog box indicates where the match occurs.

[Figure 21-4 Compare dialog box showing match
- Next difference:
- Click on this button to find the next mismatched
line. You can continue the comparison in this way until no more
differences are found.
Insert
Opens an Insert File dialog box. The editor inserts the contents of
the file you select at the current insertion point.
Revert
Rereads the file from disk, abandoning any changes made since the
last time it was saved.
Page Setup
Opens the Page Setup dialog box (Figure 21-5), which sets
parameters for printing.
[Figure 21-5 Page Setup dialog box
Header and footer
The header and footer are single lines of text displayed at the top
and bottom (respectively) of each page of the printed output. To
omit the header or footer, leave the textbox empty.
You can embed the following special-purpose codes in the header
and footer text:
- %f gives the full path and filename of active file
- %d gives the current date and time
- %p gives the current page number
Margins
Sets the page margins. The units are the standard units of
measurement used in your country (inches or centimeters), set in the
Windows Control Panel.
Font
Opens a Windows Font dialog box, with which you select a
typeface, style, and size for the printed output. The entire document,
including headers and footers, is shown in the selected font.
Printer
Opens a Windows Print Setup dialog box, with which you can set
additional printing parameters.
Print
Opens the Text Print dialog box (Figure 21-6), to let you set
additional print options and print the current file or text selection.
After setting print options, click OK to print.
[Figure 21-6 Text Print dialog box
Print range
Specifies whether the entire file or just the current text selection is
printed:
- All:
- Prints the entire file.
- Selection:
- Prints the highlighted text selection. (It is disabled if no
text is selected.)
Print quality
This drop-down listbox specifies print quality. Options include the
specified printer's output capabilities, expressed in dots per inch.
Copies
Specifies the number of copies to print.
Setup
Opens a Windows Print Setup dialog box, with which you can set
additional printing parameters.
Edit menu commands
The Edit menu (Figure 21-7) contains standard edit and search
commands, as well as commands to access text editor options.
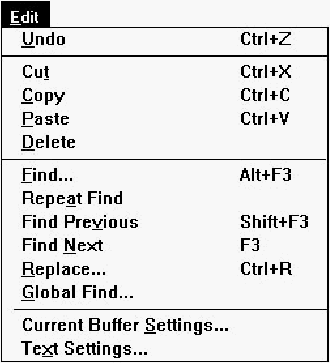
[Figure 21-7 Edit menu commands
Undo
Reverses the last cut, paste, replace, or typed character. By
repeatedly choosing this command, you can undo previous
commands, up to the limit of the undo buffer.
Cut
Copies the selected text to the Clipboard, then deletes it from the
buffer.
Copy
Copies the selected text to the Clipboard.
Paste
Inserts the text from the Clipboard at the insertion point.
Delete
Deletes the selected text from the buffer.
Find
Opens the Find dialog box (Figure 21-8), used to search the file for
specified text.
[Figure 21-8 Find dialog box
Pattern
This drop-down listbox contains the text to be found.
You can initialize the pattern by selecting the text before choosing
Find. (The text must not span a line break.) Otherwise, you may
type the text you want to find into the textbox, or select text from
previous search strings, stored in the drop-down listbox.
The pattern may also be a regular expression (text containing
wildcard characters) if the Regular Expression option is selected.
Regular expression syntax is discussed in "Using Global Find," later
in this chapter.
Ignore case
If this option is turned on, the search is not case sensitive.
Whole words only
If this option is turned on, a string is considered a match only if it is
not part of a larger alphanumeric string.
Regular expression
This option enables regular expression matching.
The search begins at the current insertion point. Click Next to search
forward in the file, or Previous to search backward in the file. If the
search is successful, the matching text is highlighted. Otherwise, the
status line displays the message "Pattern not found."
Repeat Find
Continues the search begun by Find. The search resumes from the
current insertion point and proceeds in the direction previously
specified.
If the search is successful, the matching text is highlighted.
Otherwise, the status line displays the message "Pattern not found."
Find Previous
Searches backward from the current insertion point for the text to be
found.
Find Next
Searches forward from the current insertion point for the text to be
found.
Replace
Opens the Replace dialog box (Figure 21-9), which lets you find
and replace occurrences of text with different text.
[Figure 21-9 Replace dialog box
Pattern
This drop-down listbox contains the text to be found and replaced.
You can initialize the pattern by selecting text before choosing
Replace. (The text must not span a line break.) Otherwise, you may
type the text you want to find into the textbox, or select text from
previous search strings, stored in the drop-down listbox.
The pattern may also be a regular expression (text containing
wildcard characters) if the Regular Expressions option is selected.
Regular expression syntax is discussed in the section "Using Global
Find," later in this chapter.
Replacement
This drop-down listbox contains the text with which you replace
occurrences of Pattern. Type the replacement text into the textbox,
or select text from previous replacement strings, stored in the drop-down
listbox.
Ignore case
If this option is turned on, the search is not case sensitive.
Regular expressions
Enables regular expression matching.
Confirm changes
Causes the text editor to request confirmation before each
replacement. If this option is not selected, the editor replaces all
occurrences of Pattern, starting at the current insertion point, without
prompting you.
Restrict changes to selected text
Instructs the text editor to perform replacements only within the
selected block of text.
Whole words only
If selected, the text editor considers text a match only if it is not part
of a larger alphanumeric string.
The search/replace operation begins at the current insertion point. If
you have selected Confirm Changes, the Confirm Replacement
dialog box (Figure 21-10) is displayed when a match is found.
[Figure 21-10 Confirm Replacement dialog box
You may click Yes to make the replacement, No to skip this
replacement, or Cancel to end the search/replace operation. Also, if
you uncheck Confirm, then click Yes, the editor replaces all
remaining occurrences of Pattern without prompting you.
Global Find
Opens the Global Find dialog box. See "Using Global Find," later in
this chapter.
Current Buffer Settings
Opens the Current Buffer Options dialog box (Figure 21-11), with
which you can change editing options for the current Source
window.
[Figure 21-11 Current Buffer Options dialog box
Tab spacing
Specifies the number of columns between tab stops.
Right margin
Specifies the column that acts as the right margin.
Word wrap
Enables word wrap. While typing, lines extending beyond the right
margin are broken automatically at the last word boundary before
the margin.
Autoindent
Enables automatic indentation on newline. When you press Enter,
the editor positions the cursor directly below the first nonblank
character in the previous line.
Read only
Sets the read-only flag on the buffer, so the buffer may not be
changed.
Use as default for ...
Saves the Current Buffer Options settings so they become the
defaults for any subsequent file with the same file extension that is
loaded. For example, if the file that is currently open is "test. cpp,"
the check box reads, "Use as default for .cpp." If this is an untitled
buffer, the check box is disabled.
Expand tabs with spaces
Tabs are inserted into the text as an appropriate number of spaces
rather than as tab characters.
C++ mode
The buffer is treated as C++ code. Special options for C++ code are
set in the Editing/Browsing Settings dialog box.
Persistent
Causes the buffer options for this file to be saved during the current
IDDE session, even if the file is closed. Otherwise, buffer options are
set to their global defaults if a file is closed and reopened.
Text Setting
Opens the Editing/Browsing Settings dialog box, in which you set
global text editing options. Details of this dialog box are discussed in
the "Text Settings" section later in this chapter.
Goto menu commands
The Goto menu (Figure 21-12) contains commands to move within
the source file.
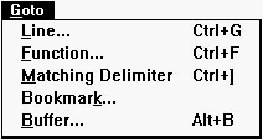
[Figure 21-12 Goto menu commands
Line
Opens the Goto Line dialog box (Figure 21-13). Type the line
number and click OK, and the insertion point is moved to the
specified line.
[Figure 21-13 Goto Line dialog box
Function
Opens the Goto Function dialog box (Figure 21-14).
[Figure 21-14 Goto Function dialog box
The Function Name listbox holds the available function names.
Either type in the function name or scroll and select the function
name from the list. When you click OK, the insertion point moves to
the beginning of the specified function.
Member functions in the list typically are displayed as
member::class. To change the format to class::member, deselect
the Reverse Class::Member Format option.
Matching Delimiter
Finds the delimiter that matches the one to the right of the current
insertion point. The insertion point is moved to the front of the
matching delimiter. This command can find matching parentheses,
square brackets, or braces.
Bookmark
Opens the Bookmarks dialog box (Figure 21-15), which you can
use to set and move to as many as ten different locations in your
source files. Bookmarks are saved through the current IDDE session
only.
[Figure 21-15 Bookmarks dialog box
Bookmark list
Shows the locations of the ten bookmarks by file, line, and column.
Click on an entry to select it; double-click on an entry to go to it.
Goto
Moves the insertion point to the selected bookmark. This command
opens a file if it is not already open. You can also double-click on
the bookmark in the list.
Clear
Removes the selected bookmark.
Drop
Sets the selected bookmark to the current insertion point. The entry
in the bookmark list is updated to show the file, line, and column.
Buffer
Opens the Edit Buffers dialog box (Figure 21-16). This dialog box
presents a list of files currently open in Source windows; it allows
you to view and change each buffer's editing options and to perform
various file-related operations.
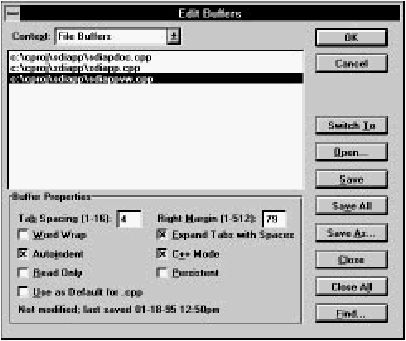
[Figure 21-16 Edit Buffers dialog box
Context
This drop-down listbox specifies File Buffers or Member Buffers. File
Buffers are Source windows open to edit an entire file. Member
Buffers are Class Editor Source panes and Hierarchy Editor Source
child windows, open to edit a particular member definition.
Buffer list
Contains the names of files currently open in Source windows (or, if
the Member Buffers context is selected, the names of member
functions open in Class Editor Source panes and Hierarchy Editor
Source child windows). Click on a filename to select it; double-click
on it to bring the corresponding Source window to the front.
Buffer properties
Lets you view and set options for each individual buffer listed in the
buffer list.
- Tab spacing:
- Specifies the number of columns between tab stops.
- Right margin:
- Specifies the column that acts as the right margin.
- Word wrap:
- Enables word wrap. While typing, lines that extend
beyond the right margin are broken automatically at the last word
boundary before the margin.
- Autoindent:
- Causes the text editor to indent automatically on
newline. When you press Enter, the editor positions the cursor
directly below the first nonblank character in the previous line.
- Read only:
- The buffer may not be changed.
- Use as default for ...:
- Saves the Current Buffer Options settings as
the defaults for any subsequent file with the same file extension that
is loaded. For example, if the currently open file is test.cpp, the
check box reads, "Use as default for .cpp." If the currently open file
is test.txt, the check box reads, "Use as default for .txt." If the
currently open file has no extension, the check box reads, "Use as
default." If this is an untitled buffer, the check box is disabled.
- Expand tabs with spaces:
- Tabs are inserted into the text as an
appropriate number of spaces, rather than as tab characters.
- C++ mode:
- Text is treated as C++ code. Special options for C++
code are set in the Editing/Browsing Settings dialog box (see
"Text Settings," later in this chapter).
- Persistent:
- Causes the buffer options for this file to be saved during
the current IDDE session, even if the file is closed. Otherwise, buffer
options are set to their global defaults if a file is closed and
reopened.
Switch to
Brings the Source window containing the file selected in the listbox
to the front.
Open
Opens a Windows File Open dialog box, with which you can select
a file to open for editing.
Save
Saves the file selected in the listbox. If the file is untitled, this
command executes Save As.
Save all
Saves all files in the listbox.
Save as
Opens a Windows File Save As dialog box, with which you can save
the file selected in the listbox under a new name.
Close
Closes the file selected in the listbox.
Close all
Closes all files in the listbox.
Find
Opens the Global Find dialog box (see "Using Global Find," later in
this chapter).
Macro menu commands
The Macro menu (Figure 21-17) allows you to record, play, and edit
macros.
[Figure 21-17 Macro menu commands
Record Macro
Starts the recording of the default macro. While a macro is being
recorded, this menu choice is replaced in the menu by Stop
Recording. Menu and keystroke recording is limited to the current
source window only.
To record a macro:
- Choose Record Macro.
If a default macro exists, you are asked to confirm that
you want to record over the default macro. Click OK.
- Enter the sequence of keystrokes and menu selections
you want to record.
- Choose Stop Recording to end the macro.
Play Macro
Plays back the default macro.
ScriptMaker
Opens the ScriptMaker dialog box (Figure 21-18), with which you
copy, name, and edit macros.
[Figure 21-18 ScriptMaker dialog box
Existing macros
This is the list of macros. Click on a macro to select it; double-click
on the macro to edit it.
Menu order
These buttons allow you to change the order of the macros listed in
the Macro menu. Click on the Up Arrow to move the selected macro
up in the menu; click on the Down Arrow to move it down in the
menu. The default macro always remains at the top of the list.
Put in menu
Causes the selected macro to be listed in the Macro menu.
Edit
Opens the Macro Editor window. For information about the macro
language and the Macro Editor window, see the Digital Mars C++ IDDE
Help.
Rename
Opens the Rename/Clone Script dialog box (Figure 21-19), with
which you can change the selected macro's menu name or filename.

[Figure 21-19 Rename/Clone Script dialog box
- Menu name:
- Name under which this macro is listed in the Macro
menu.
- File name:
- Name of the file in which the macro is saved.
You can change either or both names. Note that you cannot rename
the default macro.
Clone
This button opens the Rename/Clone Script dialog box. This
command makes a copy of the selected macro.
- Menu name:
- Name under which this macro is listed in the Macro
menu.
- File name:
- Name of the file in which the macro is saved. When
cloning, this filename must be different from that of any other macro.
Note:
To create a new macro, first use the Record Macro
command to record it as the default macro. Then
choose Scriptmaker and use Clone to make a copy
of the default macro under a new name.
Delete
Deletes the selected macro.
New! command
Opens another Source window on the current file.
Changes made to a file in one Source window are made
automatically in other Source windows containing the same file.
Pop-up menu commands
The pop-up menu (Figure 21-20) is opened by clicking the right
mouse button in the edit area of the Source window.
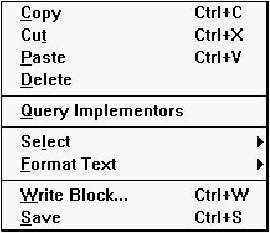
[Figure 21-20 Source window pop-up menu commands
Copy
Copies the selected text to the Clipboard.
Cut
Copies the selected text to the Clipboard, then deletes it from the
buffer.
Paste
Inserts the text from the Clipboard at the insertion point.
Delete
Deletes the selected text from the buffer.
Query Implementors
Interprets the tokens or symbols surrounding the insertion point
as a C++ class member name and locates all classes with a member
of this name. The results are displayed in the Members window
(Figure 21-21).
[Figure 21-21 Members window
For example, if the token is Test, Query Implementors shows a
list of all implementors of Test, such as One::Test.
In the Members window, you can select an implementor and choose
Show Source from the Member menu to open a Source window to
the corresponding source code or, double-click an implementor to
open a Class Editor window to the member source. Note that if only
one implementor of a token is found, the Query Implementors
command opens the Class Editor window directly, without first
opening the Members window.
Select
Opens the Select submenu (Figure 21-22).
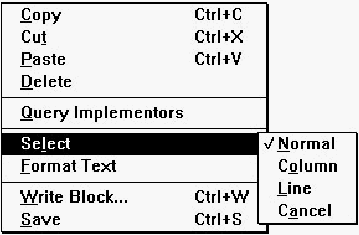
[Figure 21-22 Select submenu commands
Normal
Restores the original text select block to normal mode, undoing
changes caused by Column and Line (see the following).
Column
Changes the text selection block to a column-oriented select block,
in which only the characters in the columns between the start and
end of the original text block are selected.
Line
Changes the text selection block to a line-oriented select block, in
which all characters in the lines between the start and end of the
original text block are selected.
Cancel
Deselects the current select block.
Format Text
Opens the Format Text submenu (Figure 21-23).

[Figure 21-23 Format Text submenu commands
Indent Block
Indents all nonblank lines in the selected text by one tab stop. Tabs
are inserted as tab characters or as spaces, depending on the current
buffer option settings. All text in a region will be indented if a region
is selected upon issuing the command.
Unindent Block
Unindents all lines in the selected text by one tab stop. All text in a
region will be unindented if a region is selected upon issuing the
command.
Upper Case
Changes all alphabetic characters in the selected text to uppercase.
Lower Case
Changes all alphabetic characters in the selected text to lowercase.
Tabs to Spaces
Changes all tab characters in the selected text to spaces. The number
of spaces used to replace each tab character depends on the Tab
spacing option.
Spaces to Tabs
Changes spaces in the selected text to tab characters. The number of
spaces used to create each tab character depends on the Tab spacing
option.
Write Block
Opens a Write Block dialog box. Select a file or type a new name;
the editor writes the currently selected text block to this file. To
append the selection block to a file, check Append.
Save
Saves the current buffer to disk. If the file is untitled, this command
executes Save As.
Toolbar commands
The Source window toolbar (Figure 21-24) offers quick access to
several menu choices.
[Figure 21-24 Source window toolbar
- New:
- Same as choosing New from the File menu.
- Open:
- Same as choosing Open from the File menu.
- Save:
- Same as choosing Save from the File menu.
- Cut:
- Same as choosing Cut from the Edit menu.
- Copy:
- Same as choosing Copy from the Edit menu.
- Paste:
- Same as choosing Paste from the Edit menu.
- Print:
- Same as choosing Print from the File menu.
- Find:
- Same as choosing Find from the Edit menu.
- Find previous:
- Searches backward in the file for the search string.
- Find next:
- Searches forward in the file for the search string.
- Play macro:
- Same as choosing Play Macro from the Macro menu.
Note:
The Find previous and Find next buttons are subtly
different from Find Again in the Edit menu, which can only repeat
the search in the original direction.
Choosing Text Settings from the Source window's Edit menu opens
the Editing/Browsing Settings dialog box, a workspace with tabs
along the top margin. The tabs are used to switch between several
sets of options. Each set of options is described below.
General options
The General options set (Figure 21-25) contains options for undo
levels and the key binding file, as well as some options related to the
Class and Hierarchy Editors.
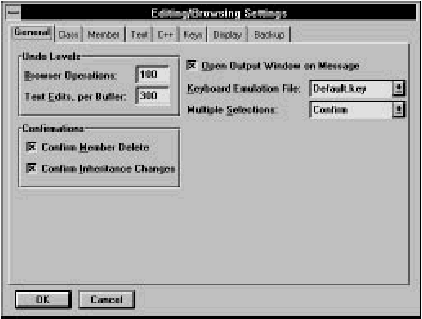
[Figure 21-25 General options
Browser operations
Specifies the number of operations that can be undone in the Class
and Hierarchy Editors. See Chapter 19,
Class Editor Reference,
and Chapter 20,
Hierarchy Editor Reference.
Text edits, per buffer
Specifies the number of edit operations that can be undone per
buffer.
Confirmations
Enables confirmation requests for various operations in the Class and
Hierarchy Editors. See Chapter 19,
Class Editor Reference,
and Chapter 20,
Hierarchy Editor Reference.
Open output window on message
Lets the IDDE open an error window whenever there is an error of
any kind (during compilation, during parsing, and so on.)
Keyboard emulation file
Specifies the key bindings set to be used. Key bindings allow you to
associate keystroke sequences with functions and macros.
Information about key bindings sets can be found in the Digital Mars
C++ IDDE Help.
Multiple selections
Enables multiple selections in lists in the Class and Hierarchy editors.
See Chapter 19,
Class Editor Reference,
and Chapter 20,
Hierarchy Editor Reference.
Text options
The Text options set (Figure 21-26) contains options for indentation,
cursor styles, keyboard emulation, and text editor font.
[Figure 21-26 Text options
Tab spacing
Specifies the default for the number of columns between tab stops.
This value may be overridden locally in each buffer.
Right margin
Specifies the default for the column that acts as the right margin. This
value may be overridden locally in each buffer.
Autoindent
Indents automatically on newline. When you press Enter, the editor
positions the cursor directly below the first nonblank character in the
previous line. This option may be overridden locally in each buffer.
Expand tabs with spaces
Tabs are inserted into the text as an appropriate number of spaces,
rather than as tab characters. This option may be overridden locally
in each buffer.
Show horizontal scroll bar
Enables the horizontal scroll bar at the bottom of the Source
window.
Remove trailing spaces on save
Trailing spaces and Tabs are removed from the end of each line
when a file is saved.
Cursor styles
Specifies caret style. You may set styles individually for the caret in
Insert and Overwrite modes. Styles are:
- Block:
- The current character is displayed in inverse video.
- Underline:
- The current character is underlined.
- Vertical bar:
- A vertical bar appears to the left of the current
character.
- Blink:
- The cursor blinks. The blink rate is specified in the Windows
Control Panel.
Font
Specifies the text font. You can select a predefined font from the
drop-down list, or you can click Custom and select any installed font
from a Windows Font dialog box.
Brief-compatible select
If you choose this option, then enter the "Toggle Mode Select"
mode. The editor remains in selection mode when you use the
arrow keys.
Typing replaces selection
Enables the Windows standard convention of replacing selected text
with any typed character or pasted text. If this option is not selected,
typing or pasting inserts the text to the left of the current selection.
Cut/copy line without selection
If no text is selected, Cut and Copy, respectively, cut and copy the
current line. If text is selected, Cut and Copy work as usual.
If this option is not selected, Cut and Copy have no effect if no text
is selected.
Normal selection for debugging
Enables normal selection of text when in debugging mode. If
disabled, you can drag from the source window to the Assembly,
Data/Object, and Function windows while debugging.
Virtual cursor
Enables virtual cursor mode, in which you can position the caret
anywhere in the window, regardless of line endings. Note that even
with this option enabled, you still cannot position the caret beyond
the last line in the file.
Enable menu accelerators
Enables menu accelerator keys. With this option selected, new
windows have underscores beneath the top-level menu items to
show the Alt key combination you can use to access the menu.
Help Files
Clicking on Help Files opens the Text Help File Configuration dialog
box, as shown in Figure 21-27.
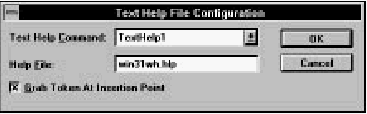
[Figure 21-27 Text Help File Configuration dialog box
This dialog box lets you associate particular Windows Help files with
each of the four Text Help commands. The Text Help commands are
run by key sequences such as Shift+F1. (The exact mapping of key
sequences to Text Help commands depends on the current key
mapping. See "Keys options," later in this chapter.) The Text Help
commands call the Windows API function Windows Help, passing it
the name of a Windows Help file and (optionally) a keyword. The
Text Help commands are useful, for example, for gaining access to
help on a particular API function or MFC class directly from the
source code.
- Text Help Command:
- Specifies a Text Help command (TextHelp1,
TextHelp2, TextHelp3, TextHelp4).
- Help File:
- Specifies the Windows Help file to be associated with the
selected Text Help command. This filename is passed to Windows
Help when the Text Help command is run.
- Grab Token At Insertion Point:
- If this box is checked, the Text
Help commands pass the token at the insertion point in the text
buffer to Windows Help as a keyword. This causes Windows Help to
search for the associated topic, and, if found, to immediately display
help on the keyword topic.
C++ options
The C++ options set (Figure 21-28) contains options to check
delimiters, indent after braces, and auto-align comments. It also
allows you to add custom keywords to the keyword dictionary.

[Figure 21-28 C++ options
Check delimiters
If you type a right parenthesis, square bracket, or brace, the editor
briefly highlights the corresponding left delimiter. If no matching
delimiter is found, an error message is displayed.
Enable C++ mode
This option enables C++ mode globally. If it is not selected, C++
mode features are disabled for all buffers, regardless of local buffer
option settings.
Enable C++ mode for untitled files
When this option is on, new files that have not yet been given a
name are assumed to be C/C++ source. This box should be checked
in most circumstances, so that keywords can be recognized in new
files, for example.
Indent after {
If the last character typed on a line is a left brace, the next line is
indented automatically by an extra tab stop. This option works only
if Autoindent is enabled in the buffer. Also, if the first character on a
line is a right brace (}), the line is unindented automatically; this is
independent of the Autoindent option.
Auto-align comments at column
If this option is enabled, when you type // to start a C++
comment, the editor automatically indents the comment to a
specified alignment column. You can specify the alignment column
in the adjacent textbox.
Enable C++ mode on extensions
Specifies the file extensions for which C++ mode is automatically
enabled. Type the extensions into the textbox, separated by spaces.
Custom keywords
You can maintain a set of custom keywords that are highlighted in
the edit window in a manner you specify (see "Display options,"
later in this chapter).
To add a new keyword, type the keyword into the textbox and click
on Add. To remove a keyword from the list, click on the keyword in
the list and click on Remove.
Keys options
The Keys options set (Figure 21-29) lets you customize key bindings
and assign key combinations to macros.
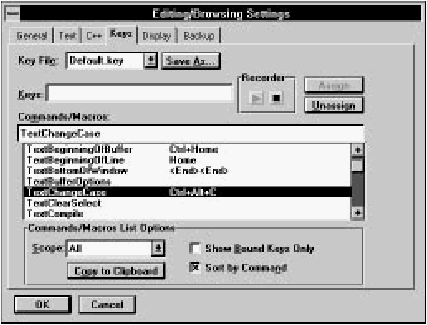
[Figure 21-29 Keys options
A Key Bindings file (.key) associates keystroke sequences with
editor commands and user-defined macros. You can select the
particular key binding set you want to use either with the Key File
option below, or with the Keyboard Emulation file option under the
General tab (see General options,
earlier in this section).
Commands are grouped into functional categories. The groups are:
- Global:
- Global commands, used anywhere (includes all
user-defined macros)
- Member:
- Member-related commands, used in the Class
and Hierarchy Editors
- Text:
- Text editor functions and commands, used in
Source windows
- Class:
- Class-related commands, used in the Class and
Hierarchy Editors
- Project:
- Project-related commands, used in the Project
window
You may assign more than one keystroke sequence to a command.
However, within a category, only one command may be associated
with a particular keystroke sequence.
Key file
Specifies the key bindings set to be used. Select a keyboard
emulation file from the drop-down list.
Keys
Specifies a key sequence. This is not an ordinary textbox; it can
display any keystroke sequence.
There are two ways to enter a keystroke sequence into the textbox:
- Click in the textbox and type the keystroke sequence.
You can enter most sequences in this way. (Keys you
cannot enter directly into the box include Home, End,
Delete, Backspace, Right Arrow, Left Arrow, and Tab.)
- Use the Recorder buttons. Click on the green arrow to
start recording. Enter your keystroke sequence. Click on
the red box to stop recording.
Commands/macros
The textbox displays the currently selected command (or macro).
You can type in the command name or select a command from the
list by clicking on it.
The list displays commands and associated key sequences. If more
than one sequence is assigned to a command, it is listed as many
times as necessary. The content and sorting of the list is determined
by the Commands/Macros List Options.
Commands/macros list options
Determine the filtering and sorting of commands and macros shown
in the Commands/Macros list.
- Scope:
- Displays commands only in the specified functional category.
Categories are Global, Member, Text, Class, and Project. Specify All
to see all commands.
- Show bound keys only:
- Shows only those commands with an
associated keystroke sequence.
- Sort by command:
- Displays the list alphabetically by command. If
this option is not selected, the list is ordered by key sequence.
- Copy to clipboard:
- Copies the current contents of the commands/
macros list to the Clipboard.
Assign
Assigns the keystroke sequence to the selected command.
If another command in the same functional category is already
bound to this keystroke sequence, you are asked if you want to
reassign the sequence to the new command.
Unassign
Dissociates the selected command from its keystroke sequence.
Save as
Saves the key bindings to a new file. When prompted, type the name
of the new file, or select a file from the drop-down list.
Display options
The Display options set (Figure 21-30) lets you select special font
colors and styles for keywords, comments, preprocessor symbols,
and other special text.

[Figure 21-30 Display options
Source code display
Allows you to customize syntax highlighting. You can specify the
highlighting for:
- Comments:
- C/C++ comments
- Custom keywords:
- Special keywords you specify. (See "C++
options," earlier in this chapter.)
- Keywords:
- C/C++ keywords
- Current line:
- The line containing the insert point
- Preprocessor:
- C/C++ preprocessor directives
- Error highlight:
- Lines on which compiler errors were found
Select Color and Font Style from the drop-down lists next to each
item. (If you select the first color, which is labeled "none," the
default text color is used for that item.)
Selection/highlight color
Specifies the text and background color of selected text.
Execution line color
Specifies the text and background color of the current execution line
during debugging.
Backup options
The Backup options set (Figure 21-31) contains options for backing
up files.
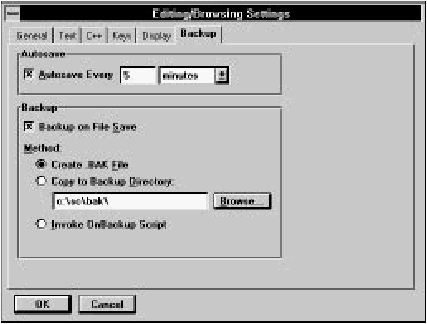
[Figure 21-31 Backup options
Autosave
Causes the editor to save your work automatically after a certain
number of changes, or after a certain number of minutes since the
last save. Specify the number of changes or minutes in the textbox,
and select changes or minutes from the drop-down list.
Backup on file save
This enables automatic backup on save. You must also select the
backup method:
- Create .bak File:
- Copies the previous saved version to file with the
extension .bak.
- Copy to backup directory:
- Copies the previously saved version to
another directory. Type the directory into the textbox, or click on
Browse to select a directory from a Directory dialog box.
- Invoke OnBackup script:
- Runs a macro called OnBackup.
Note:
The Autosave option also provides some protection
against data loss in the event of a system crash.
When you check Autosave, the editor saves the
contents of each modified buffer to a temporary file
on disk. If the editor does not exit normally (as with
a crash), these files (named ~num.sav, where
num is a unique number) will not be deleted.
Line 1 of a .sav file specifies the drive, directory,
name, and extension of the buffered file, also with
the data and time it was last saved. The rest of the
file stores the contents of the buffer, which you may
be able to recover; use the editor's Save As option
to save the .sav file as a source file.
Global Find is a multi-file search facility. You specify the files to be
searched and the string or regular expression to be searched for.
Global Find presents a list of files in which a match was found and
allows you to view and edit the files, add files to the project, or
refine the search criteria and search again.
Defining the search
You open the Global Find dialog box (Figure 21-32) by choosing
Global Find from a Source window's Edit menu, choosing
Global Find from the IDDE's Tools menu,
or clicking on the Find button in
the Edit Buffers dialog box.
[Figure 21-32 Global Find dialog box
The Global Find dialog box has two sections. The upper section
specifies the files to be searched, and the lower section specifies the
pattern to be searched for.
Search Files...
Three options are available for specifying the files to be searched.
- In the current project
- All files in the current project are searched.
- Currently listed in global search results window
- Enabled only after an initial global search has been performed. It
limits the search to files in which a match was found in the previous
global search.
- Matching the criteria
- Specify files by filename patterns, directory, date, time,
and attributes.
- File names:
- Comma-separated list of filenames and patterns. To
search all files, use *.*.
- Directory:
- Search files in the specified directory. You can click on
Browse to select a directory from the Choose Directory dialog box.
Check Include Subdirectories to search files in subdirectories as well.
- Date:
- Select Ignore to ignore the date. Otherwise, specify a date and
one of the relational options. For example, specify On and 11/6/94
to search files last modified on November 6, 1994, or After 4/1/90
and to search files last modified after April 1, 1990.
- Time:
- Select Ignore to ignore the time. Otherwise, specify a time and
one of the relational options.
- Attributes:
- Search files with the given attributes. File attributes are
Archive, Read Only, System, and Hidden.
The Attributes check boxes are three-state check boxes:
- checked
- files with the given attribute are searched.
- cleared
- files without the given attribute are searched.
- grayed
- the attribute is ignored when deciding which
files to search.
For...
Type the pattern to search for into the textbox.
These options modify the search:
- Ignore case
- Do not consider case when searching for a match.
- Whole words only
- Consider text a match only if it is not part of a larger alphanumeric
string.
- Regular expression
- Enables regular expression matching.
A regular expression is a string with wildcards, which are:
| ? |
Matches any character. |
| * |
Matches zero or more occurrences of any
character. |
| @ |
Matches zero or more occurrences of the
previous character or expression. For
example, Ax@B matches AB, AxB, AxxB, and
so on. |
| % |
Matches the beginning of a line. For example,
%{ finds lines that start with left braces. |
| < |
Matches the beginning of a line. For example,
<{ finds lines that start with left braces. |
| $ |
Matches the end of a line. For example, $
finds blank lines. |
| > |
Matches the end of a line. For example, >
finds blank lines. |
| [...] |
Matches any of the characters listed between
the square brackets. A hyphen can be used to
specify a range of characters. For example,
[axz] matches a, x, or z; [a-z] matches
any lowercase letter. |
| [~...] |
Matches any characters except those listed. |
| \ |
Escape character indicates that the following
character should be taken literally rather than
used as a wildcard character. For example, \%
matches a percent sign. |
| \t |
Matches a tab character. |
| \f |
Matches a formfeed character. |
The Search window
After specifying the search criteria, click OK to start the search.
As the search begins, the editor opens the Search window (Figure
21-33). This window contains a list of files in which a match is
found.
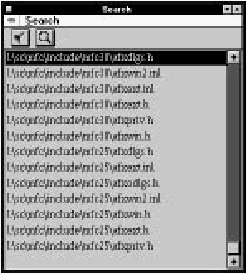
[Figure 21-33 Search window
Also during the search, the Search Progress dialog box displays
statistics (Figure 21-34). Click Stop to terminate the search at the
current point, or click Revert to return to the Global Find dialog
box.
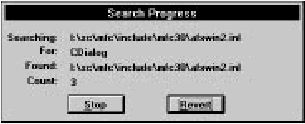
[Figure 21-34 Search Progress dialog box
When the search is complete, the Search Progress dialog box
closes and the Search window contains a list of files in which at least
one match occurred.
Search menu commands
The Search window's Search menu (Figure 21-35) contains
commands to open files in Source windows, add files to the project,
and continue the global search.
[Figure 21-35 Search menu commands
- Refine
- Reopens the Global Find dialog box. You may refine your search
criteria and continue the global search. This command is disabled if
no matches were found.
- Show File
- Opens the selected file in a Source window. You can also open a file
by double-clicking on the file in the list. The file is positioned to the
first match of the search pattern.
- Add Selected To Project
- Adds the selected file to the current project.
- Add All To Project
- Adds all files listed in the Search window to the current project.
Toolbar commands
The Search window toolbar (Figure 21-36) offers quick access to
menu choices.

[Figure 21-36 Search window toolbar
- Refine
- Same as choosing Refine from the Search menu
- Show file
- Same as choosing Show File from the Search menu
The IDDE's Version Control System (VCS) allows programmers to
work safely with the same source files simultaneously, integrate
their changes, rebuild their own sources, and store updated master
files in a common master archive.
The VCS works in combination with INTERSOLV's PVCS, a popular
version control program for the PC. However, VCS offers significant
functional improvements over PVCS alone, because it is integrated
with the IDDE's project system and has access to information stored
in the project (.prj) file. Digital Mars's VCS guards against
accidentally overwriting changes made by others and provides the
highest level of support possible for keeping both your private
project directory and the master project directory fully synchronized.
Note:
If you do not have PVCS, you need to purchase it
from INTERSOLV before you can use Digital Mars's
VCS. See the PVCS documentation for information
on PVCS features and commands.
This chapter assumes a knowledge of PVCS and a familiarity with
basic version control concepts. The chapter focuses on using the
group-oriented model of software development that VCS makes
possible, and it explains how to use VCS to build and maintain
projects.
Note:
The IDDE's Version Control System (VCS)
is supported only in the 16-bit version of
Digital Mars C++.
Overview of VCS Concepts
This section defines basic terms used in this chapter and compares
the parallel model of version control to the linear model supported
by other version control systems.
The next section, "Setting Up Version Control with VCS," presents an
overview of how you or your project team can use VCS to establish
and maintain version control on software development projects of
any size.
Terminology
The following terms are used throughout this chapter:
- Archive (or master archive):
- All revisions of a source file,
stored in a commonly accessible directory structure,
usually on a network.
- Revision:
- A revised archived source file that has a
revision number and timestamp that identifies when the
revision was created.
- Workfile:
- Your private copy of the revision that you are
currently working on.
- Private project directory:
- Your personal working
directory to which others do not have access. You work
with workfiles in your private project directory.
- GET:
- The process of obtaining a private copy of a
revision of an archive (usually the latest revision).
- MERGE:
- The process of collating changes to a revision
into the archive, without overwriting or corrupting any
changes made by others since you got the revision.
- PUT:
- The process of creating a new revision of a file in
the archive.
- Version:
- A group of revisions containing all source files
that make up a project. Typically you create versions to
correspond to milestones in the development process,
such as the weekly build or the beta build.
Version control models
There are two basic models for version control:
- Linear:
- Only one person can work with a file at any one
time.
- Parallel:
- Groups of people can work with the same set of
files simultaneously.
Most version control systems support a linear model of version
control. In practice, few support a parallel version control system
because additional support is required to prevent losing changes.
The Digital Mars C++ IDDE, however, fully supports the parallel model.
Setting Up Version Control with VCS
This section gives you an overview of how you can use VCS on your
software development project. The remainder of the chapter
explains how to use VCS to perform the operations introduced here.
Using the linear model with VCS
In the linear model, VCS locks a revision when someone GETs it;
that is, VCS prevents others from making a private copy. Thus, only
one person may work with a revision at a time. It is even possible to
lock all revisions that make up a particular version.
After changing the revision, the person who receives it must PUT it
back into the master archive before others can make changes to it.
The advantage of the linear method of version control is that you do
not have to collate (merge) sets of changes to a revision. The
obvious disadvantage is that only one person can work on a file at a
time. In large development projects in which many people are
making changes to related groups of files, this model is often
unworkable.
Using the parallel model with VCS
The parallel version control model allows two or more people to
work simultaneously with copies of the same revision- a clear
advantage even in a small work group. The disadvantage of this
model is that each person's changes must be merged with changes
made by others, so the master archive of a revision incorporates
everyone's work and the related changes made to other files
(sometimes called "dependencies").
When working in a parallel version control environment, the
revisions and versions used by the development team are stored in a
master archive, usually on a network. Developers GET a revision (or
more typically a group of related revisions) from the master archive
and work with the copies (workfiles) in their own private project
directory.
After making changes to a group of workfiles, developers must
MERGE their changes into the latest version of revisions of the files.
This is done in the private project directory because it often involves
identifying changes made by others in the interim, along with
resolving dependencies in other revisions that were affected by other
people's changes.
Note:
In your revised file, be sure to identify the revision
with which you want your changes merged. You
make this reference by adding a $revision entry
in the file.
When changes are merged successfully, and all related changes have
been made to affected revisions in the private project directory, each
developer PUTs the new revisions back into the master archive.
If a revision has been modified during the MERGE, it must be
remerged before it can be PUT into the archive. VCS warns you of
this automatically and gives you a way to prevent other people from
merging changes into the archived version of a revision until you
have successfully PUT it.
The parallel model also supports branching of revisions. When you
create a branch of a revision, you can PUT it back into the archive
without performing a MERGE. This allows others to GET your
changes to a revision. You use the branching mechanism if you want
a set of changes available to you but you do not want to MERGE the
changes until your work is complete. For more information, see
"Creating a new branch," later in this chapter.
Setting VCS Options
This section explains how to use the options in the VCS page of the
Project Settings dialog box to set up version control parameters
that specify the rules VCS follows when you GET and PUT files.
To open this dialog box, open the project you want to work with,
and choose Settings from the IDDE's Project menu. In the Project
Settings dialog box, select the VCS tab. The VCS page is shown in
Figure 22-1.
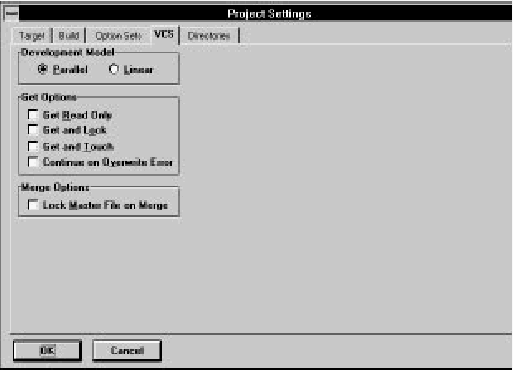
[Figure 22-1 VCS page in Project Settings dialog box
Choosing a Development Model
The Development Model radio buttons specify the development
model that VCS uses. Select the Parallel model, described earlier in
this chapter, unless you are the only person working on the files in a
project.
Select Linear if you are working alone, or if you need to deny other
developers access to revisions you are working on.
You can switch from the parallel to the linear mode when, for
example, you need to prohibit GET operations on revisions you are
merging (see "Merge Options," later in this chapter).
The IDDE sets the rest of the VCS options for you, based on the
development model you select, as described later in this chapter. If
you need more control over the version control process, you may
change the default settings. This is not usually necessary.
Get Options
These options specify how VCS handles your requests to GET
revisions from the master archive:
- Get read only:
- Lets you GET files from the master archive, but with
read only access; you cannot modify the files you GET. Check this
option if you want to view a revision (for example, an old revision),
or if you want to ensure that you do not accidentally change the
files. This option is off by default in both development models.
- Get and lock:
- Prevents others from successfully executing a GET
operation on a revision once you GET it. The revision remains
locked until you PUT it back in the archive again. This option is on
by default when you choose the Linear development model.
- Get and touch:
- Sets the time-stamp for any revision you GET to the
current date and time. This setting forces recompilation of your files.
It is off by default in both development models.
- Continue on overwrite error:
- Tells the IDDE to overwrite a file on
a GET operation without displaying a warning. Use this setting to
wipe out all changes you have made to a revision and GET a new
copy from the master archives. This option is off by default in both
development models.
Merge Options
The Lock Master File on Merge Setting prohibits others from
executing a PUT operation on a revision in the master archive while
you are performing a MERGE on it. This option is off by default in
both development models.
Creating a VCS Configuration File
A VCS configuration file defines a series of variables that tell VCS
where to look for and create files. You can create a VCS
configuration (.cfg) file with the integrated editor or any other text
editor. You need a .cfg file for each project in which you use VCS.
A sample configuration file, vcs.cfg, comes with Digital Mars C++.
(It is installed in \dm\samples\windows\wclock by default.)
The sample vcs.cfg contains information that VCS needs to work:
- vcsdir:
- The directory in which VCS stores master
archives. This variable must be defined for VCS to work.
(All others are optional and default to the current
directory.)
- journal:
- The file name and path in which VCS creates
a journal (journal.vcs) that contains the information
about changes to revisions in an archive.
- archivework:
- The directory in which VCS keeps
backup copies of revisions as they are updated. (This
command corresponds to the LOGWORK command in
older versions of PVCS.) Do not specify a RAM disk as
the ARCHIVEWORK directory.
- workdir:
- The VCS temporary directory.
It is a good idea to give the .cfg file for a project the same name as
the project itself and to save it in your private project directory.
Selecting the configuration file
Before you use VCS for the first time on a project, you need to select
the configuration file for the project:
- In the Project window, choose Configuration from the
VCS menu. The Set VCS Configuration dialog box
opens.

[Figure 22-2 Set VCS Configuration dialog box
- Select the configuration file you want and click OK. You
need to specify its location if it is not in the current
directory.
The PVCS Registration dialog box
The first time you open the Set VCS Configuration dialog box, the
PVCS Registration dialog box is displayed. You must have an
INTERSOLV LAF (License Administration Facility) code to use PVCS
in the IDDE. INTERSOLV supplies the LAF code to licensed users.
For more information, please contact INTERSOLV. Type the code in
the License Code textbox, then click OK to continue. After the PVCS
Registration dialog box disappears, a message informs you that you
must restart Windows.
The User database directory textbox shows the database directory in
which the license database is placed. This directory should be a
shared directory on the network if multiple developers are using the
same copy of the IDDE from the network. If developers have
individual copies of the IDDE, do not change the text in this box.
Note:
If you have PVCS version 5.0 or later, the IDDE
does not display the PVCS Registration dialog box.
Putting Revisions into the Archive
When you PUT a revision in the master archive, VCS updates its
revision number and time stamp and marks it as "not changed" with
respect to the corresponding workfile in your private project
directory.
Note:
If, while you were performing a MERGE, another
person has PUT a new revision of a file you want to
PUT, VCS warns you with a modal dialog box that
you must perform another MERGE operation on the
revision.
To prevent others from working on a revision while
you are merging it, check Lock Master File on
Merge. See the section "Merge Options," earlier in
this chapter, for more information.
To begin a PUT operation, choose Put from the Project window's
VCS menu. The Put dialog box is displayed.
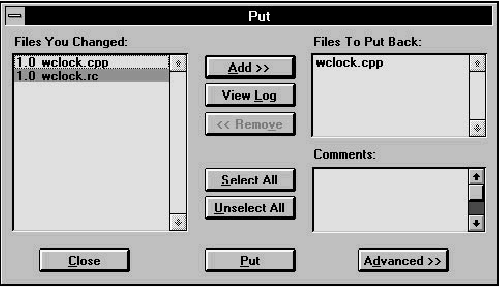
[Figure 22-3 Put dialog box
The Put Candidate Files listbox shows those workfiles in your private
project directory that have changed since you checked them out.
Click the Add button to add files from this list to the Files to Put
Back listbox; this shows the files you want to PUT into the master
archive. To remove a revision from the Files to Put Back list, select it
and click on Remove.
Click on Select All to select all files in the current listbox. Click on
Unselect All to deselect them.
Select a file name and click on View Log for a summary of who
changed the latest revision of that file and the changes that were
made.
To associate comments with all selected files in the Files to Put Back
listbox, type them into the Comments textbox.
Click on Put to PUT the files listed in the Files to Put Back listbox
into the master archive.
Click on the Advanced button and the Put dialog box expands to
show additional options.
When you PUT files into the archives, you can specify a group of
files using the Put Special textboxes. The Put Special options are:
- Revision:
- Specifies the revision number you want to give the
workfiles you are putting into the archives. The revision number has
the format nn.xx, where nn is the major number and xx is the minor
number. The numbers can range from 0 to 65,535.
If you do not explicitly assign a revision number to a revision, VCS
assigns one automatically by incrementing the minor number of the
most recent revision by one.
- Version:
- Assigns the name you want to a group of revisions, such as
beta or alpha. VCS associates the version name with all revisions
listed in the Files To Put Back listbox.
- Date/Time:
- The date and time of a version or revision you archive.
The default date format is mmm/dd/yy; mmm is the month, dd the
day, and yy the year. The time format is hh[:mm[:ss]]; hh is the hour,
mm is the minute, and ss is the second.
Creating a new branch
Use the Create New Branch option to maintain a private set of
revisions in the master archives without having to MERGE them.
When you have a private branch, you can change a file and perform
PUT operations as often as necessary, without affecting other
developers.
When you are ready, you can MERGE your private revisions back
into the master archive.
Note:
A MERGE is the only way to make the changes in a
branch available to other developers.
Getting Revisions from an Archive
Before you can work with archived revisions, you need to GET them
from the archive and copy them to your private project directory
using the Get dialog box, shown in Figure 22-4. (Both the archive
directory and your private project directory are specified in the VCS
configuration file for the project.)
When you GET a revision from an archive, VCS records the revision
identification numbers of the files, marks them as unchanged and
not new, and adds them to your project (if you so specify in the Get
dialog box).
If you are using the linear development model, VCS locks the
archived revisions when you GET them so nobody else can GET
them until you PUT them back. If you are using the parallel model,
more than one developer can check out the revision unless you
specify Get and Lock on the VCS page in the Project Settings dialog
box.
To GET revisions from the master archive:
- In the Project window, choose Get from the VCS menu.
The Get dialog box is displayed.
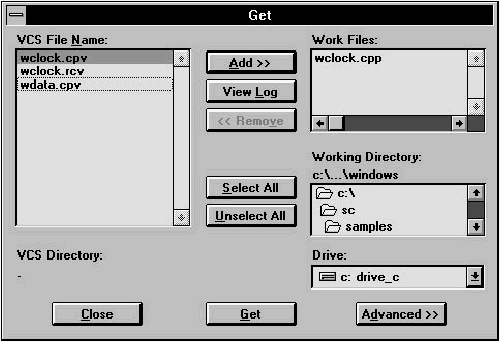
[Figure 22-4 Get dialog box
- The VCS File Name listbox shows the names of all
revisions in the archive. Select from this list the files you
want to move to your private project directory.
To add one or more files, click on the file name(s), then
click on the Add button. To add all files in the archive,
click on the Select All button. VCS moves the files you
select to the Work Files listbox.
To view a summary of who made certain changes to a
revision, click on View Log. (This is the same log that is
available from the Merge dialog box.)
- When all the files you want are in the Work Files list,
click the Get button. VCS copies those files to your
private project directory.
To remove files from the Work Files list, click on the file
name(s), then click on the Remove button.
Click on the Advanced button to display the following additional
options: Show Archives, Get Special, and Add Files to Project.
Show Archives provides the following settings:
- All archives:
- Displays all archives in the VCS File Name listbox. This
is the default setting.
- New archives:
- Displays in the VCS File Name listbox the names of
the new archives and archives that have changed since the last time
you performed a GET operation. Choose this option to update your
private copy of the project with the most current revision(s).
- Except merges:
- Displays in the VCS File Name listbox all the new
revisions in the archive except those you just merged or need to
merge. Select this option to choose only those additional archives
you need to build and to test merged revisions.
The Add Files to Project option adds the revisions automatically to
the current project when VCS gets them from the archive.
To retrieve a specific revision or version, use the Get Special
textboxes:
- Revision:
- is the number of the revision you want to get
from the archives. The revision number has the format
nn.xx, where nn is the major number and xx is the
minor number.
- Version:
- is the name of the version you want to GET. The
version name identifies a particular version, such as
alpha or beta.
- Date/Time:
- is the date and time of a particular version or
revision. The default date format is mmm/dd/yy; mmm is
the month, dd the day, and yy the year. The time format
is hh[:mm[:ss]]; where hh is the hour, mm is the minute,
and ss is the second.
Merging Revisions
If you are working with the parallel development model, after you
GET a revision and make changes to it, you may need to MERGE
those changes into the master archive. The master archive
presumably contains changes made by others that your revision does
not include. If no other developer has changed the file, then you do
not need to MERGE; you simply PUT the new revision in the master
archive.
Note:
Remember that in your revised file, you must refer
to the revision with which you want your changes
merged. You do this by adding a $revision entry
in the file.
When you MERGE a revision, VCS creates a backup of your revision
in your private project directory. In addition, VCS provides all
possible support for performing MERGE operations safely.
To merge your changes into another revision in the archive, choose
Merge from the Project window's VCS menu. The Merge dialog box
opens.
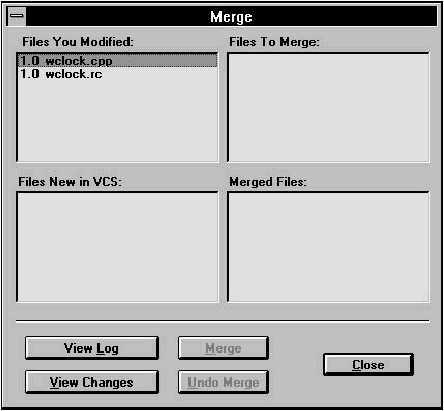
[Figure 22-5 Merge dialog box
The Merge dialog box contains four listboxes:
- Files you modified:
- Shows the files you modified in your private
project directory since the last time you performed a GET operation.
- Files new in VCS:
- Shows archives that someone else has changed
since the last time you performed a GET operation. The current
(most recent) revision number is displayed. These are files you might
need to GET to rebuild the project with your changes and to PUT
your new revisions back into the archive.
- Files to merge:
- Shows files that both you and another person
changed since the last time you performed a GET operation. These
are the workfiles you need to MERGE.
- Merged files:
- Shows files that you merged during the current
MERGE session.
To display a log showing who changed an archive and what changes
were made at each revision, click on a file name in one of the
listboxes and click on the View Log button. See the PVCS
documentation for information on the display format.
Click the View Changes button to show the changes you need to
resolve when you MERGE the selected revision. When you click
View Changes, an annotated change file appears in an IDDE editor
window. See the PVCS documentation for information on the format
of the display and the meanings of symbols.
When you are ready to perform the MERGE operation, click on
Merge. VCS guides you through a three-way merge, incorporating
your changes and those made by others into a new revision.
Because the IDDE automatically makes backup copies of both the
revision in your private project directory and the revision you want
to MERGE it with, you can undo a MERGE (before closing the Merge
dialog box) by clicking Undo Merge.
Testing the MERGE operation
To test the MERGE, return to the Get dialog box, click on Advanced,
and select Except Merges. GET the files in this list and build them
using the IDDE (see Chapter 8, "Testing an Application," for
information).
Using the VCS Manager
Use the VCS Manager for additional flexibility in managing revisions
and versions. You can apply a version name to a set of archives
when the software reaches a significant release step, such as beta or
final release. You can also delete a named version or revision from
an archive. Before deleting a version or revision, make sure that you
are deleting the right one, as a deleted version or revision cannot be
recovered. Finally, the VCS manager lets you lock or unlock a
version or revision.
To use the VCS Manager in the Project window, choose Manager
from the VCS menu.
The VCS Manager dialog box shown in Figure 22-6 is displayed.
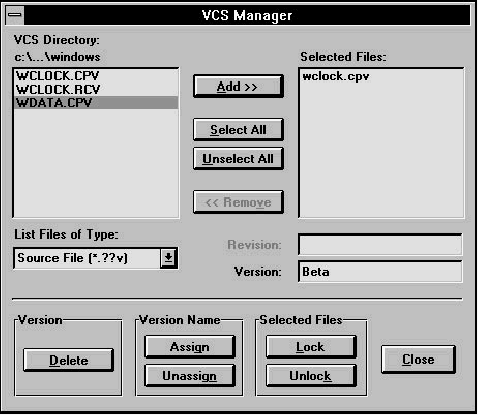
[Figure 22-6 VCS Manager dialog box
Note:
You probably will not need to use the VCS
Manager dialog box on most projects.
The VCS Directory listbox contains the names of revisions to add to a
version or revision. Double-click on the file name to add it to the
Selected Files listbox. Click on Select All to select all files.
To assign a version name, type the name, such as beta, in the
Version textbox, and click on the Assign button. This assigns the
version name to all files in Selected Files. The Assign and Unassign
buttons are available only if you specify a version name in the
Version textbox.
To control access to a particular version or revision, specify the
revision (its number) or version (its name) in the appropriate
textbox, then click on Lock to deny access or Unlock to allow
access.
To delete a version or revision, specify the appropriate information
in the Revision or Version textbox, and click on the Delete button.
Creating a Master Archive
When you begin using VCS, it may be your job to create the master
archive to and from which others GET and PUT files. This section
describes the process of creating a master archive.
The master archive contains the revisions to all source files in a
project. It also records information about changes from the previous
revision, a history of the changes since the first revision, a record of
who changed the files, the comments attached to the revisions as
they were changed, and the date and time that each revision was
PUT into the archive. See the PVCS documentation for additional
information.
To set up a master archive, you PUT the workfiles in your project
directory in the archives using the Put command. This command
takes files from the original directory and creates the archives
automatically. See "Using the VCS Manager," earlier in this chapter,
for more information on the Put dialog box and how to
use it.
When you PUT files in an archive, VCS changes their extensions
automatically. The last character of the extension on each file is
changed to V. For example, the file extension on abc.cpp becomes
abc.cpv. If the file does not have an extension, VCS adds the
extension .__v to the filename (two underscores and a v).
To create a master archive from the workfiles in your private project
directory:
- Choose Put from the VCS menu in the Project window.
- PUT the workfiles from your private project directory
into the archive by double-clicking on the file in the Put
Candidate Files listbox.
The Put Candidate Files listbox displays the names of
workfiles that you changed since the last time you
performed a GET operation. The listbox also shows the
files that do not yet have archives. Because you are
creating the archives, all files in the project are displayed.
Files you select are added to the Files To Put Back
listbox.
- To add all your workfiles to the master archive, click on
Select All. To remove a workfile from the list of files to
archive, select the file in the Files To Put Back list and
click on the Remove button.
- Optional: Type a comment in the Comments textbox.
VCS applies your comment to all selected files in the
Files to Put Back listbox.
- Click the Put button to create the master archives and
PUT your workfiles in them.
This chapter describes the commands on the IDDE's Debug menu
that you use to run the debugger. This chapter also explains
how to use breakpoints and watchpoints effectively.
Chapter 8, "Testing an Application," presents an overview of the
Digital Mars C++ debuggers and explains how to perform typical
debugging tasks.
Chapter 24, "Commands Available in Debugging Mode," describes
the commands and the functionality of each of the debug windows
that you can open from the Views palette.
Commands on the Debug Menu
Debugging commands are located in the Debug menu on the
IDDE's main menu bar. Figure 23-1 shows the Debug menu
commands.
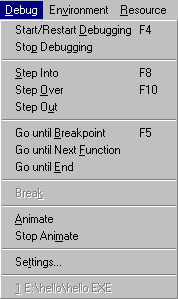
[Figure 23-1 Debug menu commands
This section describes the commands in the Debug menu in the
order shown in Figure 23-1.
Note:
Frequently used debugging commands are available
from the Debug toolbox. See "Debug Toolbox
Icons" in this chapter to learn how to use the Debug
toolbox.
Start/Restart Debugging
Starts a debugging session. During a debugging session, any open
Source window changes from editing mode to debugging mode. In
debugging mode you can set breakpoints, jump to a specific line, or
view assembly instructions generated for a line of code. You cannot,
however, edit the source code. You must exit the debugging session
(return to the editing session) to modify the source code.
Note:
If you need to specify command-line parameters in
your application, you can do so in the Run
Arguments dialog box, available by choosing the
Arguments command from the IDDE's Project
menu.
If debugging is in progress, choosing Start/Restart Debugging
restarts the application.
Note:
If you want to run the program without debugging
it, choose the Execute Program from the Project
menu.
Stop Debugging
Exits the current debugging session and switches the IDDE into
editing mode.
Step Into
Executes the program until it reaches the next source-level
statement. This command lets you step through the program's code
at the source level, statement by statement.
If Step Into is used on a procedure or function call, the debugger
steps into the first statement of the function only if tracing is enabled
for the module containing that function. For more information, see
"The Project Window," in Chapter 24, "Commands Available in
Debugging Mode."
If the Assembly window is the active window, this command
executes to the next assembly (as opposed to source level)
instruction. If the assembly window is open but is not the active
window when you use this command, it updates to show the next
instruction to be executed.
Step Over
Executes the program to the next statement, or until a breakpoint or
watchpoint is triggered or an exception is raised. If the current
statement is a call to a procedure or function, the program executes
to the next statement following the call.
If the Assembly window is the active window, this command
executes the program to the next assembly instruction without
tracing into function calls. If the current instruction is a call to a
function, the program executes to the assembly instruction following
the call.
Return from Call
Executes the program up to the current function's return address, or
until a breakpoint or watchpoint is triggered or an exception is
raised. This command is useful when executing the rest of the
current function or procedure after having stepped into it, then
stopping execution at the point immediately after the call was made.
Go until Breakpoint
Executes the program until a previously set breakpoint or
watchpoint is triggered.
Go until Next Function
Executes the program until the entry point of the next function call is
reached, or until a breakpoint or watchpoint is triggered or an
exception is raised. This command is useful when executing from
any point in a function to the next function call.
Go until End
Executes the program to the end, ignoring any breakpoints and
watchpoints that are set. If a Windows protection fault or other
exception occurs, the program breaks at the point of the violation.
Break
(32-bit IDDE only) Stops the process currently being debugged, and
shows the location of the current execution point. Choosing Break
is equivalent to typing CTRL+ALT+SYSREQ in a debugging session with
the 16-bit IDDE.
Animate
Executes the program until the next source-level statement is
reached, waits for a short delay (the animate delay), and again
executes the program until the next source-level statement is
reached. This command is equivalent to repeatedly executing the
Step Into command and waiting for a short delay. To stop the
animation mode, choose Stop Animate.
To set the animation delay time, choose the Animate Delay
command from the Settings submenu of the Debug menu (see the
section "Animate delay," later in this chapter).
Stop Animate
Stops the animation mode.
Settings
Brings up the Debugger Settings tabbed dialog box (Figure 23-2).
The tabs at the top allow you to switch between the General page,
the Exceptions page, and the Multiple EXE/ DLL page.
General
Options on this page of the Debugger Settings dialog box control
the general debugger settings, such as the animation delay.
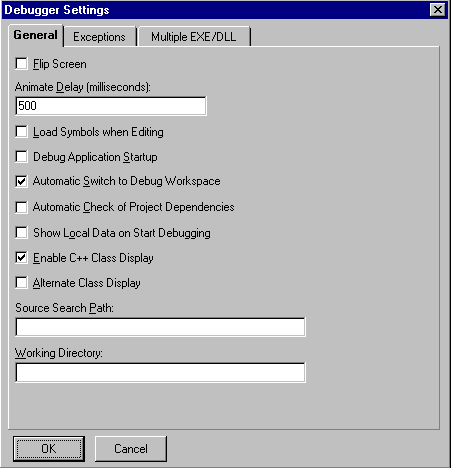
[Figure 23-2 General page of the Debugger Settings dialog box
Flip screen
Specifies whether the IDDE flips control of the screen between the
debugger and the text-mode application window each time the
debugger executes some part of the application code.
When Flip Screen is turned on, the application gets control of the
screen each time it runs. When Flip Screen is turned off, the
debugger does not activate the application to bring it to the
foreground each time the debugger gives control to the application.
Animate delay
Opens the Animate Delay dialog box. This dialog box allows you
to specify the amount of time the debugger pauses between steps
while in animation mode. In animation mode, the debugger executes
the program step by step, pausing between steps by the amount of
time you have specified. (See the section "Animate" earlier in this
chapter for information on the Animate command.)
The Animate Delay dialog box lets you specify the delay in
milliseconds. For example, to pause for one second between steps,
specify 1000; the default is one-half second (500 milliseconds) delay.
Load symbols when editing
When this option is checked, the IDDE loads debug symbols from
the compiled executable or the DLL when the IDDE is in editing
mode. This gives you access to the data definitions in the Data
Window, as well as to line number information, while editing your
source code. For this option to work properly, you must build your
project with debug symbols enabled. Note that in editing mode some
of your operations in editing mode might take longer when this
option is on because IDDE has to load the debug symbols from your
compiled project.
Warning: No changes that you have made to the source files
since the last time you compiled your project are
reflected in the debug symbols shown while you
are editing. To update the debug symbols, you must
rebuild your project.
Debug application startup
Controls whether debugging starts at the beginning of a program or
at the WinMain() or main() entry point.
If you check this option, the debugger automatically sets a fixed
breakpoint at the main entry point and lets you trace through the
application's startup code. If not, the debugger starts tracing from
WinMain() or main() onward.
Automatic switch to debug workspace
When you check this option, the debugger automatically debugs the
current project in the IDDE debugging workspace.
Automatic check of project dependencies
When you check this option, the debugger automatically checks the
project dependencies in the current project.
Show local data on start debugging
When you check this option, the debugger automatically displays
local data at the start of a debugging session. By default, the Data
window shows no data.
Enable C++ class display
Specifies whether the debugger displays C++ types in the Data/Object
window using the form class::object. When you do not check
this option, the debugger does not display C++ class names in the
Data/Object, Call, or Function windows.
Alternate class display
Reverses the order in which C++ information is displayed in the
Data/Object window to the form object::class. This command is
disabled unless you check the Enable C++ Class Display option.
Source search path
Specifies the search path for source files when debugging.
Working directory
Specifies the working directory for a debugging session.
Exceptions (32-bit IDDE only)
Options on this page let you control how the debugger responds to
the operating system when an exception occurs. This capability
helps you diagnose the cause of unforeseen, and possibly serious,
errors.
Exceptions presented on this page are NT exceptions, which are part
of the Structured Exception Handling mechanism of Win32. NT
exceptions comprise both hardware exceptions (such as access
violations, division by zero, or stack overflow) and software
exceptions (explicitly initiated either by Win32 APIs- HeapAlloc,
for instance- or by your own code). However, C++ exceptions are
also accommodated on the Exceptions page. When you throw a C++
exception in a Win32 program, an NT exception is raised. The
exception code of the NT exception is the same value, unique to
Digital Mars C++, regardless of which C++ exception was thrown.
Note:
For more information on Structured Exception
Handling, see Microsoft Win32 Programmer's
Reference, Volume 2.
You can specify whether or not the debugger should stop on a
particular exception, or should stop only if you have not provided a
handler for it. (Uses of these options are discussed below.) The
Exceptions page is shown in Figure 23-3.
[Figure 23-3 Exceptions page of the Debugger Settings dialog box
- Number:
- Contains an exception code- a DWORD that uniquely
identifies an exception. Exception codes are displayed and entered
in the Number field as eight-digit hexadecimal numbers. Symbolic
constants for the exception codes of predefined NT exceptions can
be found in include\win32\winnt.h, located beneath the
directory in which you installed Digital Mars C++.
The layout of an exception code's 32 bits is summarized in a
comment in the header file include\win32\winerror.h. If you
define your own exceptions, your exception code should adhere to
that format.
- Name:
- Contains a descriptive string. No restrictions are placed on
the contents of this field.
- Action:
- This drop-down list box contains two choices: Stop if not
Handled, and Always Stop. For both actions, the debugger stops
before the operating system itself responds to the exception.
- Stop if not handled:
- The debugger stops only if no
outstanding __try/__except or __try/catch block
will handle this exception.
- Always stop:
- The debugger stops, whether or not the
exception will be handled.
If you have written a handler for a particular exception, you can
choose to always stop on that exception to determine the point at
which it was raised. If an exception occurs that you have not
anticipated and for which you have not written a handler, either
Action will make the debugger stop. You can then diagnose the
cause of the exception by examining values of variables and the call
chain. Stop if not Handled can also be used to debug existing
exception handlers. It assists you in diagnosing situations where an
exception for which you have written a handler is being raised, but
which none of your handlers is catching.
- Add:
- Adds a new exception to the list contained in the main pane,
as specified in the Number, Name, and Action fields. The Number
field must contain a value not used by any exception already in the
list.
- Replace:
- Replaces information for the currently selected exception
in the main pane with the contents of the Number, Name, and
Action fields. This button is disabled if the Number field contains a
value different from the Number (exception code) of the selected
exception.
- Remove:
- Deletes the currently selected exception from the list in the
main pane.
- Reset:
- Undoes any changes to the built-in exception entries, without
altering any added exceptions. If any built-in exception entries have
been deleted, they are restored; all Actions and Names for built-in
exception entries are reset.
Multiple EXE/DLL debugging
Options on this page (Figure 23-4) allow you to specify how to
debug a project with multiple executables or dynamic link libraries.
[Figure 23-4 Multiple EXE/DLL page of the Debugger Settings
- Single executable:
- Debugs only the executable file. Does not
debug DLLs called by the executable.
- All loading EXE/DLLs:
- Debugs the executable file and all DLLs or
EXEs called or spawned by the executable, including DLLs loaded at
run-time via explicit calls to the LoadLibrary API.
- Specific EXE/DLLs:
- Debugs the executable file and specific DLLs or
EXEs. Select those you want in the Specify Libraries and/or Modules
to Debug portion of the dialog box (enabled only when this radio
button is selected).
- Calling program:
- For a DLL project, this textbox lets you specify
the application that calls the DLL.
Debug Toolbox Icons
The Debug toolbox contains icons that correspond to the commands
on the IDDE's Debug menu. Figure 23-5 shows the command that
each icon invokes. For information on how to use these commands,
see the previous section.
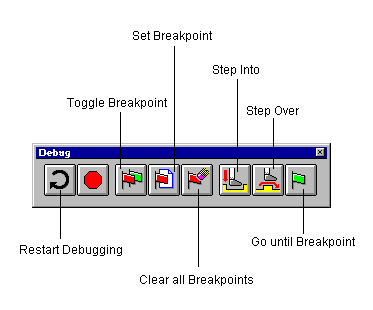
Figure 23-5 Debug toolbox icons
Working with Breakpoints
This section explains how to set and use breakpoints with the
Digital Mars C++ debuggers. The debuggers support three types of
breakpoints:
- Unconditional
- Conditional
- Delayed
Note:
Breakpoints persist across debugging sessions; the
debuggers automatically save them to and restore
them from project configuration files.
Unconditional breakpoints
An unconditional breakpoint causes the debugger to stop execution
of the program when the breakpoint is encountered.
You set unconditional breakpoints using the Set Breakpoint or the
Set/Clear Breakpoint command (F9) in the Source, Assembly,
Function, Data/Object, or Breakpoint windows (as well as in the Spy
window when debugging a Windows application). After setting an
unconditional breakpoint, choose the Go until Breakpoint
command from the IDDE's Debug menu to execute your program
until it reaches the breakpoint. When the breakpoint is reached, the
program halts and returns control to the debugger.
Note:
While in debugging mode, you can also set an
unconditional breakpoint by double-clicking in the
left margin of the Source window at the line where
you want execution to stop.
Conditional and delayed breakpoints
Conditional breakpoints let the debugger:
- Stop the execution of the program only when a specified
condition evaluates to TRUE
- Stop the execution of the program only when it
encounters a breakpoint a specified number of times
(this is a delayed breakpoint)
- Evaluate an expression at a breakpoint
- Add code to the program without recompiling
You can set these kinds of breakpoints using the Set Conditional
Breakpoint command in the Source, Assembly, Function, or
Breakpoint windows. After you execute this command, the Set Code
Breakpoint dialog box shown in Figure 23-6 is displayed.
Note:
When you choose Set Conditional Breakpoint in
the Breakpoint window, the Expression dialog
box is displayed first. Enter the address or
procedure name (for example) where you want to
set the breakpoint. The Set Code Breakpoint
dialog box is then displayed to allow you to specify
the kind of breakpoint to set.
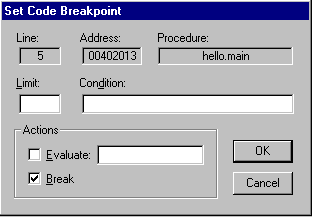
[Figure 23-6 Set Code Breakpoint dialog box
The debugger automatically sets the Line, Address, and Procedure
fields, based on the location of the breakpoint.
- Limit:
- Use this field to reach the breakpoint a specified number of
times before the debugger stops program execution. This sets a
delayed breakpoint.
- Condition:
- Use this field when you want an expression to be
evaluated every time execution of the program reaches this
breakpoint. If the expression evaluates to TRUE (nonzero), the
debugger performs the action( s) specified in the Actions group. In
the Condition field, enter the expression to be evaluated.
- Evaluate:
- Check this option if you want the debugger to evaluate
the next field's expression whenever the program reaches this
breakpoint. If you use the Condition field, a breakpoint is triggered
only if the Condition evaluates to TRUE.
This field allows you to insert into your code a statement that you
had neglected to include, or to test (in the debugger) that a
modification works before editing, compiling, and linking.
Note:
Please refer to Appendix A, "Expression Evaluation,"
for more information about expressions.
- Break:
- Check this option if you want the debugger to stop execution
of the program whenever the program reaches this breakpoint. If
you use the Condition field, the debugger stops execution on
reaching this breakpoint only if the Condition evaluates to TRUE.
Examples of conditional breakpoints
The following are examples of conditional breakpoints:
Example 1
To execute your program to a point at which a certain condition is
met- such as stopping the execution at this breakpoint only if the
value of i + j is greater than 2000 -- execute a Set Conditional
Breakpoint command. Specify the expression i + j > 2000 in the
Condition field.
The debugger executes your program and evaluates the condition
every time it executes the line on which the breakpoint is set. If the
condition specified does not evaluate to TRUE, the debugger
continues to execute your program. As soon as the value of i + j
exceeds 2000 when this line is executed, the debugger stops
executing the program and regains control.
Example 2
You omitted a statement from a line in which you should have called
the function AddRes from the module Results with the parameter
i as defined in the current function. You can use a conditional
breakpoint to direct the debugger to evaluate this call whenever it
encounters the breakpoint, and to do this before this line is executed
and without stopping execution.
Set a conditional breakpoint on the line and specify the Evaluate
option, as shown in Figure 23-7.
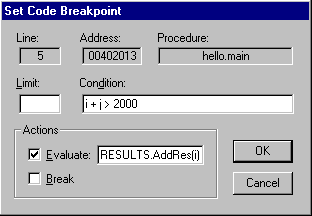
[Figure 23-7 Setting a breakpoint in your code
Every time the debugger reaches this line and i + j > 2000 is TRUE, it
calls RESULTS.AddRes(i). However, it does not stop executing
your program because you did not check the Break check box.
For information on breakpoint and watchpoint commands in
windows, see "The Command Window," in Chapter 24, "Commands
Available in Debugging Mode."
Working with Watchpoints
Watchpoints are vital to debugging. A watchpoint stops program
execution while the debugger either writes to or reads from a
location in memory. A variable or location in memory is often
improperly overwritten, causing the program to crash. Use
watchpoints to find these kinds of errors.
You can set watchpoints using the debugger. First, highlight either a
variable in the Data/Object window or a memory location in the
Memory window, then execute the Set Watchpoint command in
that window's Watch menu. You need not specify an address for the
watchpoint. The debugger sets the watchpoint on the address of the
highlighted variable or on the highlighted location in memory.
Digital Mars C++ uses the debugging capabilities of the 80386 and
higher microprocessors to provide full-speed execution of
watchpoints. These microprocessors relieve the debugger of the
need to check for the use of watchpoint locations when certain
instructions or functions are executed. Watchpoints implemented
with hardware assistance are called hardware watchpoints, in
contrast to the slower software watchpoints that debuggers must
implement in the absence of hardware support.
Setting watchpoints
When setting a watchpoint, the Set Watchpoint dialog box, shown
in Figure 23-8, prompts for information. This dialog box displays
the address of the watchpoint and the size of the watched area in
bytes. It lets you set the type of access mode on which the
watchpoint should break. You can set the watchpoint to break on
read access, write access, or both.
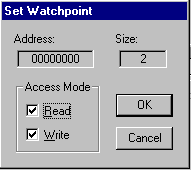
[Figure 23-8 Set Watchpoint dialog box
You can set up to four 1-byte watchpoints. You can also set four
2-byte watchpoints if all the addresses in memory for which the
watchpoints are set are word aligned.
Use watchpoints on local variables with caution
If you set a watchpoint on a stack location such as a local variable,
the debugger displays a warning message on the status line:
Warning: Setting a watchpoint on stack memory
Clear any watchpoint set on a local variable before the
function to which it is local returns. Otherwise, Windows itself
can subsequently access the location, thus triggering the watchpoint
and possibly causing Windows to crash.
This chapter describes the commands available in debug windows.
The IDDE has several windows dedicated to debugging, each with a
different view of a program and a specific set of commands for
manipulating or examining the program during a debugging session.
The descriptions of the debug windows and their menu commands
follow, in alphabetical order. Each window's commands are
discussed in the order in which they are listed in the menu bar.
Using the debug windows, the Digital Mars C++ debugger gives you up
to 18 different kinds of views into a program's state at run-time. You
open these windows from the Views toolbox (see
Chapter 2, "Introducing the IDDE" ).
Because many of the commands associated with these views are
applicable only while a specific window is active, each debug
window has its own menu, located below the window's title bar.
A window's commands are available only while that window is
active. For example, because you would not set a breakpoint when
using the Call window, no breakpoint commands appear among the
Call window's menus. Because setting breakpoints is a typical
source-level operation, several breakpoint commands are available
when the Source window is active.
Drag and drop
One of the IDDE's unique features is the ability to drag and drop
updated information between debug windows, saving you the
trouble of choosing menu commands. This chapter covers all the
valid drag-and-drop operations among the IDDE's debug windows.
Accelerator keys
You can also execute most debug window commands through an
accelerator key combination (a function key or a Control key
combination). For example, you can choose the Start/Restart
Debugging command by pressing F4. A command's description
provides the accelerator key combination (if any) that invokes it.
The Assembly window, shown in Figure 24-1, displays the
disassembled instructions of your program at a selected memory
location. The Assembly window's menus (View, Bpt, and Others)
let you set and clear assembly-level breakpoints, set the disassembly
address, and determine the amount of symbolic information to
display.

[Figure 24-1 Assembly window
The header line in the Assembly window (below the menu bar)
displays the module and function for the currently highlighted
assembly instruction. The first column of information in the window
area shows code addresses of the assembly instructions. If you
choose the Source command from the View menu to enable the
interleaved display of C++ source code, this column also shows the
line numbers of source-level statements.
If you execute the Step Into (F8) or Step Over (F10) commands
from the IDDE's Debug menu while the Assembly window is active,
the debugger steps at the assembly level as opposed to at the source
level. For more information on controlling the execution of the
debugged program, refer to
Chapter 23, "Controlling and Configuring the Debugger."
By default, the disassembly location is set to the address of the next
statement to be executed. However, by using the Set Disassembly
Address command in the Others menu, you can select another
address to disassemble.
The arrow, located to the left of the code address, indicates where
execution has currently stopped.
When Opcodes is checked in the View menu, the first column
contains source code addresses. The second column displays source-level
information and/or assembly instructions. The last column
displays opcodes for each assembly instruction if Source is checked
in the View menu.
The Assembly window has three menus (shown in Table 24-1) in the
debuggers: View, Bpt, and Others.
	Table 24-1 Assembly window commands

	Menu	Menu Item			Shortcut
	View	Symbols				none
		Source				none
		Opcodes				none
	Bpt	Set/Clear Breakpoint		Ctrl+S/Ctrl+F9
		Set Conditional Breakpoint	Ctrl+B
		Clear All Breakpoints		Ctrl+K
	Others	Set Disassembly Address		Ctrl+A
		Jump To Line			Ctrl+J
The menu items in the Assembly window are described next.
View menu
This menu sets the display modes of the Assembly window. The
Assembly window displays assembly language code mixed with
symbols and source, as well as opcodes. A checkmark indicates the
current display mode.
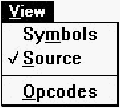
[Figure 24-2 Assembly window View menu
Symbols
Enables disassembled instructions mixed with symbolic information
such as variable names, function calls, and function entry points.
Source
Enables disassembled instructions mixed with the corresponding
source code (if debugging information is available for the
disassembled module).
Opcodes
Toggles the display of assembly instruction opcodes.
Bpt menu
The Bpt Menu commands set and clear breakpoints at the assembly
language level in the program. See the section "Working with
Breakpoints," in
Chapter 23, "Controlling and Configuring the Debugger,"
for information on how to use breakpoints.
Set/Clear Breakpoint
Sets an unconditional breakpoint at the selected assembly line. The
next time a Go command is executed (except the Go until End
command), execution of the program stops when it reaches this line.
If a breakpoint is already set on the selected assembly line, this
command clears that breakpoint.
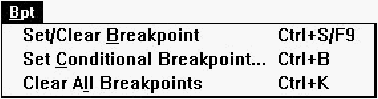
[Figure 24-3 Assembly window Bpt menu
Note:
To set a breakpoint, you can drag and drop from
the Assembly window to the Breakpoint window.
The presence of a breakpoint is indicated by a solid
black diamond to the left of the instruction's
address. You can move the breakpoint to a different
line by dragging the black diamond to a different
line. Drop the diamond outside the window to clear
the breakpoint.
Set Conditional Breakpoint
Opens the Set Code Breakpoint dialog box. You use this dialog
box to set a conditional breakpoint at the selected assembly line.
Clear All Breakpoints
Clears all breakpoints set anywhere in the program.
Others menu
Using the Others menu, you can set a particular disassembly
location and change the execution location.

[Figure 24-4 Assembly window Others menu
Set Disassembly Address
Sets the disassembly address. When this command is executed, the
debugger prompts you to enter an address. In the dialog box, enter a
hexadecimal address conforming to the language in use for the
expression evaluator. (See Appendix A, "Expression Evaluation.")
For segment:offset addressing, use the following format:
0xnnnn:0xnnnn
where nnnn is a 4-digit hexadecimal number. You may omit the
segment address (and the colon) to specify an address in the same
segment as the one currently displayed. If you are running in the
32-bit flat memory model, specify the address in the following form:
0xnnnnnnnn
where nnnnnnnn is an 8-digit hexadecimal number.
Jump to Line
Changes the execution location of the current thread to the selected
assembly line. (The execution location, also known as the instruction
pointer, is stored in the CS: IP or EIP registers.) To execute the Jump
To Line command, select the assembly line where you want
execution to resume, then press Ctrl+ J.
The Jump to Line command simulates a jump instruction, skipping
sections of code without executing them. When stepping through
the program, it continues executing from the new location.
Pop-up menu
You can access the Assembly window pop-up menu by pressing the
right mouse button anywhere in the window. The pop-up menu
provides quick access to three commands: Set/Clear Breakpoint,
Set Conditional Breakpoint, and Jump to Line. These commands
are described above.

[Figure 24-5 Assembly window pop-up menu
The Breakpoint window, shown in Figure 24-6, displays status
information about all breakpoints set in the program. Breakpoint
window commands show the source location of a breakpoint and
clear, set, enable, or disable breakpoints.
When a breakpoint in the Source, Assembly, or Spy windows is set,
cleared, or triggered, the status of the breakpoint is displayed in this
window.

[Figure 24-6 Breakpoint window
The Breakpoint window lists all breakpoints currently defined in the
program. You can view the different parameters of any breakpoint
and enable or disable the currently defined breakpoint.
The Breakpoint window displays the following information for every
line:Location, Address, Count/Limit, Act, Condition, and Action
Expr.
- Location:
- Gives the name of the module in which the breakpoint is
set, followed by the function name and the line number in the
module.
- Address:
- Provides the code address of the breakpoint setting.
- Count/Limit:
- Displays the number of times the breakpoint is
triggered. If you specify a break Condition, the count is the number
of times the breakpoint has been reached with the specified
expression evaluating to TRUE. The limit is the number of times the
breakpoint must be reached for it to be triggered. This field is
displayed only if you have specified a limit.
- Act:
- Corresponds to the Action field in the Set Code Breakpoint
dialog box. It can contain either or both of the characters B or E, or
nothing. If B is present, execution breaks when it reaches this
breakpoint location. (If a break condition is specified, execution
breaks only if the Condition expression evaluates to TRUE when the
location is reached.) If E is present, the Action Expr. field (see
below) is evaluated every time the breakpoint is reached.
- Condition:
- Shows the expression entered for a conditional
breakpoint. This expression is evaluated every time execution
reaches this breakpoint location. If the expression evaluates to TRUE
and the Action field contains B, execution stops.
- Action Expr.:
- The expression entered for a conditional breakpoint
to be evaluated at each breakpoint hit. If you specify a Condition,
the action expression is evaluated only if the Condition expression
evaluates to TRUE. This expression is evaluated every time the
execution reaches this breakpoint location if the Action field contains
E. Evaluation does not stop execution of the program unless the
Action field also contains B.
You can set a breakpoint on any program statement in the Source
window or on any assembly instruction in the Assembly window,
with no limit to the number of breakpoints set.
The Breakpoint window has two menus, as shown in Table 24-2:
Show and Bpt.
	Table 24-2 Breakpoint window commands

	Menu	Menu Item			Shortcut
	Show	Source				Ctrl+S
		Assembly			Ctrl+A
	Bpt	Set Breakpoint			F9
		Set Conditional Breakpoint	Ctrl+B
		Clear Breakpoint		Ctrl+C
		Clear All Breakpoints		Ctrl+K
		Enable Breakpoint		Ctrl+E
		Disable Breakpoint		Ctrl+D
The Breakpoint window menus are described next.
Show menu
The Show menu commands show the Source and Assembly
windows, positioned at the selected breakpoint.
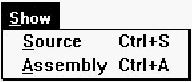
[Figure 24-7 Breakpoint window Show menu
Source
Opens the Source window if it is not already open, makes it the
active window, and positions its contents to display the selected
breakpoint. Double-clicking on a source-code breakpoint in the
Breakpoint window or dragging and dropping from the Breakpoint
window to the Source window also executes this command.
Assembly
Updates the Assembly window, if it is open, to display the assembly
location of the selected breakpoint. Dragging and dropping from the
Breakpoint window to the Assembly window also executes this
command.
Bpt menu
Bpt menu commands set breakpoints, clear individual breakpoints
or all breakpoints, and enable and disable breakpoints.
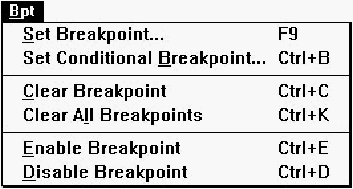
[Figure 24-8 Breakpoint window Bpt menu
Set Breakpoint
Displays an Expression dialog box. To set an unconditional
breakpoint, type the address and press Enter. You also can enter a
symbolic name, such as the name of a procedure. The new
breakpoint is added to the Breakpoint window. After executing any
Go command (except the Go until End command), execution of the
program stops when it reaches this line.
Set Conditional Breakpoint
Displays an Expression dialog box. To set a conditional breakpoint,
type the address or a procedure name and press Enter. The
debugger displays the Set Code Breakpoint dialog box. In this
dialog box, you specify the condition of the breakpoint.
Clear Breakpoint
Clears the selected breakpoint.
Clear All Breakpoints
Clears all breakpoints set in the program.
Enable Breakpoint
Enables the selected breakpoint (if currently disabled).
Disable Breakpoint
Disables the selected breakpoint (if currently enabled). Use this
command to temporarily disable a breakpoint that you can later
enable without having to set it again.
Pop-up Menu
The Breakpoint window pop-up menu allows you to access
frequently used commands quickly. You can bring up the pop-up
menu by pressing the right mouse button anywhere in the
Breakpoint window. The five commands in the pop-up menu appear
in other Breakpoint window menus and are described in detail in the
preceding sections.
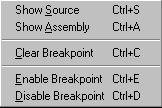
[Figure 24-9 Breakpoint window pop-menu
The Call window, shown in Figure 24-10, lists the function calls a
program has made since it began running. The entries in this list,
often referred to as the call chain, are displayed in reverse
chronological order, from the last (most recent) call to the first
(initial) call.
Each entry lists the name of the function called, followed by the
name of the module containing that function.
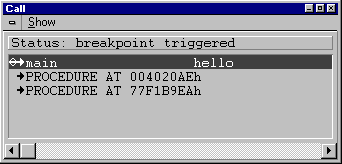
[Figure 24-10 Call window
Use the Call window to display:
- The source-level and assembly-level execution location
of any function
- The local data of any function in the call chain
If no function calls have been made or all function calls have
returned, the Call window displays one of the two following status
messages:
	No call chain (loading)

	No call chain (terminating)
If the call chain is invalid, the Call window displays the following
message:
No call chain (error)
If no debugging information is available for a function in the call
chain, its entry in the Call window is displayed as:
PROCEDURE AT segment:offset
where segment:offset is the address of the function called. In the
32-bit flat memory model, addresses are displayed as 8-digit
hexadecimal numbers rather than in segment:offset format.
If no local symbols are available, the address is displayed as:
Unknown Procedure
The Call window's local Show menu is shown in Table 24-3.
	Table 24-3 Show Menu commands

	Menu	Menu Item	Shortcut
	Show	Source		Ctrl+S
		Data		Ctrl+D
		Functions	Ctrl+U
		Assembly	Ctrl+A
		All		Ctrl+L
		Code Address	none
The menu items in the Call window are described in the following
section.
Show menu
Show menu commands update the position and information
displayed in the Source, Data, and Assembly windows. Use these
commands to view local data and the source-or assembly-level
execution position of the selected function in the Call window.

[Figure 24-11 Call window Show menu
Source
Opens the Source window (if not already open), makes it the active
window, and updates it to show the source-level location at which
the selected function is executing. Dragging and dropping from the
Call window to the Source window or double-clicking on the line in
the Call window also executes this command.
Data
Updates the Data/Object window to show the local data and variable
information of the selected function. Dragging and dropping from
the Call window to the Data/Object window also executes this
command.
Functions
Updates the Function window to show the current entry in the call
chain.
Note:
Dragging and dropping from the Call window to the
Function window shows all functions in the module
in which the selected entry in the Call window
resides.
Assembly
Updates the Assembly window to show the assembly-level location
at which the selected function is executing. Dragging and dropping
from the Call window to the Assembly window also executes this
command.
All
Updates the Source, Data, and Assembly windows. You also can
double-click on a call chain entry to execute this command.
Code Address
Displays the code address of the selected function in a message box.
Note:
Dragging and dropping from the Call window to the
Memory window displays memory contents starting
at the instruction pointer address of the selected
entry in the Call window.
Pop-up menu
The pop-up menu in the Call window has the same commands as
the Call window's Show menu (see previous section). To access the
pop-up menu, press the right mouse button anywhere in the Call
window.
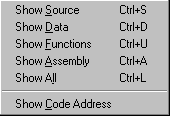
[Figure 24-12 Pop-up menu for Call window
The Command window, shown in Figure 24-13, provides a
CodeView-like command-line interface to the debuggers. To pass a
command to the debugger from the Command window, type one of
the CodeView commands or functions in Table 24-4 at the prompt in
the Command window.
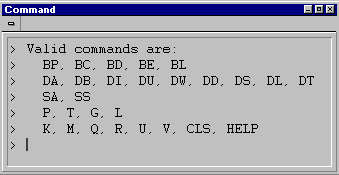
[Figure 24-13 Command window, showing its response
to the help command]
To see a list of the supported commands, type help at a Command
window prompt and press Enter.
Note:
The Command window must be the active window
for the debugger to accept commands typed into it.
	Table 24-4 Command window commands

	Commands and
	Function Keys 		Action


	BC *			Clears all breakpoints set in the program

	BD [number]		Disables the specified breakpoint
				(numbering of breakpoints starts at 1)

	BE [number]		Enables the specified breakpoint
				(numbering of breakpoints starts at 1)

	BL			Opens the Breakpoint window

	BP [.[line]][address]	Sets an unconditional breakpoint on the
				specified source line or on the specified
				address given in the format appropriate
				to the memory model

	CLS			Clears the command window screen

	DA [address]		Opens the Memory window to address
				(displays in ASCII)

	DB [address]		Opens the Memory window (displays in
				bytes)

	DD [address]		Opens the Memory window (displays in
				double words)

	DI [address]		Opens the Memory window (displays in
				integers)

	DL [address]		Opens the Memory window (displays in
				long real numbers)

	DS [address]		Opens the Memory window (displays in
				short real numbers)

	DT [address]		Opens the Memory window (displays in
				10-byte real numbers)

	DU [address]		Opens the Memory window (displays in
				unsigned integers)

	DW [address]		Opens the Memory window (displays in
				words)

	G			Executes a Go until Breakpoint
				command

	HELP			Displays a list of supported commands
				and functions

	K			Opens the Call window

	L			Restarts the program being debugged

	M			Opens the Memory window

	P			Executes a Step Over command

	Q			Closes the Command Line window

	R			Opens the Register window

	SA			Opens the Assembly window

	SS			Opens the Source window

	T			Executes a Step Into command

	U[address]		Opens the Assembly window to the
				specified address

	V.[line_number]		Updates the Source window to the
				specified line number

	F2			Opens the Register window

	F3			Switches between the Source and
				Assembly windows

	F5			Executes a Go Until Breakpoint
				command

	F7			Executes a Find Next command

	F8			Executes a Step Into command

	F9			Sets or clears a breakpoint

	F10			Executes a Step Over command
The Console window displays the output of a text-mode program
that is being debugged. This is not a debugger window but rather an
independent window under the control of the program.
The Console window looks and behaves much like a DOS Window.
It cannot be closed during program execution; choose Stop
Debugging to terminate the application.
In the debugger, the IDDE's Flip Screen option affects the Console
window. (This option is described in
Chapter 23, "Controlling and Configuring the Debugger.")
When the debugger executes the text-mode
program, the output is displayed in the foreground by default.
Choosing Flip Screen allows you to control whether or not the
debugger displays the Console window while it executes your
program.
Note:
Do not turn off the Flip Screen option when
working in text mode unless the program you are
working with has no output.
The Console window has no local menus.
The Data/Object window, shown in Figure 24-14, displays the local
variables, global (including static) variables, and objects in the
program. The header line indicates the function or module for the
local or global variables that are displayed. Each line in the Data/
Object window shows a different variable (or element of a variable),
together with its name, value, and type.
This view makes it easy to examine the elements of structures and
arrays, as well as the contents of pointers and sets. Use the Data/
Object window to set watchpoints on data or to modify data. You
can view a graphical representation of any data structure using the
Graphic Data window, described later in this chapter.
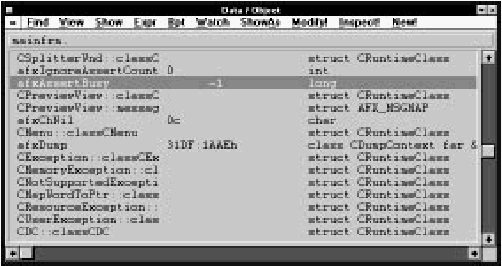
[Figure 24-14 Data/Object window
The Module and Call windows can update the Data/Object window
to display global and local data, respectively. After the variable
information is displayed in the Data/Object window, you can
examine and modify it.
The Data/Object window supports the display of C++ data type
names either in the form member::class or in the form class::member.
To control how these data type names are displayed, use the
Alternate Class Display option in the Debugger Settings dialog box
described in
Chapter 23, "Controlling and Configuring the Debugger."
If you didn't select a module or function to show data for, the
Data/Object window displays the message:
No data context selected
If the debugger attempts to show local data for a function that does
not have any local data, the Data/Object window displays the global
data of the module the function resides in. If there is no local or
global data available to view, the Data/Object window displays the
message:
No global data
Before execution has started or after it has terminated, the Data/
Object window displays the message:
No local data (no call chain)
Table 24-5 shows the Data/Object window commands.
	Table 24-5 Data/Object window commands

	Menu	Menu Item				Shortcut
	Find	In Current Scope			none
		In All Modules				Ctrl+F
		Next					F3
	View	Child/Contents				Ctrl+C
		Parent					Ctrl+P
		Right (Next Element)			Ctrl+R
		Left (Prev. Element)			Ctrl+L
		Specific Index				Ctrl+I
		Variable Level				Ctrl+V
		Local/Global Data			Ctrl+X
		Methods in Class			none
	Show	Graphic Data Structure			Ctrl+G
		Memory					Ctrl+E
		Source of Method			none
		Address					Ctrl+A
	Expr	Evaluate Expression			none
		Convert Decimal to Hex			none
		Convert Hex to Decimal			none
	Bpt	Set/Clear Breakpoint on Method		F9
		Set Conditional Breakpoint on Method	Ctrl+B
		Clear All Breakpoints			none
	Watch	Set Watchpoint				Ctrl+W
		Clear Watchpoint			none
		Clear All Watchpoints			Ctrl+K
	ShowAs	Show as Original Type			none
		Show Value in Hex			Ctrl+H
		Show Value with Type			Ctrl+T
		Show Pointer as Array			none
		Examine String Pointer			Ctrl+S
		Show Char Ptrs as Strings		none
	Modify						N/A
	Inspect!					N/A
	New!						N/A
The menu items in the Data/Object window are described below.
Find menu
Find menu commands locate variables in the current scope and in
all modules.

[Figure 24-15 Data/Object window Find menu
In Current Scope
Displays a dialog box that allows you to enter the name of the
variable to find. Enter the name of the variable (or field) for which
you want to search, and press Enter. The standard wildcards
(* and ?) are supported in the name specification; case is significant.
The debugger searches in the current scope for the variable and
selects the line with that variable in the Data/Object window. If there
is more than one local variable with the same name, you can
continue the search using Next.
In All Modules
Displays a dialog box that allows you to enter the name of the
variable to find. Enter the name of the global variable (or field) you
want to search for and press Enter. The standard wildcards
(* and ?) are supported in the name specification; case is
significant. The debugger searches all the modules for the variable
and selects that line in the Data/Object window. If there is more than
one global variable with the same name, continue the search using
Next.
Next
Repeats the last search executed using a Find command.
View menu
Commands in the View menu let you navigate within data structures
and arrays, toggle between displaying local and global data, and
toggle the inclusion of methods in the display.
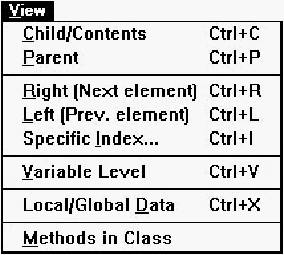
[Figure 24-16 Data/Object window View menu
Child/Contents
Displays the next level of the data structure beneath the selected
data structure, allowing you to navigate down through arrays,
structures, and pointers to view their elements. You may also
double-click on a data item to execute the Child/Contents
command on it. This command operates in the following manner:
Note:
For faster compilation, Digital Mars C++ can optionally
compile C++ modules without class debugging
information. However, you cannot view objects
(instances of classes) or structures in such modules
unless you recompile with class debugging
information.
Parent
Displays the parent data structure of the current data structure. This
command lets you move up a level in the data structure you
previously moved down in with the Child/Contents command.
When the Parent command is executed, the Data/Object window
displays the structure one level up from the current data structure.
Right (Next Element)
Displays the next index of the current array. If you use the
Child/Contents command to view the elements of an array, use the
Right (Next Element) command to quickly select the next index in
the array.
Left (Prev. Element)
Displays the previous index of the current array. If you used the
Child/Contents command to view the elements of an array, use this
command to quickly select the previous index in the array.
Specific Index
Specifies a particular index to view in the array. If you used the
Child/Contents command to view the elements of an array, this
command lets you quickly view the contents of a specific index in
the array.
When this command is executed, the debugger prompts you to enter
an expression to be evaluated. The result of the evaluation becomes
the index of the newly displayed or selected array element.
Note:
Use any one of the commands Right (Next
Element), Left (Prev. Element), or Specific
Index when you are viewing the fields of an array
element. The Data/Object window displays the
fields of the array with the new index.
For example, if there is an array of records and the
record fields of the first element of the array are
displayed, you can use the Right (Next Element)
command to directly view the record fields of the
second element of the array. This is faster than
executing the Parent command, changing the
selection to the next index, and executing the
Child/Contents command.
Variable Level
Returns to the top nesting level (the variable level) of the data
display. Use this command if you chose the Child/Contents
command to descend into a data structure and want to return to the
top variable level without repeatedly using the Parent command.
Local/Global Data
Toggles the data view between the current function's local variables
and the global variables of the current module. The command
toggles between the local data of a function and the global data of
the module that contains the function.
Methods in Class
Toggles on and off the option to view the methods in C++ objects.
Use this command if you don't want to view methods mixed with
data items.
Show menu
The Show menu is used to update the Graphic Data, Memory, and
Source windows to reflect the selected item in the Data/Object
window. It also is used to display the location- an address or a CPU
register -- of the currently selected item.

[Figure 24-17 Data/Object window Show menu
Graphic Data Structure
Select this menu item to display a graphic data representation of the
selected variable. A drawing of the selected data structure is
displayed in the Graphic Data window. This command provides a
visual overview of your structure, in addition to the data browsing
capabilities provided by the Data/Object window. For information
about the Graphic Data display, see the section "The Graphic Data
Window," later in this chapter.
Dragging and dropping from the Data/Object window to the
Graphic Data window also executes this command.
Note:
The Graphic Data Structure command is disabled
if there are not enough Windows resources
available to generate a view for the Graphic Data
window.
Memory
Updates the Memory window to display the memory location of the
variable selected in the Data/Object window. Dragging and
dropping from the Data/Object window to the Memory window also
executes this command.
Source of Method
Updates the Source window to the location of the code for the
method highlighted in the Data/Object window.
Address
Displays the memory location of the selected variable at the left of
the menu bar. If the variable is a register variable, this command
displays the register( s) it is contained in on the status line.
Expr menu
Commands in the Expr menu let you evaluate expressions, change
the value of a variable, and convert values between decimal and
hexadecimal.

[Figure 24-18 Data/Object window Expr menu
Evaluate Expression
Opens an Expression dialog box. In the text field, enter the
expression you want to evaluate. Use this command to modify a
variable.
See Appendix A, "Expression Evaluation," for more information on
entering and evaluating expressions.
Convert Decimal to Hex
Converts a decimal value to hexadecimal and displays the result on
the status line.
Convert Hex to Decimal
Converts a hexadecimal value to decimal, and displays the result on
the status line.
Bpt menu
The Bpt menu contains commands to set and clear breakpoints on
methods in the Data/Object window. Refer to
Chapter 23, "Controlling and Configuring the Debugger,"
for details on the types
of breakpoints that can be set.
[Figure 24-19 Data/Object window Bpt menu
Set/Clear Breakpoint on Method
Sets a breakpoint on the method currently selected in the
Data/Object window or clears a breakpoint that is currently set in
the selected method. Dragging and dropping from the Data/Object
window to the Breakpoint window also executes this command.
Set Conditional Breakpoint on Method
Sets a conditional breakpoint in the method currently highlighted in
the Data/Object window.
Clear All Breakpoints
Clears all breakpoints in the program.
Watch menu
Commands in the Watch menu are used to control data watchpoints
in the program. When a watchpoint is set on a variable, a change in
the variable's value or the implementation of a read access to the
variable causes the program to stop near the point at which the
variable was accessed. This feature helps you locate data
modifications or accesses that may be incorrect. Refer to the section
"Working with Watchpoints," in
Chapter 23, "Controlling and Configuring the Debugger,"
for more information about watchpoints.

[Figure 24-20 Data/Object window Watch menu
Set Watchpoint
Sets a data watchpoint on the selected variable. The debugger
displays a Set Watchpoint dialog box. This dialog box allows you
to choose whether to trigger the watchpoint on a read access or on a
write access. When executing a Go command, the debugger stops
execution of the program as soon as the program accesses the
specified variable.
Dragging and dropping from the Data/Object window to the
Watchpoint window also executes this command.
Clear Watchpoint
Clears a watchpoint set on a selected variable. This command
reverses the effect of the Set Watchpoint command.
Clear All Watchpoints
Clear all watchpoints set in the program.
ShowAs Menu
ShowAs menu commands let you change the data type that a
variable is displayed as.
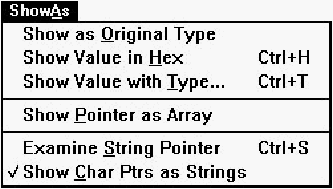
[Figure 24-21 Data/Object window ShowAs menu
Show as Original Type
Displays a variable using its actual type after it has been typecast to
another type. Executing Show Value in Hex on an already cast
variable has the same effect.
Show Value in Hex
Toggles the view between the originally declared type of the
variable and its hexadecimal display.
Show Value with Type
Changes a variable from its original type to another named type.
Note:
The / symbol to the left of the variable name
indicates that the variable is cast to a different type.
When executing Show Value with Type, the debugger prompts you
to enter the type name. If the type entered is not a predefined type,
the debugger prompts you to enter the module in which that type is
defined. The selected variable is then cast to that type. To reset the
variable to its original type, choose Show as Original Type.
Show Pointer as Array
Displays the data pointed to as an array. This command allows you
to browse dynamically allocated arrays by displaying the data
pointed to as an array.
Examine String Pointer
Displays the string that the selected character pointer points to in a
message box. To view the string, select the pointer and execute this
command.
Show Char Ptrs as Strings
Updates the Data/Object window to display the character strings to
which character pointers point.
Modify!
Modifies the contents of the selected variable or field. Select the
variable or field you want to modify in the Data/Object window,
then execute this command. The debugger prompts you to enter an
expression to modify the variable.
The expression must evaluate to a value of the same size as the
variable, but not necessarily to the same type. Refer to Appendix A,
"Expression Evaluation," for more information.
Inspect!
Creates a new line for the selected variable in the Inspector window.
Dragging and dropping a variable from the Data/Object window to
the Inspector window has the same effect.
New!
Creates a new, empty Data/Object window.
Pop-up menu
The Data/Object window pop-up menu provides quick access to
frequently used menu choices in the Data/Object window local
menu. The View, Show, ShowAs, Breakpoint, and Watch
commands access submenus that have some of the commands
available from the similarly named menus on the Data/Object
window menu bar. The Modify and Inspect commands function
the same way as do the similarly named commands in the local
menu.

[Figure 24-22 Pop-up menu for the Data/Object window
The Function window, shown in Figure 24-23, displays the functions
in your program, the names of the modules in which they are
defined, their addresses, and their memory model type (near or far-
applicable only in 16-bit programs). Commands let you find
functions and modules, set breakpoints on functions, and examine
the local and global data of any function in the program.
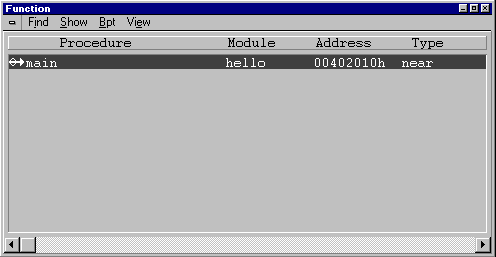
[Figure 24-23 Function window
The Function window shows information for one function per line.
The first column contains the breakpoint indicator. If a breakpoint
has been set on or in the function, the first column contains a solid
black diamond. If execution has stopped at a breakpoint in the
function, the first column contains the outline of a diamond with a
line through it.
The next column contains the execution indicator. If the program
has executed into the function, the column contains a right arrow.
Next is the name of the function, followed by the name of the
module in which the function is defined, the address of the function,
and- if a 16-bit program is being debugged- the memory model
type (near or far).
The Function window has four local menus: Find, Show, Bpt, and
View, listed in Table 24-6.
	Table 24-6 Function window commands

	Menu	Menu Item			Shortcut
	Find	Function			Ctrl+F
		Module				Ctrl+M
		Next				F3
	Show	Source				Ctrl+S
		Local Data			Ctrl+D
		Global Data			Ctrl+G
		Assembly			Ctrl+A
		All				Ctrl+L
	Bpt	Set/Clear Breakpoint		F9
		Set Conditional Breakpoint	Ctrl+B
		Clear All Breakpoints		Ctrl+K
		Set On All Functions		none
		Clear From All Functions	none
	View	Current Module			none
		All Modules			none
The menu items in the Function window are described below.
Find menu
Find menu commands locate functions and modules in the Function
window.
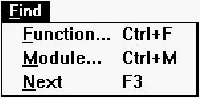
[Figure 24-24 Function window Find menu
Function
Locates a specific function in the Function window. When the
command is executed, the debugger prompts you to enter the name
of the function you want to find. The standard wildcards (* and ?)
are supported in the name specification; case is significant. If the
function is found, its entry is selected.
Module
Searches for a module in the Function window. When the command
is executed, the debugger prompts you to enter the name of the
module you want to find. The standard wildcards (* and ?) are
supported in the name specification. This command is not case
sensitive. If the module is found, its entry is selected.
Next
Repeats the last search executed, using a Find command.
Show menu
The Show menu contains commands that update the Source, Data,
and Assembly windows for any function in the Function window.
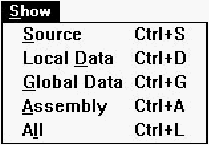
[Figure 24-25 Function window Show menu
Source
Updates the Source window and displays the selected function's
source code. It is used to view the source code of any function in the
program. If the debugger cannot locate the source file, a dialog box
prompts you to enter its filename (including a path, if necessary).
Dragging and dropping from the Function window to the Source
window also executes this command.
Local Data
Updates the Data/Object window and displays the selected
function's local data. If the selected function is not found in the call
chain (and therefore cannot have any local data), the debugger
displays an error message. Dragging and dropping from the Function
window to the Data/Object window also executes this command.
Global Data
Updates the Data/Object window and shows the global data
declared in the selected function's module. Dragging and dropping a
module from the Project window to the Data/Object window also
executes this command.
Assembly
Updates the Assembly window to the code address of the function.
Dragging and dropping from the Function window to the Assembly
window also executes this command.
Note:
You can drag and drop from the Function window
to the Memory window to show the starting address
in which the code for the selected function resides.
All
Updates the Source, Data, and Assembly windows. You can also
execute this command by double-clicking on a function entry.
Bpt menu
The Bpt menu contains commands to set and clear breakpoints in
the Function window. Refer to
Chapter 23, "Controlling and Configuring the Debugger,"
for details on the types of breakpoints
that can be set.
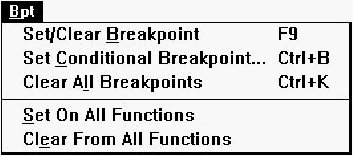
[Figure 24-26 Function window Bpt menu
Set/Clear Breakpoint
Sets an unconditional breakpoint at the entry point of the selected
function. The next time any Go command is executed (except for
the Go until End command), execution of the program stops when
it reaches this line. If a breakpoint is already set on the selected
function, this command clears it.
Dragging and dropping from the Function window to the Breakpoint
window also executes this command.
Set Conditional Breakpoint
Displays the Set Code Breakpoint dialog box, which you use to set
a conditional breakpoint at the entry point of the selected function.
Clear All Breakpoints
Clears all breakpoints set in your program.
Set On All Functions
Sets breakpoints on all functions currently being viewed in the
Function window.
Clear From All Functions
Clears any breakpoints set in the Function window.
View menu
The View menu contains commands for functions that you choose to
include in the Function window. A checkmark indicates the currently
selected mode.
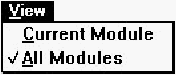
[Figure 24-27 Function window View menu
Current Module
Causes the Function window to redraw and display only those
functions belonging to the module you dropped into the Function
window.
All Modules
Selects all functions contained in the program and displays them in
the Function window.
Pop-up menu
The pop-up menu of the Function window provides easy access to
commands also found in the Show and Bpt menus, described
earlier.
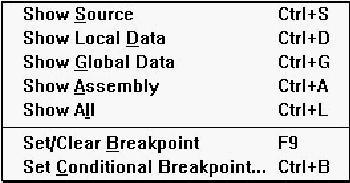
[Figure 24-28 Function window pop-up menu
The Graphic Data window, shown in Figure 24-29, is a sophisticated
tool that lets you display a graph of a simple or complex data
structure. The structure can be referenced by any variable defined in
your program. The menu commands in the Graphic Data window let
you view information and zoom in on specific parts of the graph.
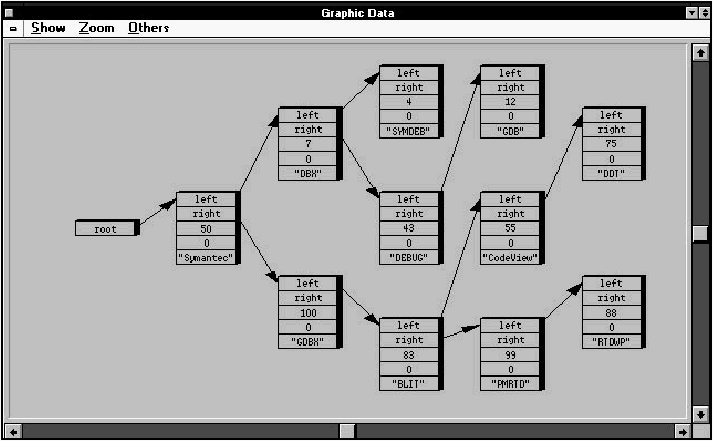
[Figure 24-29 Graphic Data window
Data structures are displayed as boxes connected by lines or arrows.
Each box represents a particular data object, each line a relationship
between data objects, and each arrow a pointer relationship between
data objects.
Data objects are items in the structure that can have either a value or
a meaning. Any of the following variables can be data objects:
simple types, pointers, arrays, structures, or objects (class instances).
To display a graph, select a variable in the Data/Object window and
choose the Graphic Data Structure command from the Show
menu. This variable becomes the starting (or root) data object of the
graph. When you open the Graphic Data window, the root data
object is displayed.
The graph generated from the root data object can be either simple
or complex. Simple graphs are created when the form of the
structure is a singly linked list. Complex graphs are created when the
form of the structure is a tree (with multiple pointers of the same
type). If the graph cannot be displayed as a simple graph, it is
displayed as a complex graph.
Simple graphs
Simple graphs (and simple portions of graphs) can be fully displayed
in the Graphic Data window. An overview of the entire graph is
visible after it is created. You can zoom in and scroll through the
graph to examine the information in more detail. A simple graph
may contain nodes that hide subgraphs, as in the case of a node
representing a tree with multiple pointers of the same type. Use the
Show Subgraph command- that is, the Subgraph command in the
Show menu- to view the subgraph.
Complex graphs
Complex graphs are displayed initially in the Graphic Data window
as a box representing the root data object of a subgraph. An object
represents a complex subgraph when the variable name in the box is
surrounded by vertical bars. To view the subgraph of a complex
graph object, choose the Show Subgraph command.
When viewing a complex subgraph, each object in the complex
structure is displayed. You can zoom in and scroll through the graph
to examine the information more closely.
If you are viewing a complex subgraph and want to view its parent
graph, choose the Show Parent command.
Creating a graph might take a few seconds, depending on the speed
of your machine, the amount of memory available, and the
complexity of the data structure. The menu commands of the
Graphic Data window are not available until a graph is displayed in
the Graphic Data window.
Each object in the graph displays information about itself, such as its
name or value. To obtain more information about an object, use the
Show Information command. Note that if an object is too small to
display its information, you must zoom in on it before the
information is displayed.
The Graphic Data window has three local menus: Show, Zoom, and
Others.
	Table 24-7 Graphic Data Window commands

	Menu	Menu Item	Shortcut
	Show	Information	Ctrl+A
		Subgraph	Ctrl+S
		Parent		Ctrl+P
	Zoom	Zoom In		Ctrl+I
		Zoom Out	Ctrl+U
		Zoom Reset	Ctrl+R
	Others	Clear Graph	Ctrl+C
The menu items in the Graphic Data window are described below.
Show menu
The Show menu displays a complex subgraph, additional
information about an object, and the parent graph of a complex
subgraph.

[Figure 24-30 Graphic Data window Show menu
Note:
To use the following commands on a particular
object, first click on the object, then execute the
command.
Information
Displays in a message box the object name and its type information
or value for the selected object. Select the object by clicking on it.
Subgraph
Causes the Graphic Data window to display the associated subgraph
of the object when a complex subgraph object is selected.
Parent
Displays the parent graph of the current subgraph. When viewing a
complex subgraph, this command lets you return to the parent
graph.
Zoom menu
Zoom menu commands control the view magnification of the
selected object.
[Figure 24-31 Graphic Data window Zoom menu
Zoom In
Zooms in on the selected object. Select the object by clicking on it,
then execute the command. The window redraws, enlarging the
selected object. Double-clicking on an object also zooms in.
Zoom Out
Zooms out from the selected object. Select the object by clicking on
it, then execute this command. You can also double-click the right
mouse button on an object to zoom out.
Zoom Reset
Resets the display of the graph to its initial state. Use this command
if you have zoomed or scrolled the display of the graph and want to
restore the graph to its original state.
Others
The Others menu contains the Clear Graph command.
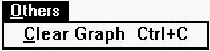
[Figure 24-32 Graphic Data window Others menu
Clear Graph
Clears the current graph from the Graphic Data window. In addition,
this command frees the memory used by the graphical
representation of the current data structure you are viewing. If the
debugger is running low on memory, this command frees up the
memory used by the Graphic Data window.
The Inspector window, shown in Figure 24-33, is similar in function
to the Data/Object window, allowing you to display and modify
variables and objects. Unlike the Data/Object window, it can display
any mix of local and global variables. It can also display the same
variable more than once, a useful feature if you want to view the
same variable in different ways- for example, in hexadecimal, as an
int, and as a pointer- all at the same time. With the Inspector
window you can select several local variables from a function, or
several global variables, and view them all simultaneously.
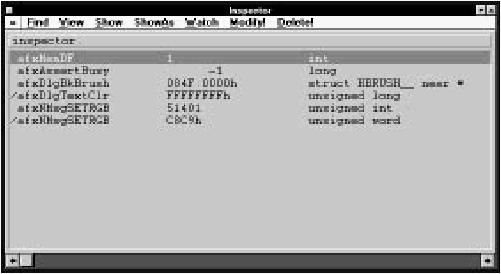
[Figure 24-33 Inspector window
Initially the Inspector window is empty. You add variables to it by
dragging them from the Data/Object window, or by selecting a
variable in the Data/Object window. then selecting Inspect! from
the Data/Object window's local menu. You can also add multiple
instances of the same variable to the Inspector window. To delete an
instance of a variable from the Inspector window, select Delete!
from the Inspector window's menu.
	Table 24-8 Inspector window commands

	Menu	Menu Item		Shortcut

	Find	Entry			none
		Next			F3
	View	Child/Contents		Ctrl+C
		Parent			Ctrl+P
		Right (Next element)	Ctrl+R
		Left (Prev. element)	Ctrl+L
		Specific Index		Ctrl+I
		Variable Level		Ctrl+V
	Show	Graphic Data Structure	Ctrl+G
		Memory			Ctrl+E
		Source of Method	none
		Address			Ctrl+A
	ShowAs	Show Pointer as Array	none
		Show Value in Hex	Ctrl+H
		Show Value with Type	Ctrl+T
		Show as Original Type	none
		Examine String Pointer	Ctrl+S
		Show Char Ptrs as Strings none
	Watch	Set Watchpoint		Ctrl+W
		Clear Watchpoint	none
		Clear All Watchpoints	Ctrl+K
	Modify!				Alt+M
	Delete!				Alt+D
The menu items in the Inspector window are described in the next
section.
Find Menu
Commands in the Find menu let you search for all instances of a
variable in the Inspector window.

[Figure 24-34 Inspector window Find menu
Entry
Displays a dialog box that allows you to enter the name of a variable
to find. Enter the name of the variable (or field) for which you want
to search, and press Enter. The standard wildcards (* and ?) are
supported in the name specification; case is significant. The
debugger searches in the current scope for the variable and selects
that line in the Inspector window. If there is more than one local
variable with the same name, continue the search by using Next.
Next
Repeats the last search executed using a Find command.
View Menu
Commands in the View menu let you navigate within data structures
and arrays.
[Figure 24-35 Inspector window View menu
Child/Contents
Displays the level of the data structure one level down from the
selected data structure. This command lets you navigate down
through arrays, structures, and pointers to view their elements. You
can also double-click on a data item to execute the Child/Contents
command on it. This command operates in the following manner:
Note:
For faster compilation, Digital Mars C++ can optionally
compile C++ modules without class debugging
information. However, you cannot view objects or
structures in such modules unless you recompile
with class debugging information.
Parent
Displays the parent data structure of the current data structure. This
command lets you move up a level in a data structure that you
previously moved down in with the Child/Contents command.
When the Parent command is executed, the Inspector window
displays the structure one level up from the current data structure.
Right (Next Element)
Displays the next index of the current array. If you used the
Child/Contents command to view the elements of an array, use the
Right (Next Element) command to quickly select the next index in
the array.
Left (Prev. Element)
Displays the previous index of the current array. If you used the
Child/Contents command to view the elements of an array, use this
command to quickly select the previous index in the array.
Specific Index
Specifies a particular index to view in the array. If you used the
Child/Contents command to view the elements of an array, use this
command to quickly view the contents of a specific index in the
array.
When this command is executed, the debugger prompts you to enter
an expression to be evaluated. The result of the evaluation becomes
the index of the newly displayed array element.
Note:
Use any one of the commands Right (Next
Element), Left (Prev. Element), or Specific
Index when you are viewing the fields of an array
element. The Inspector window displays the fields
of the array with the new index.
For example, if there is an array of records and the
record fields of the first element of the array are
displayed, use the Right (Next Element) command
to directly view the record fields of the second
element of the array. This is faster than executing
the Parent command, changing the selection to the
next index, and executing the Child/Contents
command.
Variable Level
Returns to the top nesting level (the variable level) of the data
display. Use this command if you chose the Child/Contents
command to descend into a data structure and want to return to the
top variable level without repeatedly using the Parent command.
Show Menu
The Show menu is used to update the Graphic Data Memory and
Source windows to reflect the selected item in the Inspector
window. It is also used to display the location of an address or a
CPU register of the currently selected item.
[Figure 24-36 Inspector window Show menu
Graphic Data Structure
Displays a graphic data representation of the selected variable. A
drawing of the selected data structure is displayed in the Graphic
Data window. This command provides a visual overview of your
structure in addition to the data browsing capabilities provided by
the Inspector window. For information about the Graphic Data
display, see the section "The Graphic Data Window" later in this
chapter.
Dragging and dropping from the Inspector window to the Graphic
Data window also executes this command.
Note:
The Graphic Data Structure command is disabled
if there are not enough Windows resources
available to generate a view for the Graphic Data
window.
Memory
Updates the Memory window to display the memory location of the
variable selected in the Inspector window. Dragging and dropping
from the Inspector window to the Memory window also executes
this command.
Source of Method
Updates the Source window to the location of the code for the
method highlighted in the Inspector window.
Address
Displays in a message box the memory location of the variable on
the selected line. If the variable is a register variable, this command
displays the register( s) it is contained in on the status line.
ShowAs Menu
The commands in this menu change the way the Inspector window
displays variables.

[Figure 24-37 Inspector window ShowAs menu
Show Pointer as Array
Displays the data pointed to by the variable on the selected line as
an array. This command allows you to browse dynamically allocated
arrays by displaying the data pointed to as an array.
Show Value in Hex
Changes to hexadecimal the display type of a variable on the
selected line. The command toggles the view between the originally
declared type of the variable and its hexadecimal display. If the
Inspector window displays the same variable more than once, only
one instance of this variable is affected.
Show Value with Type
Changes a variable from its original type to another named type. If
the Inspector window displays the same variable more than once,
only the selected instance of this variable is affected.
Note:
The / symbol to the left of the variable name
indicates that the variable is cast to a different type.
When executing Show Value with Type, the debugger prompts you
to enter the type name. The variable on the selected line is then cast
to that type. To reset the variable to its original type, choose Show
as Original Type from the ShowAs menu.
Show as Original Type
Displays a variable using its actual type after it has been typecast to
another type. Executing Show Value in Hex on an already cast
variable has the same effect.
Examine String Pointer
Displays the string that the selected character pointer points to in a
message box. To view the string, select a line with a pointer variable
and execute this command.
Show Char Ptrs as Strings
Updates the Inspector window to display the character strings to
which the character pointers point.
Watch menu
Commands in the Watch menu are used to control data watchpoints
in the program. When a watchpoint is set on a variable, a change in
the variable's value or in the implementation of a read access to the
variable causes the program to stop near the point at which the
variable was accessed. This feature helps locate data modifications or
accesses that may be incorrect. Refer to
Chapter 23, "Controlling and Configuring the Debugger,"
for more information about watchpoints.

[Figure 24-38 Inspector window Watch menu
Set Watchpoint
Sets a data watchpoint on the selected variable and causes the
debugger to display a Set Watchpoint dialog box. This dialog box
allows you choose whether to trigger the watchpoint on a read
access or on a write access. When executing a Go command, the
debugger stops execution of the program as soon as the program
accesses the specified variable.
Dragging and dropping from the Inspector window to the
Watchpoint window also executes this command.
Clear Watchpoint
Clears a watchpoint set on a selected variable. This command
reverses the effect of the Set Watchpoint command.
Clear All Watchpoints
Clears all watchpoints set in the program.
Modify!
Modifies the contents of the selected variable or field. First select the
variable or field you want to modify in the Inspector window before
executing the command. The debugger prompts you to enter an
expression to modify the variable.
The expression must evaluate to a value of the same size as the
variable, but not necessarily of the same type. Refer to Appendix A,
"Expression Evaluation," for more information.
Delete!
Deletes the selected line. If the variable or object that is displayed on
this line is also displayed on other lines in the Inspector window,
these lines are not affected.
Pop-up menu
The Inspector window pop-up menu provides quick access to
frequently used menu choices in the Inspector window local menu.
The View, Show, ShowAs, and Watch commands access submenus
that have some of the commands that are available from the similarly
named menus on the Inspector window menu bar. The Modify and
Delete commands function the same way as do the similarly named
commands in the local menu.

[Figure 24-39 Inspector window pop-up menu
The Memory window, shown in Figure 24-40, displays the memory
contents of a given address in different formats. Memory window
commands modify a memory location, set memory watchpoints, and
set the memory address to view.
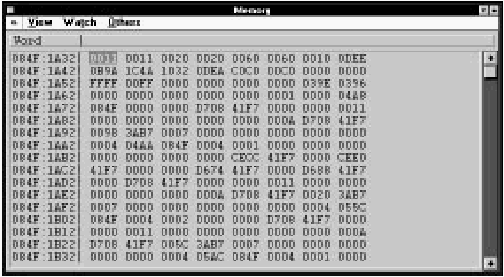
[Figure 24-40 The Memory window
The Memory window shows the contents of a range of memory
addresses. You can display memory in 11 different formats, ranging
from hexadecimal bytes to real numbers. To display memory, either
specify a particular address to view or view the address of a variable
by using the Data/Object window's Show Memory command.
In addition to examining a particular address, you can scroll through
the Memory window to view all the memory in a segment. In 32-bit
flat memory, you can scroll through your application's entire address
space. You may not have access to certain memory areas that are
restricted to your application. In that case, the memory contents are
displayed as Xs. You can modify memory and set memory
watchpoints as well.
The Memory window in the debugger has three local menus:
View, Watch, and Others.
	Table 24-9 Memory window commands

	Menu	Menu Item		Shortcut
	View	Character		Ctrl+H
		Text			Ctrl+T
		Byte			Ctrl+B
		Word			Ctrl+R
		Unsigned		Ctrl+U
		Integer			Ctrl+I
		Long Integer		Ctrl+G
		Short Real		Ctrl+S
		Long Real		Ctrl+E
		Extended Real		Ctrl+X
		Address			Ctrl+D
	Watch	Set Watchpoint		Ctrl+W
		Clear Watchpoint	none
		Clear All Watchpoints	Ctrl+K
	Others	Modify			Ctrl+M
		Set Memory Address	Ctrl+A
		Set Live Memory Expression Ctrl+L
		Show Child		Ctrl+C
View menu
The View menu sets the display mode of the Memory window. To
set the display format, select one of the formats from the menu. The
currently selected format is displayed in the upper-left corner of the
window.
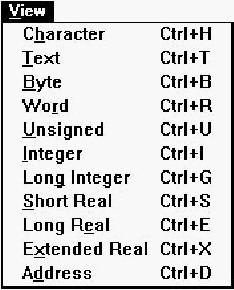
[Figure 24-41 Memory window View menu
Character
Sets the display format to character. The contents of memory are
displayed as ASCII characters enclosed in single quotes. If an address
does not contain a standard U. S. ASCII character, the octal value of
the character is displayed.
Text
Sets the display format to complete text. The contents of memory are
displayed as characters in the PC's code page. Each memory value is
displayed as a single character. The complete extended character set
is used to display the text. Values that cannot be displayed are
represented by dots.
Byte
Sets the display format to hexadecimal bytes. The contents of
memory are displayed as 2-digit hexadecimal values.
Word
Sets the display format to hexadecimal words. The contents of
memory are displayed as 4-digit hexadecimal values.
Unsigned
Sets the display format to unsigned integers. The contents of
memory are displayed as 2-byte unsigned integers in the range of 0
to 65535.
Integer
Sets the display format to signed integers. The contents of memory
are displayed as 2-byte signed integers in the range of -32768 to
32767.
Long Integer
Sets the display format to signed long integers. The contents of
memory are displayed as 4-byte signed integers in the range of
-2147483648 to 2147483647.
Short Real
Sets the display format to short real numbers. The contents of
memory are displayed as 4-byte, single-precision real numbers. The
4-byte memory ranges that are not valid 4-byte reals are denoted by
the phrase "not a real."
Long Real
Sets the display format to extended real numbers. The contents of
memory are displayed as 8-byte, double-precision real numbers.
Extended Real
Sets the display format to long real numbers. The contents of
memory are displayed as 10-byte, extended-precision real numbers.
Address
Sets the display format to addresses. The contents of memory are
displayed as addresses of the form segment: offset. If you are running
in 32-bit flat memory space, the addresses are displayed as 8-digit
hexadecimal numbers.
Watch menu
The commands on the Watch menu control memory watchpoints in
the program. After you set a watchpoint on a memory location, a
write to or a read from that location causes the program to stop near
the point where the access occurred. This feature allows you to catch
memory modifications that may be incorrect. For more information
about watchpoints, refer to
Chapter 23, "Controlling and Configuring the Debugger."
[Figure 24-42 Memory window Watch menu
Set Watchpoint
Sets a memory watchpoint on the selected memory location.
Dragging and dropping from the Memory window to the Watchpoint
window also executes this command.
Clear Watchpoint
Clears a watchpoint set on the selected memory location, reversing
the effect of the Set Watchpoint command on the location.
Clear All Watchpoints
Clears all watchpoints set in the program.
Others menu
Use the Others menu commands to modify data, to specify the
direct memory address to display, to link the memory address to an
expression, or to set the memory address through an address in
memory.
[Figure 24-43 Memory window Others menu
Modify
Displays an Expression dialog box modifying the contents of the
selected memory location.
Set Memory Address
Updates the Memory window to the address specified. When a
debugger dialog box prompts you for an address, enter the
hexadecimal address.
Type the address in the form 0Xnnnn:0Xnnnn to specify a 16-bit
segment:offset pair; type the address in the form 0Xnnnnnnnn,
where nnnnnnnn is an 8-digit hexadecimal number, to specify a 32-bit
address. For 16-bit code, to view another offset in the same
segment ac is currently displayed, enter only the offsed location. The
Memory window then displays the contents of memory at the new
location.
Set Live Memory Expression
Links the address displayed in the Memory window to an expression
(such as CS:IP or SS:SP) and causes the debugger to display an
Expression dialog box. Each time control returns to the debugger
after a Go command, the expression is evaluated and the result is
used to update the memory location to display.
Show Child
Sets the Memory window display address to the location contained
in the currently selected Memory window location. (The Memory
window must be displaying memory in the Address format.)
Pop-up menu
The Memory window pop-up menu provides quick access to
frequently used menu choices in the Memory window local menu.
The Set Watchpoint, Clear Watchpoint, Modify, and Show Child
commands function the same way as do the similarly named
commands in the local menu.
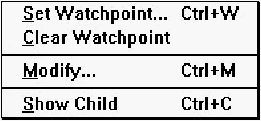
[Figure 24-44 Memory window pop-up menu
The Output window is used to display the messages generated by
the compiler, the linker, and the IDDE. For example, errors and
warnings generated by the compiler when it builds your code are
displayed in the Output window.
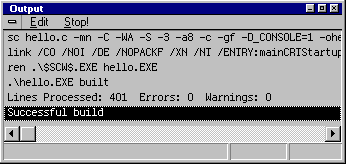
[Figure 24-45 Output window
The Output window's local menus are described below.
	Table 24-10 Output window menu commands

	Menu	Menu Item	Shortcut

	Edit	Copy All	none
		Clear		none
	Stop!			none
Edit
The commands on the Edit menu preserve and erase the contents of
the Output window.
[Figure 24-46 Output window Edit menu
Copy All
Copies the contents of the Output window to the Clipboard.
Clear
Clears the Output window.
Stop!
Choosing this menu causes the IDDE to stop a build or a parse
operation running in the background.
The Project window, displays in its left pane the names of the project
and any subprojects that form your program; in its right pane it
shows the source and object modules that comprise the project or
subproject selected on the left. Entries in the right pane can be
sorted along any of the columns displayed in that pane by clicking
on the column title; the title of the column along which entries are
sorted is shown in boldface.

[Figure 24-47 Project window
Two columns in the right pane contain meaningful information only
when the IDDE is in debugging mode; otherwise they display N/A.
The EXE/DLL column indicates the executable to which a module
belongs. The Virtual column indicates whether or not a module
whose debug information has been loaded has not had its code
loaded. You can set breakpoints for such a module; however, you
cannot set watchpoints because the module's data has not yet been
loaded.
The icon to the left of each entry in the Project window's right pane
contains status information about the module or file:
- The black bug symbol in the left part of the icon (it may
look like * on some monitors) signifies that this module
is compiled with debugging information.
- The small black T in the right part of the icon signifies
that tracing into this module is enabled.
- The dot in the lower part of the icon signifies that a
breakpoint has been set in the module. If the dot is
green, the breakpoint is enabled; if the dot is red, the
breakpoint is disabled.
When the right pane is sorted according to name, the module entries
in the Project window are listed in alphabetical order by extension
within directories, with the executable name to the right.
The Project window in the debugger has four local menus: Parse,
View, Trace, and VCS (shown in Table 24-11).
	Table 24-11 Project window commands

	Menu	Menu Item	Shortcut

	Parse	Update All	none
		Parse All	none
		Parse File	none
		Unparse File	none
		Stop Parse	none
	View	Source		Ctrl+R
		Global Data	Ctrl+G
		Functions	Ctrl+U
		Assembly	Ctrl+A
		All		Ctrl+L
		Code Address	none
	Trace	Enable		Ctrl+E
		Disable		Ctrl+D
		Enable All	none
		Disable All	none
	VCS	Configuration	none
		Get		none
		Put		none
		Merge		none
		Manager		none
		Settings	none
The menu items in the Project window are described below.
Parse menu
The Parse menu is not used during debugging. For more
information about the commands on this menu, see
Chapter 15, "More about Projects and Workspaces."
View menu
The View menu updates the Source and Data/Object windows to
display the source code and global data of the selected module. It is
also used to update the Assembly window to show the assembly
code of the module, to update the Function window to show the
functions in the module, and to display the starting code address of
the module.

[Figure 24-48 Project window View menu
The commands in this menu are grayed out unless the selected file
contains code. For example, they are grayed out for header files,
.def files, and .res files.
Source
Updates the Source window to show the source code of the selected
module. If the debugger cannot locate the source file, a dialog box
prompts you to enter the path of the source file. Dragging and
dropping from the Project window to the Source window also
executes this command.
Note:
To search for source files in different directories,
include those directories in the DPATH environment
variable.
[Figure 24-49 Project window View menu
Global Data
Updates the Data/Object window to show the global variables in the
selected module. Use this command to view the global data of any
module in the program. Dragging and dropping from the Project
window to the Data/Object window also executes this command.
Functions
Updates the Function window to show the functions in the selected
module. Dragging and dropping from the Project window to the
Function window also executes this command.
Assembly
Updates the Assembly window to the starting code address of the
module. Dragging and dropping from the Project window to the
Assembly window also executes this command.
All
Updates the Source, Data, Function, and Assembly windows.
Double-clicking on a module entry also executes this command.
Code Address
Displays a dialog box showing the code address of the first
statement in a module.
Note:
Dragging and dropping from the Project window to
the Memory window displays memory starting from
the code address of the selected entry in the Project
window.
Trace menu
Sometimes you don't want to trace into a particular module or set of
modules. The Trace menu contains commands that control whether
the debugger can step into, set breakpoints in, or watch data in a
particular module. By default, all modules in a program have tracing
enabled.
While stepping through a program using the Go menu commands,
the debugger does not stop the program in modules that have
tracing disabled. To prevent stepping into a particular module,
disable tracing for that module.

[Figure 24-50 Project window Trace menu
Enable
Enables tracing in the selected module.
Disable
Disables tracing in the selected module.
Enable All
Enables tracing in all program modules.
Disable All
Disables tracing in all program modules.
VCS menu
This menu is used to control the version control system and is not
used during debugging. See
Chapter 22, "Using Version Control," for more information.
Pop-up menus
The Project window provides a pop-up menu for each of its two
panes. They are accessible by clicking on the left or the right side of
the Project window. Most of the commands in these menus are
generally not used during debugging. They are documented in detail
in Chapter 15, "More about Projects and Workspaces."
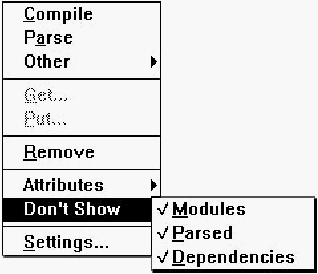
[Figure 24-51 Project window pop-up menu
There are three items in the Don't Show submenu: Modules,
Parsed, and Dependencies. When Modules is checked, the right
pane excludes files explicitly added to the project. Checking Parsed
excludes files added to the project only as a result of parsing.
Checking Dependencies excludes files added to the project only as
a result of building the project.
The Register window, shown in Figure 24-52, displays the CPU
register values of the processor. If a math coprocessor is installed in
the system, or if the CPU has a built-in floating-point unit (FPU),
those floating-point register values are displayed as well. Commands
are provided for changing the contents and the display mode of the
registers.
[Figure 24-52 Register window
The Register window displays the registers either horizontally or
vertically, and in either hexadecimal or decimal format. Select a
specific register by clicking on it or by using the arrow keys. The
Register window has two local menus, View and Others, listed in
Table 24-12.
	Table 24-12 Register window commands

	Menu	Menu Item		Shortcut

	View	Hex			Ctrl+H
		Decimal			Ctrl+D
		Vertical/Horizontal	Ctrl+X
	Others	Modify			Ctrl+M
		Out Byte to Port	none
		Out Word to Port	none
		In Byte from Port	none
		In Word from Port	none
View menu
The View menu contains commands that switch the display mode of
the registers between hexadecimal and decimal, and the display
orientation between horizontal and vertical.
[Figure 24-53 Register window View menu
Hex
Sets the register display mode to hexadecimal. After this command is
executed, register values are displayed as hexadecimal words. HEX is
displayed in the status line.
Decimal
Sets the register display mode to decimal. After it is executed,
register values are displayed as unsigned integers. DEC is displayed
in the status line.
Vertical/Horizontal
Toggles the register orientation between vertical and horizontal. The
chosen orientation persists from one session to the next.
Others menu
The Others menu commands modify the selected register.
[Figure 24-54 Register window Others menu
Modify
Opens the Expression dialog box to modify the selected register.
Out Byte to Port
Prompts for the I/O port number and a byte value. After you press
Enter, the debugger executes an OUT instruction to the specified
port.
Out Word to Port
Prompts you for I/O port number and a word value. After you press
Enter, the debugger executes an OUT instruction to the specified
port.
In Byte from Port
This command prompts you for the I/O port number and a byte
value. After you press Enter, the debugger executes an IN
instruction to the specified port.
In Word from Port
Prompts for the I/O port number and a word value. After you press
Enter, the debugger executes an IN instruction to the specified port.
Pop-up menu
The pop-up menu of the Registers window contains the Modify
command, described above in the Others menu.
The Source window, shown in Figure 24-55, displays the source
code of a program. When you start debugging, the Source window
changes from an editing to a debugging window.
In debugging mode, you can view or change the current execution
position, manipulate source-level breakpoints, and set the Assembly
window view to a particular source line in a Source window. See
Chapter 6, "Editing Program Code," for information on editing in a
Source window.

[Figure 24-55 Source window
Use any of the following methods to view the source file of a
particular module:
- Use the View Source command in the Project window.
- Select the Open command from the IDDE's File menu to
view a module.
- Drag and drop the module from the Project window to
an open Source window, or to the desktop, to open a
new Source window.
- Double-click on the module in the Project window.
The location of the selection line in the Source window also
determines the current local scope for evaluation of local variables in
the expression evaluator. Refer to Appendix A, "Expression
Evaluation," for more information.
Several different status messages can appear in the Source window.
If the source file cannot be found, the window displays the following
message:
Source file not found
If there is insufficient debug information in the module, the Source
window displays the following message:
No source associated
In debugging mode, the left margin of the Source window expands
to a vertically bordered pane two columns wide that contains the
breakpoint and execution indicators. If a breakpoint has been set on
a particular line, the first column of the margin contains a flag
(displayed as a circle on some systems) in the same row as the line
on which the breakpoint has been set.
If a line contains a function call that has not yet returned, the second
column contains an arrow. If execution has stopped at a breakpoint
in the program, the line with the breakpoint is similarly marked with
an arrow. Because it is the current line, it is also highlighted. (Refer
to "Working with Breakpoints," in
Chapter 23, "Controlling and Configuring the Debugger,"
for more information about
breakpoints.)
The Source window has five local menus: File, Edit, Goto, Macro,
and New!. The commands in the Macro menu also can be useful
during debugging, because some Source window debugging
commands can be recorded, edited, and played back. See Digital Mars
C++ IDDE Help for more information on the Digital Mars BASIC
scripting language. Some Goto commands also can be useful during
the debugging session. The other menus contain commands that are
generally applicable to editing. These are discussed in detail in
Chapter 21, "Text Editor Reference."
Pop-up menu
The pop-up menu contains commands for executing the following:
setting and clearing breakpoints, changing execution location,
showing the code address of the current selection, updating the
Assembly, Function, Memory, and Data/Object windows, and
looking up the current value of a variable and locating the source for
a particular number.
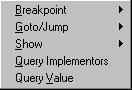
[Figure 24-56 Source window debugging mode pop-up menu
Commands in the Source window debugging mode pop-up menu
are listed in Table 24-13.
	Table 24-13 Source window debugging mode pop-up menu

	Menu Item		Shortcut

	Set/Clear Breakpoint	none
	Set Conditional Breakpoint none
	Clear All Breakpoints	none
	Go Until Line		none
	Skip to Line		none
	Show Assembly		none
	Show Functions		none
	Show Data		none
	Show Memory		none
	Show Code Address	none
	Query Implementors	none
	Query Value		none
These Source window pop-up menu items are described below.
Set/Clear Breakpoint
Sets an unconditional breakpoint at the selected source line if no
breakpoint is set on that line. The next time any Go command is
executed (except for the Go until End command), execution of the
program stops when it reaches that line. If a breakpoint is already set
on the selected source line, this command clears it.
Move a breakpoint by dragging the flag (circle) in the left
side to a new line, signifying that a breakpoint has been set on this
line. Clear a breakpoint by dragging the flag out of the
Source window and dropping it on the desktop.
You also can set an unconditional breakpoint by dragging a source
line from the Source window to the Breakpoint window. It is
possible to clear the breakpoint by dragging the source line it is set
on into the Breakpoint window. You can perform these drag
operations only if the Normal Selection for Debugging option on the
Text page of the Editing/Browsing Options dialog box is
unchecked.
Set Conditional Breakpoint
Sets a conditional breakpoint at the entry of the selected function.
This command displays the Set Code Breakpoint dialog box for
specifying the condition of the breakpoint. (Refer to "Conditional
and delayed breakpoints," in
Chapter 23, "Controlling and Configuring the Debugger,"
for more information about conditional
breakpoints.)
Clear All Breakpoints
Clears all breakpoints in the current module.
Go until Line
Allows the program to run until execution reaches the current line, at
which point execution halts and the debugger regains control. If the
current line will not be executed again before the program
terminates, this is equivalent to the Go until End command.
Double-clicking on a line in the Source window also executes up to
that line.
Skip to Line
Changes the execution location to the address of the selected source
line. After you execute the program again, it resumes execution from
the new location.
To use this command, select the source line on which you want
execution to resume and choose Skip to Line from the pop-up
menu.
If there is more than one source-level statement on that line, the
debugger uses the first statement on the line.
After this command is executed, the code and instruction pointer
registers are updated and the Source window shows the new
execution location. This command simulates a jump instruction and
lets you skip portions of code you don't want to execute.
Show Assembly
Updates the Assembly window to the code address of the current
selection. If more than one source-level statement is on that line, the
debugger uses the first statement on the line. You also can do this by
dragging and dropping from the Source window to the Assembly
window if the Normal Selection for Debugging option on the Text
page of the Editing/Browsing Options dialog box is disabled.
Show Functions
Updates the Function window to show the functions in the current
source module. You also can do this by dragging and dropping from
the Source window to the Function window if the Normal Selection
for Debugging option on the Text page of the Editing/Browsing
Options dialog box is disabled.
Show Data
Updates the Data/Object window to show the data objects in the
current scope. Choose this command when you want to see the local
variables in the scope of the current source line. You also can do this
by dragging and dropping from the Source window to the Data/
Object window if the Normal Selection for Debugging option on the
Text page of the Editing/Browsing Options dialog box is disabled.
Show Memory
Updates the Memory window to display a range of memory, starting
with the code address of the selected source line. You also can do
this by dragging and dropping from the Source window to the
Memory window if the Normal Selection for Debugging option on
the Text page of the Editing/Browsing Options dialog box is
disabled.
Show Code Address
Displays the code address of the selected line. If more than one
source-level statement is on that line, the command prompts you to
enter the statement number of the address you want to view, such as
1 or 2. If you don't enter a statement number, the debugger uses the
first statement on the line.
Query Implementors
Displays the Class Editor showing the implementation of the selected
member.
Query Value
Looks up the current value of the selected token and displays it on
the status line.
Toolbar
The Source window, when in debugging mode, has a debugging
toolbar that provides easy access to common debugging commands.
Refer to Figure 24-57 for the debugging toolbar icons. The function
of these icons is described below, in order, from left to right.

[Figure 24-57 Source window debugging mode toolbar]
- Open:
- Same as choosing Open from the File menu.
- Toggle Breakpoint:
- Same as choosing Set/Clear Breakpoint from
the pop-up menu.
- Conditional Breakpoint:
- Same as choosing Set Conditional
Breakpoint from the pop-up menu.
- Query Value:
- Same as choosing Query Value from the pop-up
menu.
- Find:
- Same as choosing Find from the Edit menu.
- Find Previous:
- Searches backward in the file for search string.
- Find Next:
- Searches forward in the file for search string.
- Play Macro:
- Same as choosing Play Macro from the Macro menu.
The Spy window, available only in the 16-bit and Win32s IDDEs, is
shown in Figure 24-58. It lets you:
- Log messages sent to selected windows
- Select windows to spy on
- Post messages to windows
- Set breakpoints on messages
- Update the Source window to the location of a
corresponding window procedure
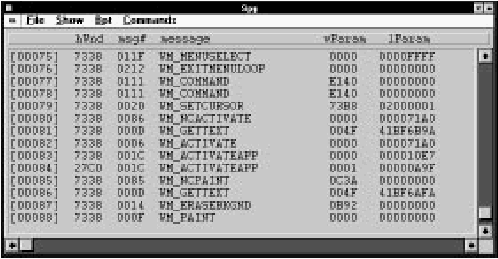
[Figure 24-58 Spy window
The Spy window has four local menus: File, Show, Bpt, and
Commands, as listed in Table 24-14.
	Table 24-14 Spy window commands

	Menu	Menu Item		Shortcut

	File	Open			none
		Close			none
		Pause			none
	Show	Window Proc Source	Ctrl+S
		lParam Memory		Ctrl+E
	Bpt	Set Breakpoint on Message	Ctrl+Z
		Set Breakpoint		Ctrl+B
		Clear All Breakpoints	Ctrl+K
	Commands Spy Enabled		Ctrl+Y
		Clear Spy Window	Ctrl+C
		Specify Windows		Ctrl+W
		Specify Messages	Ctrl+M
		Post Message		Ctrl+P
Menu items in the Spy window are described below.
File menu
The File menu contains commands for opening, closing, and
pausing a message file.
[Figure 24-59 Spy window File menu
Open
Opens a message log file in which window messages are logged.
The command prompts you to enter a filename. The log file is
created, and all subsequent messages appearing in the Spy window
are written to that file until you close or pause logging to the file.
Close
Closes a message log file so messages are no longer written to that
file. To begin message logging again, open a file with the Open
command.
Pause
Acts as a toggle switch that pauses message output to the message
log file. To continue message logging to the file, execute the Pause
command again. This command is checked when logging to the file
is paused.
Show menu
The Show menu contains two commands, one to update the Source
window to display the window procedure that handled a message,
and the other to update the Memory window with the address
specified by the lParam parameter of a message.
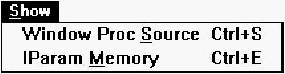
[Figure 24-60 Spy window Show menu
Window Proc Source
Updates the Source window to the location of the window
procedure to which the selected message was delivered. Dragging
and dropping from the Spy window to the Source window also
executes this command.
lParam Memory
Uses the selected message's lParam parameter as an address and
updates the Memory window to that address. The Memory window
then displays the contents of the structure passed in the message.
Dragging and dropping from the Spy window to the Memory
window also executes this command.
Bpt menu
The Bpt menu commands set and clear breakpoints on messages.
(Refer to
Chapter 23, "Controlling and Configuring the Debugger,"
for details about setting breakpoints.)
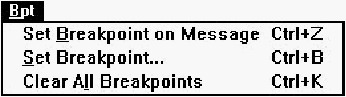
[Figure 24-61 Spy window Bpt menu
Set Breakpoint on Message
Sets a breakpoint on the message currently selected in the Spy
window. Dragging and dropping from the Spy window to the
Breakpoint window also executes this command.
Set Breakpoint
Displays a dialog box that lets you select a window and a message
on which to set a breakpoint.
Clear All Breakpoints
Clears all breakpoints that have been set, whether unconditional or
conditional.
Commands menu
The commands on this menu are used to enable and disable the
spying of messages, to specify particular messages and windows to
spy on, and to post messages to a window message queue.
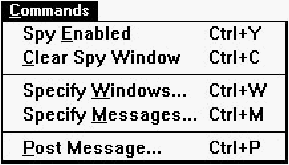
[Figure 24-62 Spy window Commands menu
Spy Enabled
Enables or disables the spying of messages. A checkmark is
displayed when message spying is enabled.
Clear Spy Window
Clears any messages logged in the Spy window.
Specify Windows
Specifies windows you want to spy on. A dialog box prompts you to
select or deselect windows to spy on when you choose this
command. If the specified window does not exist, the debugger
watches for and activates message spying after its creation.
Specify Messages
Specifies which messages you want to spy on. A dialog box opens,
in which you select the messages.
Post Message
Displays the Post Message dialog box, which allows you to post
one or more messages to one or more windows. This dialog box lets
you select a window handle and enter wParam and lParam values
for the message. The Queue for Posting button places this message
at the end of a queue that holds the messages you have specified.
Once you have queued at least one message for posting, the Exit
and Post button becomes enabled; clicking on it posts all the
messages you have queued to their respective windows, in the order
in which you queued them.
The Thread window, shown in Figure 24-63, presents at a glance all
the currently extant threads your program has created, together with
their states. All 16-bit applications can have only one thread; 32-bit
applications can be designed to have more than one thread. The
Thread window provides no benefits when debugging a single-thread
application. When debugging a 32-bit multithreaded
application, you can use the Thread window to:
- Switch easily between threads to debug
- Update the Source window with a thread's current
location
- Update the Data/Object window with a thread's data
- Update the Call window with a thread's call chain
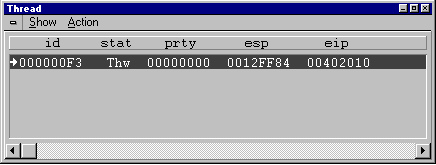
[Figure 24-63 Thread window
Current threads are listed one per row, with the currently selected
thread highlighted. You can change the selection by clicking on a
different row or by using the arrow keys. The primary thread is
identified by a bold arrow in the left margin. This thread receives
user input and is automatically created by the operating system
when a process (an instance of an application) is created. The active
thread- the one from which the debugger regained control- is
identified by a normal arrow in the left margin. The columns of the
Thread window have the following significance:
	Table 24-15 Thread window columns

	Column Title	Meaning

	id		Thread ID number. Thread IDs are unique
			within a process.
	stat		Status. Possible values of this field are:
			Frz -the thread is "frozen"
			(suspended)
			Thw -the thread is "thawed" (resumed
			or not suspended)
	prty		Priority.
	esp		Current top of stack for thread.
	eip		Current instruction location for thread.
The Thread window has two local menus, Show and Action, as
detailed in Table 24-16.
	Table 24-16 Thread window commands

	Menu	Menu Item	Shortcut

	Show	Source		Ctrl+S
		Data		Ctrl+D
		Call Chain	Ctrl+C
		All		Ctrl+L
	Action	Freeze		Ctrl+F
		Thaw		Ctrl+T
		Freeze Others	Ctrl+O
		Thaw Others	Ctrl+M
Show menu
The Show menu contains commands for updating the Source
window, Data/Object window, and Call window to reflect the state
of the currently selected thread.
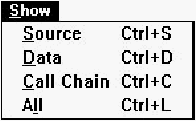
[Figure 24-64 Thread window Show menu
Source
Updates the Source window to display the location of the selected
thread.
Data
Updates the Data/Object window to reflect the data of the selected
thread. The local variables of the active functions in the thread are
displayed with the values they have in the selected thread. Dragging
and dropping from the Thread window to the Data/Object window
also executes this command.
Call Chain
Updates the Call window to display the call chain for the selected
thread. Dragging and dropping from the Thread window to the Call
window also executes this command.
All
Updates the Source window, Data/Object window, and Call
window. This command is equivalent to executing the above three
commands at once. Double-clicking on any thread in the Thread
window also executes this command.
Action menu
The Action menu contains commands for setting the status of
threads.
Freeze
Freezes (suspends) the currently selected thread.
Thaw
Unfreezes (resumes) the currently selected thread.
Freeze Others
Freezes (suspends) all threads other than the active thread.
Unfreeze Others
Unfreezes (resumes) all threads other than the active thread.
Pop-up menu
The pop-up menu contains all the commands in the Show and
Action menus, described above.
The Trace Messages window, shown in Figure 24-71, is a simple
scrolling window in which you can view debugging messages
written by the debugging version of Windows, by MFC, and by your
own program (using the MFC TRACE macros or the
OutputDebugString Windows API). You can log all messages
written to this window to a file (see the Open Trace File command
below).
Note:
Because of differences in system level support for
debugging, tracing does not begin in the Trace
Messages window on Windows 95 or Windows NT
until you start debugging and choose Go
Breakpoint or Go End. On Windows 3.1, tracing
begins when you start debugging.

[Figure 24-65 Trace Messages window
The top line of the Trace Messages window displays the destinations
of messages. The possible messages are:
	Table 24-17 Trace Messages window message destinations

	Top Line		Meaning

	No output		Messages are neither
				written to the window
				nor saved to the file.

	Output to window only	Messages are written
				to the window only.

	Output to window, File:pathname		Messages go to both
						the Trace Messages
						window and to the
						trace file.
The Trace Messages window has three local menus: File, Options,
and Clear!, listed in Table 24-18.
	Table 24-18 Trace Window commands

	Menu	Menu Item		Shortcut

	File	Open Trace File		none
		Close Trace File	none
		Pause Trace File	none
	Options	Windows Debug Messages	none
		MFC Debug Messages	none
		OLE2 LRPC Spy		none
		Output to Window	none
		No Output		none
	Clear!				none
Menu items in the Trace Messages window are described below.
File Menu
File menu commands open a new trace file, close a trace file, and
pause the output to the trace file.
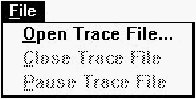
[Figure 24-66 Trace Messages window File menu
Open Trace File
Opens a trace file, to which the Trace Messages window output is
saved. You are prompted to enter a filename. Provided you have
chosen Output to Window in the Options menu (see below), the
file is created and all subsequent Trace Messages window output is
written to this file, until you close or pause trace output to the file.
Close Trace File
Closes the trace file so that trace messages no longer are written to it.
To begin logging output again, open a trace file using the Open
Trace File command.
Pause Trace File
Acts as a toggle to pause any Trace Messages window output to an
open trace file. To resume logging output to the log file, choose the
Pause Trace File command again. When output is paused, the
menu option has a checkmark next to it.
Options Menu
The Options menu commands let you specify the debug messages
you want to display in the Trace window (and in the trace file, if you
have one opened ). The commands also let you toggle the display of
debug messages on and off.
Note:
In the 32-bit IDDE, only the commands Output to
Window and No Output are present in the
Options menu..
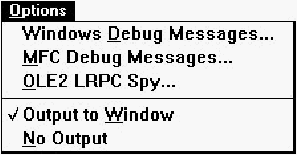
[Figure 24-67 Trace Messages window Options menu
Windows Debug Messages
(Not in 32-bit IDDE) Displays the Windows Trace Debug Options
dialog box, which lets you specify the categories of errors, warnings
and debug messages that you want the debugging version of
Windows to trap and notify you of..

[Figure 24-68 Windows Trace Debug Options dialog box
The Break Options group lets you specify whether errors, warnings,
or messages should cause a break to the debugger. Unless Break
with INT 3 is checked, a stack trace is written to the Trace Messages
window whenever the debugging version of Windows causes a
break to the debugger.
The Debug Options group lets you direct the debugging version of
Windows to perform various operations that assist you in diagnosing
problems.
The Trace Options group lets you specify which informational
messages are written to the Trace Messages window.
The options chosen here are stored in the [Windows] section of
win.ini. The Trace Options group corresponds to the
DebugOptions entry in win.ini: each check box corresponds to
a single bit of the hexadecimal number stored as the value of
DebugOptions. The Break and Debug groups correspond to the
FilterOptions entry in win.ini: here also, each check box
corresponds to a single bit of the hexadecimal number stored as the
value of FilterOptions.
For further information on these options, see the documentation for
the WINDEBUGINFO structure in Microsoft Windows Programmer's
Reference, Volume 3. In particular, the bits of the fields dwOptions
and dwFilter of WINDEBUGINFO correspond to the
DebugOptions and FilterOptions entries in win. ini.
Note:
If you choose this command and are not running
the debug version of Windows, a message box
informs you:
	This command requires installed
	debugging Windows system binaries.
MFC Debug Messages
(Not in 32-bit IDDE) Displays the MFC Trace Debug Options
dialog box.
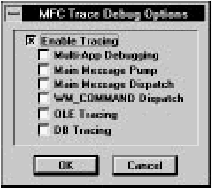
[Figure 24-69 MFC Trace Debug Options dialog box
This dialog box lets you choose which MFC debug messages to
capture. The options chosen here are stored in the
[Diagnostics] section of the file afx. ini, located in the
Windows directory. The Enable Tracing check box corresponds to
the TraceEnabled entry in afx. ini. The remaining check boxes
correspond as a group to the single entry TraceFlags in
afx. ini, and each check box corresponds to a single bit of the
hexadecimal number stored as the value of TraceFlags.
OLE2 LRPC Spy
(Not in 32-bit IDDE) Enables monitoring of OLE Lightweight Remote
Procedure Calls (LRPC), the mechanism by which OLE2 transports
procedure calls across process boundaries from an OLE container to
an OLE server or vice-versa. The command brings up the OLE2
LRPC Trace Debug Options dialog box.
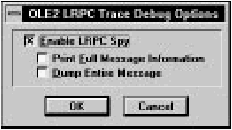
[Figure 24-70 OLE LRPC Trace Debug Options dialog box
Output to Window
Displays debug messages in the window. If you have opened a trace
file, you must choose this command for messages to be written to
the file. Choosing this checks the item on the menu and unchecks
No Output.
No Output
Disables display of debug messages in the window. It prevents
messages from being written to any opened trace file. Choosing this
command checks the item on the menu and unchecks Output to
window.
Clear!
Removes all messages in the Trace window, but does not remove
them from the trace file.
The Trace Messages window, shown in Figure 24-71, is a simple
scrolling window in which you can view debugging messages
written by the debugging version of Windows, by MFC, and by your
own program (using the MFC TRACE macros or the
OutputDebugString Windows API). You can log all messages
written to this window to a file (see the Open Trace File command
below).
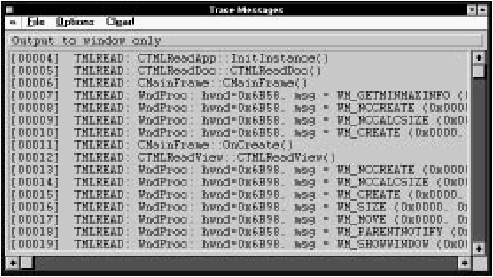
[Figure 24-71 Trace Messages window]
The top line of the Trace Messages window displays the destinations
of messages. The possible messages are:
Table 24-19 Trace Messages window message destinations
- No output
- Messages are neither written to the window nor saved to the file.
- Output to window only
- Messages are written to the window only.
- Output to window, File:pathname
- Messages go to both the Trace Messages window and to the trace file.
The Trace Messages window has three local menus: File, Options,
and Clear!, listed in Table 24-18.
	Table 24-20 Trace Window commands

	Menu	  Menu Item	 	   Shortcut

	File	  Open Trace File	   none
		  Close Trace File	   none
		  Pause Trace File	   none
	Options	  Windows Debug Messages   none
		  MFC Debug Messages	   none
		  OLE2 LRPC Spy		   none
		  Output to Window	   none
		  No Output		   none
	Clear!				   none
Menu items in the Trace Messages window are described below.
File Menu
File menu commands open a new trace file, close a trace file, and
pause the output to the trace file.

[Figure 24-72 Trace Messages window File menu
- Open Trace File
- Opens a trace file, to which the Trace Messages window output is
saved. You are prompted to enter a filename. Provided you have
chosen Output to Window in the Options menu (see below), the
file is created and all subsequent Trace Messages window output is
written to this file, until you close or pause trace output to the file.
- Close Trace File
- Closes the trace file so that trace messages no longer are written to it.
To begin logging output again, open a trace file using the Open
Trace File command.
- Pause Trace File
- Acts as a toggle to pause any Trace Messages window output to an
open trace file. To resume logging output to the log file, choose the
Pause Trace File command again. When output is paused, the
menu option has a checkmark next to it.
Options Menu
The Options menu commands let you specify the debug messages
you want to display in the Trace window (and in the trace file, if you
have one opened ). The commands also let you toggle the display of
debug messages on and off.
Note:
In the 32-bit IDDE, only the commands Output to
Window and No Output are present in the
Options menu..
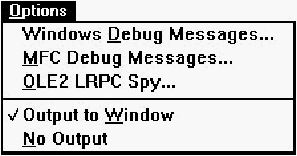
[Figure 24-73 Trace Messages window Options menu]
- Windows Debug Messages
- (Not in 32-bit IDDE) Displays the Windows Trace Debug Options
dialog box, which lets you specify the categories of errors, warnings
and debug messages that you want the debugging version of
Windows to trap and notify you of.
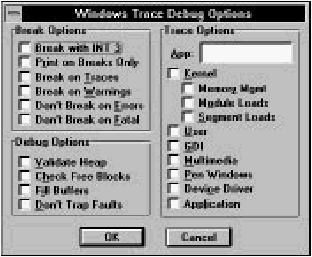
[Figure 24-74 Windows Trace Debug Options dialog box
The Break Options group lets you specify whether errors, warnings,
or messages should cause a break to the debugger. Unless Break
with INT 3 is checked, a stack trace is written to the Trace Messages
window whenever the debugging version of Windows causes a
break to the debugger.
The Debug Options group lets you direct the debugging version of
Windows to perform various operations that assist you in diagnosing
problems.
The Trace Options group lets you specify which informational
messages are written to the Trace Messages window.
The options chosen here are stored in the [Windows] section of
win.ini. The Trace Options group corresponds to the
DebugOptions entry in win.ini: each check box corresponds to
a single bit of the hexadecimal number stored as the value of
DebugOptions. The Break and Debug groups correspond to the
FilterOptions entry in win.ini: here also, each check box
corresponds to a single bit of the hexadecimal number stored as the
value of FilterOptions.
For further information on these options, see the documentation for
the WINDEBUGINFO structure in Microsoft Windows Programmer's
Reference, Volume 3. In particular, the bits of the fields dwOptions
and dwFilter of WINDEBUGINFO correspond to the
DebugOptions and FilterOptions entries in win.ini.
Note:
If you choose this command and are not running
the debug version of Windows, a message box
informs you:
	This command requires installed
	debugging Windows system binaries.
- MFC Debug Messages
- (Not in 32-bit IDDE) Displays the MFC Trace Debug Options
dialog box.

[Figure 24-75 MFC Trace Debug Options dialog box
This dialog box lets you choose which MFC debug messages to
capture. The options chosen here are stored in the
[Diagnostics] section of the file afx.ini, located in the
Windows directory. The Enable Tracing check box corresponds to
the TraceEnabled entry in afx.ini. The remaining check boxes
correspond as a group to the single entry TraceFlags in
afx.ini, and each check box corresponds to a single bit of the
hexadecimal number stored as the value of TraceFlags.
- OLE2 LRPC Spy
- (Not in 32-bit IDDE) Enables monitoring of OLE Lightweight Remote
Procedure Calls (LRPC), the mechanism by which OLE2 transports
procedure calls across process boundaries from an OLE container to
an OLE server or vice-versa. The command brings up the OLE2
LRPC Trace Debug Options dialog box.
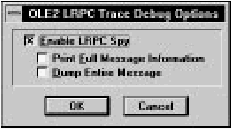
[Figure 24-76 OLE LRPC Trace Debug Options dialog box]
- Output to Window
- Displays debug messages in the window. If you have opened a trace
file, you must choose this command for messages to be written to
the file. Choosing this checks the item on the menu and unchecks
No Output.
- No Output
- Disables display of debug messages in the window. It prevents
messages from being written to any opened trace file. Choosing this
command checks the item on the menu and unchecks Output to
window.
Clear!
Removes all messages in the Trace window, but does not remove
them from the trace file.
Watchpoints are used to determine the approximate point in the
code where a specific memory location or a location in a range of
memory is written to or read from. A watchpoint defines a range in
memory and causes the debugger to stop the program if any value in
that memory range changes or is accessed.
You can set watchpoints on variables in the Data/Object window, on
memory locations in the Memory window, or on ranges.
The Watch window, shown in Figure 24-77, displays a list of all
watchpoints set in the program. You can view the memory locations
of watchpoints and clear watchpoints selectively.

[Figure 24-77 Watch window]
If no watchpoints are set in the program, the Watch window displays
the following message:
No watchpoints defined
After watchpoints are set on data in the program, the Watch window
displays the following information:
name [address range]
name: If the watchpoint has been set on a variable in the
Data/Object window, this field contains the name of the variable. For
Memory window watchpoints, the field contains the string memory.
address range: This is the range of memory being watched.
Byte1: This shows the successive bytes being watched in the
memory range.
The Watch window has two local menus, Show and Commands,
listed in Table 24-21.
	Table 24-21 Watch window commands

	Menu		Menu Item		Shortcut

	Show		Memory			Ctrl+E
	Commands	Clear Watchpoint	Ctrl+C
			Clear All Watchpoints	Ctrl+K
The local menu commands of the Watch window are described
below.
Show menu
The Show menu contains one command that shows the starting
address of the memory, and displays the memory.
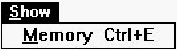
[Figure 24-78 Watch window Show menu]
- Memory
- Displays the starting address of the watchpoint range and updates
the Memory window to display the memory at that address.
Commands menu
The commands in this menu let you clear selected watchpoints or all
the watchpoints in the program.

[Figure 24-79 Watch window Commands menu]
- Clear Watchpoint
- Clears selected watchpoints.
- Clear All Watchpoints
- Clears all watchpoints set in the program.
Pop-up menu
The pop-up menu of the Watch window contains the commands
Show Memory and Clear Watchpoint. These behave identically to
the local menu commands Memory and Show Watchpoint
described above.
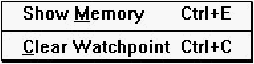
[Figure 24-80 Watch window pop-up menu]
This ResourceStudio reference chapter contains details about the
commands and options found in the Shell and Browser windows.
For an introduction to ResourceStudio, see
Chapter 7, Adding Look and Feel with Resources.
The Shell Window
The ResourceStudio Shell window is:
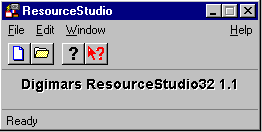
Figure 25-1 The Shell window
The Shell window is ResourceStudio's main control center.
It opens resource files, creates new resource files, sets
preferences, arranges windows, and accesses online help.
File menu commands
The File menu (see Figure 25-2) contains commands to create and
open resource files and to exit ResourceStudio. In addition to the
commands listed below, the File menu contains a list of recently
opened resource files.
Any of these files may be reopened by choosing its name from the
menu.
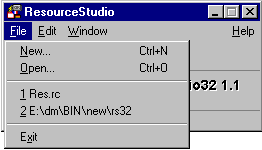
[Figure 25-2 Shell window File menu
- New
- Opens the New File dialog box (see Figure 25-3). Use this dialog
box to create a new resource file.

[Figure 25-3 New File dialog box
- Type
- Specifies the type of resource file to create.
| Resource script
| Creates a resource script (.rc) file
|
| Binary resource
| Creates a binary resource (.res) file
|
| Icon
| Creates an icon (.ico) file
|
| Cursor
| Creates a cursor (.cur) file
|
| Bitmap
| Creates a bitmap (.bmp) file
|
| Font
| Creates a font (.fnt) file
|
For Resource Script or Binary Resource, the new file opens
in a Browser window; otherwise, the appropriate resource editor
opens in a separate window.
- Platform
- Specifies the target platform for the resource file.
| Windows 3.1
| Creates resources for Windows 3.1
|
| Windows NT
| Creates resources for Windows NT
|
| Windows 95
| Creates resources for Windows 95
|
Windows 95 resources use the MENUEX and DIALOGEX resource
types for menus and dialogs, respectively. For more information, see
your Windows 95 documentation.
- Support MFC
- Applies to resource script files; specifies that the file should include
MFC resource headers. Check this box if you plan to use your
resources in an MFC application.
- Open
- Opens the File Open dialog box (see Figure 25-4). This is a standard
dialog box for opening files, with an extra field for specifying the
target platform.
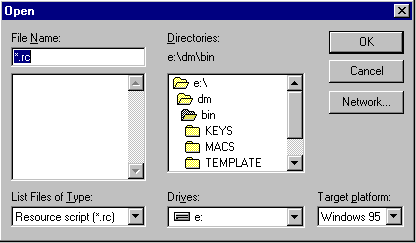
[Figure 25-4 File Open dialog box
- Target platform
- Specifies the target platform. Choices include Windows 3.1,
Windows NT, and Windows 95.
- Exit
- Closes ResourceStudio.
Edit menu commands
The Edit menu (see Figure 25-5) contains a single command, used to
set ResourceStudio preferences.
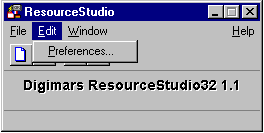
[Figure 25-5 Shell window Edit menu
Preferences
Opens the Preferences dialog box, used to set miscellaneous
ResourceStudio options. This dialog box has three tabs of options.
Note:
The Controls tab of options is not available when
running ResourceStudio on Windows 95 and Windows NT.
The General tab (see Figure 25-6) contains miscellaneous
ResourceStudio options.
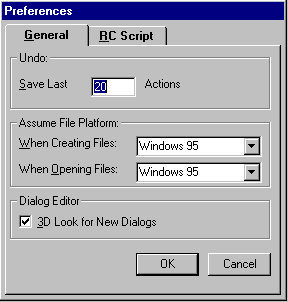
[Figure 25-6 General tab of Preferences dialog box
- Undo
- Specifies the number of previous states that are saved and, therefore,
the number of actions that can be undone. Each Browser window
and each individual resource editor keeps a separate list of actions
that were undone.
- Assume File Platform
- These options specify default file platforms for creating and loading
resource files.
- When Creating Files:
- Specifies default platform for new resource files.
- When Opening Files:
- Specifies default platform for opened resource files.
- 3D Look for New Dialogs
- If checked, new dialogs are given a 3-dimensional look by default.
The RC Script tab (see Figure 25-7) contains options for resource
script files.
[Figure 25-7 RC Script tab of Preferences dialog box
- Definitions
- Contains a list of symbols to be defined with a #define directive in
each .rc file. Click on a symbol to copy its name and value to the
textboxes below the list. You can edit the name or value, then click
on the symbol in the list again to copy the new name and value back
to the list.
- Name
- Contains a symbol name.
- Value
- Contains a symbol value.
- Add
- Adds the current symbol and value to the Definitions list.
- Remove
- Deletes the currently selected symbol from the Definitions list.
The Controls tab (see Figure 25-5) contains options for installing
custom controls. A custom control resides in a DLL that implements
the standard functions which allow a dialog editor (such as
ResourceStudio) to manipulate and display the control.
Note:
The Controls tab of options is not available when
running ResourceStudio on Windows 95 and Windows NT.
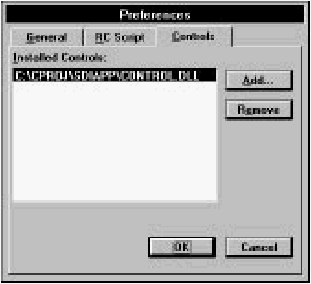
[Figure 25-8 Controls tab of Preferences dialog box
- Installed Controls
- Contains a list of custom control DLLs that are currently installed.
- Add
- Adds a custom control DLL to the list of installed controls.
- Remove
- Removes a custom control DLL from the list of installed controls.
Window menu commands
The Window menu (see Figure 25-8) contains commands to arrange
ResourceStudio windows. These commands execute the standard
Windows Cascade, Tile, and Close All functions. Attached to the
bottom of the menu is a list of currently opened Browser and editor
windows. Choose a window name to bring that window to the
foreground or to restore it after it has been minimized.
[Figure 25-9 Shell window Window menu
Help menu commands
The Help menu (see Figure 25-9) contains commands to access
online help and to display program information.
[Figure 25-10 Shell window Help menu
- Index
- Opens ResourceStudio online help to the index.
- Using Help
- Opens online help to information about how to use help.
- About ResourceStudio
- Opens a dialog box that displays ResourceStudio version and
copyright information.
Toolbar commands
The Shell window toolbar provides quick access
to menu commands and to context-sensitive help:

[Figure 25-11 Shell window toolbar]

| Creates a new resource script file and opens it in a Browser
window. The platform is set to the default platform for creating new
files (as set in the Preferences dialog box).
|

| Same as choosing Open from the File menu, except that the
target platform for the resource is automatically set to the last
platform chosen with File Open.
|

| Same as choosing About ResourceStudio
from the Help menu.
|

| Enters context-sensitive help mode. A
question mark is appended to the cursor while in this mode. Select
any component of ResourceStudio, such as a menu item or a toolbar
icon, to open the online help for information about that component.
|
The Browser Window
The Browser window (see Figure 25-11) supervises the editing of a
multiresource file, such as a resource script file. The resource types
contained in the file are listed in the upper-left pane; when a type is
selected, the resources of that type are listed in the lower-left pane.
The right pane contains a preview of the currently selected resource.
[Figure 25-12 The Browser window
Individual resources can be edited either in separate windows or in
the right pane of the Browser window. In the latter case, the menu
bar of the resource editor replaces the Browser window's menu bar
during editing.
File menu commands
The File menu (see Figure 25-12) contains commands to save the
resource file, to edit resources, and to perform other miscellaneous
functions.

[Figure 25-13 Browser window File menu
- Save
- Saves the resource file. If the file is unnamed, this command
executes Save As.
- Save As
- Opens a Windows File Save As dialog box, which can be used to
save the resource file under a new name.
- Edit Resource
- Opens the selected resource in the right pane of the Browser
window so that the resource can be edited. This command is also
executed by double-clicking on a resource, or double-clicking in the
right pane when a preview of the resource is displayed there.
- Edit in Separate Window
- Opens the selected resource in a separate window so that the
resource can be edited.
- Export Resource
- Opens a dialog box that can be used to save the currently selected
resource in a separate file. This command is only available when the
current resource is a bitmap, icon, cursor, or font.
- Edit Resource IDs
- Opens the Resource ID Browser dialog box (see Figure 25-13).
This dialog box is used to browse and modify resource IDs.
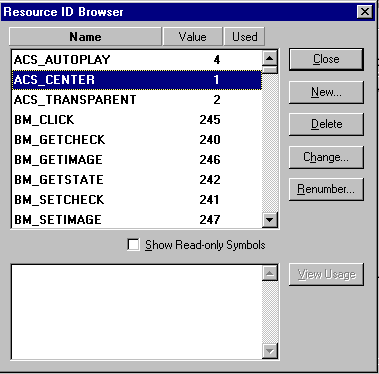
[Figure 25-14 Resource ID Browser dialog box
For more information about managing resource IDs and using the
Resource ID Browser dialog box, see "Managing Resource IDs," in
Chapter 7, "Adding Look and Feel with Resources."
- ClassExpress
- Runs ClassExpress and passes the filename of the resource file as the
project that ClassExpress should open. You should run ClassExpress,
for example, after creating a dialog box. With ClassExpress you
can create a class for the dialog box, set up a message map, and
add member variables corresponding to controls. For more
information, see Chapter 18, "More about ClassExpress," and
Chapter 14, "Lesson 5: Add a Dialog Box with ClassExpress."
- Close
- Closes the Browser window.
Edit menu commands
The Edit menu (see Figure 25-15) contains standard editing
commands. You can copy and paste entire resources, making it easy
to move resources from one file to another.
[Figure 25-15 Browser window Edit menu
- Undo
- Undoes the last Browser window operation.
- Redo
- Redoes the last Browser window operation that was undone.
- Cut
- Copies the selected resource to the Clipboard, then deletes it from
the resource file.
- Copy
- Copies the selected resource to the Clipboard.
- Paste
- Copies the resource in the Clipboard into the resource file.
Delete
- Deletes the selected resource from the resource file.
Resource menu commands
Commands in the Resource menu (see Figure 25-16) are used to
create new resources. In each case, a new ID is automatically
created and assigned to the resource, and the resource is opened in
the right pane of the Browser window so that the resource can be
edited.
[Figure 25-16 Browser window Resource menu
- New Dialog Box
- Creates a new dialog box. As the resource is created, the
DialogExpress dialog box lets you select a predefined dialog type
to use as a starting point (see "Dialog Editor," in Chapter 26, "Dialog
Editor").
- New Bitmap
- Creates a new bitmap. As the resource is created, the
BitmapExpress dialog box lets you specify initial bitmap
parameters (see "Bitmap Editor," in Chapter 28, "Bitmap, Cursor,
Icon, and Font Editors").
- New Icon
- Creates a new icon.
- New Cursor
- Creates a new cursor.
- New Menu
- Creates a new menu.
- New Font
- Creates a new font. As the resource is created, the FontExpress
dialog box lets you specify initial font parameters (see "Font Editor,"
in Chapter 28, "Bitmap, Cursor, Icon, and Font Editors").
- New String Table
- Creates a new string table.
- New Accelerator Table
- Creates a new accelerator table.
- New Version
- Creates a new version information resource.
- New Other
- Opens the Create Custom Resource dialog box (see Figure 25-17). Use this
dialog box to select a custom resource type to create and to define
new custom resource types.
[Figure 25-17 Create Custom Resource dialog box
To create one of the listed resource types, select it and click OK. To
define a new resource type, click on Add Type. The New Resource
Type dialog box opens (see Figure 25-18).
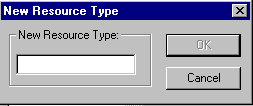
[Figure 25-18 New Resource Type dialog box
Type a name for the new resource type in the textbox and click OK.
The new type is added to the list in the Create Custom Resource dialog
box.
Toolbar commands
The Browser window toolbar provides quick
access to frequently used menu commands:

[Figure 25-19 Browser window toolbar]

| Same as choosing Save from the File menu.
|

| Same as choosing Undo from the Edit menu. Right-click on
this button to undo multiple operations at once.
|

| Same as choosing Redo from the Edit menu. Right-click on
this button to redo multiple operations at once.
|

| Same as choosing Cut from the Edit menu.
|

| Same as choosing Copy from the Edit menu.
|

| Same as choosing Paste from the Edit menu.
|

| Same as choosing Edit Resource IDs from
the File menu.
|

| Same as choosing New Bitmap from the Resource
menu.
|

| Same as choosing New Cursor from the Resource
menu.
|

| Same as choosing New Dialog Box from the
Resource menu.
|

| Same as choosing New Icon from the Resource menu.
|

| Same as choosing New Menu from the Resource
menu.
|

| Same as choosing New Font from the Resource menu.
|

| Same as choosing New String Table from the
Resource menu.
|

| Same as choosing New Accelerator Table
from the Resource menu.
|

| Same as choosing New Version from
the Resource menu.
|
Resource properties
When the Browser window is active and a resource in the lower-left
pane is selected, the Property Sheet displays properties of the
resource, which specify the resource ID and the resource memory
options. Figure 25-20 shows the properties of a Menu resource.
[Figure 25-20 Resource properties
| ID
| Specifies the resource ID by one of the following:
- Select an existing ID from the drop-down list.
- Type a new symbol for the resource ID. The ID is
assigned a new, unique value.
- Type a new symbol, followed by an equal sign, followed
by a value (for example, IDC_NAME=550). If you do
not specify a value, one is supplied. The ID is assigned
the value.
- Type a textual resource identifier, enclosed in double
quotes (for example, "MenuOne"). Textual IDs cannot
be assigned to font resources.
|
| Preload
| Specifies that the resource should be loaded into memory when the
application is started. If this option is not checked, the resource is
loaded when it is needed.
|
| Moveable
| Lets Windows move the resource in memory after it is loaded.
|
| Discardable
| Lets Windows remove the resource from memory when it is no
longer needed.
|
| Pure
| Protects the resource in memory from being modified.
|
This ResourceStudio reference chapter contains details about the
commands and options found in the Dialog editor. For an
introduction to ResourceStudio, see Chapter 7, "Adding Look and
Feel with Resources."
Dialog Editor
The Dialog editor (see Figure 26-1) is used to edit dialog resources.
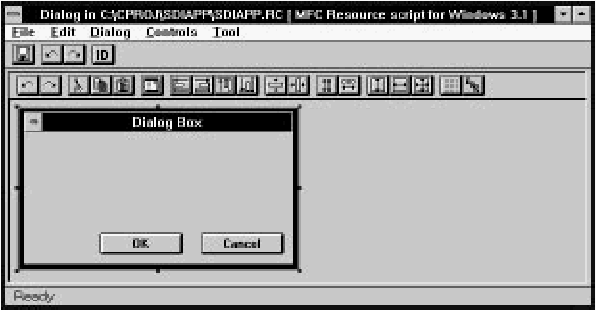
[Figure 26-1 The Dialog editor
The Dialog editor displays the dialog box and its controls as they will
appear at run time. To add a new control to the dialog box, select a
tool from the Tool menu (or from the toolbox), then place the
control in the dialog box by clicking and dragging. Controls can be
moved and resized by clicking and dragging as well. Commands in
the Controls menu can be used to center and align controls. The
dialog box can be tested by choosing Test Dialog in the Dialog
menu. For more information about using the Dialog editor, see
Chapter 7, "Adding Look and Feel with Resources."
DialogExpress
As a new dialog resource is created, the DialogExpress dialog box
opens (see Figure 26-2). DialogExpress lets you select a predefined
dialog box type to use as a starting point for your dialog resource.
[Figure 26-2 DialogExpress
Select dialog type
Specifies a type of dialog box to create as a starting point for the
dialog resource.
- Standard:
- Creates a dialog box with no controls.
- About box:
- Creates a dialog box with static text and an OK button.
- Standard, buttons on the bottom:
- Creates a dialog box with OK
and Cancel buttons along the bottom.
- Standard, buttons on the right:
- Creates a dialog box with OK and
Cancel buttons along the right edge.
3-dimensional look
Specifies that the dialog box and controls should look 3-dimensional.
File menu commands
The File menu (see Figure 26-3) contains commands to save the
resource file, edit resource IDs, and perform other miscellaneous
functions.
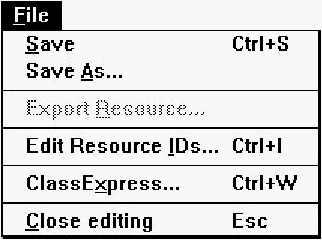
[Figure 26-3 Dialog editor File menu
Save
Saves the resource file. If the file is unnamed, this command
executes Save As.
Save As
Opens a Windows File Save As dialog box, which is used to save
the resource file under a new name.
Edit Resource IDs
Opens the Resource ID Browser dialog box, used to browse and
modify resource IDs. For more information about managing resource
IDs and using the Resource ID Browser dialog box, see "Managing
Resource IDs," in Chapter 7, "Adding Look and Feel with Resources."
ClassExpress
Runs ClassExpress, passing the filename of the resource file as the
project that ClassExpress should open. This command is only
enabled if the Dialog editor is running in the right pane of the
Browser window.
Close Editing
Closes the Dialog editor.
Edit menu commands
The Edit menu (see Figure 26-4) contains standard editing
commands. You can undo operations, and can cut, copy, paste, and
delete single or multiple controls. Note that to select multiple
controls, you must press Shift or Control while clicking the second
and subsequent controls, or must use the selection tool to drag a box
around the controls.
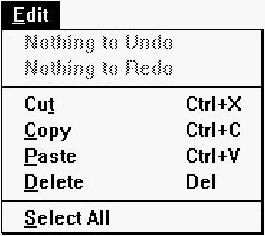
[Figure 26-4 Dialog editor Edit menu
Undo
Undoes the last Dialog editor operation.
Redo
Redoes the last action that was undone.
Cut
Copies the selected control to the Clipboard, then deletes it from the
dialog box.
Copy
Copies the selected control to the Clipboard.
Paste
Copies the control in the Clipboard to the dialog box.
Delete
Deletes the selected control from the dialog box.
Select All
Selects all controls in the dialog box.
Dialog menu commands
The Dialog menu (see Figure 26-5) contains commands to control
the grid, display tab stops, test the dialog, and check for duplicate
control IDs.
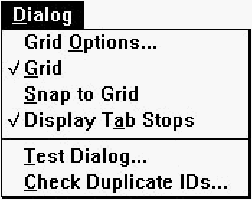
[Figure 26-5 Dialog editor Dialog menu
Grid Options
Opens the Grid Settings dialog box (see Figure 26-6), used to set
grid options.
[Figure 26-6 Grid Settings dialog box
Width
Specifies the grid point horizontal spacing.
Height
Specifies the grid point vertical spacing.
Snap to grid
If checked, controls can only be moved to positions which coincide
with grid points. When controls are resized, horizontal and vertical
sizes are adjusted to multiples of the grid point spacings.
Display grid
If checked, the grid is displayed.
Grid
Toggles display of the grid.
Snap to Grid
Moves the selected control to the nearest grid point.
Display Tab Stops
Toggles the display of tab stop numbers on controls. Tab order can
be adjusted with commands in the Tab Order submenu of the
Controls menu.
Test Dialog
Runs the dialog. End testing by clicking on a button with a resource
ID of IDOK or IDCANCEL, or by pressing Alt+ F4.
Check Duplicate IDs
Checks the dialog for duplicate control IDs. If any two items have
the same ID, the Resolve Duplicate IDs dialog box opens (see
Figure 26-7).

[Figure 26-7 Resolve Duplicate IDs dialog box
To resolve duplicate IDs, first click on a number in the Duplicate IDs
list. The Used By listbox displays the controls that are using that ID.
Click on Resolve One to automatically assign new IDs (with unique
values) to the controls.
Note that all static text usually shares the same ID; in general, this is
acceptable and does not cause conflicts in the application.
Controls menu commands
The Controls menu (see Figure 26-8) contains commands to align,
space, and center controls, and to adjust tab order.
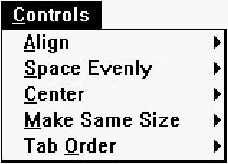
[Figure 26-8 Dialog editor Controls menu
Align
Opens the Align submenu (see Figure 26-9). Before choosing one of
these commands, select two or more controls and designate one as
the standard by clicking on it while pressing the Control key.
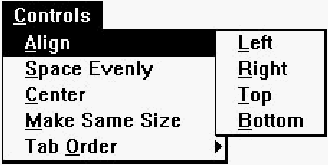
[Figure 26-9 Dialog editor Controls menu Align submenu
Left
Aligns the left edges of the selected controls with the left edge of the
standard.
Right
Aligns the right edges of the selected controls with the right edge of
the standard.
Top
Aligns the top edges of the selected controls with the top edge of the
standard.
Bottom
Aligns the bottom edges of the selected controls with the bottom
edge of the standard.
Space Evenly
Opens the Space Evenly submenu (see Figure 26-10). Before
choosing one of these commands, select three or more controls.
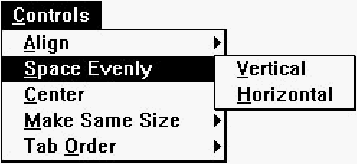
[Figure 26-10 Dialog editor Controls menu Space Evenly submenu
Vertical
Spaces the selected controls evenly in the vertical direction.
Horizontal
Spaces the selected controls evenly in the horizontal direction.
Center
Opens the Center submenu (see Figure 26-11). Before choosing one
of these commands, select one or more controls.
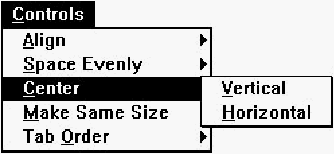
[Figure 26-11 Dialog editor Controls menu Center submenu
Vertical
Centers the selected controls vertically within the dialog box.
Horizontal
Centers the selected controls horizontally within the dialog box.
Make Same Size
Opens the Make Same Size submenu (see Figure 26-12). Before
choosing one of these commands, select two or more controls and
designate one as the standard by clicking on it while pressing the
Control key.

[Figure 26-12 Dialog editor Controls menu Make Same Size submenu
Vertical
Changes the vertical size of the selected controls to that of the
standard.
Horizontal
Changes the horizontal size of the selected controls to that of the
standard.
Both
Changes both the vertical and horizontal sizes of the selected
controls to those of the standard.
Tab Order
Opens the Tab Order submenu (see Figure 26-13). Before choosing
one of these commands, select a single control.
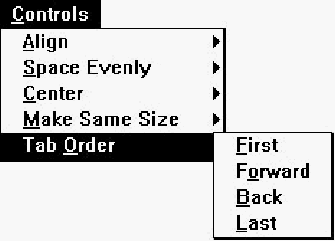
[Figure 26-13 Dialog editor Controls menu Tab Order submenu
First
Moves the selected control to the front of the tab sequence.
Forward
Moves the selected control forward in the tab sequence.
Back
Moves the selected control back in the tab sequence.
Last
Moves the selected control to the end of the tab sequence.
Tool menu commands
The Tool menu (see Figure 26-14) lets you select tools used to place
controls in the dialog box. After selecting a tool, click and drag in the
dialog box to place and size the new control. Once the control is
placed, the Select tool is selected automatically.
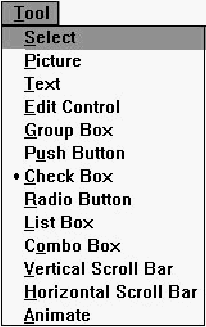
[Figure 26-14 Dialog editor Tool menu
Select
Selects the Select tool. With the Select tool, you can select individual
controls. You can select groups of controls by clicking in the dialog
box outside of any control and dragging a box over the controls to
be selected.
Picture
Selects the Picture tool, used to place a static image (a box, frame, or
icon) in the dialog box.
Text
Selects the Text tool, used to place static text in the dialog box.
Edit Control
Selects the Edit Control tool, used to place an edit control (a textbox)
in the dialog box.
Group Box
Selects the Group Box tool, used to place a group box in the dialog
box.
Push Button
Selects the Push Button tool, used to place a push button in the
dialog box.
Check Box
Selects the Check Box tool, used to place a check box in the dialog
box.
Radio Button
Selects the Radio Button tool, used to place a radio button in the
dialog box.
List Box
Selects the List Box tool, used to place a listbox in the dialog box.
Combo Box
Selects the Combo Box tool, used to place a combobox in the dialog
box.
Vertical Scroll Bar
Selects the Vertical Scroll Bar tool, used to place a vertical scroll bar
in the dialog box.
Horizontal Scroll Bar
Selects the Horizontal Scroll Bar tool, used to place a horizontal
scroll bar in the dialog box.
Toolbar commands
The Dialog editor toolbar (see Figure 26-15) provides quick access to
frequently used menu commands. Left-click on these buttons, except
where noted.

[Figure 26-15 Dialog editor toolbar
- Undo:
- Same as choosing Undo from the Edit menu. You can right-click
on this button to undo multiple operations at once.
- Redo:
- Same as choosing Redo from the Edit menu. You can right-click
on this button to redo multiple operations at once.
- Cut:
- Same as choosing Cut from the Edit menu.
- Copy:
- Same as choosing Copy from the Edit menu.
- Paste:
- Same as choosing Paste from the Edit menu.
- Test Dialog:
- Same as choosing Test Dialog from the Dialog menu.
- Align Left:
- Same as choosing Left from the Align submenu of the
Controls menu.
- Align Right:
- Same as choosing Right from the Align submenu of
the Controls menu.
- Align Top:
- Same as choosing Top from the Align submenu of the
Controls menu.
- Align Bottom:
- Same as choosing Bottom from the Align submenu
of the Controls menu.
- Center Vertical:
- Same as choosing Vertical from the Center
submenu of the Controls menu.
- Center Horizontal:
- Same as choosing Horizontal from the Center
submenu of the Controls menu.
- Space Evenly Vertical:
- Same as choosing Vertical from the Space
Evenly submenu of the Controls menu.
- Space Evenly Horizontal:
- Same as choosing Horizontal from the
Space Evenly submenu of the Controls menu.
- Same Size Vertical:
- Same as choosing Vertical from the Make
Same Size submenu of the Controls menu.
- Same Size Horizontal:
- Same as choosing Horizontal from the
Make Same Size submenu of the Controls menu.
- Same Size Both:
- Same as choosing Both from the Make Same Size
submenu of the Controls menu.
- Grid:
- Same as choosing Grid from the Dialog menu.
- Tab Stops:
- Same as choosing Display Tab Stops from the Dialog
menu.
Toolbox
The Dialog editor toolbox (see Figure 26-16) provides quick access
to the tools available in the Tool menu, plus tools for adding custom
controls and user controls (not pictured). For more information, see
"Tool menu commands," earlier in this chapter.
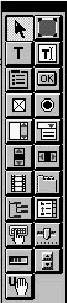
[Figure 26-16 Dialog editor toolbox
Dialog box properties
The dialog box has three pages of properties (four if the target
platform is Windows 95). The General properties are shown in
Figure 26-17.
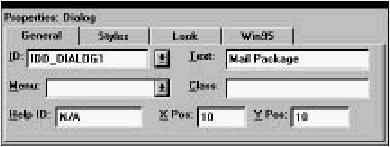
[Figure 26-17 Dialog box General properties
The Text field is used to specify the dialog box title.
Styles properties are shown in Figure 26-18.
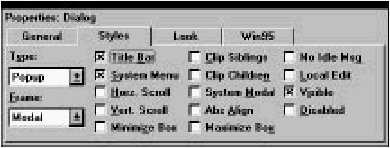
[Figure 26-18 Dialog box Styles properties
Look properties are shown in Figure 26-19.
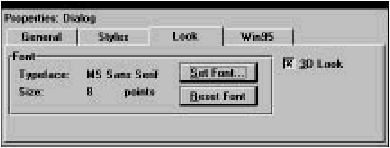
[Figure 26-19 Dialog box Look properties
The dialog box font can be set by clicking on Set Font and selecting
a font from the dialog box which opens. The Reset Font button
resets the dialog box font to the system default.
If the target platform is Windows 95, the dialog box has an extra
page of properties, as shown in Figure 26-20.
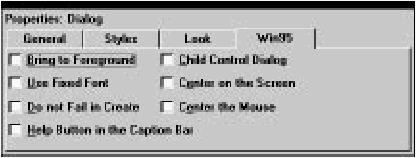
[Figure 26-20 Dialog box Win95 properties
See your Windows 95 documentation for more information.
Picture properties
Pictures (static images) have properties as shown in Figure 26-21.

[Figure 26-21 Picture properties
Select a Type from the drop-down list. If you select Icon, you must
also select an icon from the Icon drop-down list.
Text properties
Static text properties are shown in Figure 26-22.
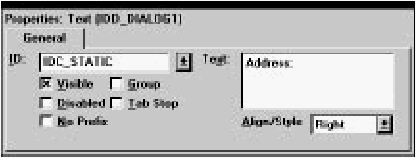
[Figure 26-22 Text properties
Type the static text into the Text textbox. Newlines can be entered
by typing Ctrl+ Enter.
Edit control properties
Edit controls have two pages of properties. The General properties
are shown in Figure 26-23.
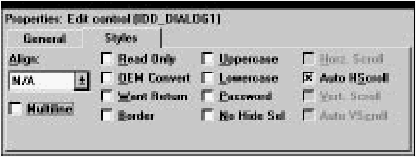
[Figure 26-23 Edit control General properties
Edit control Styles properties are shown in Figure 26-24.
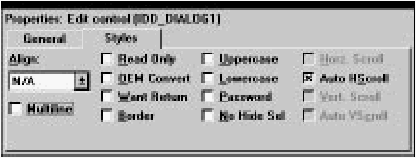
[Figure 26-24 Edit control Styles properties
Group box properties
Group box properties are shown in Figure 26-25.
[Figure 26-25 Group box properties
Push button properties
Push button properties are shown in Figure 26-26.
[Figure 26-26 Push button properties
Check box properties
Check box properties are shown in Figure 26-27.
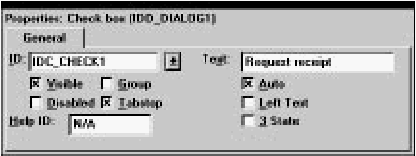
[Figure 26-27 Check box properties
Radio button properties
Radio button properties are shown in Figure 26-28.
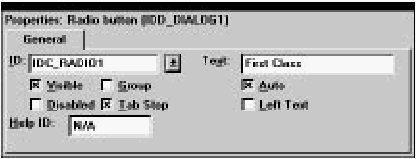
[Figure 26-28 Radio button properties
Listbox properties
Listboxes have two pages of properties. The General properties are
shown in Figure 26-29.
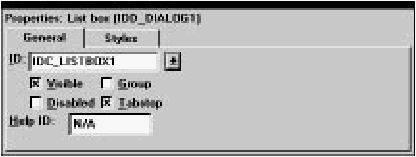
[Figure 26-29 Listbox General properties
Listbox Styles properties are shown in Figure 26-30.
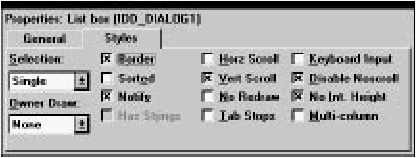
[Figure 26-30 Listbox Styles properties
Combobox properties
Comboboxes have two pages of properties. The General properties
are shown in Figure 26-31.
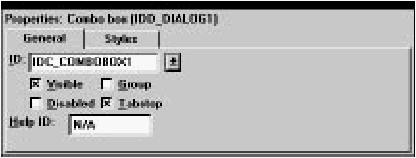
[Figure 26-31 Combobox General properties
Combobox Styles properties are shown in Figure 26-32.
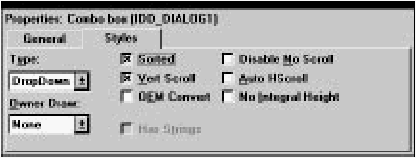
[Figure 26-32 Combobox Styles properties
Scroll bar properties
Scroll bar properties are shown in Figure 26-33.
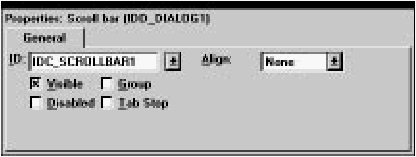
[Figure 26-33 Scroll bar properties
Custom control properties
These pages let you work with custom controls. A custom control
resides in a DLL that implements the standard functions for
manipulating and displaying the control. ResourceStudio can display
a custom control as it will appear in your application.
Custom controls have two pages of properties. The General
properties are shown in Figure 26-31. Use the ID field to edit a
custom control's resource ID. To change its style attributes, click
Style; this displays the dialog box that the control DLL implements
for that purpose.
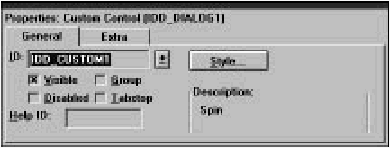
[Figure 26-34 Custom Control General properties
Custom control Extra properties are shown in Figure 26-32. You edit
the initialization data for custom controls in this page.
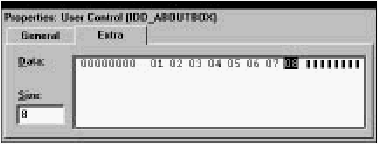
[Figure 26-35 Custom Control Extra properties
Working with custom controls
Installed custom control DLLs provide ResourceStudio with the
information it needs to display the control as it will appear in the
application, and open the DLL's control-specific dialog box, with
which you specify the control's attributes.
To place a custom control in a dialog box:
- Install its DLL using the Add button on the Controls page
of the Preferences dialog box.
- Click the button in the Toolbox that corresponds to the
control, and drag it into the dialog box. Right-clicking on
a custom control's button displays its name.
- Use the General property page to specify the control's
resource ID and style attributes.
- Use the Extra property page to specify any initialization
data for the control. At run-time, the control's window
procedure receives a pointer to this data in lParam of
the WM_CREATE message.
User control properties
These pages let you work with user controls. A user control is any
control that either is not implemented in a DLL, or whose
implementation is non-standard. ResourceStudio can only display a
user control as a box. ResourceStudio treats VBX controls as user
controls.
User controls have two pages of properties. The General properties
are shown in Figure 26-36. You use this page to edit a user control's
resource ID or change its style bits.
[Figure 26-36 User Control General properties
User control Extra properties are shown in Figure 26-32. You edit the
initialization data for user controlsin this page.

[Figure 26-37 User Control Extra properties
Working with user controls
To place a user control in a dialog box:
- Click the user control button in the Toolbox, and drag it
into the dialog box.
- Use the General property page to specify the control's
resource ID, style bits, and other information.
- Use the Extra property page to specify any initialization
data for the user control. At run-time, the control's
window procedure receives a pointer to this data in
lParam of the WM_CREATE message.
Animate control properties
Animate control properties are shown in Figure 26-38.
[Figure 26-38 Animate control properties
Tree view properties
Tree view properties are shown in Figure 26-39.
[Figure 26-39 Tree View properties
Tab control properties
Tab controls have two pages of properties. The General properties
are shown in Figure 26-40.
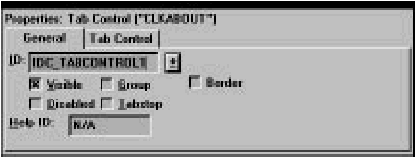
[Figure 26-40 Tab Control General properties
Tab Control properties are shown in Figure 26-41.
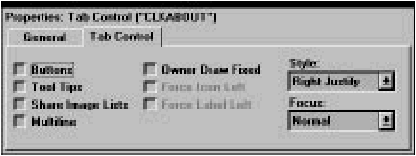
[Figure 26-41 Tab Control properties
List view control properties
List view controls have three pages of properties. The General
properties are shown in Figure 26-42.
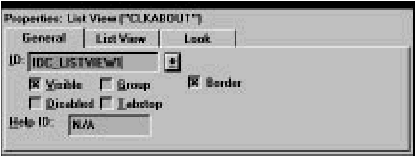
[Figure 26-42 List View Control General properties
List View properties are shown in Figure 26-43.
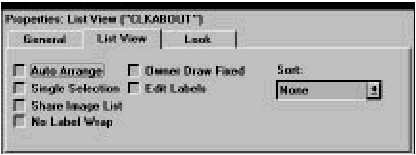
[Figure 26-43 List View properties
Look properties are shown in Figure 26-44.
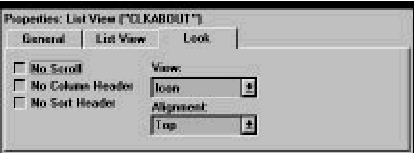
[Figure 26-44 List View Look properties
Hotkey properties
Hotkey properties are shown in Figure 26-45.
[Figure 26-45 Hotkey properties
Track Bar properties
Track bars have two pages of properties. The General properties are
shown in Figure 26-46.
[Figure 26-46 Track Bar General properties
Track Bar properties are shown in Figure 26-47.
[Figure 26-47 Track Bar properties
Progress control properties
Progress control properties are shown in Figure 26-48.
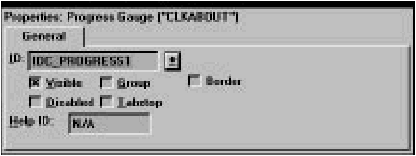
[Figure 26-48 Progress control properties
Up/Down control properties
Up/Down controls have two pages of properties. The General
properties are shown in Figure 26-49.
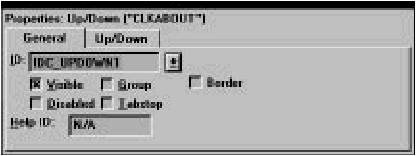
[Figure 26-49 Up/Down control General properties
Up/Down properties are shown in Figure 26-50.
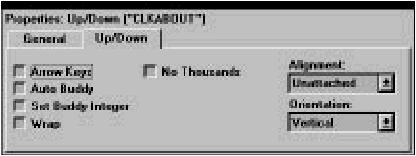
[Figure 26-50 Up/Down properties
This ResourceStudio reference chapter contains details about the
commands and options found in the Menu editor, the Accelerator
Table editor and the String Table editor. For an introduction to
ResourceStudio, see Chapter 7, "Adding Look and Feel with
Resources."
Menu Editor
The Menu editor (see Figure 27-1) is used to edit menu resources.
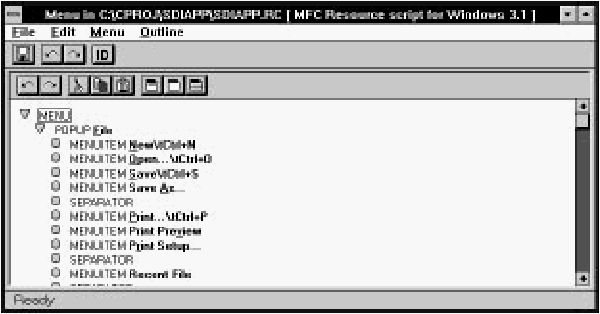
[Figure 27-1 The Menu editor
The Menu editor displays the menu as a hierarchy of POPUPs, each
of which may contain MENUITEMs, SEPARATORs, and other
POPUPs. Items are added to the menu with commands in the Menu
menu (or by clicking buttons in the toolbar), and are rearranged with
commands in the Outline menu or by dragging with the mouse. The
menu may be tested as a pull-down or pop-up menu at any time in
the Test menu window, which is opened automatically when the
Menu editor is started. For more information about using the Menu
editor, see Chapter 7, "Adding Look and Feel with Resources."
File menu commands
The File menu (see Figure 27-2) contains commands to save the
resource file, to edit resource IDs, and to perform other
miscellaneous functions.
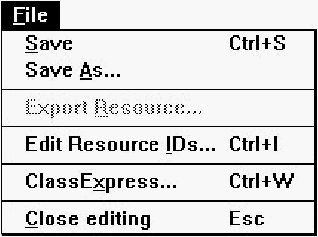
[Figure 27-2 Menu editor File menu
Save
Saves the resource file. If the file is unnamed, this command
executes Save As.
Save As
Opens a Windows File Save As dialog box, which can be used to
save the resource file under a new name.
Edit Resource IDs
Opens the Resource ID Browser dialog box, used to browse and
modify resource IDs. For more information about managing resource
IDs and using the Resource ID Browser dialog box, see "Managing
Resource IDs," in Chapter 7, "Adding Look and Feel with Resources."
ClassExpress
Runs ClassExpress, passing the filename of the resource file as the
project that ClassExpress should open. This command is only
enabled if the Menu editor is running in the right pane of the
Browser window.
Close Editing
Closes the Menu editor.
Edit menu commands
The Edit menu (see Figure 27-3) contains standard editing
commands. You can undo operations, and can cut, copy, paste, and
delete individual MENUITEMs or entire POPUPs.
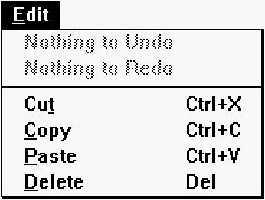
[Figure 27-3 Menu editor Edit menu
Undo
Undoes the last Menu editor operation.
Redo
Redoes the last Menu editor operation that was undone.
Cut
Copies the selected item to the Clipboard, then deletes it from the
menu.
Copy
Copies the selected item to the Clipboard.
Paste
Copies the item in the Clipboard into the menu.
Delete
Deletes the selected item from the menu.
Menu menu commands
The Menu menu (see Figure 27-4) contains commands to add items
to the menu. You can insert individual MENUITEMs, POPUPs, and
SEPARATORs, and you can insert predefined File, Edit, and Help
menus. An additional command lets you check for duplicate
command IDs.
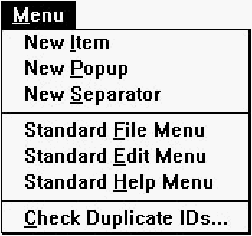
[Figure 27-4 Menu editor Menu menu
Before adding a new item, select the item after which the new item
should be inserted.
New Item
Adds a new MENUITEM after the selected item.
New Popup
Adds a new POPUP after the selected item.
New Separator
Adds a new SEPARATOR after the selected item.
Standard File Menu
Adds a standard File menu after the selected item.
Standard Edit Menu
Adds a standard Edit menu after the selected item.
Standard Help Menu
Adds a standard Help menu after the selected item.
Check Duplicate IDs
Checks the menu for duplicate command IDs. If any two items have
the same ID, the Resolve Duplicate IDs dialog box opens (see
Figure 27-5).
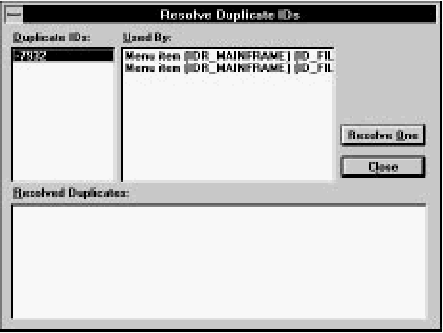
[Figure 27-5 Resolve Duplicate IDs dialog box
To resolve duplicate IDs, first click on a number in the Duplicate IDs
list. The Used By listbox displays the items that are using that ID.
Click on Resolve One to automatically assign new IDs (with unique
values) to the items.
Outline menu commands
The Outline menu (see Figure 27-6) is used to rearrange the menu.
You can move items within their current hierarchical level, or you
can promote or demote items from one level to another.
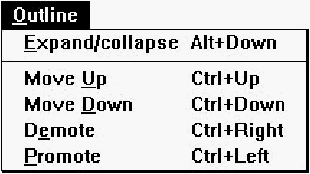
[Figure 27-6 Menu editor Outline menu
Expand/Collapse
Expands or collapses (depending on the present state) the view of
the contents of a POPUP item. While a POPUP is collapsed, the
items within a POPUP are not shown, and the triangle to the left of
the POPUP points rightward. While expanded, the items within the
POPUP are shown and the triangle points downward. You can also
execute this command by clicking on the triangle next to the
POPUP.
Move Up
Exchanges the selected item with the previous item in the same level
of the hierarchy.
Move Down
Exchanges the selected item with the next item in the same level of
the hierarchy.
Demote
If the previous item in the same level of the hierarchy is a POPUP,
moves the selected item into the POPUP.
Promote
If the selected item is within a POPUP, moves the item out of the
POPUP to the same hierarchical level as the POPUP.
Toolbar commands
The Menu editor toolbar (see Figure 27-7) provides quick access to
frequently used menu commands.

[Figure 27-7 Menu editor toolbar
- Undo:
- Same as choosing Undo from the Edit menu. Right-click on
this button to undo multiple operations at once.
- Redo:
- Same as choosing Redo from the Edit menu. Right-click on
this button to redo multiple operations at once.
- Cut:
- Same as choosing Cut from the Edit menu.
- Copy:
- Same as choosing Copy from the Edit menu.
- Paste:
- Same as choosing Paste from the Edit menu.
- New Item:
- Same as choosing New Item from the Menu menu.
- New Popup:
- Same as choosing New Popup from the Menu menu.
- New Separator:
- Same as choosing New Separator from the Menu
menu.
Popup item properties
POPUP item properties are shown in Figure 27-8.
[Figure 27-8 Popup properties
Menu item properties
MENUITEMs and SEPARATORs have two pages of properties. The
General properties are shown in Figure 27-9.
[Figure 27-9 Menu item / separator General properties
A SEPARATOR would have the Separator box checked.
The Connect properties (see Figure 27-10) only apply to
MENUITEMs.
[Figure 27-10 Menu item Connect properties
The Prompt textbox is used to set help text for the item. The Hotkey
field displays the accelerator key combination associated with the
item. For more information about how to create menus with help
text and accelerators, see Chapter 7, "Adding Look and Feel with
Resources."
Accelerator Table Editor
The Accelerator Table editor (see Figure 27-11) is used to edit
accelerator tables.
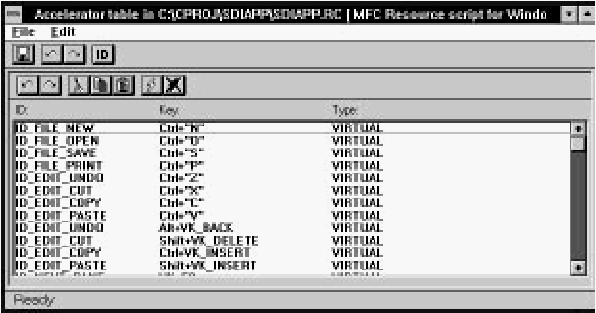
[Figure 27-11 The Accelerator Table editor
The Accelerator Table editor displays a list of accelerator IDs and
associated key combinations. To create and delete accelerators, use
the New and Delete commands in the Edit menu. You can set the
ID and key combination of an accelerator in the Property Sheet.
Accelerators are usually associated with menu items, and you can
create accelerators directly from the Menu editor. For more
information, see Chapter 7, "Adding Look and Feel with Resources."
File menu commands
The File menu (see Figure 27-12) contains commands to save the
resource file, to edit resource IDs, and to perform other
miscellaneous functions.
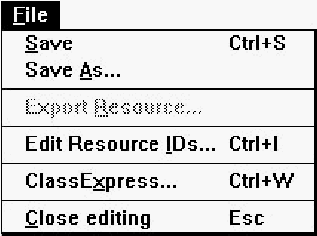
[Figure 27-12 Accelerator Table editor File menu
Save
Saves the resource file. If the file is unnamed, this command
executes Save As.
Save As
Opens a Windows File Save As dialog box, which can be used to
save the resource file under a new name.
Edit Resource IDs
Opens the Resource ID Browser dialog box, used to browse and
modify resource IDs. For more information about managing resource
IDs and using the Resource ID Browser dialog box, see "Managing
Resource IDs," in Chapter 7, "Adding Look and Feel with Resources."
ClassExpress
Runs ClassExpress, passing the filename of the resource file as the
project that ClassExpress should open. This command is only
enabled if the Accelerator Table editor is running in the right pane of
the Browser window.
Close Editing
Closes the Accelerator Table editor.
Edit menu commands
The Edit menu (see Figure 27-13) contains standard editing
commands. You can undo operations, and can cut, copy, paste, add,
and delete accelerators.
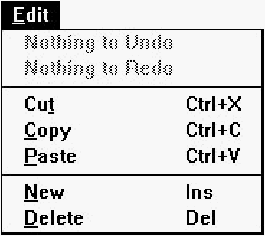
[Figure 27-13 Accelerator Table editor Edit menu
Undo
Undoes the last Accelerator Table editor operation.
Redo
Redoes the last Accelerator Table editor operation that was undone.
Cut
Copies the selected accelerator to the Clipboard, then deletes it from
the table.
Copy
Copies the selected accelerator to the Clipboard.
Paste
Copies the accelerator in the Clipboard into the table.
New
Adds a new accelerator to the table.
Delete
Deletes the selected accelerator from the table.
Toolbar commands
The Accelerator Table editor toolbar (see Figure 27-14) provides
quick access to frequently used menu commands.

[Figure 27-14 Accelerator Table editor toolbar
- Undo:
- Same as choosing Undo from the Edit menu. Right-click on
this button to undo multiple operations at once.
- Redo:
- Same as choosing Redo from the Edit menu. Right-click on
this button to redo multiple operations at once.
- Cut:
- Same as choosing Cut from the Edit menu.
- Copy:
- Same as choosing Copy from the Edit menu.
- Paste:
- Same as choosing Paste from the Edit menu.
- New:
- Same as choosing New from the Edit menu.
- Delete:
- Same as choosing Delete from the Edit menu.
Accelerator properties
Accelerator properties are shown in Figure 27-15.
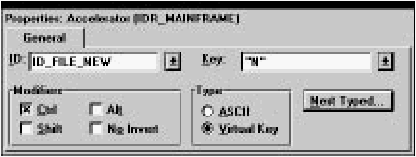
[Figure 27-15 Accelerator properties
The accelerator key combination can be set by clicking on Next
Typed, then pressing the key combination. The Key, Type, and
Modifiers options are set automatically.
String Table Editor
The String Table editor (see Figure 27-16) is used to edit string
tables.
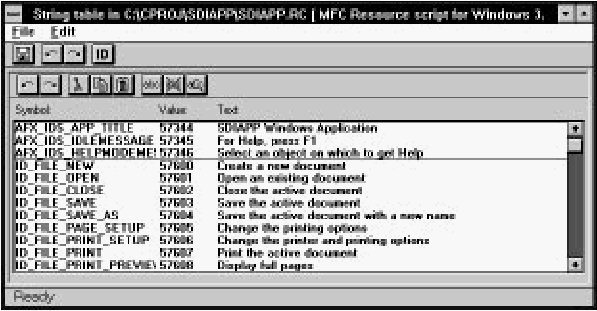
[Figure 27-16 The String Table editor
The String Table editor displays a list of IDs and associated text. To
create and delete strings, use the New and Delete commands in the
Edit menu. You can set the ID and text of a string in the Property
Sheet.
Although they can be used for any purpose, strings are commonly
used to display information about menu commands. You can create
strings associated with menu items directly from the Menu editor.
For more information, see Chapter 7, "Adding Look and Feel with
Resources."
File menu commands
The File menu (see Figure 27-17) contains commands to save the
resource file, to edit resource IDs, and to perform other
miscellaneous functions.

[Figure 27-17 String Table editor File menu
Save
Saves the resource file. If the file is unnamed, this command
executes Save As.
Save As
Opens a Windows File Save As dialog box, which can be used to
save the resource file under a new name.
Edit Resource IDs
Opens the Resource ID Browser dialog box, used to browse and
modify resource IDs. For more information about managing resource
IDs and using the Resource ID Browser dialog box, see "Managing
Resource IDs," in Chapter 7, "Adding Look and Feel with Resources."
ClassExpress
Runs ClassExpress, passing the filename of the resource file as the
project that ClassExpress should open. This command is only
enabled if the String Table editor is running in the right pane of the
Browser window.
Close Editing
Closes the String Table editor.
Edit menu commands
The Edit menu (see Figure 27-18) contains standard editing
commands. You can undo operations, and can cut, copy, paste, add,
and delete strings. The find commands can help you to locate
particular strings in large tables.
[Figure 27-18 String Table editor Edit menu
Undo
Undoes the last String Table editor operation.
Redo
Redoes the last String Table editor operation that was undone.
Cut
Copies the selected string to the Clipboard, then deletes it from the
table.
Copy
Copies the selected string to the Clipboard.
Paste
Copies the string in the Clipboard into the table.
New
Adds a new string to the table.
Delete
Deletes the selected string from the table.
Find
Opens the Find String dialog box (see Figure 27-19). This dialog
box is used to locate a string containing particular text.

[Figure 27-19 Find String dialog box
Type the search text into the Find What textbox. Select Match Case
to make the search case sensitive. When you click OK, the String
Table editor locates the first occurrence of the text in the string table.
Find Again
Finds the next occurrence of the search text, starting from the
currently selected string.
Toolbar commands
The String Table editor toolbar (see Figure 27-20) provides quick
access to frequently used menu commands.

[Figure 27-20 String Table editor toolbar
- Undo:
- Same as choosing Undo from the Edit menu. Right-click on
this button to undo multiple operations at once.
- Redo:
- Same as choosing Redo from the Edit menu. Right-click on
this button to redo multiple operations at once.
- Cut:
- Same as choosing Cut from the Edit menu.
- Copy:
- Same as choosing Copy from the Edit menu.
- Paste:
- Same as choosing Paste from the Edit menu.
- New:
- Same as choosing New from the Edit menu.
- Delete:
- Same as choosing Delete from the Edit menu.
- Find:
- Same as choosing Find from the Edit menu.
String properties
String properties are shown in Figure 27-21.
[Figure 27-21 String properties
Enter the string in the Text textbox. You can insert tabs and carriage
returns by typing Ctrl+Tab and Ctrl+Enter, respectively. You can also
use \t to represent a tab and \n for a carriage return.
This ResourceStudio reference chapter contains details about the
commands and options found in the Bitmap editor, the Cursor
editor, the Icon editor, and the Font editor. For an introduction to
ResourceStudio, see Chapter 7, "Adding Look and Feel with
Resources."
This chapter shows the editors running in standalone windows. If
you edit a binary resource directly (that is, if you open or create it by
choosing Open from the Shell window's File menu), the File menu
you will see will not match those shown below, and the ID and File
fields in the Property sheet will be disabled.
The Bitmap editor (see Figure 28-1) is used to edit bitmaps.
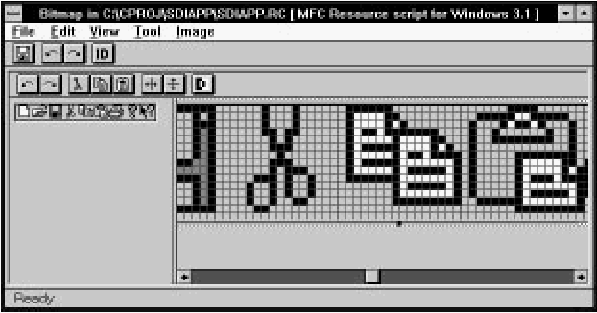
[Figure 28-1 The Bitmap editor
The Bitmap editor displays two views of the bitmap. Each view can
be independently zoomed; you may wish to keep one view at
normal size for reference, and one at a higher magnification for
easier drawing. You can draw in either view, though.
Drawing tools are selected by choosing commands in the Tool
menu, or by clicking on the tool in the toolbox. Colors are selected
in the palette section of the toolbox. The View menu is used to
zoom the views and to turn on the grid. Simple image manipulation
functions are available in the Image menu.
For more information about using the Bitmap editor, see Chapter 7,
"Adding Look and Feel with Resources."
BitmapExpress
As a new bitmap is created, the BitmapExpress dialog box opens
(see Figure 28-2). This dialog box is used to set initial bitmap
properties.
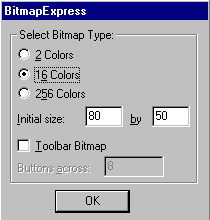
[Figure 28-2 BitmapExpress
Select bitmap type
Specifies the number of colors in the bitmap (2, 16, or 256).
Initial size
Specifies the bitmap width and height.
Toolbar bitmap
Select this option if the bitmap will be used as the toolbar in an MFC
application. If this option is selected, the number of colors is set to
16 and the initial size is determined by the value of the Buttons
across option.
Buttons across
Specifies the number of buttons for toolbar bitmaps. The bitmap's
initial size is changed to accommodate the number of buttons you
request. Each button is 15 pixels high and 16 pixels across.
File menu commands
The File menu (see Figure 28-3) contains commands to save the
resource file, to edit resource IDs, and to perform other
miscellaneous functions.
[Figure 28-3 Bitmap editor File menu
- Save
- Saves the resource file. If the file is unnamed, this command
executes Save As.
- Save As
- Opens a Windows File Save As dialog box, which can be used to
save the resource file under a new name.
- Export Resource
- Opens a dialog box which can be used to save the bitmap in a
separate file.
- Edit Resource IDs
- Opens the Resource ID Browser dialog box, used to browse and
modify resource IDs. For more information about managing resource
IDs and using the Resource ID Browser dialog box, see "Managing
Resource IDs," in Chapter 7, "Adding Look and Feel with Resources."
- ClassExpress
- Runs ClassExpress, passing the filename of the resource file as the
project that ClassExpress should open. This command is only
enabled if the Bitmap editor is running in the right pane of the
Browser window.
- Class Editing
- Closes the Bitmap editor.
Edit menu commands
The Edit menu (see Figure 28-4) contains standard editing
commands. You can undo operations, and can cut, copy, paste, and
clear rectangular regions of the bitmap. To select a region to cut,
copy, or clear, select the Selection tool from the toolbox or from the
Tool menu, then drag a box around the region.

[Figure 28-4 Bitmap editor Edit menu
- Undo
- Undoes the last Bitmap editor operation.
- Redo
- Redoes the last undone Bitmap editor operation.
- Cut
- Copies the selected region to the Clipboard, then clears the region in
the bitmap, filling it with the current background color.
- Copy
- Copies the selected region to the Clipboard.
- Paste
- Copies the region in the Clipboard to the bitmap. The new region is
initially placed in the upper left corner of the bitmap, but may be
dragged to a new location.
- Clear
- Clears the selected region, filling it with the current background
color. If no region is selected, the entire bitmap is cleared.
View menu commands
The View menu (see Figure 28-5) contains commands to set view
magnification and to set grid options.
[Figure 28-5 Bitmap editor View menu
- Zoom 1
- Sets the current view's zoom factor to 1 (normal size).
- Zoom 2
- Sets the current view's zoom factor to 2 (twice normal size).
- Zoom 4
- Sets the current view's zoom factor to 4 (four times normal size).
- Zoom 8
- Sets the current view's zoom factor to 8 (eight times normal size).
- Grid
- Turns on the grid. The grid is only visible in views where the zoom
factor is 4 or 8.
- Button Grid
- Turns on the button grid. The button grid is used to identify the
boundaries of toolbar buttons when you are creating a toolbar
bitmap.
- Grid Settings
- Opens the Grid Settings dialog box (see Figure 28-6), used to set
grid options.
[Figure 28-6 Grid Settings dialog box
Pixel grid
Turns on display of the pixel grid.
Button grid
Turns on display of the button grid. The spacing of points on the
button grid can be specified in the Width and Height fields; defaults
for an MFC application toolbar are 16 pixels wide by 15 pixels high.
Tool menu commands
The Tool menu (see Figure 28-7) lets you select drawing tools.
While over the drawing area, the cursor changes shape to indicate
the currently selected tool. To draw, click or click and drag (as
appropriate) in the drawing area. Using the right button rather than
the left reverses the roles of foreground and background colors.
Drawing tools can also be selected in the toolbox. For more
information about drawing operations in the Bitmap editor, see
Chapter 7, "Adding Look and Feel with Resources."

[Figure 28-7 Bitmap editor Tool menu
- Brush
- Selects the brush tool.
- Erase
- Selects the eraser tool.
- Eye Drop
- Selects the eye-dropper tool. Use this tool to select foreground and
background colors directly from the image.
- Line
- Selects the straight line tool.
- Text
- Selects the text tool.
- Oval
- Selects the hollow oval tool.
- Oval (Filled)
- Selects the solid oval tool.
- Paint
- Selects the paint can (flood fill) tool.
- Pen
- Selects the pen (pencil) tool.
- Rect
- Selects the hollow rectangle tool.
- Rect (Filled)
- Selects the solid rectangle tool.
- Round Rect
- Selects the hollow rounded rectangle tool.
- Round Rect (Filled)
- Selects the solid rounded rectangle tool.
- Select
- Selects the Selection tool. Use this tool to select rectangular regions
for cut, copy, clear, drag, flip, and invert operations.
- Spray
- Selects the spray brush (airbrush) tool.
Image menu commands
Commands in the Image menu (see Figure 28-8) perform simple
image manipulation functions. To select a region to flip or invert,
select the Selection tool from the toolbox or from the Tool menu,
then drag a box around the region. If no region is selected, these
commands operate on the entire bitmap.

[Figure 28-8 Bitmap editor Image menu
- Flip Vertically
- Flips the selected region vertically.
- Flip Horizontally
- Flips the selected region horizontally.
- Invert Colors
- Inverts the colors in the selected region (for example, in a 16 color
bitmap, color 0 is replaced with color 15, color 1 is replaced with
color 14, and so on).
Toolbar commands
The Bitmap editor toolbar (see Figure 28-9) provides quick access to
frequently used menu commands.

[Figure 28-9 Bitmap editor toolbar
- Undo:
- Same as choosing Undo from the Edit menu. Right-click on
this button to undo multiple operations at once.
- Redo:
- Same as choosing Redo from the Edit menu. Right-click on
this button to redo multiple operations at once.
- Cut:
- Same as choosing Cut from the Edit menu.
- Copy:
- Same as choosing Copy from the Edit menu.
- Paste:
- Same as choosing Paste from the Edit menu.
- Flip horizontally:
- Same as choosing Flip Horizontally from the
Image menu.
- Flip vertically:
- Same as choosing Flip Vertically from the Image
menu.
- Invert colors:
- Same as choosing Invert Colors from the Image
menu.
Toolbox
The Bitmap editor toolbox (see Figure 28-10) provides quick access
to the tools available in the Tool menu. The toolbox also lets you
select foreground and background colors, brush types, background
pattern, and line type.
For more information on the Bitmap editor toolbox, see Chapter 7,
"Adding Look and Feel with Resources."
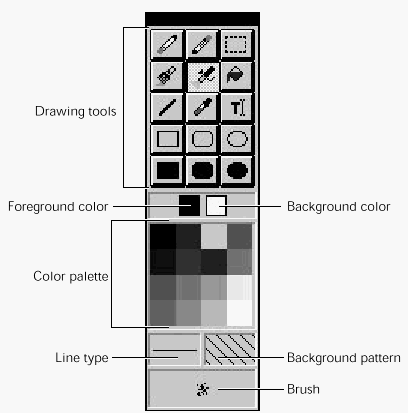
[Figure 28-10 Bitmap editor toolbox
Bitmap properties
Bitmaps have two pages of properties. The General properties are
shown in Figure 28-11.
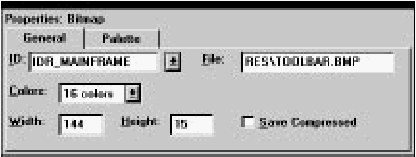
[Figure 28-11 Bitmap General properties
Specify a filename for the bitmap in the File textbox. The Width and
Height of the bitmap can be changed here, or the bitmap can be
resized in the main display by dragging one of the handles along the
bitmap edge.
Palette properties of a bitmap are shown in Figure 28-12.
[Figure 28-12 Bitmap Palette properties
Foreground and background drawing colors can be set by
respectively clicking and right-clicking colors in this display. Double-clicking
a color opens the Custom Color dialog box, which can be
used to change the color's red, green, and blue components.
The Cursor editor (see Figure 28-13) is used to edit cursors.

[Figure 28-13 The Cursor editor
Since cursors are much like bitmaps, the Cursor editor behaves much
like the Bitmap editor (see "Bitmap Editor," earlier in this chapter).
The distinguishing characteristics of cursors are as follows:
- A cursor resource may contain more than one cursor.
ResourceStudio lets you create up to four different
cursors in a cursor resource. The four possible cursor
types have predefined sizes and color depths.
- In addition to normal colors, cursors can have areas
which are tagged "Transparent" and "Inverted." In
Transparent areas, the background screen color shows
through the cursor. In Inverted areas, the background
screen color is bitwise-complemented.
- Cursors have a "hotspot," a particular pixel which is used
by Windows to map the cursor to a screen location.
The Cursor editor displays two views of the cursor. Each view can be
independently zoomed; you may wish to keep one view at normal
size for reference, and one at a higher magnification for easier
drawing. You can draw in either view, though.
Drawing tools are selected by choosing commands in the Tool
menu, or by clicking on the tool in the toolbox. Colors are selected
in the palette section of the toolbox. The View menu is used to
zoom the views and to turn on the grid. Simple image manipulation
functions are available in the Image menu. The cursor hotspot is set
by choosing Set Hotspot from the Image menu.
File menu commands
The File menu (see Figure 28-14) contains commands to save the
resource file, to edit resource IDs, and to perform other
miscellaneous functions.
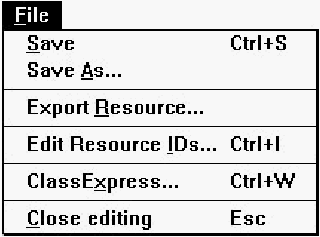
[Figure 28-14 Cursor editor File menu
- Save
- Saves the resource file. If the file is unnamed, this command
executes Save As.
- Save As
- Opens a Windows File Save As dialog box, which can be used to
save the resource file under a new name.
- Export Resource
- Opens a dialog box which can be used to save the cursor resource
in a separate file.
- Export Resource IDs
- Opens the Resource ID Browser dialog box, used to browse and
modify resource IDs. For more information about managing resource
IDs and using the Resource ID Browser dialog box, see "Managing
Resource IDs," in Chapter 7, "Adding Look and Feel with Resources."
- ClassExpress
- Runs ClassExpress, passing the filename of the resource file as the
project that ClassExpress should open. This command is only
enabled if the Cursor editor is running in the right pane of the
Browser window.
- Close Editing
- Closes the Cursor editor.
Edit menu commands
The Edit menu (see Figure 28-15) contains standard editing
commands. You can undo operations, and can cut, copy, paste, and
clear rectangular regions of the cursor. To select a region to cut,
copy, or clear, select the Selection tool from the toolbox or from the
Tool menu, then drag a box around the region.
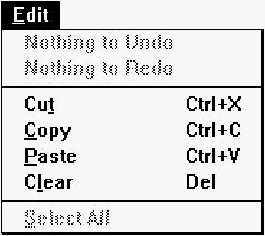
[Figure 28-15 Cursor editor Edit menu
- Undo
- Undoes the last Cursor editor operation.
- Redo
- Redoes the last undone Cursor editor operation.
- Cut
- Copies the selected region to the Clipboard, then clears the region in
the cursor, filling it with the current background color.
- Copy
- Copies the selected region to the Clipboard.
- Paste
- Copies the region in the Clipboard to the cursor. The new region is
initially placed in the upper-left corner of the cursor, but may be
dragged to a new location.
- Clear
- Clears the selected region, filling it with the current background
color. If no region is selected, the entire cursor is cleared.
- Select All
- Select all cursor regions.
View menu commands
The View menu (see Figure 28-16) contains commands to set view
magnification and to set grid options.
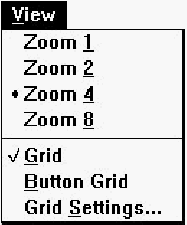
[Figure 28-16 Cursor editor View menu
- Zoom 1
- Sets the current view's zoom factor to 1 (normal size).
- Zoom 2
- Sets the current view's zoom factor to 2 (twice normal size).
- Zoom 4
- Sets the current view's zoom factor to 4 (four times normal size).
- Zoom 8
- Sets the current view's zoom factor to 8 (eight times normal size).
- Grid
- Turns on the grid. The grid is only visible in views where the zoom
factor is 4 or 8.
- Button Grid
- Turns on the button grid.
- Grid Settings
- Opens the Grid Settings dialog box (see Figure 28-17), used to set
grid options.
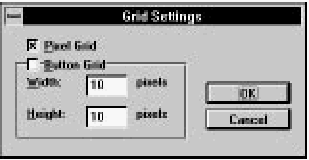
[Figure 28-17 Grid Settings dialog box
Pixel grid
Turns on display of the pixel grid.
Button grid
Turns on display of the button grid. The spacing of points on the
button grid can be specified in the Width and Height fields.
Tool menu commands
The Tool menu (see Figure 28-18) lets you select drawing tools.
While over the drawing area, the cursor changes shape to indicate
the currently selected tool. To draw, click or click and drag (as
appropriate) in the drawing area. Using the right button rather than
the left reverses the roles of foreground and background colors.
Drawing tools can also be selected in the toolbox. Drawing
operations are identical to those in the Bitmap editor.
For more information, see Chapter 7, "Adding Look and Feel with
Resources."
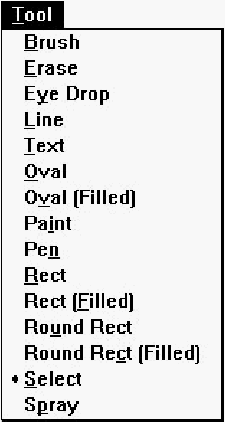
[Figure 28-18 Cursor editor Tool menu
- Brush
- Selects the brush tool.
- Erase
- Selects the eraser tool.
- Eye Drop
- Selects the eye-dropper tool. Use this tool to select foreground and
background colors directly from the image.
- Line
- Selects the straight line tool.
- Text
- Selects the text tool.
- Oval
- Selects the hollow oval tool.
- Oval (Filled)
- Selects the solid oval tool.
- Paint
- Selects the paint can (flood fill) tool.
- Pen
- Selects the pen (pencil) tool.
- Rect
- Selects the hollow rectangle tool.
- Rect (Filled)
- Selects the solid rectangle tool.
- Round Rect
- Selects the hollow rounded rectangle tool.
- Round Rect (Filled)
- Selects the solid rounded rectangle tool.
- Select
- Selects the Selection tool. Use this tool to select rectangular regions
for cut, copy, clear, drag, flip, and invert operations.
- Spray
- Selects the spray brush (airbrush) tool.
Image menu commands
Commands in the Image menu (see Figure 28-19) perform simple
image manipulation functions. To select a region to flip or invert,
select the Selection tool from the toolbox or from the Tool menu,
then drag a box around the region. If no region is selected, these
commands operate on the entire cursor. This menu also contains a
command to set the cursor hotspot.

[Figure 28-19 Cursor editor Image menu
- Flip Vertically
- Flips the selected region vertically.
- Flip Horizontally
- Flips the selected region horizontally.
- Invert Colors
- Inverts the colors in the selected region (for example, in a 16 color
cursor, color 0 is replaced with color 15, color 1 is replaced with
color 14, and so on).
- Set Hotspot
- Sets the cursor hotspot. You are prompted to click on the image at
the location of the hotspot.
Toolbar commands
The Cursor editor toolbar (see Figure 28-20) provides quick access to
frequently used menu commands.

[Figure 28-20 Cursor editor toolbar
- Undo:
- Same as choosing Undo from the Edit menu. Right-click on
this button to undo multiple operations at once.
- Redo:
- Same as choosing Redo from the Edit menu. Right-click on
this button to redo multiple operations at once.
- Cut:
- Same as choosing Cut from the Edit menu.
- Copy:
- Same as choosing Copy from the Edit menu.
- Paste:
- Same as choosing Paste from the Edit menu.
- Flip horizontally:
- Same as choosing Flip Horizontally from the
Image menu.
- Flip vertically:
- Same as choosing Flip Vertically from the Image
menu.
- Invert colors:
- Same as choosing Invert Colors from the Image
menu.
Toolbox
The Cursor editor toolbox (see Figure 28-21) provides quick access
to the tools available in the Tool menu. The toolbox also lets you
select foreground and background colors, brush types, background
pattern, and line type.
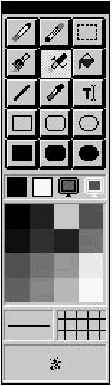
[Figure 28-21 Cursor editor toolbox
The toolbox is slightly different from the toolbox used in the Bitmap
editor. In addition to the usual color palette, two extra colors are
available: Transparent and Inverted. Transparent is used to draw
areas in the cursor where the background screen color shows
through. Inverted is used to draw areas in the cursor where the
background screen color is bitwise-complemented.
Other than these two additions, the Cursor editor toolbox is identical
to the Bitmap editor toolbox. For more information on the Bitmap
editor toolbox, see Chapter 7, "Adding Look and Feel with
Resources."
Cursor properties
Cursor properties are shown in Figure 28-22.
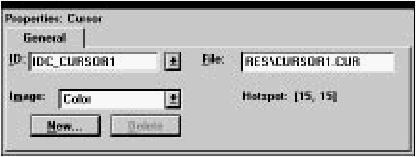
[Figure 28-22 Cursor properties
Specify a filename for the cursor resource in the File textbox. The
cursor hotspot coordinates are displayed below the File textbox. The
Image field specifies which of the cursors in the cursor resource is
currently displayed. Click on New to create a new cursor in the
current resource, or click on Delete to delete the current cursor from
the resource. Note that you cannot delete the last cursor from the
resource.
The Icon editor (see Figure 28-23) is used to edit icons.
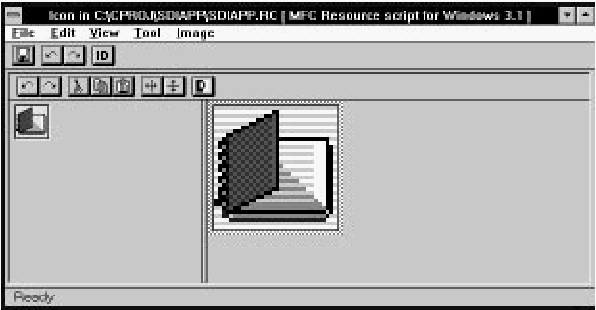
[Figure 28-23 The Icon editor
Since icons are much like bitmaps, the Icon editor behaves much
like the Bitmap editor (see "Bitmap Editor," earlier in this chapter).
The distinguishing characteristics of icons are as follows:
- An icon resource may contain more than one icon.
ResourceStudio lets you create up to twelve different
icons in an icon resource. You can create 32 by 16, 32 by
32, 16 by 16, and 64 by 64 pixel icons in 2, 8, 16, and 256
colors.
- In addition to normal colors, icons can have areas which
are tagged "Transparent" and "Inverted." In Transparent
areas, the background screen color shows through the
icon. In Inverted areas, the background screen color is
bitwise-complemented.
The Icon editor displays two views of the icon. Each view can be
independently zoomed; you may wish to keep one view at normal
size for reference, and one at a higher magnification for easier
drawing. You can draw in either view, though.
Drawing tools are selected by choosing commands in the Tool
menu, or by clicking on the tool in the toolbox. Colors are selected
in the palette section of the toolbox. The View menu is used to
zoom the views and to turn on the grid. Simple image manipulation
functions are available in the Image menu.
File menu commands
The File menu (see Figure 28-24) contains commands to save the
resource file, to edit resource IDs, and to perform other
miscellaneous functions.
[Figure 28-24 Icon editor File menu
- Save
- Saves the resource file. If the file is unnamed, this command
executes Save As.
- Save As
- Opens a Windows File Save As dialog box, which can be used to
save the resource file under a new name.
- Export Resource
- Opens a dialog box which can be used to save the icon resource in
a separate file.
- Edit Resource IDs
- Opens the Resource ID Browser dialog box, used to browse and
modify resource IDs. For more information about managing resource
IDs and using the Resource ID Browser dialog box, see "Managing
Resource IDs," in Chapter 7, "Adding Look and Feel with Resources."
- ClassExpress
- Runs ClassExpress, passing the filename of the resource file as the
project that ClassExpress should open. This command is only
enabled if the Icon editor is running in the right pane of the Browser
window.
- Close Editing
- Closes the Icon editor.
Edit menu commands
The Edit menu (see Figure 28-25) contains standard editing
commands. You can undo operations, and can cut, copy, paste, and
clear rectangular regions of the icon. To select a region to cut, copy,
or clear, select the Selection tool from the toolbox or from the Tool
menu, then drag a box around the region.
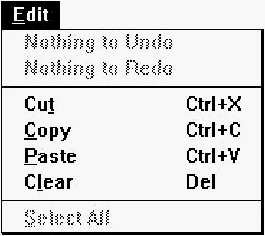
[Figure 28-25 Icon editor Edit menu
- Undo
- Undoes the last Icon editor operation.
- Redo
- Redoes the last undone Icon editor operation.
- Cut
- Copies the selected region to the Clipboard, then clears the region in
the icon, filling it with the current background color.
- Copy
- Copies the selected region to the Clipboard.
- Paste
- Copies the region in the Clipboard to the icon. The new region is
initially placed in the upper-left corner of the icon, but may be
dragged to a new location.
- Clear
- Clears the selected region, filling it with the current background
color. If no region is selected, the entire icon is cleared.
- Select All
- Select all icon regions.
View menu commands
The View menu (see Figure 28-26) contains commands to set view
magnification and to set grid options.
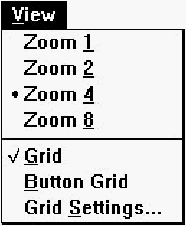
[Figure 28-26 Cursor editor View menu
- Zoom 1
- Sets the current view's zoom factor to 1 (normal size).
- Zoom 2
- Sets the current view's zoom factor to 2 (twice normal size).
- Zoom 4
- Sets the current view's zoom factor to 4 (four times normal size).
- Zoom 8
- Sets the current view's zoom factor to 8 (eight times normal size).
- Grid
- Turns on the grid. The grid is only visible in views where the zoom
factor is 4 or 8.
- Button Grid
- Turns on the button grid.
- Grid Settings
- Opens the Grid Settings dialog box (see Figure 28-27), used to set
grid options.
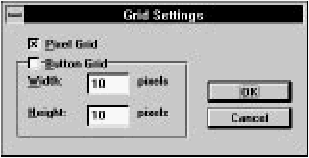
[Figure 28-27 Grid Settings dialog box
Pixel grid
Turns on display of the pixel grid.
Button grid
Turns on display of the button grid. The spacing of points on the
button grid can be specified in the Width and Height fields.
Tool menu commands
The Tool menu (see Figure 28-28) lets you select drawing tools.
While over the drawing area, the cursor changes shape to indicate
the currently selected tool. To draw, click or click and drag (as
appropriate) in the drawing area. Using the right button rather than
the left reverses the roles of foreground and background colors.
Drawing tools can also be selected in the toolbox. Drawing
operations are identical to those in the Bitmap editor.
For more information, see Chapter 7, "Adding Look and Feel with
Resources."

[Figure 28-28 Icon editor Tool menu
- Brush
- Selects the brush tool.
- Erase
- Selects the eraser tool.
- Eye Drop
- Selects the eye-dropper tool. Use this tool to select foreground and
background colors directly from the image.
- Line
- Selects the straight line tool.
- Text
- Selects the text tool.
- Oval
- Selects the hollow oval tool.
- Oval (Filled)
- Selects the solid oval tool.
- Paint
- Selects the paint can (flood fill) tool.
- Pen
- Selects the pen (pencil) tool.
- Rect
- Selects the hollow rectangle tool.
- Rect (Filled)
- Selects the solid rectangle tool.
- Round Rect
- Selects the hollow rounded rectangle tool.
- Round Rect (Filled)
- Selects the solid rounded rectangle tool.
- Select
- Selects the Selection tool. Use this tool to select rectangular regions
for cut, copy, clear, drag, flip, and invert operations.
- Spray
- Selects the spray brush (airbrush) tool.
Image menu commands
Commands in the Image menu (see Figure 28-29) perform simple
image manipulation functions. To select a region to flip or invert,
select the Selection tool from the toolbox or from the Tool menu,
then drag a box around the region. If no region is selected, these
commands operate on the entire icon.

[Figure 28-29 Icon editor Image menu
- Flip Vertically
- Flips the selected region vertically.
- Flip Horizontally
- Flips the selected region horizontally.
- Invert Colors
- Inverts the colors in the selected region (for example, in a 16 color
icon, color 0 is replaced with color 15, color 1 is replaced with color
14, and so on).
Toolbar commands
The Icon editor toolbar (see Figure 28-30) provides quick access to
frequently-used menu commands.

[Figure 28-30 Icon editor toolbar
- Undo:
- Same as choosing Undo from the Edit menu. Right-click on
this button to undo multiple operations at once.
- Redo:
- Same as choosing Redo from the Edit menu. Right-click on
this button to redo multiple operations at once.
- Cut:
- Same as choosing Cut from the Edit menu.
- Copy:
- Same as choosing Copy from the Edit menu.
- Paste:
- Same as choosing Paste from the Edit menu.
- Flip horizontally:
- Same as choosing Flip Horizontally from the
Image menu.
- Flip vertically:
- Same as choosing Flip Vertically from the Image
menu.
- Invert colors:
- Same as choosing Invert Colors from the Image
menu.
Toolbox
The Icon editor toolbox (see Figure 28-31) provides quick access to
the tools available in the Tool menu. The toolbox also lets you select
foreground and background colors, brush types, background
pattern, and line type.
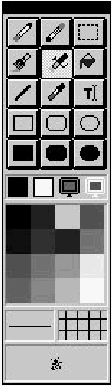
[Figure 28-31 Icon editor toolbox
The toolbox is slightly different from the toolbox used in the Bitmap
editor. In addition to the usual color palette, two extra colors are
available: Transparent and Inverted. Transparent is used to draw
areas in the cursor where the background screen color shows
through. Inverted is used to draw areas in the cursor where the
background screen color is bitwise-complemented.
Other than these two additions, the Icon editor toolbox is identical to
the Bitmap editor toolbox. For more information on the Bitmap
editor toolbox, see Chapter 7, "Adding Look and Feel with
Resources."
Icon properties
Icon properties are shown in Figure 28-32.
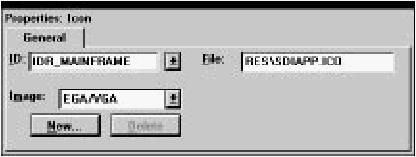
[Figure 28-32 Icon properties
Specify a filename for the icon resource in the File textbox. The
Image field specifies which of the icons in the icon resource is
currently displayed. Click on New to create a new icon in the current
resource, or click on Delete to delete the current icon from the
resource. Note that you cannot delete the last icon from the
resource.
The Font editor (see Figure 28-33) is used to edit font resources.
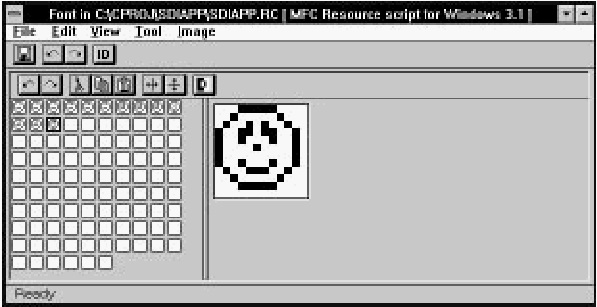
[Figure 28-33 The Font editor
Unlike the Bitmap editor, the two views in the Font editor are not
equivalent. The left pane displays each of the character bitmaps in
the font at normal size. To select a bitmap for editing, click on it in
the left pane. The current bitmap is edited in the right pane, which
functions in the same way as a pane in the Bitmap editor.
Otherwise, the Font editor functions much like the Bitmap editor.
Drawing tools are selected by choosing commands in the Tool
menu, or by clicking on the tool in the toolbox. Colors are selected
in the palette section of the toolbox (font bitmaps are monochrome,
so only two colors are available). The View menu is used to zoom
the editing view and to turn on the grid. Simple image manipulation
functions are available in the Image menu.
FontExpress
As a new font is created, the FontExpress dialog box opens (see
Figure 28-34). This dialog box is used to set initial font properties.

[Figure 28-34 FontExpress
The most important option to specify is the point size. While most of
the other options can be easily changed at a later time, a change in
the font height may require redrawing any characters you have
drawn so far. All of the character bitmaps in the font have the same
height.
The Proportional option enables
setting the horizontal size of each character independently.
File menu commands
The File menu (see Figure 28-35) contains commands to save the
resource file, to edit resource IDs, and to perform other
miscellaneous functions.
[Figure 28-35 Font editor File menu
- Save
- Saves the resource file. If the file is unnamed, this command
executes Save As.
- Save As
- Opens a Windows File Save As dialog box, which can be used to
save the resource file under a new name.
- Export Resource
- Opens a dialog box which can be used to save the font in a separate
file.
- Export Resource IDs
- Opens the Resource ID Browser dialog box, used to browse and
modify resource IDs. For more information about managing resource
IDs and using the Resource ID Browser dialog box, see "Managing
Resource IDs," in Chapter 7, "Adding Look and Feel with Resources."
- Class Express
- Runs ClassExpress, passing the filename of the resource file as the
project that ClassExpress should open. This command is only
enabled if the Font editor is running in the right pane of the Browser
window.
- Close Editing
- Closes the Font editor.
Edit menu commands
The Edit menu (see Figure 28-36) contains standard editing
commands. You can undo operations, and can cut, copy, paste, and
clear rectangular regions of the character bitmap. To select a region
to cut, copy, or clear, select the Selection tool from the toolbox or
from the Tool menu, then drag a box around the region.

[Figure 28-36 Font editor Edit menu
- Undo
- Undoes the last Font editor operation.
- Redo
- Redoes the last undone Font editor operation.
- Cut
- Copies the selected region to the Clipboard, then clears the region in
the character bitmap, filling it with the current background color.
- Copy
- Copies the selected region to the Clipboard.
- Paste
- Copies the region in the Clipboard to the character bitmap. The new
region is initially placed in the upper-left corner of the bitmap, but
may be dragged to a new location.
- Clear
- Clears the selected region, filling it with the current background
color. If no region is selected, the entire bitmap is cleared.
- Select All
- Select all bitmap regions.
View menu commands
The View menu (see Figure 28-37) contains commands to set editing
view magnification and to set grid options.
[Figure 28-37 Font editor View menu
- Zoom 1
- Sets the editing view's zoom factor to 1 (normal size).
- Zoom 2
- Sets the editing view's zoom factor to 2 (twice normal size).
- Zoom 4
- Sets the editing view's zoom factor to 4 (four times normal size).
- Zoom 8
- Sets the editing view's zoom factor to 8 (eight times normal size).
- Grid
- Turns on the grid. The grid is only visible when the editing view
zoom factor is 4 or 8.
- Button Grid
- Turns on the button grid.
- Grid Settings
- Opens the Grid Settings dialog box (see Figure 28-38), used to set
grid options.

[Figure 28-38 Grid Settings dialog box
Pixel grid
Turns on display of the pixel grid.
Button grid
Turns on display of the button grid. The spacing of points on the
button grid can be specified in the Width and Height fields.
Tool menu commands
The Tool menu (see Figure 28-39) lets you select drawing tools.
While over the drawing area, the cursor changes shape to indicate
the currently selected tool. To draw, click or click and drag (as
appropriate) in the drawing area. Using the right button rather than
the left reverses the roles of foreground and background colors.
Drawing tools can also be selected in the toolbox. Drawing
operations are identical to those in the Bitmap editor.
For more information, see Chapter 7, "Adding Look and Feel with
Resources."
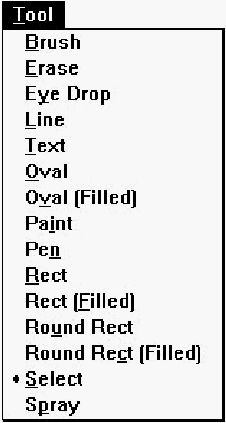
[Figure 28-39 Font editor Tool menu
- Brush
- Selects the brush tool.
- Erase
- Selects the eraser tool.
- Eye Drop
- Selects the eye-dropper tool. Use this tool to select foreground and
background colors directly from the image.
- Line
- Selects the straight line tool.
- Text
- Selects the text tool.
- Oval
- Selects the hollow oval tool.
- Oval (Filled)
- Selects the solid oval tool.
- Paint
- Selects the paint can (flood fill) tool.
- Pen
- Selects the pen (pencil) tool.
- Rect
- Selects the hollow rectangle tool.
- Rect (Filled)
- Selects the solid rectangle tool.
- Round Rect
- Selects the hollow rounded rectangle tool.
- Round Rect (Filled)
- Selects the solid rounded rectangle tool.
- Select
- Selects the Selection tool. Use this tool to select rectangular regions
for cut, copy, clear, drag, flip, and invert operations.
- Spray
- Selects the spray brush (airbrush) tool.
Image menu commands
Commands in the Image menu (see Figure 28-40) perform simple
image manipulation functions. To select a region to flip or invert,
select the Selection tool from the toolbox or from the Tool menu,
then drag a box around the region. If no region is selected, these
commands operate on the entire character bitmap.
[Figure 28-40 Font editor Image menu
- Flip vertically
- Flips the selected region vertically.
- Flip horizontally
- Flips the selected region horizontally.
- Invert colors
- Inverts the colors in the selected region. Black is changed to white,
and white to black.
Toolbar commands
The Font editor toolbar (see Figure 28-41) provides quick access to
frequently used menu commands.

[Figure 28-41 Font editor toolbar
- Undo:
- Same as choosing Undo from the Edit menu. Right-click on
this button to undo multiple operations at once.
- Redo:
- Same as choosing Redo from the Edit menu. Right-click on
this button to redo multiple operations at once.
- Cut:
- Same as choosing Cut from the Edit menu.
- Copy:
- Same as choosing Copy from the Edit menu.
- Paste:
- Same as choosing Paste from the Edit menu.
- Flip horizontally:
- Same as choosing Flip Horizontally from the
Image menu.
- Flip vertically:
- Same as choosing Flip Vertically from the Image
menu.
- Invert colors:
- Same as choosing Invert Colors from the Image
menu.
Toolbox
The Font editor toolbox (see Figure 28-42) provides quick access to
the tools available in the Tool menu. The toolbox also lets you select
foreground and background colors, brush types, background
pattern, and line type.
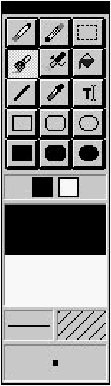
[Figure 28-42 Font editor toolbox
The only difference between the Font editor toolbox and the Bitmap
editor toolbox is that (since font character bitmaps are monochrome)
only two colors are ever displayed in the Font editor toolbox palette.
For more information on the Bitmap editor toolbox, see Chapter 7,
"Adding Look and Feel with Resources."
Font properties
Fonts have four pages of properties. The General properties are
shown in Figure 28-43.
[Figure 28-43 Font General properties
Specify a filename for the font in the File textbox.
Header properties of a font are shown in Figure 28-44.
[Figure 28-44 Font Header properties
Sizes properties of a font are shown in Figure 28-45.
[Figure 28-45 Font Sizes properties
Styles properties of a font are shown in Figure 28-46.

[Figure 28-46 Font Styles properties
This ResourceStudio reference chapter contains details about the
commands and options found in the Version Information editor and
the Custom Resource editor. For an introduction to ResourceStudio,
see Chapter 7, "Adding Look and Feel with Resources."
The Version Information editor (see Figure 29-1) is used to edit
version information resources.
[Figure 29-1 The Version Information editor
A version information resource consists of a header and one or more
blocks of variable information. The Version Information editor
displays the resource as a scrolling list of information, with the
header information at the top of the list and the blocks of variable
information below. Most data can be edited directly in the list; click
on an item, and the data appears in a textbox, ready for editing.
File menu commands
The File menu (see Figure 29-2) contains commands to save the
resource file, to edit resource IDs, and to perform other
miscellaneous functions.

[Figure 29-2 Version Information editor File menu
Save
Saves the resource file. If the file is unnamed, this command
executes Save As.
Save As
Opens a Windows File Save As dialog box, which can be used to
save the resource file under a new name.
Edit Resource IDs
Opens the Resource ID Browser dialog box, used to browse and
modify resource IDs. For more information about managing resource
IDs and using the Resource ID Browser dialog box, see "Managing
Resource IDs," in Chapter 7, "Adding Look and Feel with Resources."
ClassExpress
Runs ClassExpress, passing the filename of the resource file as the
project that ClassExpress should open. This command is only
enabled if the Version Information editor is running in the right pane
of the Browser window.
Close Editing
Closes the Version Information editor.
Edit menu commands
The Edit menu (see Figure 29-3) contains standard editing
commands. You can undo operations, and can cut, copy, paste,
delete, and add variable information blocks.

[Figure 29-3 Version Information editor Edit menu
Undo
Undoes the last Version Information editor operation.
Redo
Redoes the last undone Version Information editor operation.
Cut
Copies the current variable information block to the Clipboard, then
deletes the variable information block from the version information
resource. Note that a version information resource must contain at
least one variable information block, so the last one cannot be cut.
Copy
Copies the current variable information block to the Clipboard.
Paste
Copies the variable information block in the Clipboard to the version
information resource.
Delete Block
Deletes the current variable information block from the version
information resource. Note that a version information resource must
contain at least one variable information block, so the last one
cannot be deleted.
New Block
Adds a new variable information block to the version information
resource.
Toolbar commands
The Version Information editor toolbar (see Figure 29-4) provides
quick access to frequently used menu commands.

[Figure 29-4 Version Information editor toolbar
- Undo:
- Same as choosing Undo from the Edit menu. Right-click on
this button to undo multiple operations at once.
- Redo:
- Same as choosing Redo from the Edit menu. Right-click on
this button to redo multiple operations at once.
- Cut:
- Same as choosing Cut from the Edit menu.
- Copy:
- Same as choosing Copy from the Edit menu.
- Paste:
- Same as choosing Paste from the Edit menu.
- New:
- Same as choosing New Block from the Edit menu.
- Delete:
- Same as choosing Delete Block from the Edit menu.
Header properties
Properties of the version information resource header are shown in
Figure 29-5.
[Figure 29-5 Header properties
Block properties
Properties of the version information variable information block are
shown in Figure 29-6.

[Figure 29-6 Block properties
The Custom Resource editor (or Hex editor) is shown in Figure 29-7.

[Figure 29-7 The Custom Resource editor
Custom resources are created by choosing New Other from the
Browser window's Resource menu. Custom resources are edited as
hexadecimal data. The size of the custom resource is set in the
Property Sheet.
File menu commands
The File menu (see Figure 29-8) contains commands to save the
resource file, to edit resource IDs, and to perform other
miscellaneous functions.

[Figure 29-8 Custom Resource editor File menu
Save
Saves the resource file. If the file is unnamed, this command
executes Save As.
Save As
Opens a Windows File Save As dialog box, which can be used to
save the resource file under a new name.
Edit Resource IDs
Opens the Resource ID Browser dialog box, used to browse and
modify resource IDs. For more information about managing resource
IDs and using the Resource ID Browser dialog box, see "Managing
Resource IDs," in Chapter 7, "Adding Look and Feel with Resources."
ClassExpress
Runs ClassExpress, passing the filename of the resource file as the
project that ClassExpress should open. This command is only
enabled if the Custom Resource editor is running in the right pane of
the Browser window.
Close Editing
Closes the Custom Resource editor.
Edit menu commands
The Edit menu (see Figure 29-9) contains commands to undo data
changes and to redo undone changes.
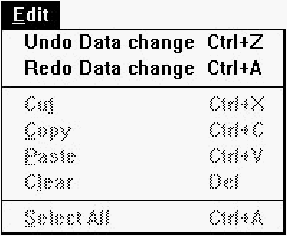
[Figure 29-9 Custom Resource editor Edit menu
Undo
Undoes the last data change in the Custom Resource editor.
Redo
Redoes the last undone data change in the Custom Resource editor.
Toolbar commands
The Custom Resource editor toolbar (see Figure 29-10) provides
quick access to the undo and redo commands.

[Figure 29-10 Custom Resource editor toolbar
- Undo:
- Same as choosing Undo from the Edit menu. Right-click on
this button to undo multiple operations at once.
- Redo:
- Same as choosing Redo from the Edit menu. Right-click on
this button to redo multiple operations at once.
Custom resource properties
Custom resource properties are shown in Figure 29-11.
[Figure 29-11 Custom resource properties
ID
Specifies the resource ID.
Size
Specifies the size of the custom resource in bytes.
An expression comprises operands and operators, such as constants,
variables, and functions. You can specify variables and functions
using their symbolic names defined in your program. Digital Mars C++
supports standard language operators. This manual does not provide
a complete discussion of language expressions.
Entering Expressions
The following IDDE operations prompt you to enter an expression:
- Modifying a variable
- Modifying a memory location
- Modifying a CPU register
- Setting a conditional breakpoint
- Evaluating an expression
- Specifying an array index
- Specifying a memory address
- Specifying a live memory expression
When one of these operations is executed, the debugger displays the
Expression dialog box, shown in Figure A-1. For example, to
modify a variable in the Data/Object window, you can input a new
value by entering an expression. The debugger evaluates this
expression and assigns the result to the variable.
Figure A-1 Expression dialog box
Symbols and Their Scope
A symbol is the name of a variable, procedure, module, or
enumerated symbol in your program. You declare symbols in the
scope of a procedure or module. When you use a symbol in an
expression, the debugger determines its scope based on the module,
procedure, and line where the current instruction is located.
The IDDE expression evaluator tries to match an entered symbol
against:
- A symbol in the current procedure
- The current procedure's name
- A global symbol in the current module
- The current module's name
- Any other module's name
If you want the debugger to search for a symbol in other procedures
or modules, you must qualify the symbol by using a scope override
(described below).
Scope override
You can override the current scope where the debugger looks for a
symbol by qualifying the symbol with a module or a procedure
name. To override the current scope, use the syntax:
[ModuleName.][ProcName.] SymbolName
The debugger looks for the symbol SymbolName in the procedure
ProcName declared in the module ModuleName. For example, if you
enter:
InOut.WriteString.i
the debugger tries to find the symbol i in the scope of the
procedure WriteString declared in the module InOut.
If you do not include the module name, the debugger uses the
current module (the module containing the current instruction).
For example, if you enter:
WriteString.i
the debugger tries to find the symbol i in the scope of the
procedure WriteString declared in the module displayed in the
Source window.
If you specify a module name but not a procedure name, the
debugger uses the global scope of the module specified. For
example, if you enter:
InOut.i
the debugger tries to find the symbol i in the global scope of the
module InOut.
Register symbols
To evaluate processor register values, use the symbols listed in the
following tables:
	Table A-1 Processor registers, 16-bit

	Symbol		Register

	AX or ax	AX
	BX or bx	BX
	CX or cx	CX
	DX or dx	DX
	SI or si	SI
	DI or di	DI
	SS or ss	SS
	DS or ds	DS
	CS or cs	CS
	ES or es	ES
	SP or sp	SP
	BP or bp	BP
	IP or ip	IP
	_F or _f	Flags
	FS		FS available only when debugging in 32-bit mode
	GS		GS available only when debugging in 32-bit mode


	Table A-2 Processor registers, 32-bit (available only when debugging
	in 32-bit mode)


	Symbol		Register

	EAX or eax	EAX
	EBX or ebx	EBX
	ECX or ecx	ECX
	EDX or edx	EDX
	ESI or esi	ESI
	EDI or edi	EDI
	ESP or esp	ESP
	EBP or ebp	EBP
	EIP or eip	EIP


	Table A-3 Floating point stack registers

	Symbol		Floating point stack

	FP0 or fp0	ST(0)
	FP1 or fp1	ST(1)
	FP2 or fp2	ST(2)
	FP3 or fp3	ST(3)
	FP4 or fp4	ST(4)
	FP5 or fp5	ST(5)
	FP6 or fp6	ST(6)
	FP7 or fp7	ST(7)
Operators
The IDDE supports standard C and C++ operators in expressions.
These operators, described in the following sections, have the same
precedence within the debugger's expression evaluator as they do in
C and C++.
In addition to the standard operators in C and C++, the IDDE
supports the colon operator (:). The colon operator joins a
segment:offset pair of unsigned integers to specify an address value.
This operator has the same priority as the unary operators.
The IDDE supports the standard C and C++ operators listed below,
in descending order of precedence:
Primary
() [] -> . this ::
Unary
* & -! ~ ++ --sizeof
Binary
	.* ->*
	* / % + -
	>> << > < >= <=
	== != &
	^ |
	&& ||
Assignment
	 = += -= *= /= %= >>= <<=
	&= ^= |=
C expressions in the IDDE also may include typecasts of the form:
(type-name) expression
For C++, the above typecast is valid only for built-in types.
Because the debugging information does not associate line numbers
with local scopes, the IDDE cannot distinguish variables declared in
a local scope. For example, in line 7 of the following source code:
	1 int i;
	2 proc()
	3 {
	4     int i;
	5     if (i){
	6         int i;
	7         i= 5;
	8     }
	9 }
The intent is for the variable i in i = 5 to refer to
the i in line 6, but
the IDDE will associate it with the i in line 4.
Considerations When Using C++ Expressions
This section describes considerations for working with the IDDE
expression evaluator and C++ expressions.
The expression evaluator generally expects the same syntax as the
compiler.
Access to class members
All members of a class object are accessible, no matter which type of
access control is imposed (public, protected, or private), or if the
object is a member of a base class (embedded object).
For example, if class Customer has a private member name, enter
the following into the IDDE expression evaluator:
Customer::name
The expression evaluator provides the value of name in an output
dialog box. You also can access members of an object using a
pointer to the object.
For example, if the Salesperson class defines a virtual function
named totalSales, redefined in the class inherited from
Salesperson, totalSales can be called using a pointer to
Salesperson:
salePtr->totalSales()
Ambiguous references
When an expression makes an ambiguous reference to a member
name, qualify it with the class name. For example, the
class Resistor is defined as follows:
	1 class Parts
	2 {
	3   unsigned int specs;
	4 } resistorParts;
	5
	6 class Components
	7 {
	8   unsigned int specs;
	9 } resistorComponents;
	10
	11 class Resistor:
	12 public Parts, public Components;
	13 {
	14   int name;
	15 } resistor;
	16 ...
Assume that class Resistor inherits from the Parts and
Components classes. Both Parts and Components define a
member item called specs. If largeResistor is an instance of
class Resistor, the following expression is ambiguous:
largeResistor.specs
To resolve this problem, use either of the following expressions:
- largeResistor.Parts::specs
- largeResistor.Components::specs
Constructors and destructors
The IDDE expression evaluator calls constructor or destructor
functions just as it calls normal functions. Functions that declare or
return local objects are valid expressions, and they return the
address of the resulting object.
Note:
The IDDE expression evaluator does not let you call
the new and delete operators.
Overloaded functions
The IDDE expression evaluator supports calling overloaded
functions only if an exact match exists or if the match does not need
a conversion involving the construction of an object. For example,
the overloaded function Print is defined as below:
	1 Print( int x)
	2 {
	3   ...
	4 }
	5
	6 Print( float y)
	7 {
	8   ...
	9 }
In this case, both of the following expressions for the IDDE
expression evaluator are valid:
Overloaded operators
IDDE's expression evaluator lets you call an overloaded operator for
user-defined types. For example, suppose you define a class that
represents arrays as follows:
class Array array1, array2, array3, array4
If this class has a member function that overloads the + operator,
then you can evaluate the following:
array1 = array2 + array3 + array4
Make sure that no variables overflow during evaluation. The
expression evaluator automatically creates temporary objects as
needed to store the intermediate values and discards them after it
performs the evaluation.
Function and Procedure Calls
The IDDE lets you execute function and procedure calls defined in
your program when evaluating an expression. Use this feature to:
- Insert a call in your program.
- Call a procedure that you define to display your
program's data in a customized format, such as a graph,
a table, or a statistical chart.
- Use a function call as a condition for a breakpoint. When
the breakpoint is reached, the function is called.
Depending on the return value, the debugger stops your
program's execution.
To include a function call in an expression, use the syntax:
procedureName([param1[, param2]...])
You can specify the procedure parameters as expressions. The IDDE
passes all parameters by value.
Evaluating expressions with function calls
The IDDE evaluates expressions, except for function and procedure
calls, by interpretation. When the interpreter encounters a function
call, it saves the application's registers and pushes its own evaluation
stack onto the application program's stack. Next, the debugger
orders the application to begin executing at the function's entry
point. If the Flip Screen command is on, the application's screen
comes to the foreground. When the application's procedure returns,
the debugger takes control and restores the application's register
state. During the evaluation of a procedure or a function, the
debugger ignores breakpoints and watchpoints. It takes the return
value and continues evaluating the expression, if necessary.
Side effects of expression evaluation
When including function or procedure calls in the IDDE expressions,
beware of possible side effects caused when you evaluate a function
that results in changes to your program's data. Such changes could
alter the behavior of your program after it resumes execution.
Expression Evaluation Errors
The IDDE normally evaluates an expression and displays the
result after you press Enter. However, with the Set Conditional
Breakpoint command, the IDDE does not evaluate an expression
until it reaches the breakpoint. If a run-time error occurs during the
evaluation of a conditional breakpoint expression, the IDDE assumes
that the expression is false and does not display an error message.
When the IDDE finds a syntax or semantic error in an expression, it
displays the error message in the title bar of the debugger's main
window.
This appendix provides a series of figures that show the relationship
between the settings on the Build page of the IDDE Project Settings
dialog box and the command line options that you pass to the command
line utilities. To opens the Project Settings
dialog box, select Project Settings from the IDDE Project menu.
Then click on the Build tab to select the Build page.
The Build page comprises different subpages, each one containing
specific options for the compiler, linker, .def file, resource
compiler, and librarian utility. Chapter 16,
More about Project Build Settings,
describes in detail each of the subpages of the Build page.
For detailed information on how these options affect the compilation
and linking of your code, refer to the Digital Mars C++
Compiler and Tools Guide.
This chapter consists of a series of figures showing subpages of the
Build page. Each figure has callouts to each option that has a
command-line equivalent.
Mapping IDDE Options to Command-Line Parameters
Options in the callouts to the Compiler pages are passed to the
dmc.exe compiler.
Options in the callouts to the Linker subpage are
passed to the
optlink.exe linker.
Definition file options (shown
in the Definition subpages callouts) are placed in your project's
.def file. Options for the resource compiler (Resource Compiler
subpage) are passed to the Digital Mars resource compiler and linker
utility,
rcc.exe. Options for the librarian utility are passed to
lib.exe.
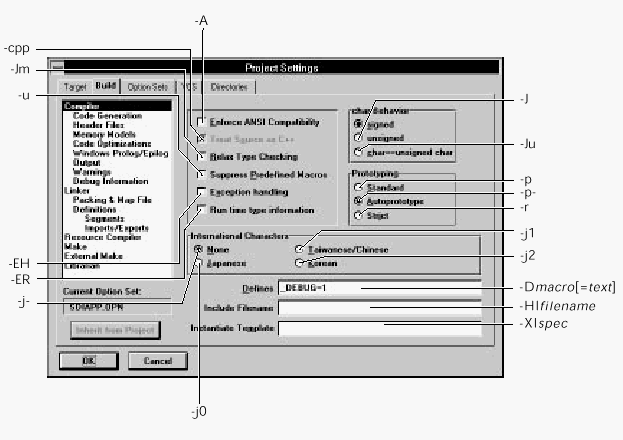
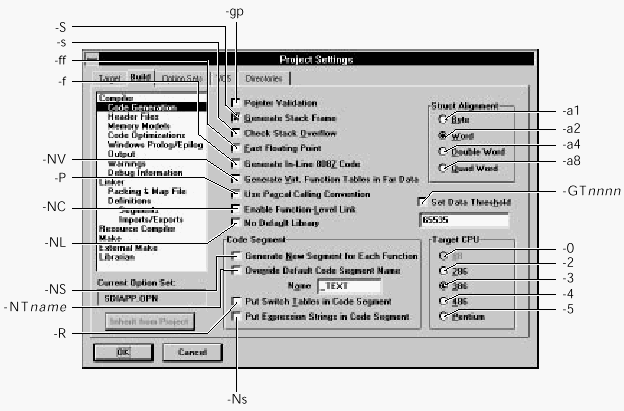
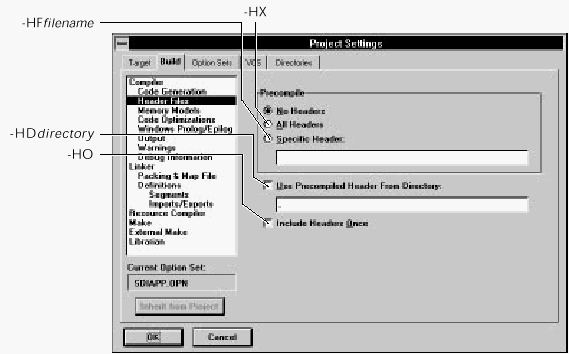
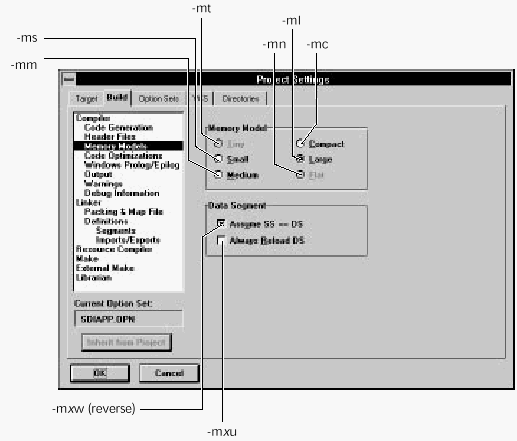


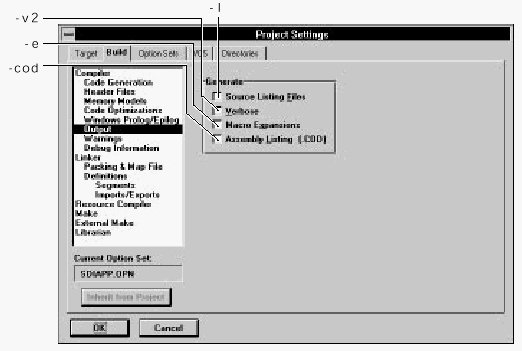

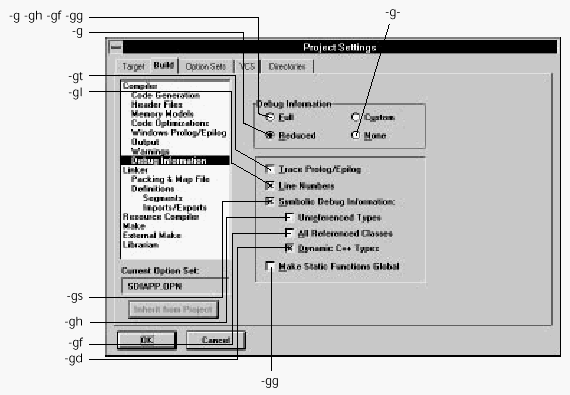
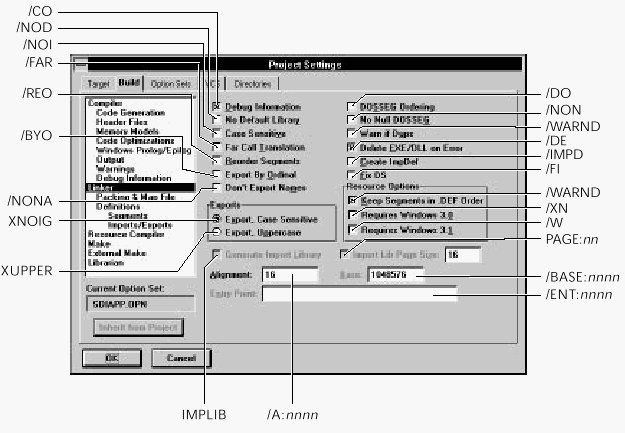
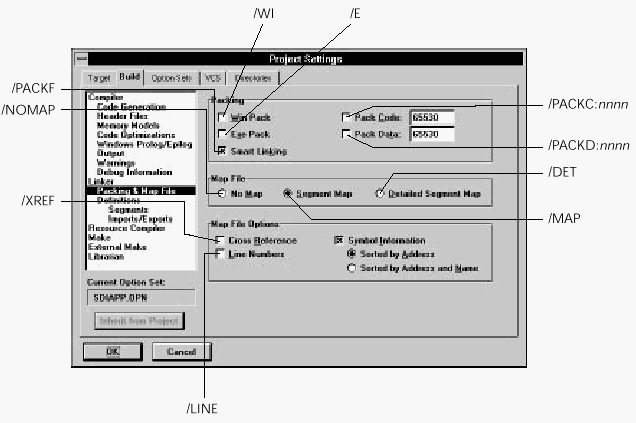
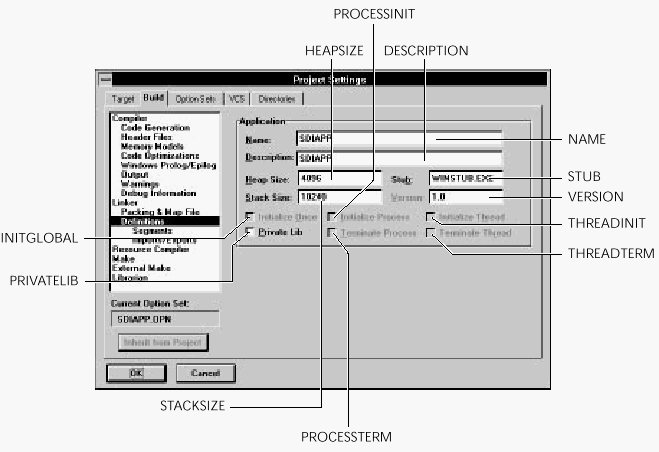
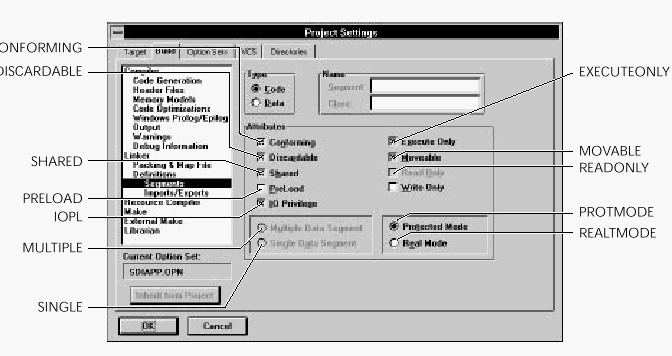
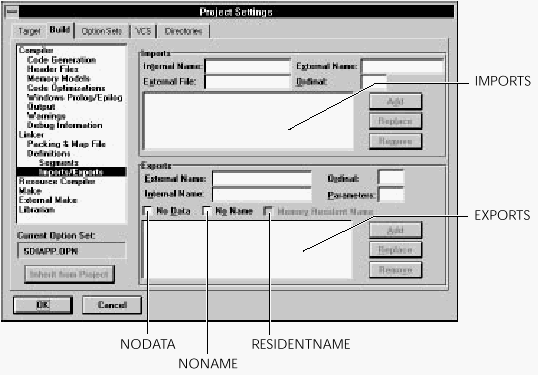
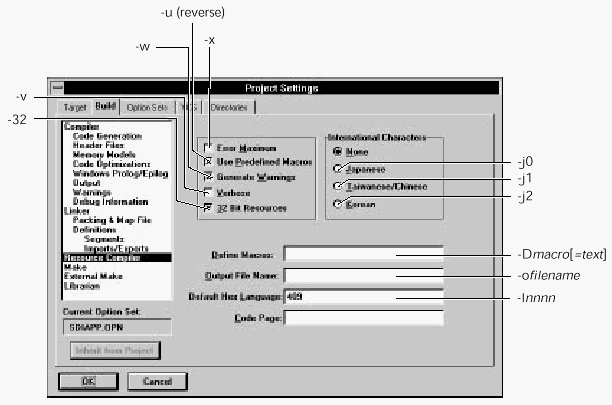
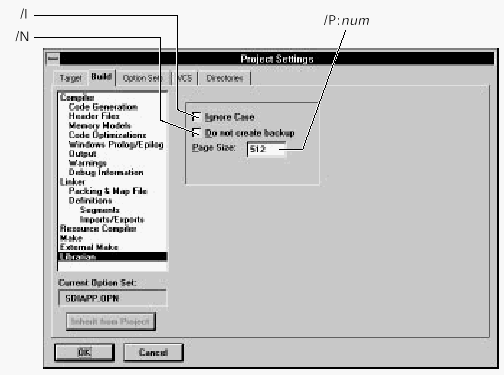
NetBuild is a feature of Digital Mars C++ that lets you distribute the task
of building a project across the network. Using NetBuild, you can employ
any idle PCs on the network to compile your files.
Before you can use
NetBuild you must install the NetBuild
Administrator software on your network server and the NetBuild
Server software on any PCs that will participate in the distributed
build. For information on how to install the NetBuild feature of
Digital Mars C++, see the Getting Started Guide.
The following sections detail how to use the Digital Mars C++ NetBuild
feature.
Using the Build Client
Your PC (the one controlling the build) is called the build client.
Functioning as a client, it must request a server to perform a task.
The PCs that compile your project are called build servers.
Configuring the build client
The options for controlling the NetBuild on the build client are
located in the Project Settings dialog box. To access these options,
select Settings from the IDDE's Project menu, then click on the
Build tab to bring up the Build page of the Project Options dialog
box. In the list of subpages on the left, choose Make.
The Make subpage is shown in Figure C-1.

[Figure C-1 The Make subpage
To turn on the NetBuild feature, make sure that the Use NetBuild
check box has a check mark.
If you enable the Use Remote Headers option, the client PC instructs
the build servers to use the header files on their local drives (as
opposed to getting the header files from the build client). This
option can be overridden on the build server side by disabling the
Use Local Headers option in the Build Server Configuration window.
See "Configuring a build server," later in this chapter.
When you enable the Use NetBuild option, you must specify the
pathname of the build server control directory in the Working
Directory textbox. This is the directory in which the NetBuild
Administrator is installed on the network server. You specify this
pathname in the Working Directory textbox. All the PCs participating
in the distributed build must have access to this directory.
If your network administrator has set up a network password, you
must enter it in the Remote Password textbox. If sources are shared
through Microsoft Network on a local hard disk, and a sharing
password is used for access protection, it must be specified in the
Remote Password textbox.
Starting a distributed build
Once you have configured the build client, every time you rebuild or
update your project, the NetBuild system identifies the build
server( s) that can participate in the distributed build. If there is at
least one build server available, the distributed build can occur;
otherwise the build client builds the project locally. For information
on starting and configuring build servers, see the following section.
When the distributed build process begins, the Build Client window
opens on the client PC's screen (see Figure C-2). This window allows
you to monitor the progress of the distributed build.
When the build is done, a message specifying successful completion
or an error condition is displayed in the output window on the build
client.
Monitoring a distributed build
You can monitor a distributed build from the build client PC by
viewing the messages displayed in the Build Client window.

[Figure C-2 The Build Client window
This window displays an icon each for the build client and each of
the build servers participating in the distributed build. Each icon
shows a list of the programs and header files being handled by that
particular PC. The name of the build server is shown at the top of its
icon.
Stopping a distributed build
You can cancel a build from the build client PC by:
- Choosing the Stop! command in the output window
- Choosing Stop Build from the Project menu
- From the client PC, clicking the Cancel button in the
build client window
Depending on the options that have been specified for the project
being compiled, there may be a short delay before the distributed
build stops.
Using a Build Server
A build server is a PC that is helping the build client PC compile a
project. A build server normally is idle until a client requests it to
perform a task. There must be at least one build server in the
distributed build environment.
Starting a build server
You start the NetBuild Server application by double-clicking on its
icon, or as you start any other Windows program. Once started, the
server application is minimized into an icon. It then runs in the
background, waiting to receive a task from a build client.
Configuring a build server
When the build server compiles files, the build server application
name changes to the name of the file it is compiling.
Double-click on the NetBuild Server application icon to display a
Build Server Configuration window (see Figure C-3).

[Figure C-3 The Build Server Configuration window
This window displays the build server name, the pathname of the
working directory, and the pathname of the directory containing the
header files used in the compilation. (If the pathname of the working
directory is changed, then the pathname must be identical in the
client working directory.) This window also contains a message area;
this is where messages, such as the name of the file being compiled,
the file being read, and error messages, are displayed.
If Use Local Header Files option is enabled, the build server looks
for the header files in the "Directory for Header Files" specified in
the build server window. If the Use Local Header Files option is not
enabled, the build server gets the header files from the build client
PC. This option is enabled if the Use Remote Headers option is
enabled on the client PC; however, you can still force the build client
to retrieve the headers from the build client by disabling the Use
Local Header Files option in the Build Server Configuration window.
Note:
If Use Local Header Files is selected and the build
server needs a header file and cannot find it, the
build server sends the job back to the build client
for processing.
If the Status Bar option is selected, the status bar is displayed at the
bottom of the Build Server Configuration window.
Stopping a build server
You can close the NetBuild Server application by:
- Pressing Alt+F4
- Double-clicking on the system menu button
- Choosing Close on the system menu
If the server is participating in a distributed build when you try to
stop it, the dialog box shown in Figure C-4 is displayed.

[Figure C-4 Abort Compile dialog box
If you click on Cancel in the dialog box, the build server resumes
processing. If you click on Close, the build server finishes processing
any files that are in the queue (that is, files currently being compiled
and files already read), then stops. If you click on Abort, the build
server halts the current compilation and returns the uncompleted job
to the build client. If you selected Close or Abort, the NetBuild
Server application closes and you must restart it if you want the PC
to be able to participate in a distributed build again. (See "Starting a
build server," earlier in this chapter.)
Troubleshooting
If the build client or build server seems to hang (because no
messages are being displayed), wait for a few minutes. NetBuild tries
to establish a connection several times before giving up.
If both the build client and build server start, but the build server
does not compile your program, then:
- Make sure you selected the NetBuild option on the Make
Subpage.
- Make sure the NetBuild Working Directory has the
correct pathname for the build server control directory.
- Make sure the build client and build server have the
same drive mapping.
- Make sure the build servers have access tot he include
directories. The include files can be installed on the build
server, or in a fully-sharable directory on the build client.
If the build client does not receive messages from the build server( s):
- Make sure the network is not down.
- Make sure the build server is still running. If the build
server is still displaying messages, the network
connection may be broken. If not, Windows may be
hung. If the build server is in iconized form, it may have
finished the compile, but was not able to communicate
with the build client.
If files do not compile or the build server can't find header files:
- Make sure all relevant files have been moved to the
network drive.
- Make sure the environment variables that indicate where
to find the header files are set properly.
NetBuild Messages
This section describes the NetBuild error and information messages.
Build client messages
- Build being done on build_server
- This informational message is repeated for each command line.
build_server is the name of the build server compiling the module.
- Compile has been aborted, Rescheduling to another server
- The build server was shut down abruptly. The job has been sent to
another server to be compiled. This message is displayed when
someone cancels the build and selects the abort option.
- NetBuild has lost contact with build_server
- The netbuild has lost contact with the specified server. The build
server PC is hung, the network is down, or the netbios protocol is
not set correctly.
- There is not enough memory to do distributed builds
- The system does not have enough memory to run.
- Unable to access build_server. client_server will compile this
build locally
- The build server was not able to access the specified file. The more
likely problems are that the drive on the client side is not shared or
the file is not in the shared directory.
- Unable to Load network connection Dlls (WNET32, WNET16)
- The system was not able to load the following DLLs: wnet32.dll,
wnet16.dll. They may be missing or corrupted.
- Unable to Load network share Dlls (WSHR32, WSHR16)
- The system was not able to load the following DLLs: wshr32.dll,
wshr16.dll. They may be missing or corrupted.
Build server messages
- Another Station has the control file locked
- The control file has been locked by another station. It is probable
that station is also hung.
- Error checking for Control file, Error xx
- An unexpected error has occurred. Record the error number (xx)
and contact technical support, providing as much information as
possible.
- Error checking for Control Path Error xx
- An unexpected error has occurred. Record the number (xx) and
contact technical support, providing as much information as
possible.
- Error in packet
- The build server and build client software are not the same version.
- Problems reading ini file.
- There is a problem reading the .ini file. This message should not
occur if the .ini file is missing.
- Problem with initializing build server name
- There is a problem reading the .ini file. This message should not
occur if the .ini file is missing.
- Problem with initializing control file
- There is a problem reading the .ini file. This message should not
occur if the .ini file is missing.
- Problem with initializing header path
- There is a problem reading the .ini file. This message should not
occur if the .ini file is missing.
- The control file path is invalid
- The specified build server control file pathname specified in the
NetBuild Working Directory dialog box is not valid.
Network errors
- Network Dlls Failed to initialize Correctly, Cannot initialize
- Netbios on lana xx
Unable to initialize netbios. It may not be installed correctly. The
lana xx refers to the netbios protocol that has failed (there can be
several on a machine).
- Network Dlls Failed to initialize Correctly, Listens Failed To
Establish
- System was able to initialize netbios but unable to set up
communication.
- Network Dlls Failed to initialize Correctly, Netbios command
xx error code yy lana zz
- A call to netbios has failed. This message lists the command, the
error code, and the lana number (all in hexadecimal).
- Network Dlls Failed to initialize Correctly, Netbios is not
installed.
- This message refers to the netbios name table. The system probably
has crashed. The best solution is to restart your computer.
- Network Dlls Failed to initialize Correctly, Netbios name
already exists.
- This message refers to the netbios name table. The system probably
has crashed. The best solution is to restart your computer.
- Network Dlls Failed to initialize Correctly, Netbios name table
full.
- This message refers to the netbios name table. The system probably
has crashed. The best solution is to restart your computer.
- Network Dlls Failed to initialize Correctly, No Error
- Information Available
Unknown error. No error information is available. This is a catch-all
error that the system uses.
- Network Dlls Failed to initialize Correctly, Out Of Memory
- System is low on memory.
- Network Dlls Failed to initialize Correctly, Reset Timed out on
lana xx
- Unable to reset the netbios settings. It probably is not installed
correctly. The lana xx refers to the netbios protocol that has failed.
(There can be several on a machine.)
- Network Dlls Failed to initialize Correctly, Unable To Get
Network Address
- Unable to get the address of the network card. The card or netbios
probably is not installed correctly.
- Network Dlls Failed to initialize Correctly, Unknown Error
- Unknown error. No error information is available. This is a catch-all
error that the system uses.
- Unable to Load network Dll because could not find entry point
in network DLL
- The DLL, which was able to load, is not a valid DLL.
- Unable to Load network Dll because could not load NB32.DLL
- The system could not load the nb32.dll file. This is a Windows NT
or Windows 95 message.
- Unable to Load network Dll because could not load NBND.DLL
- The system could not load the nbnd.dll or nbd.dll files. This is
a Windows NT or Windows 95 message.
Web conversion Copyright © 1999-2018 by
Digital Mars
All Rights Reserved.
|